The smell of date nut bread baking in your oven is one of those kitchen moments that stops you mid-task and makes you close your eyes for a second. This isn’t a fussy, temperamental bread; it’s the kind of recipe that works reliably every time and tastes like it took way more effort than it actually did.
What makes this loaf special is the tender crumb from the softened dates and the satisfying crunch from toasted nuts, all wrapped up in a moist, lightly sweet package that feels more like a treat than breakfast. The beauty here is simplicity: no fancy techniques, no unusual ingredients, just straightforward baking that delivers serious flavor.
Why You’ll Love This Recipe
This bread strikes the perfect balance between wholesome and indulgent, making it work for breakfast, snacks, or dessert. You’ll nail it on your first try, and it keeps beautifully for days.
- Naturally sweetened with dates, so you control the sugar content
- One bowl mixing method saves cleanup time
- Packed with nuts for protein and healthy fats
- Makes your kitchen smell incredible
- Works as a gift or potluck contribution
My Experience Making This Recipe
I first made this bread on a lazy Sunday morning when I had a bag of Medjool dates sitting around and wanted something more interesting than toast. The dough came together so quickly that I had the loaf in the oven within 15 minutes of deciding to bake.
The waiting was the hardest part, honestly. As it baked, the aroma filled my entire apartment and had my roommate asking questions before the bread even finished cooling. When I sliced into it the next day, the texture was perfectly moist without being dense, and the dates had broken down into sweet pockets throughout.
I’ve made this at least a dozen times since, and I’ve never had a single failure. My go-to move now is doubling the batch and freezing half for those moments when I want fresh baked bread without the effort.
Recipe Overview
- Recipe Name: Date Nut Bread
- Servings: 12 slices (1 loaf)
- Prep Time: 15 minutes
- Cook Time: 55 minutes
- Total Time: 1 hour 10 minutes
- Course: Breakfast or Dessert
- Cuisine: American
- Calories per Serving: 245
Equipment You Will Need
- One 9×5 inch loaf pan
- Medium mixing bowl
- Large mixing bowl
- Whisk
- Wooden spoon or rubber spatula
- Measuring cups and spoons
- Cutting board and sharp knife
- Oven with thermometer
- Wire cooling rack
Ingredients for Date Nut Bread
- 1 cup pitted dates, roughly chopped (about 8 ounces)
- 1 cup boiling water
- 1/2 cup unsalted butter, softened
- 1 cup granulated sugar
- 2 large eggs
- 1 teaspoon vanilla extract
- 1 3/4 cups all-purpose flour
- 1 teaspoon baking soda
- 1/2 teaspoon salt
- 3/4 cup chopped walnuts or pecans
Ingredient Notes and Substitutions
- Pitted dates are essential because they provide natural sweetness and moisture that keeps the bread tender; if you only find unpitted dates, you’ll need to pit them yourself, which adds a few minutes to prep time.
- Boiling water softens the dates so they blend smoothly into the batter; you can substitute with hot water from the tap if that’s what you have, though the dates will take slightly longer to soften.
- Softened butter combines smoothly with sugar to create the right crumb structure; melted butter will make the bread denser and slightly greasier in texture.
- All-purpose flour works perfectly here; you can use bread flour if you prefer a chewier crumb, though the texture will be noticeably tighter.
- Baking soda is your leavening agent that reacts with the slightly acidic dates; baking powder won’t deliver the same rise and lift.
- Walnuts and pecans are both excellent choices; if you’re allergic to tree nuts, sunflower seed butter stirred into the batter adds richness, though the flavor profile shifts noticeably.
How to Make Date Nut Bread
Step 1: Prepare Your Pan and Oven
Preheat your oven to 350 degrees Fahrenheit and position the rack in the center. Grease your loaf pan with butter or cooking spray, then line the bottom with parchment paper to make removal easier and prevent sticking on the troublesome bottom corners.
Step 2: Soften the Dates
Place your chopped dates in a medium bowl and pour the boiling water over them. Let them sit for 5 minutes without stirring; the heat will soften them and make them easier to blend into your batter.
Step 3: Cream Butter and Sugar
In your large mixing bowl, combine the softened butter and sugar, beating them together with a whisk or wooden spoon until the mixture looks pale and fluffy (about 2 minutes of vigorous mixing). This step incorporates air into the batter, which helps the bread rise evenly and creates a lighter crumb.
Step 4: Add Eggs and Vanilla
Break your eggs directly into the butter mixture and add the vanilla extract, stirring until everything is fully combined and the mixture looks smooth. This step should take about one minute of steady mixing.
Step 5: Combine Dry Ingredients
In your medium bowl, whisk together the flour, baking soda, and salt. Whisking these together prevents lumps and distributes the baking soda evenly so your bread rises uniformly.
Step 6: Mix Wet and Dry Ingredients
Add your softened date mixture (including the water) to the butter and egg mixture, stirring until mostly combined. Then add your dry ingredients and fold everything together gently until no flour streaks remain; overmixing at this point can make the bread tough and dense.
Step 7: Fold in the Nuts
Stir in your chopped walnuts or pecans, distributing them evenly throughout the batter. The nuts add texture and flavor while also providing structure to the bread.
Step 8: Transfer and Bake
Pour the batter into your prepared loaf pan and smooth the top with a spatula. Bake for 55 to 60 minutes, until a toothpick inserted into the center comes out clean with just a few moist crumbs clinging to it; if it comes out completely wet, give it another 5 minutes.
Step 9: Cool and Remove
Allow the bread to cool in the pan for 15 minutes, then turn it out onto a wire rack to cool completely. This resting time helps the bread set properly so it won’t fall apart when you slice it.
Pro Tip: Don’t slice the bread until it’s completely cool, which takes about two hours; warm bread crumbles easily and won’t show off those beautiful date and nut pockets properly.
Tips for the Best Date Nut Bread
- Use truly softened butter, not melted or room temperature; softened butter should yield easily to a finger press but still hold its shape.
- Don’t skip the parchment paper in the bottom of the pan; it prevents the bread from sticking and browning too dark on the bottom.
- Chop your nuts fairly small so they distribute throughout the bread evenly rather than creating chunky pockets.
- Check the bread at 50 minutes; every oven runs differently, and you want to catch it right when the toothpick test passes.
- Store your baked bread in an airtight container or wrapped tightly in plastic wrap to keep it moist for up to four days.
- Toast your walnuts or pecans in a dry skillet for 2 minutes before chopping if you want deeper, more robust nut flavor.
Common Mistakes to Avoid
- Using boiling water that’s cooled down is a mistake because cooler water takes longer to soften the dates, and you’ll end up with firmer bits in your finished bread.
- Adding cold eggs to the batter can cause it to break and look curdled, which affects the final crumb texture; always use eggs at room temperature.
- Overmixing the batter after adding the dry ingredients develops gluten, which toughens the bread and makes it chewy rather than tender.
- Slicing the bread while it’s warm will cause it to fall apart because the crumb hasn’t fully set; patience here makes the difference between beautiful slices and crumbles.
Serving Suggestions
Slice this bread thick and serve it warm or at room temperature, and watch how quickly it disappears. The versatility here is part of the appeal: it works for quiet mornings and fancy occasions alike.
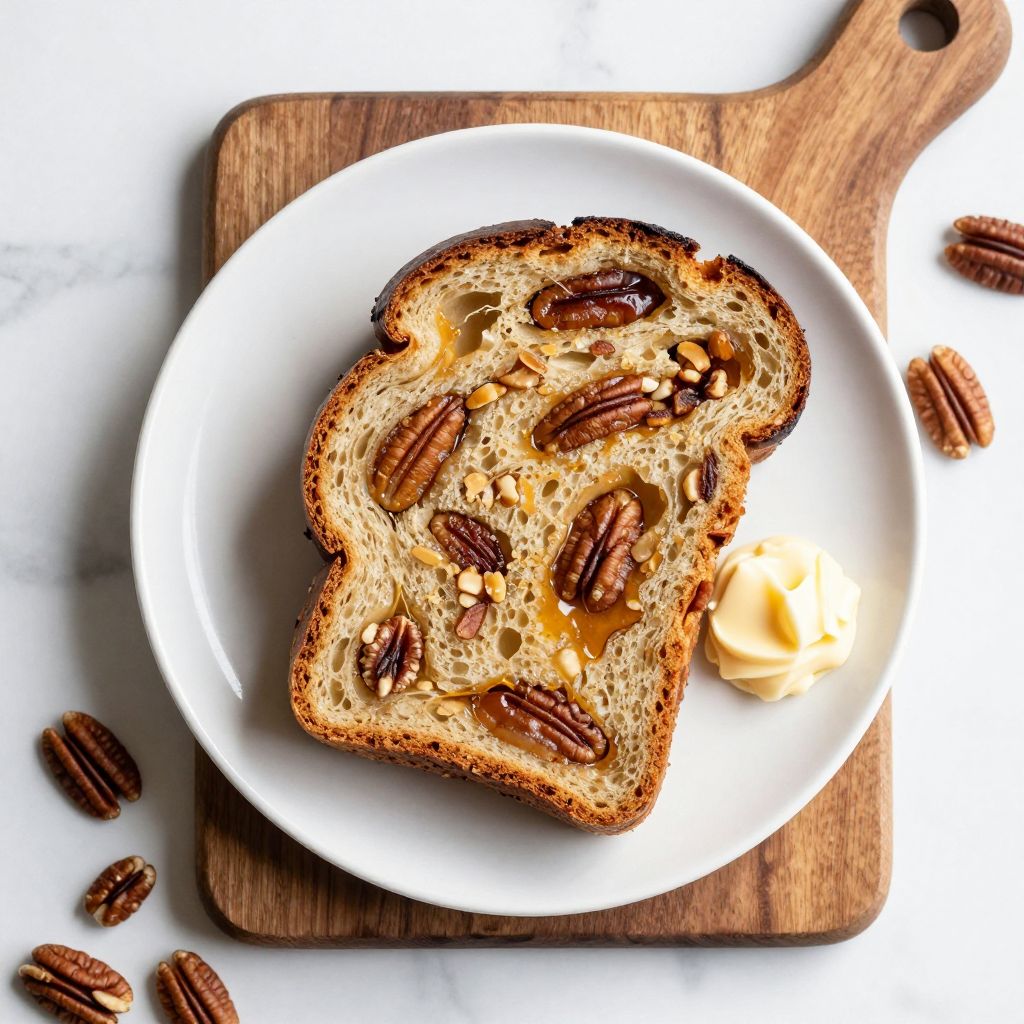
- Spread with cream cheese and a drizzle of honey for an easy breakfast
- Toast a slice and top with almond butter and banana slices
- Serve alongside tea or coffee in the afternoon
- Layer slices with whipped cream for a simple dessert
- Package slices individually and give as gifts during the holidays
Variations to Try
- Add 1/2 teaspoon of ground cinnamon and 1/4 teaspoon of ground nutmeg to the dry ingredients for warm spice notes that complement the dates beautifully.
- Substitute half the water used to soak the dates with strong brewed coffee to add depth and slight bitterness that balances the sweetness.
- Mix in 1/2 cup of shredded coconut along with the nuts for tropical flavor and extra moisture.
- Replace half the walnuts with chopped dried apricots or raisins for a mixed dried fruit bread with more complex sweetness.
- Stir 1 tablespoon of molasses into the wet ingredients to add richness and a subtle caramel undertone.
Dietary Adaptations
- Gluten-free: Use a one-to-one gluten-free flour blend in place of all-purpose flour; the texture will be slightly more tender but still delicious.
- Dairy-free: Substitute the butter with coconut oil or dairy-free butter in equal amounts; the flavor shifts slightly but the bread stays moist.
- Vegan: Replace each egg with 1/4 cup of unsweetened applesauce and use dairy-free butter; the crumb will be slightly denser but still satisfying.
- Low-carb: This recipe is inherently moderate in carbs due to the nuts; you can reduce sugar to 3/4 cup, though the bread will be less sweet.
Storage and Reheating
Refrigerator
Wrap your cooled bread tightly in plastic wrap or store it in an airtight container to keep it fresh and moist. The bread will stay delicious for up to five days in the fridge.
- Keep it away from strong-smelling foods so it doesn’t absorb odors
- Slice it as needed rather than all at once to minimize air exposure
Freezer
Wrap the entire loaf in plastic wrap, then place it in a freezer bag to protect it from freezer burn. Frozen date nut bread keeps beautifully for up to three months.
- Thaw it overnight at room temperature before serving
- You can also freeze individual slices for grab-and-go breakfasts
Reheating
Warm slices in a toaster oven at 300 degrees for 5 to 10 minutes if you want them warm, or simply enjoy them at room temperature straight from storage. Fresh bread doesn’t need much more than a gentle warming to taste homemade again.
- Toast slices in a regular toaster for a crispy exterior
- Wrap the entire loaf in foil and warm at 350 degrees for 15 minutes for a gentler reheating
Nutrition Information
| Nutrient | Amount |
|---|---|
| Calories | 245 |
| Total Fat | 11g |
| Saturated Fat | 4g |
| Carbohydrates | 33g |
| Fiber | 2g |
| Sugar | 22g |
| Protein | 4g |
| Sodium | 185mg |
| Cholesterol | 35mg |
These values are approximate and calculated per slice of one 12-slice loaf using standard ingredient measurements.
Frequently Asked Questions
Can I make this bread without nuts?
Yes, you can omit the nuts entirely if you have allergies or simply don’t enjoy them. The bread will still be delicious, though slightly less textured; you might add an extra 1/4 teaspoon of vanilla extract to boost flavor.
How do I know when the bread is fully baked?
Insert a toothpick into the center of the loaf; it should come out with just a few moist crumbs clinging to it rather than wet batter. If you see wet batter, bake for another five minutes and test again.
Can I prepare the batter ahead of time?
You can make the batter up to two hours ahead and refrigerate it in a covered bowl, though it’s best baked fresh. The baking soda will lose some potency if it sits too long, which can affect the rise slightly.
Why is my bread too dense?
Dense bread usually results from overmixing the batter after adding the dry ingredients or using melted butter instead of softened butter. Both issues develop too much gluten, which tightens the crumb and removes airiness.
Can I double this recipe?
Absolutely, you can double everything and bake two loaves at the same time; just add 5 to 10 minutes to the baking time since the pans will be fuller. Use two loaf pans and position them on different racks in your oven.
What type of dates should I use?
Medjool dates are the most common choice because they’re soft and sweet, but you can use any pitted variety like Deglet Noor; avoid date paste or processed dates that may contain added ingredients.
Date Nut Bread
Ingredients
Equipment
Method
- Preheat your oven to 350 degrees Fahrenheit and position the rack in the center. Grease your loaf pan with butter or cooking spray, then line the bottom with parchment paper.
- Place your chopped dates in a medium bowl and pour the boiling water over them. Let them sit for 5 minutes without stirring to soften.
- In your large mixing bowl, combine the softened butter and sugar, beating them together with a whisk or wooden spoon until the mixture looks pale and fluffy, about 2 minutes of vigorous mixing.
- Break your eggs directly into the butter mixture and add the vanilla extract, stirring until everything is fully combined and the mixture looks smooth, about one minute.
- In your medium bowl, whisk together the flour, baking soda, and salt to prevent lumps and distribute the baking soda evenly.
- Add your softened date mixture including the water to the butter and egg mixture, stirring until mostly combined. Then add your dry ingredients and fold everything together gently until no flour streaks remain.
- Stir in your chopped walnuts or pecans, distributing them evenly throughout the batter.
- Pour the batter into your prepared loaf pan and smooth the top with a spatula. Bake for 55 to 60 minutes, until a toothpick inserted into the center comes out clean with just a few moist crumbs clinging to it.
- Allow the bread to cool in the pan for 15 minutes, then turn it out onto a wire rack to cool completely for about 2 hours before slicing.
Notes
Final Thoughts
This date nut bread recipe is the kind that you’ll return to again and again because it works, it tastes wonderful, and it doesn’t demand much from you. Once you’ve made it once, you’ll have the confidence to tweak it with your favorite nuts or dried fruits.
Get your dates softening and your oven preheated, and in about an hour you’ll have a loaf that fills your home with warmth and smell. Your first slice is waiting, and honestly, that’s all the reason you need to make it today.