
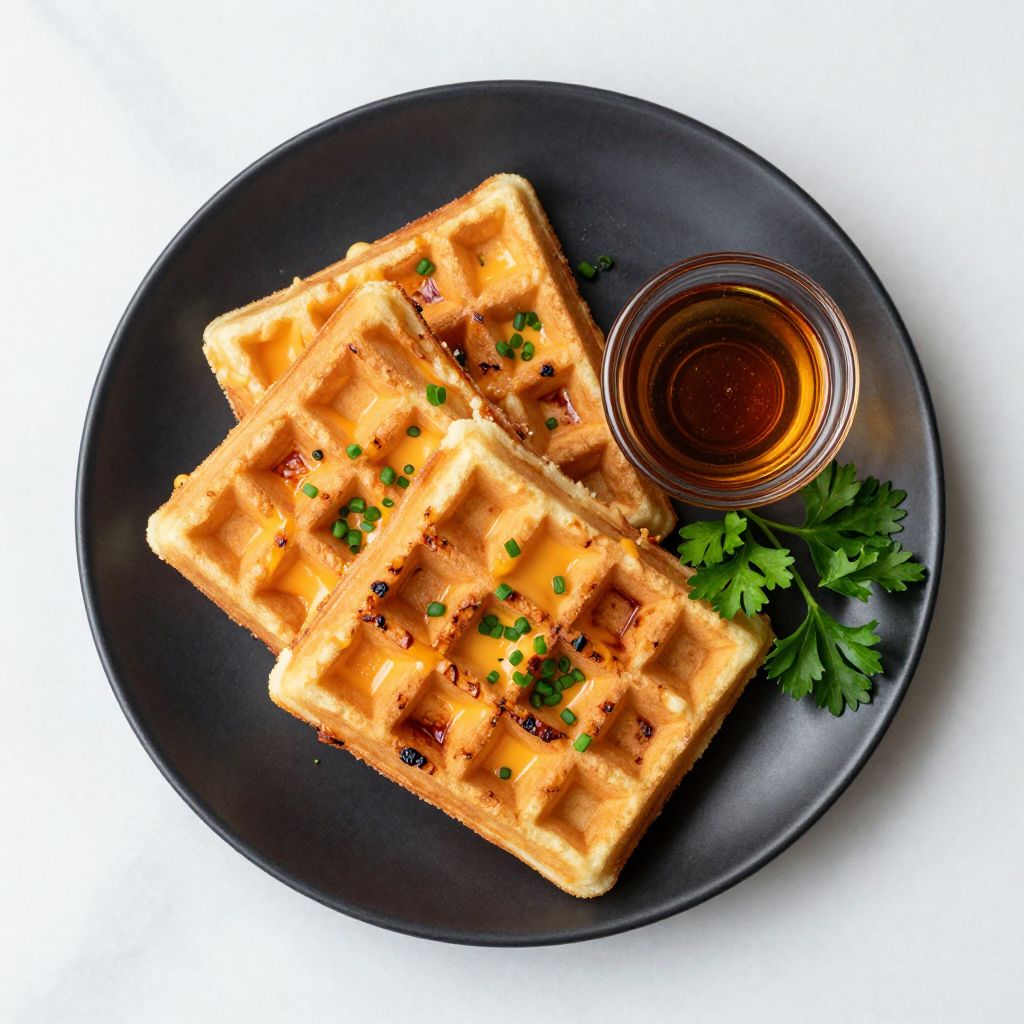
Picture waking up to the smell of something crispy and golden coming from your waffle iron, except it’s not a traditional waffle at all—it’s a chaffle, a low-carb, keto-friendly creation that tastes indulgent while keeping carbs minimal. Chaffles are essentially cheese and egg waffles that cook up beautifully in minutes, delivering a sturdy yet tender texture that works equally well for breakfast, lunch, or even a savory dinner vessel.
What makes chaffles so special is their versatility and simplicity: just a handful of ingredients, a waffle iron, and you’ve got a crispy-edged, cheese-loaded base that pairs with everything from bacon and eggs to sugar-free syrup or creamy avocado.
Why You’ll Love This Recipe
Chaffles check every box for busy cooks who want something fast, nutritious, and genuinely delicious without the carb overload of bread or traditional waffles.
- Ready in under 10 minutes from ingredient to plate
- Only 5 simple ingredients: eggs, cheese, vanilla, salt, and optional sweetener
- Works perfectly for keto, low-carb, and paleo diets
- Crispy exterior with a tender, custardy interior packed with melted cheese
- Sweet or savory—one base recipe, infinite flavor possibilities
My Experience Making This Recipe
I was skeptical the first time I made chaffles, honestly thinking there was no way eggs and cheese alone could create something worth eating. The moment I opened that waffle iron and saw the golden, crispy edges with perfectly melted cheddar pockets, I was sold.
My family now requests them weekly, and I’ve learned that the magic really is in the technique: don’t overfill the iron, wait until it stops steaming before opening it, and use good melting cheese. The texture hits that sweet spot between a crispy chip and a tender waffle that makes them genuinely crave-worthy.
Even my kids, who usually turn their noses up at anything “diet-friendly,” eat these without complaint. That alone makes this recipe a winner in my kitchen.
Recipe Overview
- Recipe Name: Classic Cheddar Chaffles
- Servings: 4 chaffles (2 servings)
- Prep Time: 5 minutes
- Cook Time: 4 minutes
- Total Time: 9 minutes
- Course: Breakfast or Snack
- Cuisine: American
- Calories per Serving: 180
Equipment You Will Need
- Standard waffle iron (preferably mini or regular size)
- Small mixing bowl
- Fork or whisk for beating eggs
- Measuring cups and spoons
- Cheese grater (if using block cheese)
- Silicone spatula or wooden spoon
- Plate for serving
Ingredients for Classic Cheddar Chaffles
- 2 large eggs, beaten
- 1 cup shredded cheddar cheese (sharp or mild, your preference)
- 1/4 teaspoon vanilla extract
- 1/4 teaspoon salt
- 1/8 teaspoon black pepper (optional)
- 1/4 teaspoon sweetener of choice (optional, for sweet chaffles)
Ingredient Notes and Substitutions
- Cheddar Cheese: Sharp cheddar provides bold flavor that stands up to the egg base, while mild cheddar keeps things subtle. You can swap in mozzarella for a milder, stretchier texture, though you’ll lose some of the distinctive chaffle flavor.
- Eggs: Large eggs are the standard and provide the right consistency; medium eggs will produce slightly thinner chaffles with less structure. If you only have extra-large eggs on hand, use three eggs instead of four for the next batch to keep ratios balanced.
- Vanilla Extract: Vanilla bridges the savory cheese and eggs, adding a subtle sweetness that feels complete. Almond extract works in a pinch, though it will shift the flavor profile noticeably.
- Sweetener: Erythritol or monk fruit work best in chaffles without affecting texture; sugar alcohols can occasionally make them slightly greasier. Standard sugar works but defeats the low-carb purpose.
- Salt: Kosher salt dissolves evenly and prevents that chemical aftertaste some table salts can leave. Sea salt is a fine alternative if you have it available.
How to Make Classic Cheddar Chaffles
Step 1: Preheat Your Waffle Iron
Turn on your waffle iron and let it heat for 2 to 3 minutes until it’s hot enough that water droplets sizzle on contact. A properly preheated iron is crucial because it ensures the eggs cook and set quickly on the exterior, creating that signature crispy edge.
Step 2: Beat the Eggs
Crack both large eggs into a small mixing bowl and beat them with a fork or whisk until the whites and yolks are fully combined and the mixture looks light and uniform. This breaks down the egg whites and incorporates air, which helps your chaffles rise slightly and become more tender rather than dense.
Step 3: Mix in the Cheese
Add the shredded cheddar cheese to the beaten eggs and stir until the cheese is evenly distributed throughout the mixture. The cheese should be coated with egg so it doesn’t clump together or cook unevenly in the waffle iron.
Step 4: Add Vanilla, Salt, and Seasonings
Stir in the vanilla extract, salt, pepper (if using), and any sweetener or additional seasonings you want. Mix until everything is combined and you don’t see any streaks of vanilla or white spots of salt remaining in the batter.
Step 5: Lightly Oil or Butter the Waffle Iron
Brush a thin layer of melted butter or cooking spray onto the hot waffle iron plates to prevent sticking. Even non-stick irons benefit from a light coating, especially on your first chaffle of the batch.
Step 6: Pour the Mixture into the Iron
Pour about half of your batter into the center of the waffle iron, using roughly 1/4 cup of the egg mixture per chaffle. Resist the urge to overfill: too much batter will overflow when the eggs puff slightly and make a mess on your stove.
Step 7: Close and Cook Until Steam Stops
Close the waffle iron lid and let it cook undisturbed for about 2 to 3 minutes, or until the steam from the edges slows to almost nothing. Steam is a sign that water in the eggs is still cooking off; when it stops, your chaffle is likely set and crispy on the outside.
Step 8: Check for Crispness and Remove
Carefully open the waffle iron and look for a golden-brown exterior with slightly darker spots where the cheese has caramelized. If it looks pale or feels soft when you gently press with a spatula, close it for another 30 seconds and check again.
Step 9: Transfer to a Plate and Repeat
Use a silicone spatula or wooden spoon to gently lift the chaffle from the iron and transfer it to a serving plate. Repeat steps 6 through 8 with the remaining batter to make your second chaffle.
Pro Tip: Don’t open the waffle iron early out of curiosity, as this releases steam and can cause your chaffles to stick; patience here makes the difference between a beautiful golden chaffle and a broken mess.
Tips for the Best Classic Cheddar Chaffles
- Use freshly shredded cheese or cheese shreds that don’t contain anti-caking agents, which can make your mixture watery or prevent even melting. Pre-shredded bagged cheese often works fine, but block cheese shredded at home gives the most reliable results.
- Keep your waffle iron clean between batches by wiping away any stuck cheese or egg residue with a damp paper towel once it cools slightly. This prevents burnt bits from sticking to your next chaffle.
- Room temperature eggs beat more easily and incorporate air better than cold eggs straight from the refrigerator. Take them out 5 minutes before you start prep if you have time.
- If your chaffles turn out too soft and chewy rather than crisp, your iron probably wasn’t hot enough; let it preheat for an extra minute next time. Temperature consistency matters more than cooking duration.
- Serve chaffles immediately or keep them warm on a low oven setting while you finish cooking the batch, since they firm up as they cool. They lose that peak crispness after about 5 minutes sitting on a plate.
- Experiment with different cheese blends: mixing sharp cheddar with gruyere or adding a touch of parmesan creates complexity and deeper flavor.
Common Mistakes to Avoid
- Overfilling the waffle iron: Too much batter overflows, creates a mess, and produces unevenly cooked chaffles with some parts crispy and others raw. Stick to about 1/4 cup per chaffle.
- Opening the iron too early: Peeking before the chaffle is set causes it to tear or stick to the plates. Wait for the steam to stop; it’s your reliable signal.
- Using wet or clumpy cheese: Moisture in your cheese mix makes the chaffle soggy instead of crispy, and clumps create hot spots that cook unevenly. Always use dry, evenly shredded cheese.
- Skipping the vanilla extract: Without it, chaffles taste one-dimensional and savory in a flat way. A quarter teaspoon is barely noticeable as vanilla but makes a huge difference in balance.
- Not preheating the iron thoroughly: A lukewarm iron cooks the chaffle slowly, allowing the egg whites to spread and cook before the exterior sets, resulting in thin, chewy chaffles instead of crispy-edged ones.
Serving Suggestions
Chaffles shine as both sweet and savory vehicles, and their sturdy structure makes them perfect for holding toppings without falling apart or getting soggy. Serve them warm right out of the iron for maximum crispness and melt.
- Topped with sugar-free maple syrup, butter, and a sprinkle of cinnamon for a sweet breakfast option
- Topped with a fried egg, crispy bacon, and a dollop of sour cream or avocado for a hearty brunch
- Topped with cream cheese, smoked salmon, and fresh dill for an elegant lunch or snack
- Used as a base for a burger patty, lettuce, tomato, and low-carb sauce for a bread-free sandwich
- Topped with melted brie, sliced turkey, and arugula for a warm, gourmet chaffle sandwich
Variations to Try
- Herb and Pepper Jack Chaffles: Replace cheddar with pepper jack cheese and add 1/2 teaspoon dried Italian seasoning or fresh chopped chives for a spicy, herb-forward twist that pairs beautifully with chicken or breakfast sausage.
- Garlic and Parmesan Chaffles: Mix sharp cheddar with grated parmesan and add 1/4 teaspoon garlic powder for a savory, umami-rich chaffle that tastes like garlic bread in waffle form. Serve with marinara sauce for dipping.
- Bacon and Chive Chaffles: Fold 2 tablespoons of crispy cooked bacon bits and 1 tablespoon of fresh chopped chives into the batter for a chaffle loaded with smoky, oniony flavor that works perfectly for lunch or alongside eggs.
- Everything Bagel Chaffles: Replace the salt with a quarter teaspoon of everything bagel seasoning for a bold, multi-layered chaffle with sesame, poppy seeds, garlic, and onion notes. Top with cream cheese and smoked salmon.
- Jalapeño Popper Chaffles: Add 2 tablespoons of finely diced jalapeño and 1 tablespoon of crispy bacon to the batter, then top with additional cream cheese for a spicy, creamy take that brings serious heat and richness.
Dietary Adaptations
- Gluten-Free: Chaffles are naturally gluten-free as written, since they contain no flour or grain products. The trade-off is none, making this an excellent option if you avoid gluten.
- Dairy-Free: Replace cheddar with a dairy-free cheddar alternative and skip the vanilla to avoid alcohol content, relying instead on the salt and pepper for flavor. The texture will be slightly different and less melty, but still crispy and satisfying.
- Vegan: Replace eggs with a flax egg (1 tablespoon ground flaxseed plus 2.5 tablespoons water per large egg) and use dairy-free cheese; note that the structure and texture will be less custardy and more cake-like. The cooking time may increase by 30 seconds to a minute.
- Low-Carb and Keto: This recipe is already keto-compliant with roughly 1 gram of net carbs per chaffle, so no adaptation is needed. Using monk fruit or erythritol instead of sugar keeps it perfectly aligned with strict keto macros.
Storage and Reheating
Refrigerator
Store cooled chaffles in an airtight container or zip-top bag in the refrigerator for up to 3 days. They’ll lose some crispness as they absorb moisture, but they’ll still taste good.
- Place a paper towel in the container to absorb excess moisture and keep them from becoming soggy
- Stack them with parchment paper between each chaffle to prevent sticking
Freezer
Chaffles freeze beautifully for up to 2 months when stored properly, making them perfect for meal prep. Freeze them in a single layer on a baking sheet first, then transfer to a freezer bag once solid.
- Label your bag with the date so you know how long they’ve been frozen
- Thaw at room temperature for 10 minutes before reheating, or reheat from frozen if you prefer
Reheating
The waffle iron or toaster oven delivers the crispiest results, though the microwave works in a pinch if you’re in a rush. Toasting restores the exterior crunch that refrigeration steals.
- Waffle iron: place a cooled chaffle back in a preheated iron for 1 to 2 minutes to restore crispness
- Toaster oven: place on a rack at 350 degrees for 3 to 4 minutes until warmed through and edges are crispy again
- Microwave: wrap in a damp paper towel and heat for 15 to 20 seconds, though crispness will suffer
Nutrition Information
| Nutrient | Amount |
|---|---|
| Calories | 180 |
| Total Fat | 14g |
| Saturated Fat | 8g |
| Carbohydrates | 1g |
| Fiber | 0g |
| Sugar | 0g |
| Protein | 15g |
| Sodium | 320mg |
| Cholesterol | 185mg |
These values are approximate and based on standard ingredients; using different cheese varieties or add-ins will shift the nutrition slightly. This data is for one serving, defined as two chaffles.
Frequently Asked Questions
Can I make chaffle batter ahead of time?
Yes, you can prepare the batter up to 2 hours ahead and store it covered in the refrigerator. Let it sit at room temperature for 5 minutes before cooking to ensure even cooking.
Why are my chaffles falling apart?
Your waffle iron likely wasn’t hot enough, causing the eggs to spread and cook unevenly rather than set quickly. Preheat for a full 3 minutes and check that water droplets sizzle on contact before pouring batter.
Can I use pre-shredded bagged cheese?
Yes, pre-shredded cheese works fine in most cases, though some brands contain anti-caking agents that can make the mixture slightly watery. If you notice excess moisture in your batter, switch to freshly shredded block cheese.
What’s the difference between sweet and savory chaffles?
Sweet chaffles include a sweetener like erythritol or monk fruit, while savory versions skip sweetener and sometimes add herbs or spices. Both use the same base recipe; it’s only the additions that change the profile.
How do I prevent my chaffles from sticking to the waffle iron?
Brush a thin layer of melted butter or cooking spray on the hot plates before each chaffle, and resist the urge to open the iron early. Opening prematurely causes the eggs to stick before they fully set.
Can I double this recipe?
Absolutely—double all ingredients and cook in batches, or prepare two separate batches if you have time. Just make sure your waffle
Classic Cheddar Chaffles
Ingredients
Equipment
Method
- Turn on your waffle iron and let it heat for 2 to 3 minutes until it's hot enough that water droplets sizzle on contact.
- Crack both large eggs into a small mixing bowl and beat them with a fork or whisk until the whites and yolks are fully combined and the mixture looks light and uniform.
- Add the shredded cheddar cheese to the beaten eggs and stir until the cheese is evenly distributed throughout the mixture.
- Stir in the vanilla extract, salt, pepper (if using), and any sweetener or additional seasonings you want. Mix until everything is combined.
- Brush a thin layer of melted butter or cooking spray onto the hot waffle iron plates to prevent sticking.
- Pour about half of your batter (approximately 1/4 cup) into the center of the waffle iron.
- Close the waffle iron lid and let it cook undisturbed for about 2 to 3 minutes, or until the steam from the edges slows to almost nothing.
- Carefully open the waffle iron and look for a golden-brown exterior with slightly darker spots where the cheese has caramelized. If it looks pale or feels soft, close it for another 30 seconds.
- Use a silicone spatula or wooden spoon to gently lift the chaffle from the iron and transfer it to a serving plate.
- Repeat with the remaining batter to make your second chaffle. Serve immediately for maximum crispness.