
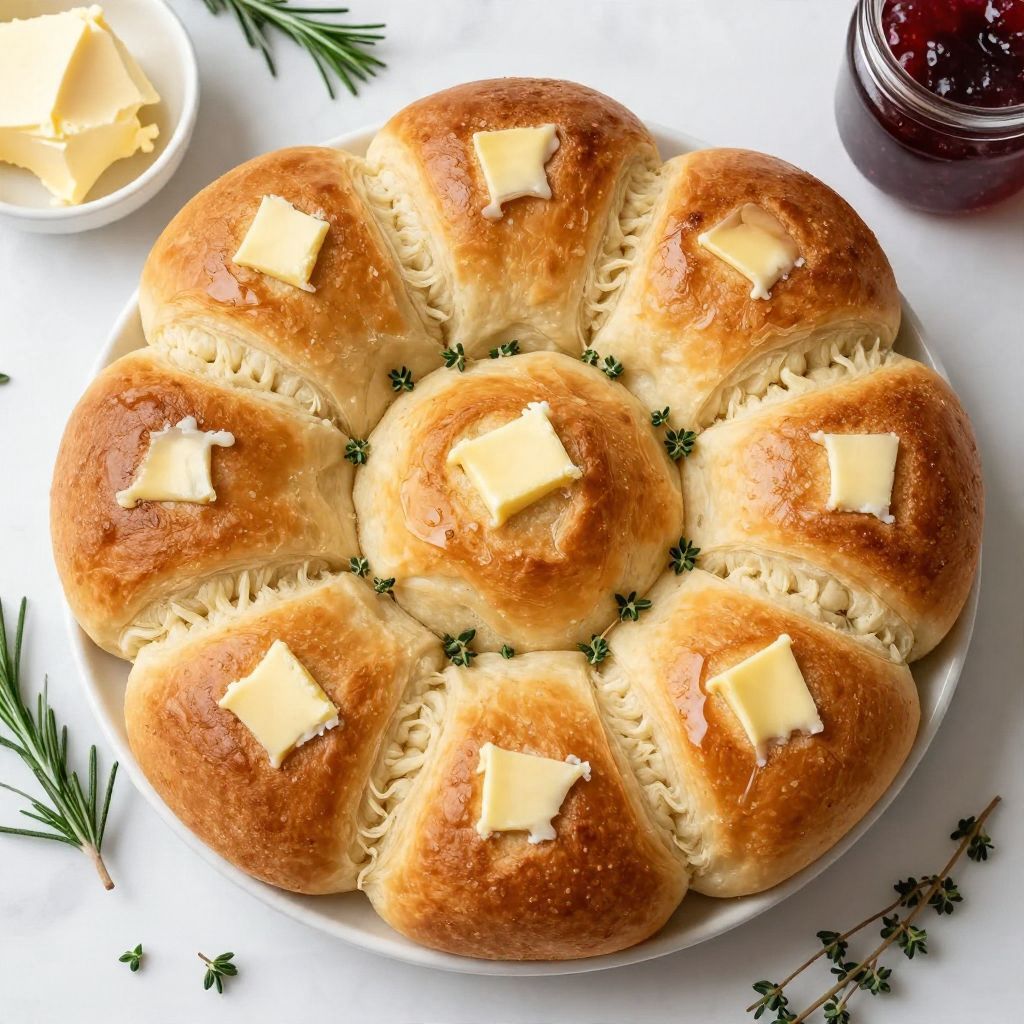
Imagine walking into your home and being greeted by the warm, buttery aroma of freshly baked rolls. These Best Homemade Rolls are not just a side dish; they are a comforting hug on a plate, perfect for any meal or occasion. With a soft, fluffy texture and a golden-brown crust, these rolls are a delightful addition to your family dinner or holiday feast.
What makes this recipe special is its simplicity and the rewarding experience of making them from scratch. They are versatile, easy to customize, and sure to impress everyone at the table.
Why You’ll Love This Recipe
These rolls are a must-try for any home cook looking to elevate their baking skills.
- Soft and fluffy texture that melts in your mouth.
- Simple ingredients that are likely already in your pantry.
- Perfect for any meal, from weeknight dinners to holiday gatherings.
- Customizable with herbs, cheeses, or even sweet additions.
- Fun to make and share with family and friends.
My Experience Making This Recipe
When I first attempted these rolls, I was pleasantly surprised by how easy they were to make. The dough came together beautifully, and the smell of baking bread filled my kitchen, bringing back wonderful memories of family gatherings.
Everyone who tried the rolls raved about their light and airy texture. Watching them disappear from the breadbasket was a rewarding experience that left me eager to bake another batch.
Recipe Overview
- Recipe Name: Best Homemade Rolls
- Servings: 12 rolls
- Prep Time: 15 minutes
- Cook Time: 20 minutes
- Total Time: 35 minutes
- Course: Bread
- Cuisine: American
- Calories per Serving: 150
Equipment You Will Need
- Mixing bowl
- Measuring cups and spoons
- Whisk
- Wooden spoon or spatula
- 9×13 inch baking dish
- Kitchen towel
- Oven
Ingredients for Best Homemade Rolls
- 2 cups all-purpose flour
- 1 cup warm milk (110°F/43°C)
- 1/4 cup granulated sugar
- 1/4 cup unsalted butter, melted
- 1 packet (2 1/4 teaspoons) active dry yeast
- 1 teaspoon salt
- 1 large egg
Ingredient Notes and Substitutions
- All-purpose flour: Provides the structure for the rolls. You can substitute with bread flour for a chewier texture.
- Warm milk: Activates the yeast and adds moisture. Almond milk works as a dairy-free alternative.
- Granulated sugar: Balances the flavors and feeds the yeast. Honey or maple syrup makes a great substitute.
- Unsalted butter: Adds richness and flavor. Coconut oil can be used for a dairy-free option.
- Active dry yeast: Essential for leavening. Instant yeast can be used without proofing.
How to Make Best Homemade Rolls
Step 1: Activate the Yeast
In a mixing bowl, combine warm milk, sugar, and yeast. Let it sit for about 5 minutes until it becomes foamy, indicating that the yeast is active.
Step 2: Mix the Wet Ingredients
Once the yeast is foamy, add melted butter and the egg to the bowl. This adds richness and flavor to the rolls.
Step 3: Combine Dry Ingredients
In another bowl, whisk together flour and salt. This ensures even distribution of the salt throughout the dough.
Step 4: Form the Dough
Gradually add the dry ingredients to the wet mixture, stirring until a dough forms. Make sure to mix until no dry flour remains.
Step 5: Knead the Dough
Transfer the dough to a floured surface and knead for about 5 minutes. This develops the gluten, giving the rolls their delightful texture.
Step 6: Let It Rise
Place the kneaded dough in a greased bowl, cover with a towel, and let it rise in a warm place for about 1 hour. This allows the dough to double in size.
Step 7: Shape the Rolls
After the dough has risen, punch it down and divide it into 12 equal pieces. Shape each piece into a ball and place them in a greased baking dish.
Step 8: Second Rise and Bake
Cover the shaped rolls with a towel and let them rise again for about 30 minutes. Preheat your oven to 375°F (190°C) and bake the rolls for 20 minutes until golden brown.
Pro Tip: For extra flavor, brush the tops of the rolls with melted butter immediately after baking.
Tips for the Best Best Homemade Rolls
- Use fresh yeast for the best rise and flavor.
- Ensure your milk is warm, not hot, to avoid killing the yeast.
- Let the rolls rise in a warm, draft-free area for optimal results.
- Experiment with add-ins like herbs or cheese for a unique twist.
- Store leftover rolls in an airtight container to keep them soft.
Common Mistakes to Avoid
- Not proofing the yeast: This can lead to dense rolls. Always check for a foamy texture.
- Using cold ingredients: Cold milk can hinder yeast activation. Always use warm ingredients.
- Over-kneading the dough: This can create tough rolls. Knead just until smooth and elastic.
- Skipping the second rise: This step develops flavor and texture. Don’t rush it!
- Not baking long enough: Undercooked rolls can be doughy. Aim for golden brown tops.
Serving Suggestions
These rolls are delightful on their own, but they shine alongside various dishes.
- Serve with butter and jam for breakfast.
- Pair with soups or stews for a comforting meal.
- Use them to make delicious sliders.
- Enjoy with a side of garlic herb butter.
- Serve at holiday dinners with your favorite roast.
Variations to Try
- Garlic Parmesan Rolls: Add minced garlic and grated Parmesan to the dough for a savory twist.
- Cinnamon Sugar Rolls: Mix cinnamon and sugar into the dough for a sweet breakfast option.
- Herb Rolls: Incorporate fresh herbs like rosemary or thyme for a fragrant addition.
- Cheese Rolls: Fold in shredded cheese for a cheesy delight.
- Sweet Potato Rolls: Replace some flour with mashed sweet potatoes for a hint of sweetness and color.
Dietary Adaptations
- Gluten-free: Substitute with a gluten-free flour blend for a similar texture.
- Dairy-free: Use almond milk and coconut oil instead of milk and butter.
- Vegan: Replace the egg with a flax egg and use coconut oil.
- Low-carb/keto: Use almond flour and a low-carb sweetener for a keto-friendly version.
Storage and Reheating
Refrigerator
Store rolls in an airtight container in the fridge for up to 4 days.
- Make sure they are completely cooled before sealing.
- Reheat in the oven for a few minutes to regain softness.
Freezer
These rolls freeze beautifully, making them great for meal prep.
- Wrap each roll individually in plastic wrap and place in a freezer bag.
- They can be frozen for up to 3 months.
Reheating
To reheat, simply place frozen rolls in a preheated oven at 350°F (175°C) for about 10-15 minutes.
- Cover with foil if they are browning too quickly.
- Ensure they are heated through before serving.
Nutrition Information
| Nutrient | Amount |
|---|---|
| Calories | 150 |
| Total Fat | 5g |
| Saturated Fat | 3g |
| Carbohydrates | 23g |
| Fiber | 1g |
| Sugar | 2g |
| Protein | 3g |
| Sodium | 130mg |
| Cholesterol | 15mg |
This nutritional information is approximate and may vary based on ingredients used.
Frequently Asked Questions
Can I make the dough ahead of time?
Yes, you can prepare the dough and refrigerate it for up to 24 hours before the second rise. Just let it come to room temperature before shaping.
What can I substitute for yeast?
For a quick option, you can use baking powder instead, but the texture will differ. You will need to adjust the liquid and omit the rising times.
How should I store leftover rolls?
Store them in an airtight container at room temperature for up to 4 days. For longer storage, freeze them for up to 3 months.
Why are my rolls dense?
This may be due to expired yeast or not allowing the dough to rise properly. Always check the yeast’s expiration date before using.
Can I use whole wheat flour?
Yes, but the rolls may be denser. Consider using a mix of all-purpose and whole wheat flour for a lighter texture.
Final Thoughts
Making your own rolls is incredibly satisfying, and once you try this recipe, you’ll never want store-bought again. They are soft, flavorful, and perfect for any occasion, making them a staple in my kitchen.
So grab your apron, roll up your sleeves, and let those warm rolls fill your home with love. For more delicious bread recipes, check out these caramel rolls or try this cinnamon roll recipe with heavy cream!