
There’s something uniquely comforting about a pot of Authentic Mexican Charro Beans simmering on the stove. The rich aroma of spices and smoky bacon fills the kitchen, reminding me of family gatherings where laughter and stories flowed as freely as the beans. This recipe is a cherished tradition that brings everyone together, boasting a robust flavor and heartwarming texture that’s simply irresistible. Perfect as a side dish or a main course, these beans are a versatile staple that can elevate any meal. Let’s dive into the ingredients and steps to create this delicious dish!
Why You’ll Love This Recipe
This recipe is a delightful combination of flavors and textures that will please any palate.
- Rich, smoky flavor from the bacon and spices.
- Perfectly tender beans that melt in your mouth.
- Simple ingredients that pack a punch of taste.
- Versatile dish that pairs well with various meals.
- Great for meal prep and leftovers taste even better!
My Experience Making This Recipe
Making Charro Beans has become a ritual in my home. Each time I prepare them, the smell transports me back to my grandmother’s kitchen, where we would gather to enjoy hearty meals and share stories.
The first time I served these beans to friends, they couldn’t get enough. Watching their faces light up with each bite was the best reward!
Recipe Overview
- Recipe Name: Authentic Mexican Charro Beans
- Servings: 6
- Prep Time: 15 minutes
- Cook Time: 2 hours
- Total Time: 2 hours 15 minutes
- Course: Side Dish
- Cuisine: Mexican
- Calories per Serving: 220
Equipment You Will Need
- Large pot or Dutch oven
- Colander
- Wooden spoon
- Knife and cutting board
- Measuring cups and spoons
Ingredients for Authentic Mexican Charro Beans
- 1 cup dried pinto beans
- 4 cups water, for soaking
- 4 cups water, for cooking
- 4 slices bacon, chopped
- 1 small onion, diced
- 2 cloves garlic, minced
- 2 jalapeño peppers, chopped (seeds removed for less heat)
- 1 teaspoon ground cumin
- 1 teaspoon dried oregano
- Salt to taste
- Fresh cilantro for garnish, optional
Ingredient Notes and Substitutions
- Dried pinto beans: These are traditional for charro beans, providing a creamy texture. You can substitute with canned beans, but adjust cooking time accordingly.
- Bacon: Adds a smoky flavor essential to the dish. Turkey bacon or smoked sausage can be used for a lighter option.
- Jalapeño peppers: These give a nice kick. Bell peppers can replace them for a milder flavor.
- Ground cumin: Offers a warm, earthy flavor. Coriander can be used as a substitute.
- Fresh cilantro: Adds brightness. If you’re not a fan, omit it or replace it with parsley.
How to Make Authentic Mexican Charro Beans
Step 1: Soak the Beans
Start by rinsing the dried pinto beans in cold water to remove any debris. Soaking them for at least 4 hours, or overnight, helps to soften them and reduces cooking time.
Step 2: Drain and Rinse
After soaking, drain the beans and rinse them again. This step removes any excess salt or impurities.
Step 3: Cook the Bacon
In a large pot or Dutch oven, cook the chopped bacon over medium heat until crispy. This not only adds flavor but also renders the fat, which will enhance the beans.
Step 4: Sauté the Vegetables
Add the diced onion and minced garlic to the pot, cooking until softened. This builds a flavorful base for the dish.
Step 5: Add the Beans and Water
Stir in the soaked beans and 4 cups of fresh water. Bring the mixture to a boil, then reduce the heat to low.
Step 6: Season the Beans
Add the chopped jalapeños, cumin, oregano, and salt to taste. Seasoning early allows the flavors to meld beautifully during cooking.
Step 7: Simmer the Beans
Cover the pot and let the beans simmer on low heat for about 1.5 to 2 hours. Stir occasionally and add more water if needed to keep the beans submerged.
Step 8: Final Adjustments
Once the beans are tender, taste and adjust the seasoning if necessary. Remove from heat and let them sit for a few minutes before serving.
Pro Tip: For extra depth of flavor, add a smoked ham hock or a bay leaf while the beans simmer.
Tips for the Best Authentic Mexican Charro Beans
- Use fresh ingredients for the best flavor.
- Don’t rush the cooking process; low and slow is key.
- Adjust the spice level by adding more or fewer jalapeños.
- For creamier beans, mash a portion with a fork before serving.
- Garnish with fresh cilantro just before serving for a burst of flavor.
Common Mistakes to Avoid
- Skipping the soaking step—this can lead to tough beans.
- Not rinsing the beans—this can cause gritty texture.
- Using too much salt at the start—taste and adjust later.
- Cooking on high heat—this can break the beans apart.
Serving Suggestions
These charro beans are delicious served hot and can complement a variety of dishes.
- Pair with grilled meats for a hearty meal.
- Serve alongside rice for a filling vegetarian option.
- Use as a topping for tacos or burritos.
- Add to a salad for extra protein and flavor.
Variations to Try
- Add diced tomatoes for a fresh twist.
- Incorporate different types of beans for a mix of textures.
- Try adding a splash of lime juice for a citrusy zing.
- Include roasted corn for added sweetness and crunch.
Dietary Adaptations
- Gluten-free: This recipe is naturally gluten-free.
- Dairy-free: No dairy is used, making it perfect for lactose intolerance.
- Vegan/Vegetarian: Omit the bacon and use vegetable broth for a plant-based version.
- Low-carb/Keto: Substitute beans with cauliflower for a low-carb option.
Storage and Reheating
Refrigerator
Store leftovers in an airtight container in the fridge for up to 5 days.
- Allow beans to cool before sealing.
- Refrigerate promptly to maintain freshness.
Freezer
Charro beans freeze well for up to 3 months.
- Portion into freezer-safe bags or containers.
- Label with the date for easy tracking.
Reheating
Reheat on the stovetop or in the microwave until heated through.
- Add a splash of water to avoid drying out.
- Stir occasionally for even heating.
Nutrition Information
| Nutrient | Amount |
|---|---|
| Calories | 220 |
| Total Fat | 8g |
| Saturated Fat | 3g |
| Carbohydrates | 32g |
| Fiber | 8g |
| Sugar | 1g |
| Protein | 10g |
| Sodium | 400mg |
| Cholesterol | 15mg |
This information is approximate and can vary based on specific ingredients used.
Frequently Asked Questions
Can I use canned beans instead of dried?
Yes, you can use canned beans, but adjust the cooking time to about 30 minutes since they are already cooked.
How can I make this recipe ahead of time?
Prepare the beans up to 2 days in advance and store them in the refrigerator. Reheat before serving.
How long do charro beans last in the fridge?
They can last up to 5 days in an airtight container in the fridge.
What if my beans are still hard after cooking?
If the beans are hard, they may need more time to cook. Add additional water and continue cooking until tender.
Can I make charro beans vegetarian?
Absolutely! Just omit the bacon and use vegetable broth for added flavor.
Final Thoughts
Making Authentic Mexican Charro Beans is a rewarding experience that brings comfort and joy to the table. With their rich flavors and simple preparation, they are sure to become a beloved staple in your kitchen.
Don’t hesitate to experiment and make this recipe your own. Enjoy these beans with your favorite dishes, and be sure to check out other delicious recipes like a bean and cheese burrito or an authentic chimichurri for a complete meal experience!
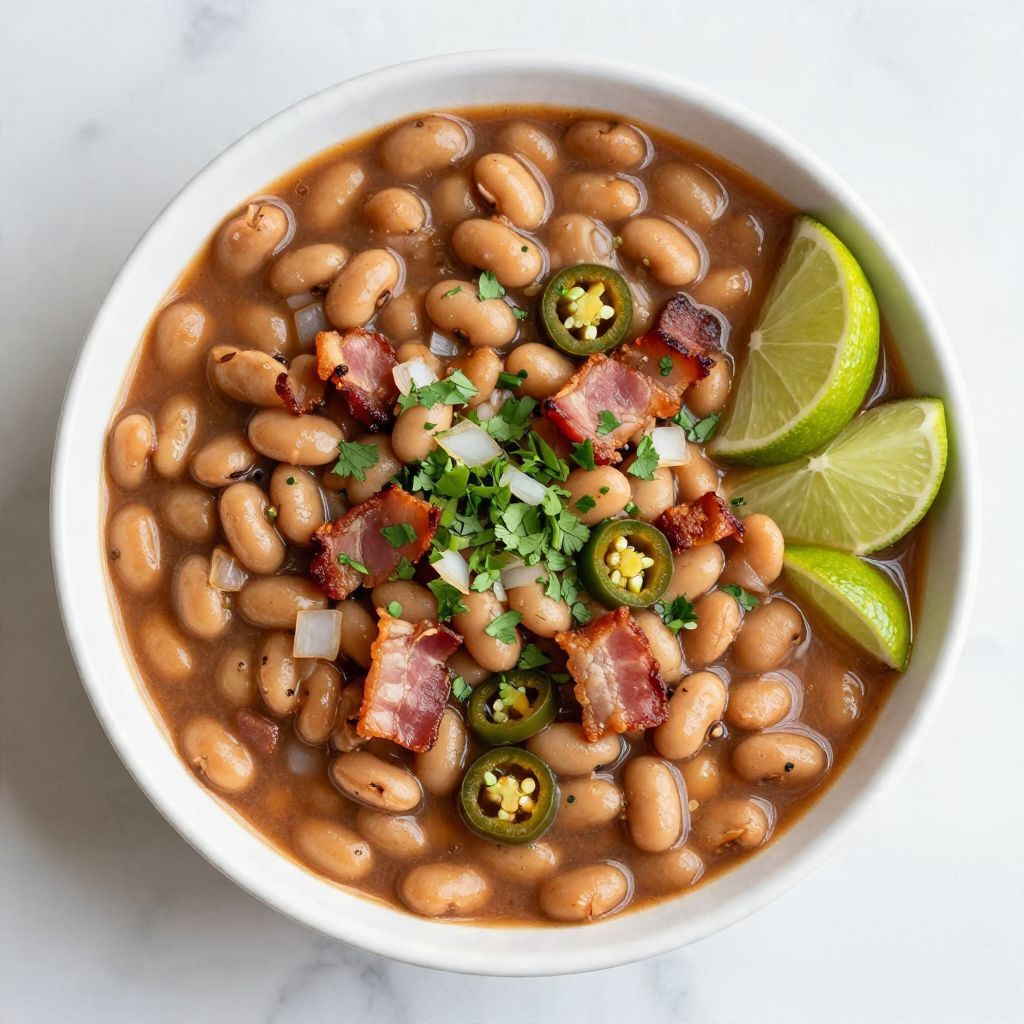
Authentic Mexican Charro Beans
Ingredients
Equipment
Method
- Start by rinsing the dried pinto beans in cold water to remove any debris. Soak them for at least 4 hours, or overnight.
- After soaking, drain the beans and rinse them again.
- In a large pot or Dutch oven, cook the chopped bacon over medium heat until crispy.
- Add the diced onion and minced garlic to the pot, cooking until softened.
- Stir in the soaked beans and 4 cups of fresh water. Bring the mixture to a boil, then reduce the heat to low.
- Add the chopped jalapeños, cumin, oregano, and salt to taste.
- Cover the pot and let the beans simmer on low heat for about 1.5 to 2 hours, stirring occasionally.
- Once the beans are tender, taste and adjust the seasoning if necessary. Remove from heat and let them sit for a few minutes before serving.