
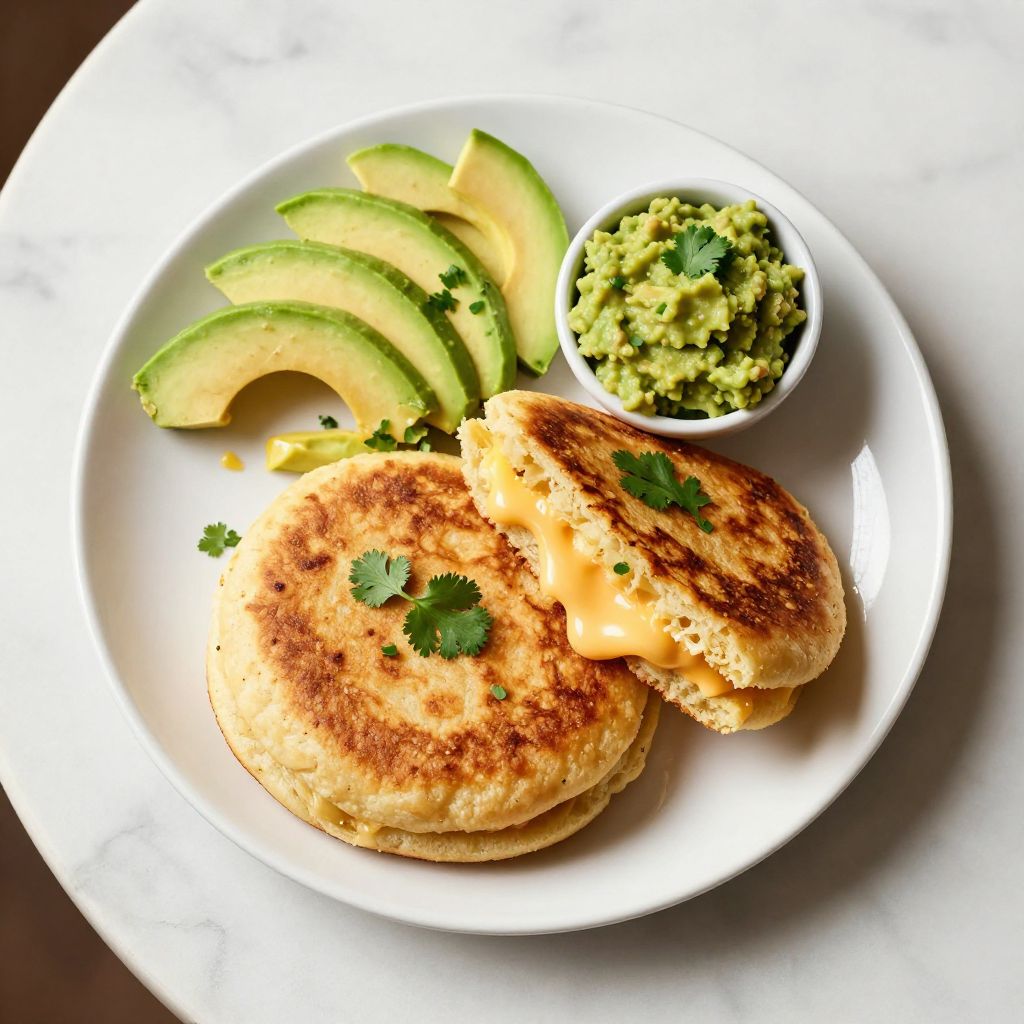
Picture this: a warm, golden arepa, its crispy exterior giving way to a soft, steamy center. This Arepa Recipe Colombian is more than just a dish; it’s a comforting staple that brings families together, perfect for any meal of the day.
With its delightful texture and versatility, you can fill these cornmeal pockets with almost anything. Whether you prefer cheese, avocado, or savory meats, these little delights are bound to impress.
Why You’ll Love This Recipe
This recipe is a must-try for anyone looking to explore Colombian cuisine.
- Quick and simple to prepare.
- Versatile fillings for various tastes.
- Perfect for breakfast, lunch, or dinner.
- Gluten-free and naturally delicious.
- Great for sharing with family and friends.
My Experience Making This Recipe
When I first made arepas, the aroma of toasting cornmeal filled my kitchen, making my mouth water. Each bite transported me to the bustling streets of Colombia, where food is a celebration of culture and love.
My family devoured these arepas, each one filled with their favorites. Watching them enjoy every bite reminded me of the joy that comes from sharing good food.
Recipe Overview
- Recipe Name: Arepa Recipe Colombian
- Servings: 8 arepas
- Prep Time: 10 minutes
- Cook Time: 20 minutes
- Total Time: 30 minutes
- Course: Main Course
- Cuisine: Colombian
- Calories per Serving: 150
Equipment You Will Need
- Mixing bowl
- Skillet or griddle
- Spatula
- Plastic wrap
- Measuring cups
Ingredients for Arepa Recipe Colombian
- 2 cups of arepa flour (masarepa)
- 2 ½ cups of warm water
- 1 teaspoon of salt
- 1 tablespoon of vegetable oil
- Optional: Cheese for stuffing
Ingredient Notes and Substitutions
- Arepa flour: This is a fine corn flour used for arepas. You can substitute with regular cornmeal, but the texture will be different.
- Warm water: Helps to hydrate the flour evenly. Room temperature water can work but may yield a denser arepa.
- Salt: Enhances flavor. You can reduce it if watching sodium intake.
- Vegetable oil: Adds richness. Feel free to use olive oil or butter for extra flavor.
How to Make Arepa Recipe Colombian
Step 1: Combine the Ingredients
In a mixing bowl, combine the arepa flour and salt. This ensures even seasoning throughout the dough.
Step 2: Add Warm Water
Gradually add the warm water while mixing with your hands. This helps to achieve the right consistency, making it easier to form the dough.
Step 3: Knead the Dough
Knead the dough for about 2-3 minutes until it’s smooth and pliable. This step is crucial for the right texture.
Step 4: Rest the Dough
Cover the dough with plastic wrap and let it rest for 10 minutes. This allows the flour to absorb the water fully.
Step 5: Shape the Arepas
Divide the dough into equal portions and shape each into a patty about ½ inch thick. This thickness ensures they cook evenly.
Step 6: Heat the Skillet
Heat a skillet or griddle over medium heat and add a little vegetable oil. The oil prevents sticking and adds flavor.
Step 7: Cook the Arepas
Place the arepas on the skillet and cook for about 5-7 minutes on each side until golden brown. This creates that delicious crispy crust.
Step 8: Fill and Serve
Let the arepas cool slightly, then split them open and fill with your choice of cheese, avocado, or any desired filling. This is where the flavor explosion happens!
Pro Tip: For extra crispy edges, allow the arepas to rest in the skillet for an extra minute after flipping.
Tips for the Best Arepa Recipe Colombian
- Use fresh arepa flour for the best flavor.
- Let the dough rest to improve texture.
- Don’t skip the oil in the skillet for a nice crust.
- Experiment with fillings to find your favorite combination.
- Serve warm for the best experience.
Common Mistakes to Avoid
- Using cold water can lead to dense arepas. Warm water is key.
- Not resting the dough can result in tough arepas.
- Overcooking can make them dry. Keep an eye on the color.
- Skipping the oil may cause sticking. Always use it.
Serving Suggestions
Arepas are fantastic on their own, but they shine even more when paired with the right sides.
- Serve with guacamole for a fresh twist.
- Pair with a simple salad for a light meal.
- Enjoy with a side of black beans for extra protein.
- Top with salsa for a flavorful kick.
Variations to Try
- Add cheese directly into the dough for cheesy arepas.
- Incorporate herbs like cilantro for a fresh flavor.
- Use sweet arepa flour for a dessert version.
- Try different fillings like shredded chicken or beans.
Dietary Adaptations
- Gluten-free: Arepas are naturally gluten-free, perfect for those with sensitivities.
- Dairy-free: Skip the cheese or use a dairy-free alternative.
- Vegan: Fill with avocado, beans, or veggies for a hearty meal.
- Low-carb/keto: Use almond flour instead of arepa flour for a lower-carb version.
Storage and Reheating
Refrigerator
Store leftover arepas in an airtight container in the fridge for up to 3 days.
- Reheat on a skillet for best results.
- Microwave if you’re in a hurry, but they may lose crispness.
Freezer
Freeze cooked arepas by placing them in a single layer in a freezer bag. They can last up to 2 months.
- Separate layers with parchment paper.
- Thaw in the fridge before reheating.
Reheating
To reheat frozen arepas, place them in a skillet over medium heat until warmed through.
- This helps retain their crispy texture.
- Oven reheating is also an option for a crispy finish.
Nutrition Information
| Nutrient | Amount |
|---|---|
| Calories | 150 |
| Total Fat | 5g |
| Saturated Fat | 0.5g |
| Carbohydrates | 23g |
| Fiber | 2g |
| Sugar | 0g |
| Protein | 3g |
| Sodium | 200mg |
| Cholesterol | 0mg |
This information is approximate and can vary based on specific ingredients used.
Frequently Asked Questions
Can I make arepas ahead of time?
Yes, you can prepare the dough in advance and store it in the fridge for up to 24 hours.
What if my arepas are too dry?
If your arepas turn out dry, try adding a little more water to the dough next time for better moisture.
Can I freeze arepas after cooking?
Absolutely! Just make sure to let them cool completely before freezing them in a single layer.
What can I substitute for arepa flour?
You can use regular cornmeal or masa harina, but the texture will be different than traditional arepas.
Why did my arepas not rise?
Arepas do not rise much because they are made from corn flour, which doesn’t contain gluten like wheat flour does.
Final Thoughts
Making Arepa Recipe Colombian is not just about cooking; it’s about creating memories. I encourage you to try this recipe and bring a taste of Colombia to your kitchen.
For more exciting recipes, check out my fried cornbread recipe or explore this fry bread recipe for delightful variations. Enjoy your culinary adventures!
Arepa Recipe Colombian
Ingredients
Equipment
Method
- In a mixing bowl, combine the arepa flour and salt.
- Gradually add the warm water while mixing with your hands.
- Knead the dough for about 2-3 minutes until smooth and pliable.
- Cover the dough with plastic wrap and let it rest for 10 minutes.
- Divide the dough into equal portions and shape each into a patty about ½ inch thick.
- Heat a skillet or griddle over medium heat and add a little vegetable oil.
- Place the arepas on the skillet and cook for about 5-7 minutes on each side until golden brown.
- Let the arepas cool slightly, then split them open and fill with your choice of cheese, avocado, or any desired filling.