
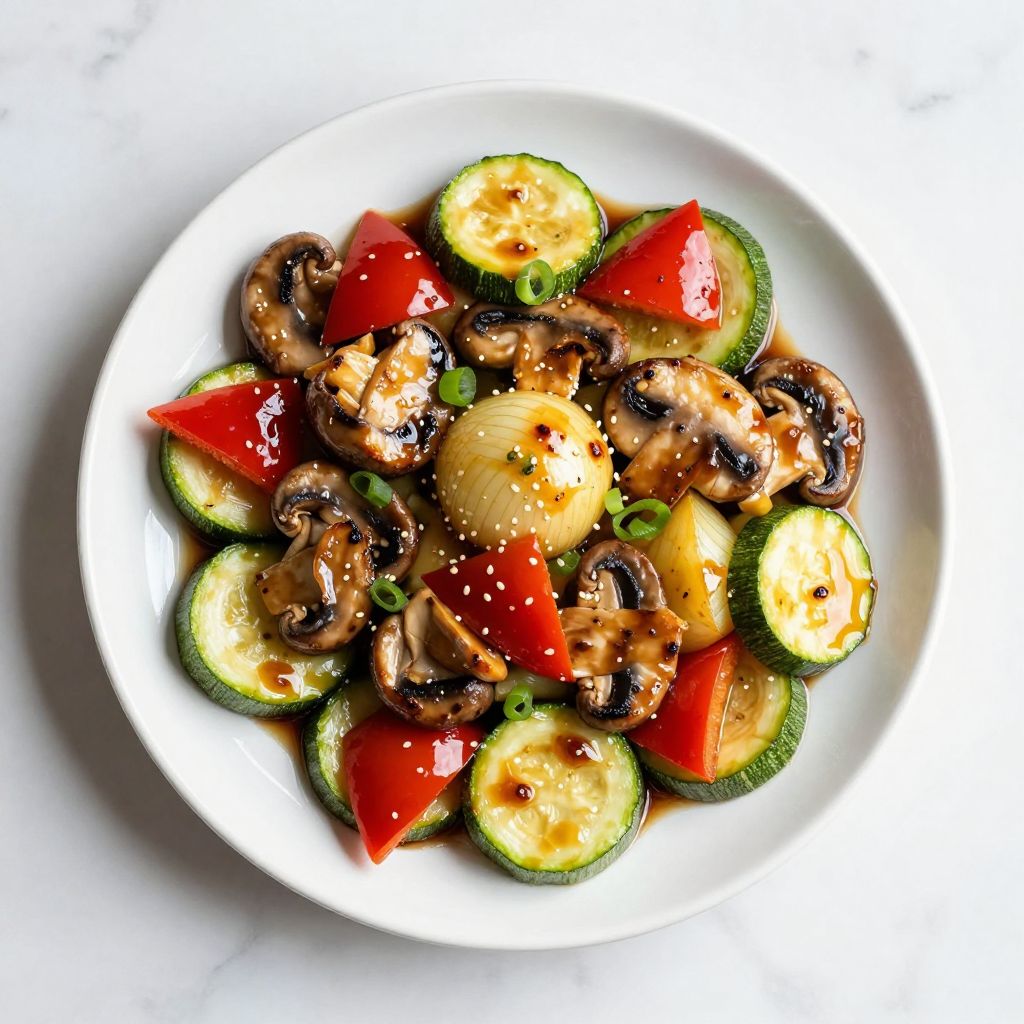
The sound of sizzling vegetables hitting a hot griddle is pure kitchen magic, and hibachi vegetables deliver that restaurant experience right to your stovetop. These quick-cooked, caramelized veggies taste like they came from a professional teppanyaki chef, yet you can have them ready in under 20 minutes.
What makes this recipe so special is the combination of high heat, perfectly timed stirring, and a savory glaze that coats each vegetable with flavor. You’ll get tender-crisp texture, beautiful browning, and restaurant-quality results every single time.
Why You’ll Love This Recipe
Hibachi vegetables hit all the right notes for weeknight dinners and entertaining alike. They’re fast, impressive, and work with almost any protein or grain you pair them with.
- Ready in under 20 minutes from start to finish
- Restaurant-quality results with simple home kitchen equipment
- Naturally gluten-free and easily customizable for dietary needs
- Works perfectly as a side dish or main course component
- Uses affordable, commonly available vegetables
My Experience Making This Recipe
The first time I made hibachi vegetables at home, I was skeptical that my regular skillet could replicate that teppanyaki magic. I cranked up the heat, added the vegetables, and within seconds the kitchen filled with that unmistakable sizzle and aroma that made my family gather around the stove.
What surprised me most was how quickly the vegetables caramelized and developed those golden, slightly charred edges. The whole experience felt fancy but required almost no technical skill, just proper heat and good timing.
My kids, who normally push vegetables around their plates, actually asked for seconds. Now this recipe appears on our dinner rotation at least twice a month, and I’ve made it for countless dinner parties where guests assumed I’d spent hours cooking.
Recipe Overview
- Recipe Name: Hibachi Vegetables
- Servings: 4 as a side dish
- Prep Time: 15 minutes
- Cook Time: 12 minutes
- Total Time: 27 minutes
- Course: Side Dish
- Cuisine: Japanese-inspired
- Calories per Serving: 180
Equipment You Will Need
- One large cast iron skillet or griddle (12-inch ideal)
- Sharp chef’s knife for chopping vegetables
- Wooden or metal cooking spatulas
- Medium mixing bowl
- Small bowl for the sauce
- Whisk or fork for combining ingredients
- Measuring spoons and cups
- Cutting board
Ingredients for Hibachi Vegetables
- 3 tablespoons unsalted butter
- 2 tablespoons vegetable oil
- 1 large zucchini, sliced into 1/4-inch half-moons
- 1 large yellow onion, cut into 1-inch chunks
- 8 ounces mushrooms, sliced
- 1 red bell pepper, cut into 1-inch pieces
- 3 cloves garlic, minced
- 3 tablespoons soy sauce
- 1 tablespoon mirin (or 1 teaspoon sugar dissolved in 1 tablespoon water)
- 1 teaspoon sesame oil
- 1/2 teaspoon white pepper
- 1/4 teaspoon salt
- 1 tablespoon sesame seeds for garnish
- 2 green onions, sliced for garnish
Ingredient Notes and Substitutions
- Butter and Oil: The combination creates the signature sizzle and prevents sticking. You can use all vegetable oil, but you’ll lose some of the rich flavor that butter provides.
- Zucchini: This vegetable adds mild flavor and absorbs the glaze beautifully. Yellow squash works identically if zucchini isn’t available.
- Mushrooms: They develop a meaty texture and contribute umami depth. Cremini, button, or shiitake mushrooms all work well.
- Bell Peppers: Any color works, though red and yellow tend to be sweeter. Green peppers will taste slightly more grassy.
- Mirin: This sweet rice wine is traditional in hibachi cooking and adds subtle sweetness and glossy finish. Brown sugar or honey can substitute, though the flavor profile shifts slightly.
- Soy Sauce: Use low-sodium if you’re watching salt intake. Tamari works as a gluten-free alternative.
- Sesame Oil: This adds authentic nutty flavor at the end. Regular oil won’t provide the same depth.
How to Make Hibachi Vegetables
Step 1: Prepare All Vegetables
Slice the zucchini into 1/4-inch half-moons, cut the onion into 1-inch chunks, slice the mushrooms, and cut the bell pepper into 1-inch pieces. Having everything prepped and ready is critical because once the pan heats up, cooking happens fast and you won’t have time to chop.
Step 2: Make the Sauce
Whisk together soy sauce, mirin, sesame oil, white pepper, and salt in a small bowl. Set this aside within arm’s reach of your cooking station so you can add it without stepping away from the heat.
Step 3: Heat Your Skillet
Place your cast iron skillet or griddle over high heat for 3 minutes until it’s smoking slightly. High heat is non-negotiable here because it creates the caramelization and browning that makes hibachi vegetables taste restaurant-quality.
Step 4: Add Butter and Oil
Once the pan is properly hot, add butter and vegetable oil and swirl to combine quickly. The pan should be hot enough that the butter foams immediately when it hits the surface.
Step 5: Cook the Onions and Mushrooms First
Add the onions and mushrooms to the hot pan and let them sit undisturbed for 2 minutes to develop color. This initial sear builds flavor through the Maillard reaction, which creates those delicious browned, caramelized edges.
Step 6: Stir and Add Remaining Vegetables
After 2 minutes, stir everything and push vegetables to the outer edges of the pan. Add the zucchini and bell pepper to the center, then stir everything together after about 1 minute so all vegetables get exposed to direct heat.
Step 7: Cook Until Tender-Crisp
Continue cooking and stirring for another 3 to 4 minutes until vegetables are tender but still have a slight bite. You want them cooked through but not soft, with visible browning on multiple sides.
Step 8: Add Garlic and Sauce
Push all vegetables to the sides of the pan and add minced garlic to the center spot where the residual oil is hottest. Let it cook for about 15 seconds until fragrant, then pour the sauce over everything and toss quickly to coat.
Step 9: Final Toss and Garnish
Toss everything together for another 30 seconds so the sauce reduces slightly and coats all vegetables evenly. Transfer to a serving plate and top with sesame seeds and sliced green onions immediately.
Pro Tip: Don’t crowd the pan or skip the preheating step; both prevent proper caramelization and result in steamed rather than seared vegetables.
Tips for the Best Hibachi Vegetables
- Cut vegetables uniformly so they cook at the same rate and finish at the same time. Uneven pieces lead to some vegetables overcooked while others are undercooked.
- Use a cast iron skillet or heavy-bottomed pan that retains heat well. Thin pans lose temperature too quickly when you add cold vegetables.
- Keep your heat on high throughout cooking to maintain the sizzle and browning. Lowering heat partway through steams the vegetables instead of searing them.
- Stir frequently but not constantly; let each batch sit for 1 to 2 minutes between stirring to develop color. Constant movement prevents proper caramelization.
- Add the sauce at the very end, not partway through cooking. Early sauce addition steams vegetables and prevents the browning you’re after.
- Taste a vegetable before adding sauce and adjust salt as needed, since soy sauce is quite salty.
Common Mistakes to Avoid
- Starting with a cold pan: This leads to steaming instead of searing, resulting in pale, soft vegetables instead of caramelized, flavorful ones.
- Cutting vegetables too small: Tiny pieces overcook and fall apart before larger pieces are done. Stick to 1-inch chunks for consistency.
- Adding sauce too early: Pouring sauce into a hot pan with vegetables creates steam that prevents browning. Wait until the vegetables are nearly done.
- Stirring constantly: Every time you move vegetables, you interrupt the searing process. Let them sit for brief periods to develop color.
- Using low or medium heat: Hibachi cooking requires high heat for speed and browning; anything less produces bland, mushy results.
Serving Suggestions
Hibachi vegetables shine as a side dish to grilled proteins, atop steamed rice, or as part of a composed dinner plate. They’re equally at home alongside chicken, beef, fish, or tofu.
- Serve over white or brown jasmine rice with grilled salmon or miso-glazed fish
- Pair with hibachi chicken or steak for a complete teppanyaki experience at home
- Top crispy fried tofu for a vegetarian main course
- Use as a filling for lettuce wraps or spring rolls
- Add to bowl dishes with quinoa, feta cheese, and tahini dressing for a Mediterranean twist
Variations to Try
- Spicy Hibachi Vegetables: Add 1/2 teaspoon red pepper flakes or sriracha to the sauce for heat that builds with each bite without overpowering the vegetable flavors.
- Garlic and Ginger Version: Increase garlic to 5 cloves and add 1 tablespoon fresh grated ginger to the sauce for a more aromatic, complex version.
- Broccoli and Cauliflower Focus: Replace 4 ounces of softer vegetables with broccoli and cauliflower florets cut into 1-inch pieces for more texture contrast.
- Butter-Forward Style: Use 5 tablespoons butter and only 1 tablespoon oil for a richer version that tastes more decadent and restaurant-like.
- Sweet and Savory Version: Add 1 tablespoon oyster sauce to the glaze for deeper umami and subtle sweetness that rounds out the soy sauce.
Dietary Adaptations
- Gluten-Free: Use tamari instead of soy sauce and verify that mirin contains no wheat; most do, but some brands add barley.
- Dairy-Free: Replace butter with additional vegetable oil or use a dairy-free butter alternative; the sauce is naturally dairy-free.
- Vegan and Vegetarian: This recipe is naturally vegetarian; verify your soy sauce and mirin are vegan, as some contain fish-based ingredients.
- Low-Carb and Keto: Replace mirin with 1 teaspoon erythritol or monk fruit sweetener; the carbs from vegetables are minimal, making this already keto-friendly.
Storage and Reheating
Refrigerator
Store leftover hibachi vegetables in an airtight container for up to 4 days. The vegetables soften slightly as they sit but remain flavorful and safe to eat.
- Keep sauce separate if you have extra; add it fresh when reheating for better flavor
- Drain any liquid that accumulates in the container before reheating
Freezer
Hibachi vegetables freeze reasonably well for up to 3 months, though texture becomes softer after thawing. This works better if you plan to use them in fried rice or mixed bowls rather than eating straight.
- Freeze in a single layer on a baking sheet before transferring to freezer bags
- Thaw in the refrigerator overnight before reheating
Reheating
Reheat in a skillet over medium-high heat for 3 to 5 minutes, stirring occasionally, until warmed through. This method revives the texture better than microwaving, which can make vegetables mushy.
- Add a splash of water or broth if vegetables seem dry
- Consider making fresh sauce if the original has been absorbed
Nutrition Information
| Nutrient | Amount |
|---|---|
| Calories | 180 |
| Total Fat | 14g |
| Saturated Fat | 4g |
| Carbohydrates | 12g |
| Fiber | 2g |
| Sugar | 6g |
| Protein | 3g |
| Sodium | 650mg |
| Cholesterol | 11mg |
These values are approximate and calculated using standard USDA nutritional data. Individual results vary based on specific brands and ingredient choices.
Frequently Asked Questions
Can I make hibachi vegetables ahead of time?
You can prep vegetables hours ahead and store them in the refrigerator, but cook them just before serving for best texture and browning. Cooking ahead results in soft, steamed vegetables rather than the crispy-edged versions you want.
What’s the best pan for this recipe?
A cast iron skillet or flat-top griddle works best because they retain and distribute heat evenly. Stainless steel works acceptably, but nonstick pans don’t get hot enough to create proper browning.
Can I use frozen vegetables?
Frozen vegetables release too much water and prevent browning, so fresh vegetables are strongly recommended. If you must use frozen, thaw and pat them completely dry first, then expect slightly softer results.
Why aren’t my vegetables browning?
Your pan likely isn’t hot enough or you’re stirring too frequently. Heat the empty pan until smoke appears, and wait 1 to 2 minutes between stirring so vegetables develop color.
Can I add protein to this recipe?
Absolutely; slice chicken, beef, or shrimp thin and cook them first until nearly done, then push to the side and cook vegetables around them. This approach keeps proteins from overcooking while vegetables sear.
What if I don’t have mirin?
Mix 1 teaspoon sugar with 1 tablespoon water or use honey; the result tastes slightly different but still delicious. Avoid substituting with sugar alone, which dissolves unevenly.
Final Thoughts
Hibachi vegetables transform your weeknight dinner into something that feels special and restaurant-quality, yet you’ll spend less than 30 minutes from start to finish. The high heat, proper technique, and flavorful glaze do all the heavy lifting for you.
Make this recipe once and you’ll understand why it becomes a regular favorite; make it a few times and you’ll be confidently adjusting vegetables and seasonings to match what you have on hand. Your family dinner just got a serious upgrade.
Explore more ways to bring teppanyaki magic into your kitchen with our hibachi sauce recipe for endless flavor combinations, or level up your entire meal with our blackstone hibachi recipe for cooking proteins alongside these beautiful vegetables.
Hibachi Vegetables
Ingredients
Equipment
Method
- Slice the zucchini into 1/4-inch half-moons, cut the onion into 1-inch chunks, slice the mushrooms, and cut the red bell pepper into 1-inch pieces.
- Whisk together soy sauce, mirin, sesame oil, white pepper, and salt in a small bowl and set aside.
- Place a cast iron skillet or griddle over high heat for 3 minutes until it begins to smoke slightly.
- Add the unsalted butter and vegetable oil to the hot pan and swirl to combine; the butter should foam immediately.
- Add the yellow onion chunks and sliced mushrooms to the pan and let sit undisturbed for 2 minutes to develop color.
- Stir the onions and mushrooms, push them to the outer edges of the pan, add zucchini and bell pepper to the center, cook for 1 minute, then stir everything together.
- Continue cooking and stirring for 3 to 4 minutes until the vegetables are tender-crisp with visible browning.
- Push all vegetables to the sides of the pan, add the minced garlic to the center, cook for 15 seconds until fragrant, then pour the sauce over everything and toss to coat.
- Toss the vegetables and sauce together for 30 seconds until the sauce reduces slightly, transfer to a serving plate, and garnish with sesame seeds and sliced green onions.