
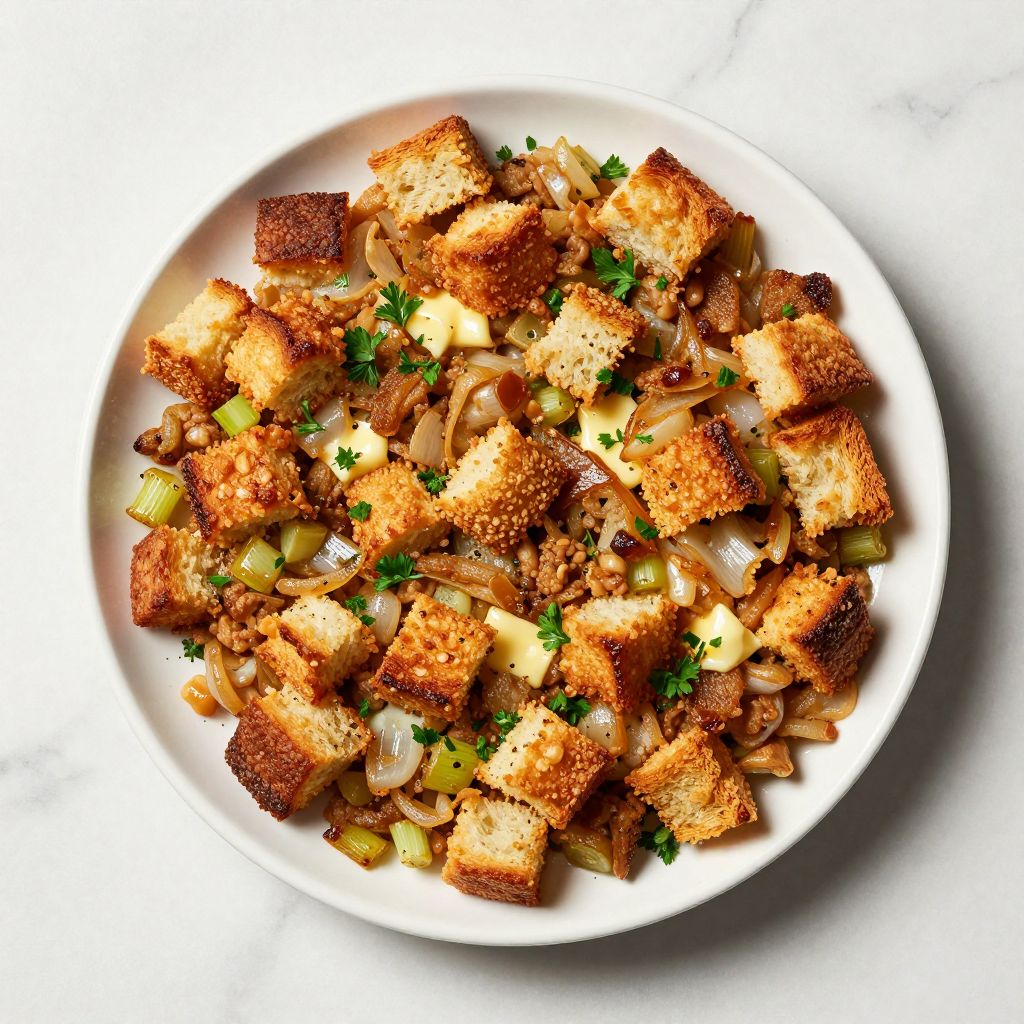
The smell of butter-toasted bread cubes filling your kitchen on a holiday afternoon is comfort in its purest form. Pepperidge Farm stuffing has been a cornerstone of American family dinners for generations, and there’s a reason why: it’s reliable, delicious, and incredibly easy to customize.
This recipe transforms the iconic boxed stuffing into something that tastes homemade while keeping all the convenience you love. Whether you’re cooking for Thanksgiving, a weeknight side dish, or a potluck, this simple approach delivers a golden, flavorful dish that everyone reaches for.
Why You’ll Love This Recipe
This stuffing strikes the perfect balance between convenience and real flavor. You get restaurant-quality results without fussing over scratch recipes or spending hours in the kitchen.
- Ready in about 45 minutes from start to finish
- Uses just a handful of everyday pantry staples
- The bread cubes achieve that perfect crispy-tender texture
- Endlessly customizable with mix-ins like vegetables, herbs, or sausage
- Makes enough to feed a crowd or leave you with delicious leftovers
My Experience Making This Recipe
I’ve made this stuffing every year since I learned my grandmother’s method of doctoring up the boxed mix. The first time, I was skeptical that such simple ingredients could taste this good, but the moment those bread cubes hit the hot broth, I understood the magic.
The reaction around the table is always the same: people come back for seconds, and someone inevitably asks for the recipe. What they don’t realize is that you’re not slaving over a stove for hours, yet the result tastes like you did.
My favorite part is the aroma that fills your home. It’s nostalgic, warm, and immediately signals that something special is about to happen at your dinner table.
Recipe Overview
- Recipe Name: Pepperidge Farm Stuffing
- Servings: 8-10
- Prep Time: 10 minutes
- Cook Time: 35 minutes
- Total Time: 45 minutes
- Course: Side Dish
- Cuisine: American
- Calories per Serving: 245
Equipment You Will Need
- 9×13 inch baking dish
- Large mixing bowl
- Measuring cups and spoons
- Wooden spoon or spatula
- Small saucepan
- Oven
- Kitchen knife and cutting board (for optional additions)
Ingredients for Pepperidge Farm Stuffing
- One 14-ounce box Pepperidge Farm stuffing mix (herb seasoned or your preferred variety)
- 6 tablespoons unsalted butter
- 1 medium onion, finely diced
- 2 celery stalks, finely diced
- 3 cups chicken or vegetable broth, warmed
- 1 large egg
- 1/2 teaspoon black pepper
- 1/4 teaspoon salt (adjust to taste)
- 2 tablespoons fresh parsley, chopped (optional but recommended)
Ingredient Notes and Substitutions
- Pepperidge Farm Stuffing Mix: This seasoned bread cube blend provides the foundation and saves you from cubing bread yourself. You can substitute with any quality herb seasoning mix or even homemade seasoned breadcrumbs, though the flavor profile will shift.
- Butter: Butter creates richness and helps toast the bread cubes evenly. Olive oil works as a substitute but delivers less depth; use the same amount.
- Onion and Celery: These aromatics build a savory base layer. If you dislike onions, skip them entirely; if celery isn’t available, use an extra 1/2 cup diced mushrooms for umami.
- Chicken Broth: Warm broth hydrates the bread cubes and infuses flavor. Vegetable broth works equally well and keeps the dish vegetarian.
- Egg: The egg acts as a binder and creates a slight custardy texture. Omit it if you prefer a more crumbly texture, though the stuffing may be drier.
How to Make Pepperidge Farm Stuffing
Step 1: Preheat Your Oven
Set your oven to 350 degrees Fahrenheit and allow it to preheat fully. A properly heated oven ensures even browning and crisping of the bread cubes.
Step 2: Melt Butter and Saute Aromatics
In a small saucepan over medium heat, melt the butter completely. Add your diced onion and celery, stirring frequently for about 5 minutes until they soften and become fragrant but not browned.
Step 3: Pour Stuffing Mix into a Large Bowl
Empty the entire box of Pepperidge Farm stuffing mix into your large mixing bowl. Breaking up any clumps with your fingers helps the bread cubes absorb liquid evenly.
Step 4: Add the Sauteed Vegetables
Pour the butter and vegetable mixture over the stuffing mix, scraping the saucepan to capture all the flavorful butter. Stir gently to coat the bread cubes evenly with butter.
Step 5: Warm the Broth
Heat your chicken or vegetable broth until it’s steaming but not boiling. Warm broth hydrates the bread more gently and allows better absorption than cold broth.
Step 6: Combine Liquid Ingredients
In a small bowl, whisk together the egg, warm broth, black pepper, and salt. Whisking the egg first ensures it distributes evenly rather than cooking in clumps when it hits the hot broth.
Step 7: Mix Everything Together
Pour the broth mixture over the stuffing mix and stir gently but thoroughly for about 1 minute. Every bread cube should be moistened but the mixture should not be soupy; you want it slightly damp, like wet sand.
Step 8: Transfer to Baking Dish and Bake
Spread the mixture evenly into your 9×13 baking dish. Bake uncovered at 350 degrees for 30 to 35 minutes, until the top turns golden brown and the edges crisp up slightly.
Step 9: Rest Before Serving
Remove the stuffing from the oven and let it sit for 5 minutes. This resting period allows the structure to set and makes serving much cleaner.
Pro Tip: Toast your bread cubes in a dry skillet over medium heat for 2 to 3 minutes before adding liquid to deepen their flavor and ensure maximum crispness.
Tips for the Best Pepperidge Farm Stuffing
- Use warm broth rather than cold broth to help the bread cubes hydrate gently and evenly. Cold broth can create uneven moisture distribution.
- Don’t oversaturate the mixture. If it looks like soup, you’ve added too much liquid and the result will be mushy rather than fluffy and tender.
- Sauté your onions and celery until they’re just softened, not browned. Deep browning can make them bitter and overpower the subtle herb flavors.
- Chop your vegetables into small, uniform pieces so they distribute evenly throughout and don’t create dense pockets in your finished stuffing.
- Cover the baking dish with foil for the first 20 minutes if the top is browning too quickly, then uncover to finish crisping.
- Taste the broth mixture before adding it to the bread cubes. If it needs more salt or seasoning, adjust it then rather than trying to fix it after baking.
Common Mistakes to Avoid
- Using cold broth straight from the carton results in uneven hydration and potentially mushy or dry pockets throughout your stuffing.
- Adding too much liquid turns your stuffing into a wet casserole rather than achieving that light, fluffy texture everyone craves.
- Skipping the sauté step means missing out on caramelized flavors that make this dish taste homemade and deeply savory.
- Stirring too aggressively breaks down the bread cubes and creates a gummy consistency instead of a tender, bite-able texture.
- Baking at too high a temperature burns the top before the interior hydrates properly, leaving you with a crunchy exterior and dry center.
Serving Suggestions
This stuffing pairs beautifully with roasted turkey, ham, chicken, or even vegetarian main courses. It’s hearty enough to anchor a plate yet flexible enough to complement almost any protein.
- Serve alongside herb-roasted turkey with cranberry sauce for a classic holiday meal
- Pair with grilled chicken breast and roasted vegetables for a lighter weeknight dinner
- Offer alongside baked ham with a honey glaze and roasted root vegetables
- Combine with meatloaf and steamed green beans for comfort food at its finest
- Add to a plate with roasted pork chops and applesauce for fall-inspired flavors
Variations to Try
- Sausage Stuffing: Brown one pound of Italian sausage and mix it in during step 7 for a protein-rich, savory version that’s hearty enough to be a main dish.
- Mushroom and Thyme: Sauté one cup of diced mushrooms with your onions and celery, then add 1 teaspoon of fresh thyme to the broth mixture for an earthy, sophisticated flavor.
- Cranberry and Walnut: Stir in 3/4 cup of dried cranberries and 1/2 cup of toasted walnuts after step 7 for bright sweetness and pleasant crunch.
- Apple and Sage: Add one diced apple and 1 teaspoon of dried sage to your sauté pan along with the onions and celery for a sweet and herbaceous twist.
- Spicy Version: Mix in 1/2 teaspoon of cayenne pepper and one finely diced jalapeño to your vegetable mixture for a kick of heat that doesn’t overwhelm the classic flavors.
Dietary Adaptations
- Gluten-Free: Substitute a certified gluten-free stuffing mix in place of the Pepperidge Farm box. The technique remains identical, and the result tastes just as good.
- Dairy-Free: Use olive oil or dairy-free butter in place of regular butter at a 1:1 ratio. The flavor shifts slightly but remains delicious and comforting.
- Vegan: Replace the egg with 3 tablespoons of aquafaba (liquid from canned chickpeas) whisked with 1 tablespoon of cornstarch. Use vegetable broth and dairy-free butter for a fully plant-based version.
- Low-Carb/Keto: This traditional stuffing is carb-heavy due to bread, so consider making a cauliflower rice base with the same seasonings instead for a lower-carb alternative.
Storage and Reheating
Refrigerator
Store leftover stuffing in an airtight container for up to 4 days. Properly stored stuffing stays moist and flavorful throughout.
- Cool completely before transferring to containers to prevent condensation
- Store in shallow containers rather than deep ones for more even reheating
Freezer
Freeze stuffing in airtight freezer bags or containers for up to 3 months. Freezing works best if done before baking, though baked stuffing also freezes well.
- Spread cooled stuffing in a single layer before freezing to prevent solid blocks
- Label containers with the date to track freshness
Reheating
Reheat refrigerated stuffing in a covered baking dish at 350 degrees for about 15 minutes until warmed through. To restore crispness, uncover for the last 5 minutes.
- Sprinkle a few tablespoons of broth over the top before reheating to prevent drying
- Microwave individual portions for 1 to 2 minutes, though the texture will be softer than oven-reheated stuffing
- Thaw frozen stuffing overnight in the refrigerator before reheating using the same method as refrigerated leftovers
Nutrition Information
| Nutrient | Amount |
|---|---|
| Calories | 245 |
| Total Fat | 12g |
| Saturated Fat | 6g |
| Carbohydrates | 28g |
| Fiber | 1g |
| Sugar | 2g |
| Protein | 5g |
| Sodium | 580mg |
| Cholesterol | 35mg |
Nutrition values are estimates based on standard ingredients and an 8-serving yield. Variations in brands and preparation methods may slightly alter these numbers.
Frequently Asked Questions
Can I Make This Stuffing Ahead of Time?
Yes, you can assemble the stuffing up to 24 hours ahead and refrigerate it before baking. Bake directly from the refrigerator, adding 5 to 10 minutes to the baking time to account for the cold temperature.
What If My Stuffing Turns Out Dry?
Dry stuffing usually means not enough broth was added or it baked too long. Next time, ensure your broth is warm and add it slowly, checking that the mixture feels like damp sand before baking. Cover with foil for most of the baking time.
Can I Use Homemade Broth Instead of Store-Bought?
Absolutely, homemade broth works beautifully and often tastes even richer than store-bought versions. Just ensure it’s well-seasoned and warm before mixing it in.
How Much Liquid Should the Mixture Actually Have?
The mixture should be noticeably moist but not wet or soupy. If you can squeeze liquid from a handful of the mixture, you’ve added too much broth.
Can I Double This Recipe for a Larger Crowd?
Yes, doubling works perfectly with two boxes of stuffing and two 9×13 baking dishes, or you can use one large roasting pan. Keep all other ingredients the same proportionally and add just a few extra minutes to the baking time.
Is There a Difference Between Different Pepperidge Farm Stuffing Varieties?
Yes, Pepperidge Farm makes herb, cornbread, and other specialty varieties, each with distinct flavors. The technique stays identical, but herb seasoning is the most traditional and versatile option for this recipe.
Final Thoughts
This Pepperidge Farm stuffing recipe proves that simplicity and excellence aren’t mutually exclusive. With just a few quality ingredients and about 45 minutes of your time, you create something that tastes like it took hours to perfect.
Don’t hesitate to make this for holidays, weeknight dinners, or whenever you want comfort food that genuinely delivers. Your family will ask for it again and again, and you’ll love how easy it is to please them.
If you’re looking to expand your stuffing repertoire, try our sourdough stuffing recipe for a tangier, more complex flavor, or explore the unexpected sweetness of our pineapple stuffing recipe. Each brings its own character to the table while maintaining that same comforting, homemade appeal.
Pepperidge Farm Stuffing
Ingredients
Equipment
Method
- Preheat the oven to 350 degrees Fahrenheit.
- In a small saucepan over medium heat, melt the butter; add diced onion and celery and sauté for 5 minutes until softened.
- Empty the box of stuffing mix into a large bowl and break up any clumps.
- Pour the butter, onion, and celery mixture over the stuffing mix and stir to coat.
- Heat the broth until steaming but not boiling.
- Whisk the egg, warm broth, black pepper, and salt together in a small bowl.
- Pour the broth mixture over the stuffing and stir gently until evenly moistened.
- Transfer the stuffing to the baking dish and bake uncovered at 350 degrees Fahrenheit for 30 to 35 minutes until golden brown and crisp at the edges.
- Remove from the oven and let rest for 5 minutes before serving.