
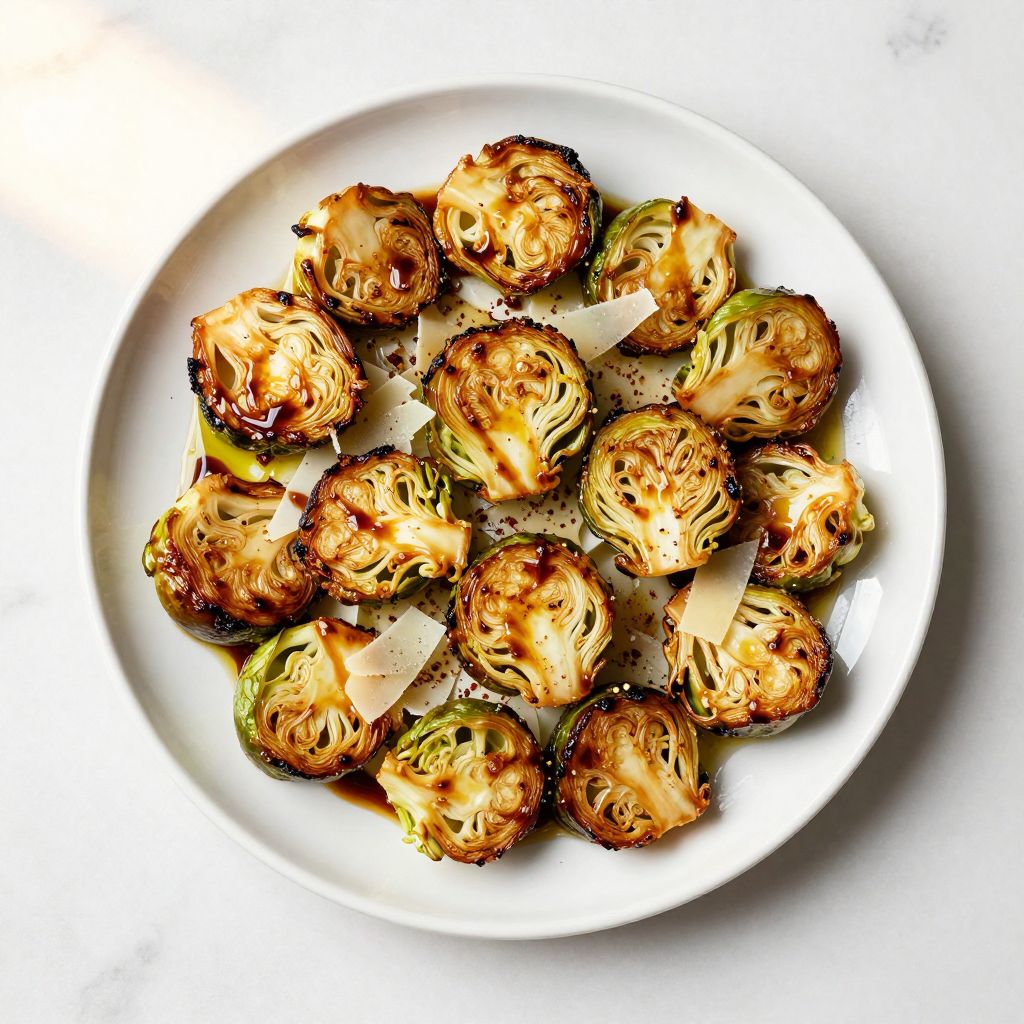
There’s something magical about crispy shaved brussel sprouts hitting a hot pan and turning into golden, caramelized deliciousness in minutes. This shaved brussel sprouts recipe transforms those often-misunderstood little cabbages into a side dish so addictive that people who swear they hate vegetables will ask for seconds.
What makes this dish special is the contrast: tender, buttery interiors with crispy, charred edges that crack between your teeth. You get restaurant-quality results on a weeknight, no fancy equipment needed, and the whole thing comes together faster than you’d think.
Why You’ll Love This Recipe
This shaved brussel sprouts recipe delivers serious flavor with minimal effort, and it works for nearly any occasion from casual weeknight dinners to impressive dinner parties. The technique is foolproof once you understand the heat level, and the results taste like they came from a professional kitchen.
- Ready in under 20 minutes from start to finish.
- Crispy, caramelized edges with tender, buttery centers.
- Works as a side dish for any protein or as a vegetable-forward main.
- Naturally vegan, gluten-free, and low-carb friendly.
- Uses ingredients you probably already have in your kitchen.
My Experience Making This Recipe
I first made shaved brussel sprouts at home after eating them at a high-end restaurant and thinking there was no way I could replicate that crispy-outside, tender-inside texture. Turns out I was overthinking it, and my first attempt was better than I expected.
The smell that fills your kitchen when these start to caramelize is incredible. Within five minutes, you go from raw, thinly sliced brussel sprouts to something that looks like it took hours to prepare.
My family actually requests this dish now, which tells you everything you need to know. Even my kid who previously refused to eat anything green ate three servings without complaint.
Recipe Overview
- Recipe Name: Shaved Brussel Sprouts with Garlic and Balsamic
- Servings: 4 as a side dish
- Prep Time: 10 minutes
- Cook Time: 8 minutes
- Total Time: 18 minutes
- Course: Side Dish
- Cuisine: Contemporary American
- Calories per Serving: 145
Equipment You Will Need
- Sharp knife or mandoline slicer
- Large skillet or cast iron pan
- Cutting board
- Small bowl for mixing garlic and oil
- Wooden spoon or silicone spatula
- Paper towels for drying brussel sprouts
Ingredients for Shaved Brussel Sprouts
- Brussel sprouts: 1 pound, fresh and firm
- Olive oil: 3 tablespoons, divided
- Garlic: 4 cloves, minced
- Sea salt: 3/4 teaspoon
- Black pepper: 1/4 teaspoon, freshly ground
- Balsamic vinegar: 2 tablespoons
- Parmesan cheese: 1/4 cup, shaved (optional but recommended)
- Red pepper flakes: 1/4 teaspoon (optional)
Ingredient Notes and Substitutions
- Brussel sprouts: Look for firm, bright green ones without yellowing or soft spots. Frozen brussel sprouts work if you thaw and dry them thoroughly, though fresh gives better caramelization and texture.
- Olive oil: Use good quality oil since it’s a main flavor component. You can substitute with avocado oil or ghee for a different flavor profile.
- Garlic: Fresh garlic adds pungency and depth. Garlic powder loses its bright flavor in high heat, so avoid it here.
- Balsamic vinegar: Adds sweetness and acidity that balances the caramelized brussel sprouts. Sherry vinegar or apple cider vinegar work as substitutes with slightly different flavor notes.
- Parmesan cheese: Adds umami and richness. Pecorino Romano gives a sharper bite, while nutritional yeast keeps it vegan.
How to Make Shaved Brussel Sprouts
Step 1: Prep Your Brussel Sprouts
Rinse your brussel sprouts under cold water and pat them completely dry with paper towels. Moisture is the enemy of crispy vegetables, so don’t skip this step or your sprouts will steam instead of caramelize.
Trim the stem end and remove any yellowed or damaged outer leaves. Keep the leaves intact so they hold together when you slice.
Step 2: Slice the Brussel Sprouts Thin
Using a sharp knife or mandoline, slice each brussel sprout as thin as you can manage, ideally around 1/8 inch thick. The thinner the slice, the more surface area you get for caramelization and crispness.
If using a mandoline, take your time and use the hand guard to protect your fingers. A mandoline makes this step nearly effortless and delivers consistent thickness, which matters for even cooking.
Step 3: Heat Your Pan to Medium High
Place a large skillet or cast iron pan over medium high heat and let it preheat for about two minutes. Cast iron holds heat beautifully and creates superior caramelization, but stainless steel works fine too.
You want the pan hot enough that a drop of water sizzles immediately when it hits the surface. This temperature is crucial for getting that crispy, browned exterior without burning the garlic.
Step 4: Add Oil and Garlic
Add two tablespoons of olive oil to the hot pan and immediately add your minced garlic. The garlic will start to turn golden within thirty seconds, filling your kitchen with an amazing aroma.
Don’t walk away here. Garlic burns fast at this temperature, and you want it fragrant but not charred, which would taste bitter and ruin the delicate flavor.
Step 5: Add the Brussel Sprouts and Season
Once the garlic is fragrant, add all your sliced brussel sprouts to the pan along with the salt and black pepper. The sprouts will seem to overflow, but they shrink significantly as they cook down.
Stir everything together to coat with the garlicky oil, then let the mixture sit without stirring for about two minutes. This contact time with the hot pan is what creates the crispy, caramelized edges you’re after.
Step 6: Stir and Cook Until Golden
After two minutes of undisturbed cooking, give everything a good stir and let it cook for another two to three minutes, stirring occasionally. Watch as the brussel sprouts transform from pale green to golden brown with charred, crispy edges.
You’re looking for color here. Don’t be afraid of a little dark browning on the leaves; that’s where the best flavor lives.
Step 7: Finish with Balsamic Vinegar
Remove the pan from heat and drizzle in the balsamic vinegar, stirring quickly to coat everything evenly. The warm pan will help the vinegar reduce slightly and coat each piece beautifully.
The acidity of the balsamic cuts through the richness of the oil and adds a subtle sweetness that makes people ask what the secret ingredient is. Spoiler: it’s just good technique and fresh ingredients.
Step 8: Top and Serve
Transfer your shaved brussel sprouts to a serving dish and top with shaved parmesan cheese and red pepper flakes if using. Taste and adjust seasoning with a pinch more salt if needed.
Serve immediately while everything is still warm and crispy. These are best eaten right away, though they hold up reasonably well if you must let them sit for a few minutes.
Pro Tip: Don’t stir constantly. Let the brussel sprouts sit undisturbed for the first two minutes so they build up that crispy, caramelized crust instead of steaming.
Tips for the Best Shaved Brussel Sprouts
- Dry your sliced brussel sprouts with paper towels a second time right before cooking. Extra moisture trapped between layers steam-cooks the vegetable instead of crisping it up.
- Use a cast iron skillet if you have one. The heat retention is superior and creates more consistent browning than lighter pans.
- Don’t crowd the pan if you’re doubling the recipe. Work in two batches instead so each piece has contact with the hot surface for proper caramelization.
- Slice your brussel sprouts as thin as possible without them falling apart. Thinner slices cook faster and develop more crispy edges relative to tender center.
- Keep your heat at medium high, not high. Too much heat burns the garlic and the outside of the sprouts before the inside cooks through.
- Add the parmesan right before serving rather than cooking it into the dish. Fresh parmesan shavings stay flaky and don’t clump up from the residual heat.
Common Mistakes to Avoid
- Slicing too thick. Brussel sprouts thicker than 1/4 inch won’t caramelize properly and stay tough rather than crispy and tender.
- Cooking with wet brussel sprouts. Any moisture prevents proper browning and causes steaming instead of caramelization.
- Stirring constantly. Constant stirring prevents the brussel sprouts from making contact with the hot pan surface, which is what creates the crispy crust.
- Using low heat. Medium high heat is necessary for quick caramelization. Low heat just softens the sprouts without creating any crust or color.
- Adding salt at the end instead of the beginning. Salt sprinkled on at the start seasons the vegetable throughout and helps draw out moisture for crispier edges.
Serving Suggestions
Shaved brussel sprouts work as a side dish alongside nearly any protein, from roasted chicken to grilled steak to baked salmon. The crispy texture and bright flavors complement rich proteins beautifully without weighing down the plate.
- Pair with roasted chicken breast and a grain like farro or wild rice for a balanced meal.
- Serve alongside grilled steak with a baked potato for a classic dinner.
- Add to grain bowls with roasted sweet potato, chickpeas, and tahini dressing.
- Top a simple green salad with shaved brussel sprouts for added texture and warmth.
- Serve as part of a vegetable-forward mezze board with hummus, pita, and other roasted vegetables.
Variations to Try
- Spicy Asian Style: Replace balsamic with soy sauce and add a teaspoon of sesame oil plus a pinch of ginger. Top with sesame seeds and sliced green onions for an entirely different flavor profile.
- Crispy Bacon Version: Cook bacon until crispy, remove it, and cook your brussel sprouts in two tablespoons of the bacon fat instead of olive oil. Top with crumbled bacon for a savory, smoky twist.
- Apple Cider and Thyme: Substitute apple cider vinegar for balsamic and add a few fresh thyme sprigs while cooking. This combination tastes like fall on a plate.
- Honey Sriracha: Drizzle with a mixture of honey and sriracha after cooking for a sweet and spicy version that works great with Asian-inspired meals.
- Roasted Nuts Version: Top with toasted walnuts or pecans instead of parmesan for added crunch and richness without dairy.
Dietary Adaptations
- Gluten Free: This recipe is naturally gluten free. Just verify any parmesan you use hasn’t been processed in a facility that handles gluten.
- Dairy Free: Skip the parmesan or use a dairy free parmesan alternative. Nutritional yeast adds umami and a similar savory quality.
- Vegan: The recipe is already vegan if you skip the parmesan. Use nutritional yeast for added umami and a similar salty-savory element.
- Low Carb and Keto: This recipe fits perfectly into low carb and keto diets. Brussel sprouts are low in carbs and high in fiber, making them ideal for these eating patterns.
Storage and Reheating
Refrigerator
Store leftover shaved brussel sprouts in an airtight container for up to three days. They lose some of their crispiness over time, but the flavor remains delicious.
- Let cool completely before storing to prevent condensation.
- Add parmesan and any garnishes after reheating rather than before storage.
Freezer
Shaved brussel sprouts don’t freeze well due to their high water content and the texture you’ve worked to create. Fresh preparation is always best.
- If you must freeze, store in a freezer bag for up to one month, though quality will suffer.
Reheating
Reheat in a skillet over medium heat for two to three minutes, stirring occasionally, to restore some of the crispiness. You’ll never fully regain the original texture, so eating fresh is ideal.
- Avoid the microwave, which will make them mushy and limp.
- Add a splash of fresh olive oil while reheating to restore some richness.
Nutrition Information
| Nutrient | Amount |
|---|---|
| Calories | 145 |
| Total Fat | 11g |
| Saturated Fat | 2g |
| Carbohydrates | 10g |
| Fiber | 2g |
| Sugar | 3g |
| Protein | 4g |
| Sodium | 480mg |
| Cholesterol | 5mg |
Nutrition information is an estimate and may vary based on specific ingredients and brands used. These values assume four servings and include parmesan cheese as shown in the recipe.
Frequently Asked Questions
Can I use frozen brussel sprouts for this recipe?
You can, but they won’t crisp up the same way. Thaw them completely and dry them thoroughly with paper towels to minimize moisture before cooking, though the result will be softer than fresh.
How do I know when the brussel sprouts are done cooking?
Look for golden brown color and crispy, slightly charred edges on many of the pieces. The insides should feel tender when you press them with a spoon, while the outside has some crunch.
Can I make this recipe ahead of time?
You can slice the brussel sprouts up to four hours ahead and store them in a container in the refrigerator, but cook them fresh just before serving. The texture stays best when cooked immediately before eating.
What if my brussel sprouts burn instead of caramelize?
Your heat is too high or you’re cooking them too long. Use medium high heat, not high, and aim for four to five minutes of total cooking time. Medium high should give you beautiful golden color without charring.
Can I double this recipe?
Yes, but cook in two batches rather than overcrowding one pan. Overcrowding causes the brussel sprouts to steam rather than caramelize, and you’ll lose all the texture you worked to create.
Is there a substitute for balsamic vinegar?
Sherry vinegar, apple cider vinegar, or even a squeeze of fresh lemon juice all work well. Each creates a slightly different flavor, so choose based on what sounds good to you.
Final Thoughts
This shaved brussel sprouts recipe proves that vegetables can be exciting, delicious, and anything but boring. Once you nail the technique, you’ll find yourself making this constantly because it’s genuinely that good and that easy.
The best part is watching people’s faces light up when they taste these for the first time. Give this recipe a try, and you might just convert someone at your table into a brussel sprouts believer.
If you enjoyed this recipe, explore more vegetable-forward sides that deserve space on your dinner table. Try our sauteed cabbage recipe for a similar quick-cooking technique, or check out our sausage and cabbage recipe for a heartier, protein-packed variation that uses many of the same cooking methods.
Shaved Brussel Sprouts with Garlic and Balsamic
Ingredients
Equipment
Method
- Rinse 1 pound of shaved brussel sprouts under cold water and pat dry thoroughly with paper towels.
- Trim the stem ends and remove any yellowed outer leaves, keeping the sprouts intact for slicing.
- Slice each brussel sprout into 1/8-inch thick pieces using a sharp knife or mandoline slicer.
- Heat a large skillet or cast iron pan over medium-high heat for about 2 minutes until a drop of water sizzles immediately.
- Add 2 tablespoons of olive oil and the minced garlic to the hot pan and cook for 30 seconds, stirring constantly to prevent burning.
- Add the sliced brussel sprouts, sea salt, and black pepper to the pan, tossing to coat evenly with the garlic oil.
- Let the sprouts cook undisturbed for 2 minutes to develop crispy, caramelized edges.
- Stir and cook for an additional 2-3 minutes, stirring occasionally, until the sprouts are golden brown and tender.
- Remove the pan from heat and drizzle in the balsamic vinegar, stirring quickly to coat all pieces.
- Transfer to a serving dish and top with shaved parmesan cheese and red pepper flakes if using.
- Serve immediately while warm and crispy.
Delicious! Easy to make and it disappeared quickly!
Tasty, good looking and very flavorful.
I will make it again.