
The aroma of toor dal simmering on the stove takes me back to my grandmother’s kitchen, where a simple pot of lentils transformed into liquid gold that fed our entire family.
Toor dal is a staple in Indian households for good reason: it’s protein-packed, cooks faster than most lentils, and tastes incredible with minimal fuss.
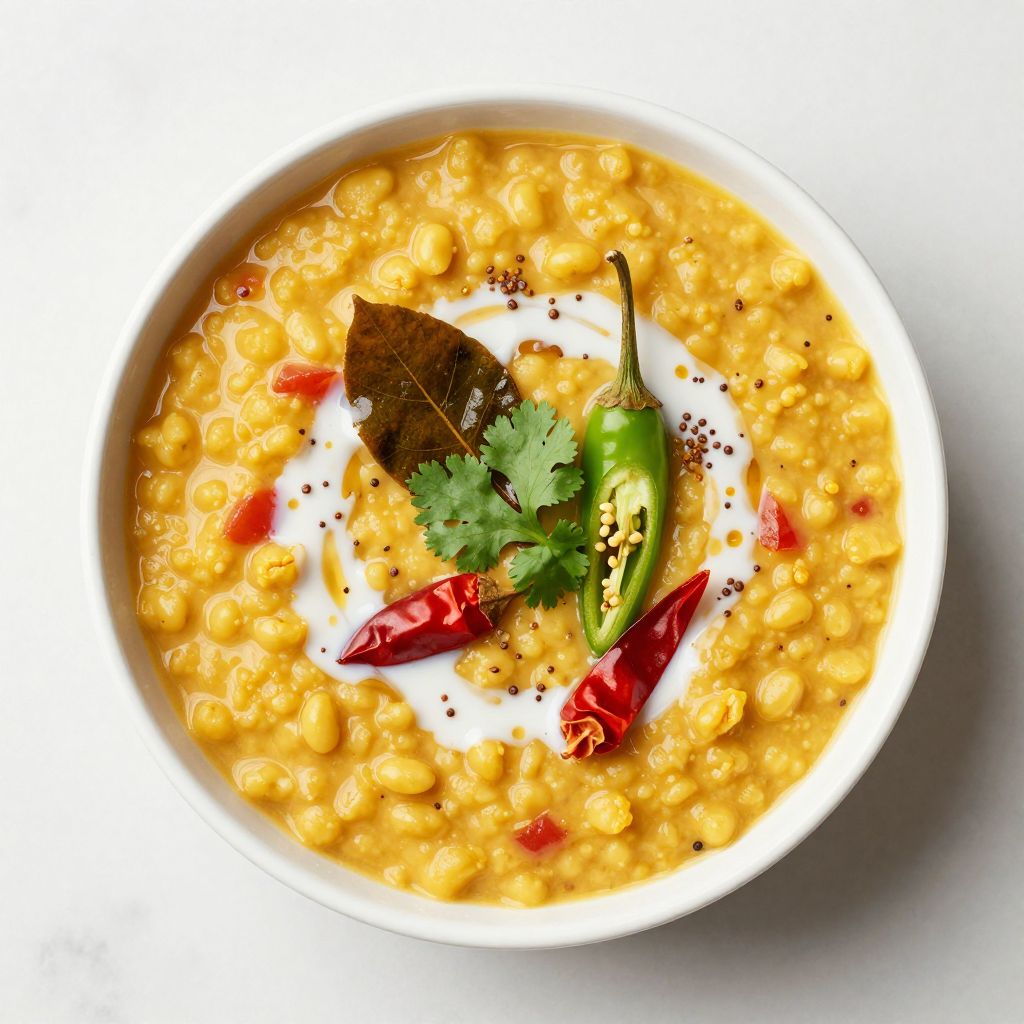
This recipe delivers a creamy, comforting dal that works as a main course or side dish, paired with rice or flatbread.
Whether you’re new to cooking dal or returning to a family favorite, this straightforward approach will have you making it weekly.
Why You’ll Love This Recipe
This recipe strips away complexity and delivers pure, honest flavor in under an hour.
- Quick cooking time compared to other dried lentils
- High in protein and fiber, making it genuinely nourishing
- One-pot simplicity with minimal cleanup
- Naturally vegetarian and pairs with almost any grain or bread
- Budget-friendly and pantry-friendly ingredients
My Experience Making This Recipe
I started making dal on my own about five years ago after realizing restaurant versions tasted better than my first attempts at home. The difference came down to two things: cooking the dal until completely soft rather than stopping early, and tempering the spices in hot oil at the end to wake up the flavors.
The first time I nailed it, I served it to friends who’d never had homemade dal before, and they were genuinely surprised by how silky and flavorful it was. Now I make it constantly, sometimes simplifying it further for weeknight dinners and other times elaborating with extra vegetables or coconut milk for weekend meals.
What strikes me most is how this humble dish feels both elegant and unpretentious on the table. It’s comfort food that also happens to be healthy, which makes it feel like a win every single time.
Recipe Overview
- Recipe Name: Toor Dal
- Servings: 4 to 5
- Prep Time: 10 minutes
- Cook Time: 35 to 40 minutes
- Total Time: 45 to 50 minutes
- Course: Main or side dish
- Cuisine: Indian
- Calories per Serving: 185
Equipment You Will Need
- Large heavy-bottomed pot or pressure cooker
- Fine mesh strainer or colander
- Small skillet for tempering spices
- Wooden spoon or ladle
- Measuring cups and spoons
- Sharp knife for chopping onions and ginger
Ingredients for Toor Dal
- Toor dal (split pigeon peas): 1 cup, rinsed
- Water: 4 cups
- Turmeric powder: 1/2 teaspoon
- Salt: to taste, approximately 1 teaspoon
- Asafetida (hing): a pinch
- Onion: 1 medium, finely chopped
- Garlic: 4 cloves, minced
- Ginger: 1 tablespoon, minced
- Tomato: 1 medium, chopped
- Green chili: 1, slit lengthwise
- Coconut milk: 1/2 cup (optional)
- Ghee or oil: 2 tablespoons
- Cumin seeds: 1 teaspoon
- Mustard seeds: 1/2 teaspoon
- Dry red chili: 2, broken
- Curry leaves: 8 to 10
Ingredient Notes and Substitutions
- Toor dal cooks faster than other lentils due to its smaller size and softer texture. You can substitute yellow split peas or moong dal, though they’ll cook at slightly different rates and taste slightly different.
- Turmeric adds warmth and earthiness while also being anti-inflammatory. Replace it with an extra pinch of cumin if you run out, though the flavor won’t be identical.
- Asafetida adds a savory depth that mimics onion flavors in some cuisines. If you don’t have it, simply increase the garlic and ginger slightly or skip it entirely without harming the dish.
- Ghee creates the richest tempering oil with exceptional flavor. Coconut oil or vegetable oil works just as well if ghee isn’t available.
- Coconut milk adds creaminess and sweetness. Omit it for a lighter dal or replace it with cashew cream for a different texture.
How to Make Toor Dal
Step 1: Rinse and Prepare the Dal
Rinse the toor dal under cold running water two or three times until the water runs mostly clear. This removes surface dust and any small stones that may be hiding in the batch, which matters more than you’d think for texture and safety.
Step 2: Bring Water to a Boil
Pour 4 cups of water into your pot and bring it to a rolling boil over high heat. Starting with boiling water shortens cooking time and helps the dal cook evenly rather than developing a tough outer layer.
Step 3: Add Dal and Aromatics
Add the rinsed dal to the boiling water along with the minced garlic, ginger, green chili, turmeric, and asafetida. Stir well to combine and prevent the dal from sticking to the bottom of the pot.
Step 4: Simmer Until Soft
Reduce heat to medium-low and simmer uncovered for 25 to 30 minutes, stirring occasionally. The dal should break down completely and look creamy rather than grainy; you’re looking for a porridge-like consistency that’s soft enough to mash easily.
Step 5: Add Tomatoes and Adjust Seasoning
Stir in the chopped tomato and salt to taste, then simmer for another 5 to 10 minutes until the tomato softens and the dal reaches your desired thickness. If you want it thinner, add warm water a splash at a time; if you want it thicker, simmer longer uncovered.
Step 6: Stir in Coconut Milk (Optional)
If using coconut milk, pour it in now and stir gently to combine without breaking up the soft dal. Let it heat through for 2 to 3 minutes without boiling, which could separate the coconut milk.
Step 7: Prepare the Tempering Spices
While the dal finishes cooking, heat 2 tablespoons of ghee or oil in a small skillet over medium-high heat. Wait for it to shimmer, which means it’s hot enough to toast the spices properly.
Step 8: Temper the Spices
Once the oil shimmers, add the cumin seeds and mustard seeds immediately. They’ll pop and crackle within seconds, so stand back slightly and listen for that beautiful sound.
Step 9: Add Remaining Spices to Tempering
Add the broken dry red chilies and curry leaves to the hot oil and let them fry for 5 to 10 seconds until fragrant. The heat will open up their essential oils and fill your kitchen with an incredible aroma.
Step 10: Pour Tempering Over Dal
Carefully pour the entire contents of the skillet, including the hot oil, over the cooked dal and stir well. This tempering transforms the dal from good to unforgettable by adding toasted, complex flavors that didn’t exist before.
Pro Tip: Don’t skip the tempering step; it’s what separates homemade dal from mediocre versions and takes only five extra minutes.
Tips for the Best Toor Dal
- Cook the dal longer than you think necessary; it should be completely soft and slightly mushy, never firm or grainy.
- Use fresh curry leaves and dry red chilies for the tempering, as their flavors degrade over time in storage.
- Add salt at the end rather than the beginning, which can slow down the cooking process and make the dal tough.
- Keep the dal at a gentle simmer rather than a rolling boil, which breaks it apart unevenly and makes it cloudy.
- Adjust the water level as needed; dal should be creamy and pourable but not soupy like soup.
- Make extra and freeze portions; dal tastes even better the next day after flavors meld together overnight.
Common Mistakes to Avoid
- Skipping the rinse step leads to sandy, gritty dal that feels unpleasant on the tongue.
- Using old toor dal that’s been stored for over a year means it takes twice as long to cook and never gets fully soft.
- Adding tomato or lemon juice too early acidifies the dal and prevents it from softening completely.
- Using low heat from the start makes cooking take over an hour; start hot, then reduce heat once it boils.
- Forgetting to temper the spices leaves the dal tasting flat and incomplete, missing the toasted complexity that makes it shine.
Serving Suggestions
Serve this creamy dal hot alongside rice, flatbread, or both, and watch how quickly your bowl empties.
- Serve over jasmine rice or basmati rice with a dollop of ghee on top
- Pair with warm naan, roti, or paratha for scooping and soaking
- Top with fresh cilantro and a squeeze of lime juice for brightness
- Serve alongside a tangy vegetable curry or pickle for contrast
- Offer with papadums or fried onions for textural contrast
Variations to Try
- Add diced vegetables like carrots, bell peppers, or green beans in step 3, giving the dal more texture and nutrition without changing its essential character.
- Stir in 1/2 cup of thick cream or cashew cream at the end for an even richer, restaurant-style version that tastes indulgent.
- Include a small handful of spinach or kale in the last few minutes of cooking for added greens without extra cooking time or flavor competition.
- Make it with a South Indian twist by adding grated coconut and chopped pineapple, which creates unexpected sweetness and lightness.
- Create a dal fry by cooking it thicker, then pan-frying it in ghee until slightly crispy on the edges for a completely different texture and presentation.
Dietary Adaptations
- Gluten-free: This recipe is naturally gluten-free as written, though check your spice blends to confirm no cross-contamination occurred during processing.
- Dairy-free: Replace ghee with coconut oil or olive oil without any impact on the cooking process or final taste.
- Vegan: The recipe is already vegan as written; simply use oil instead of ghee in the tempering step.
- Low-carb or keto: Dal is higher in carbs than ideal for strict keto, but reducing portion sizes and pairing with cauliflower rice helps fit it into some low-carb plans with trade-offs in authenticity.
Storage and Reheating
Refrigerator
Store leftover dal in an airtight container and refrigerate for up to 4 days without any quality loss. The flavors actually deepen and improve as it sits overnight.
- Cool completely before covering to avoid condensation
- Store the tempering separately if making ahead, then pour it over just before serving for maximum flavor impact
Freezer
Freeze dal in airtight containers or freezer bags for up to 3 months with excellent results. Leave a little headspace in containers since dal expands slightly when frozen.
- Freeze in individual portions for easy weeknight reheating
- Thaw overnight in the refrigerator before reheating for best texture
Reheating
Reheat gently on the stovetop over medium heat, adding a splash of water if it’s thickened too much during storage. Microwave reheating works too; cover loosely and heat in 2-minute intervals, stirring between each.
- Reheat to steaming hot throughout, stirring occasionally
- Add fresh tempering again if reheating from frozen, as the original flavors fade slightly
Nutrition Information
| Nutrient | Amount |
|---|---|
| Calories | 185 |
| Total Fat | 6 grams |
| Saturated Fat | 2 grams |
| Carbohydrates | 25 grams |
| Fiber | 7 grams |
| Sugar | 2 grams |
| Protein | 10 grams |
| Sodium | 480 milligrams |
| Cholesterol | 5 milligrams |
These values are estimates based on standard ingredient sizes and may vary depending on specific brands and how densely you pack ingredients when measuring.
Frequently Asked Questions
Can I make this in a pressure cooker to save time?
Yes, absolutely. Rinse and add dal with water, turmeric, asafetida, and aromatics to the pressure cooker, then cook on high pressure for 8 to 10 minutes followed by natural pressure release. Finish with the tempering step as written.
What’s the difference between toor dal and yellow lentils?
Toor dal has a slightly earthier flavor and creamy texture when cooked, while yellow lentils are more delicate and break down into mush more easily. Both work in this recipe, but cooking times differ by a few minutes.
Can I make this dal without ghee for a lighter version?
Yes, use any neutral oil like vegetable, coconut, or olive oil in equal amounts. You’ll lose some richness but gain a lighter, cleaner flavor that’s still delicious.
Why is my dal still grainy after cooking for so long?
Old dal takes longer to soften, so check your package date. If the dal is fresh, try cooking longer, adding a pinch of baking soda to speed softening, or switching to a fresher batch.
Can I add coconut milk if I don’t like cream or dairy?
Coconut milk is a great choice for richness without dairy; add it in step 6 as written. Cashew cream, almond milk, or even water works too if you prefer a lighter version.
How can I make the dal taste more like restaurant versions?
Restaurant dal often includes extra ghee, cream, or butter, plus a careful tempering that’s poured over at the table. Doubling the ghee in the tempering step and adding a splash of cream will get you closest to that rich, luxurious restaurant taste.
Final Thoughts
Making toor dal at home transformed my weeknight cooking from relying on takeout to confidently preparing dishes that taste better than restaurants. Once you nail this simple recipe, you’ll find yourself making it constantly for lunch bowls, dinner sides, and unexpected company.
This is comfort food that also happens to nourish your body, which makes it feel like a genuine win every single time you make it. Try it this week and see why this humble lentil dish has fed families across India for generations.
Explore More Indian Recipes
Now that you’ve mastered this creamy dal, explore other Indian dishes that pair beautifully with it or round out your dinner table.
Try making saag recipe as a vibrant green accompaniment, or branch out into heartier fare like cowboy chili recipe for nights when you want something completely different but equally satisfying.
Toor Dal
Ingredients
Equipment
Method
- Rinse the toor dal under cold running water two to three times until the water runs clear.
- Bring 4 cups of water to a rolling boil in a large pot over high heat.
- Add the rinsed dal, minced garlic, minced ginger, slit green chili, turmeric powder, and asafetida; stir to combine.
- Reduce heat to medium-low and simmer uncovered for 25 to 30 minutes, stirring occasionally, until the dal is soft and creamy.
- Stir in the chopped tomato and salt; simmer for another 5 to 10 minutes until the tomato softens and the dal reaches desired thickness.
- If using coconut milk, stir it in and heat through for 2 to 3 minutes without boiling.
- While the dal finishes, heat ghee or oil in a small skillet over medium-high heat until it shimmers, about 1 minute.
- Add cumin seeds and mustard seeds to the hot oil; let them crackle for about 5 seconds.
- Add broken dry red chilies and curry leaves; fry for 5 to 10 seconds until fragrant.
- Carefully pour the tempering over the cooked dal and stir well to combine.
- Serve hot with rice or flatbread.