
There’s nothing quite like the smell of cowboy chili simmering on the stove on a crisp autumn evening, filling your kitchen with the warmth of cumin, chili powder, and slow-cooked beef. Cowboy chili is that no-fuss, crowd-pleasing dish that brings people together without requiring a culinary degree or hours of fussy prep work.
This recipe celebrates bold flavors and hearty meat without the beans that some chili purists argue don’t belong in a true Texas-style pot. What makes this version special is its balance of smokiness, heat, and deep savory richness that tastes even better the next day.
Why You’ll Love This Recipe
Cowboy chili delivers serious flavor with minimal fuss, making it perfect for weeknight dinners, game day gatherings, or meal prep for the week ahead.
- Bold, smoky flavor from cumin and chili powder that tastes like it simmered for hours
- Budget-friendly ingredients that don’t compromise on taste or texture
- Naturally freezes beautifully for up to three months, so you can make ahead with confidence
- Flexible enough to serve over rice, cornbread, or in a bowl with all your favorite toppings
- No beans means no digestive complaints, just pure, satisfying comfort food
My Experience Making This Recipe
I first made cowboy chili on a lazy Saturday afternoon when I wanted something hearty but didn’t feel like spending the entire day in the kitchen. The smell that filled my apartment was absolutely intoxicating, and within an hour, a neighbor knocked on my door asking what I was cooking.
What struck me most was how the flavors deepened as the chili simmered, transforming simple ingredients into something that tasted genuinely restaurant-quality. My friends devoured two full pots that evening, and I’ve made it at least once a month ever since.
The real win came when I froze the leftovers and thawed them a week later for a quick dinner. The flavors had actually improved, blending together more seamlessly than when the chili was fresh.
Recipe Overview
- Recipe Name: Cowboy Chili
- Servings: 8
- Prep Time: 20 minutes
- Cook Time: 2 hours 15 minutes
- Total Time: 2 hours 35 minutes
- Course: Main Dish
- Cuisine: American, Tex-Mex
- Calories per Serving: 385
Equipment You Will Need
- Large heavy-bottomed pot or Dutch oven (at least 6-quart capacity)
- Sharp chef’s knife and cutting board
- Wooden spoon for stirring
- Measuring spoons and cups
- Meat thermometer (optional but helpful)
- Colander for draining if needed
- Can opener
Ingredients for Cowboy Chili
- 3 pounds ground beef (80/20 blend works best)
- 2 large yellow onions, diced
- 6 cloves garlic, minced
- 3 tablespoons chili powder
- 2 tablespoons ground cumin
- 1 tablespoon smoked paprika
- 1 teaspoon cayenne pepper
- 2 teaspoons dried oregano
- 1 teaspoon salt
- 1/2 teaspoon black pepper
- 2 tablespoons tomato paste
- 1 can (28 ounces) crushed tomatoes
- 1 can (15 ounces) diced tomatoes
- 2 cups beef broth
- 1 tablespoon Worcestershire sauce
- 1 tablespoon hot sauce (optional, for extra heat)
- 2 tablespoons olive oil
Ingredient Notes and Substitutions
- Ground beef: An 80/20 ratio provides enough fat to create rich flavor without excessive greasiness. You can substitute with ground bison for leaner meat, though you may need to add an extra tablespoon of olive oil to compensate.
- Chili powder: This dried spice blend is the backbone of cowboy chili’s signature taste. If you can’t find it, combine 2 tablespoons paprika with 1 tablespoon ground ancho chili and 1 teaspoon cayenne for a similar profile.
- Smoked paprika: It delivers that authentic campfire smokiness that defines cowboy chili. Regular paprika will work, but you’ll lose some of that signature depth and might want to add a pinch of liquid smoke instead.
- Beef broth: Quality broth matters here since it flavors the entire pot. Homemade stock is best, but a good-quality low-sodium store brand works well and lets you control saltiness.
- Crushed tomatoes: Fresh tomatoes can work if you blend them smoothly, but canned crushed tomatoes create a more consistent texture and ensure you have enough liquid throughout the long simmer.
How to Make Cowboy Chili
Step 1: Brown the Beef
Heat your pot over medium-high heat and add the olive oil. Once it shimmers, add the ground beef in batches, breaking it into small pieces with your spoon and cooking until it’s deeply browned and no pink remains, about 8 to 10 minutes total.
Browning the beef creates what cooks call the Maillard reaction, which builds tons of savory flavor. Don’t rush this step or skip browning it properly, or your chili will taste flat and one-dimensional.
Step 2: Cook the Aromatics
Once the beef is browned, remove all but 2 tablespoons of excess fat from the pot. Add the diced onions and cook, stirring occasionally, until they become soft and translucent, about 5 minutes.
The onions release their natural sugars during cooking, which adds sweetness and depth to balance the spices. This flavor foundation makes a huge difference in how polished your final chili tastes.
Step 3: Add the Garlic
Stir in the minced garlic and cook for about 1 minute, until fragrant. You’ll immediately smell how the garlic transforms the aroma in the pot.
Cooking garlic briefly before adding liquids prevents it from becoming bitter and harsh. This short cook time mellows the garlic and integrates it smoothly into the base.
Step 4: Bloom the Spices
Add the chili powder, cumin, smoked paprika, cayenne, oregano, salt, and pepper all at once. Stir constantly for about 1 to 2 minutes until the spices become fragrant and coat the meat and vegetables.
Blooming spices in fat releases their essential oils and deepens their flavors dramatically. Skipping this step means your spices stay powdery and one-note instead of rich and complex.
Step 5: Add the Tomato Paste
Stir in the tomato paste, coating everything evenly, and let it cook undisturbed for about 2 minutes. The tomato paste will deepen in color and smell even more concentrated.
Cooking tomato paste this way caramelizes its sugars and removes any tinny canned flavor. This technique transforms a simple ingredient into pure umami richness.
Step 6: Deglaze and Add Liquids
Pour in the crushed tomatoes, diced tomatoes with their liquid, beef broth, Worcestershire sauce, and hot sauce if using. Stir well, scraping up any browned bits stuck to the bottom of the pot (these bits are liquid gold for flavor).
Those stuck-on bits contain concentrated beef flavor that makes your chili taste deeper and more complex. Deglazing ensures nothing goes to waste and every element contributes to the final dish.
Step 7: Bring to a Simmer
Bring the chili to a gentle boil, then reduce the heat to low, creating just a few lazy bubbles breaking the surface. Partially cover the pot with a lid, leaving it slightly ajar so steam can escape.
Low heat allows the spices to meld and the beef to become incredibly tender over time. High heat would toughen the meat and prevent flavors from developing properly.
Step 8: Simmer Low and Slow
Let the chili simmer for about 2 hours, stirring occasionally to prevent sticking. The longer it simmers, the deeper and more complex the flavors become, and any harsh spice edges soften into harmony.
Taste the chili at the 90-minute mark and adjust salt or spices if needed. At this point, you can add more cayenne if you want more heat, or a tablespoon of brown sugar if it tastes too acidic.
Step 9: Final Check and Rest
The chili is done when it reaches a rich, deep brown color and has thickened to your preferred consistency. If it seems too thin, simmer uncovered for another 15 minutes; if too thick, add beef broth a half-cup at a time.
Remove from heat and let the chili rest for 5 to 10 minutes before serving. This resting period allows flavors to settle and the chili to thicken slightly from residual heat.
Pro Tip: Make your cowboy chili one day ahead of serving and refrigerate it overnight. The flavors meld beautifully, and you’ll find the chili tastes even better and more complex than when freshly made.
Tips for the Best Cowboy Chili
- Use freshly ground spices when possible, as they pack more punch than spices that have sat in your cabinet for years. Check the purchase date on your spice jars and replace any older than a year.
- Don’t skip the smoked paprika, even if you think you’re not a paprika person. It creates the signature campfire flavor that makes cowboy chili taste authentic and memorable.
- Keep an eye on your heat level throughout the cooking process. If you notice the chili bubbling aggressively rather than simmering gently, turn the heat down further to prevent excessive evaporation.
- Taste the chili multiple times during cooking and adjust seasonings as needed. Some beef broths are saltier than others, and you might need to dial back salt or add more spices depending on your ingredients.
- Save a tablespoon of raw onion to scatter on top of each bowl just before serving. The fresh crunch and bite contrast beautifully with the soft, cooked chili underneath.
- If your chili tastes too acidic from the tomatoes, add a tablespoon of brown sugar or honey to balance the flavor without making it sweet.
Common Mistakes to Avoid
- Undercooking the beef at the beginning: If you don’t brown the meat deeply, your chili will taste thin and unsatisfying no matter how long it simmers.
- Cooking the chili too hot: High heat toughens the meat and causes too much liquid to evaporate, concentrating flavors unevenly and creating an overly salty result.
- Forgetting to bloom the spices: Simply stirring spices into cold liquid produces powdery, flat flavors that never fully integrate into the dish.
- Using old spices: Stale cumin and chili powder taste musty and one-dimensional, making even perfect technique seem lackluster.
- Adding too much salt early: Beef broth already contains sodium, and the liquid reduces as it simmers, concentrating saltiness. Add salt gradually and taste frequently instead.
Serving Suggestions
Cowboy chili shines on its own in a bowl, but it’s even more special when topped with your favorite garnishes and served alongside complementary sides. The key is balancing the rich, spiced chili with fresh, contrasting flavors and textures.
- Top with shredded sharp cheddar, diced red onion, fresh cilantro, and a dollop of sour cream for a loaded bowl experience
- Serve over steamed white or brown rice to stretch the recipe further and create a more substantial main dish
- Ladle into a hollowed cornbread bowl for an edible vessel that soaks up every last drop of sauce
- Pair with a simple green salad dressed with lime vinaigrette to cut through the richness with brightness
- Serve alongside jalapeño cornbread or buttermilk biscuits for soaking up the flavorful sauce
Variations to Try
- White Cowboy Chili: Swap ground beef for diced chicken breast, skip tomatoes entirely, and add 2 cans of white beans, 1 can of diced green chiles, and 1 cup of chicken broth. This lighter version tastes cleaner and less heavy while maintaining the cowboy spirit.
- Spicy Campfire Chili: Add 2 diced fresh jalapeños, 1 diced habanero, and an extra teaspoon of cayenne to bump up the heat level significantly. Fresh chiles add brightness and a different kind of heat than dried spices alone.
- Three-Meat Cowboy Chili: Brown 1 pound of ground beef alongside 8 ounces of diced bacon and 8 ounces of ground pork for a richer, more complex flavor profile. The bacon adds smokiness that amplifies the smoked paprika beautifully.
- Chocolate-Enhanced Chili: Stir in 1 ounce of unsweetened chocolate or 1 tablespoon of cocoa powder during the final 15 minutes of cooking. The chocolate adds depth and subtle sweetness without tasting like dessert at all.
- Beer-Braised Cowboy Chili: Replace 1 cup of the beef broth with a rich brown ale or stout beer added after browning the beef. The beer adds malty sweetness and complexity that complements the spices perfectly.
Dietary Adaptations
- Gluten-Free: This recipe is naturally gluten-free as written, but double-check your Worcestershire sauce and hot sauce labels to ensure they don’t contain hidden gluten. Most brands are safe, but a few older formulations may include it.
- Dairy-Free: The recipe contains no dairy as written, but if serving with toppings, skip the sour cream and use dairy-free alternatives like coconut milk or cashew cream instead.
- Vegan and Vegetarian: Swap the ground beef for 3 cups of diced mushrooms, cooked until they release their moisture and brown slightly. Add an extra tablespoon of tomato paste and 1 teaspoon of soy sauce for savory depth that mimics beef.
- Low-Carb and Keto: This recipe works beautifully for keto diets as written, with only 18 grams of carbs per serving. Serve in a bowl without rice or bread, and top with full-fat sour cream and cheddar cheese for added fat.
Storage and Reheating
Refrigerator
Store leftover cowboy chili in an airtight container for up to 5 days in the refrigerator. The flavors continue to meld and deepen during storage, making day-old chili taste even better than freshly made.
- Transfer chili to a glass or ceramic container with a tight-fitting lid
- Let the chili cool to room temperature before refrigerating to prevent condensation
- Label the container with the date so you remember when you made it
Freezer
Cowboy chili freezes beautifully for up to 3 months without any loss of quality or flavor. In fact, freezing and thawing actually improves the taste by allowing flavors to fully integrate.
- Freeze in portion-sized containers for easy grab-and-go meals throughout the month
- Leave an inch of headspace at the top of the container since chili expands slightly when frozen
- Alternatively, freeze in a gallon-size freezer bag laid flat for space-efficient storage
- Thaw overnight in the refrigerator before reheating for best results
Reheating
Reheat your chili gently to avoid scorching the bottom or boiling off additional liquid. Stovetop reheating is gentler than the microwave and produces the best texture.
- Transfer to a pot and reheat over low heat, stirring occasionally, until warmed through (about 10 to 15 minutes)
- Add a splash of beef broth or water if the chili seems too thick after sitting
- If using the microwave, heat in 2-minute intervals at 50% power, stirring between each interval
Nutrition Information
| Nutrient | Amount |
|---|---|
| Calories | 385 |
| Total Fat | 24g |
| Saturated Fat | 9g |
| Carbohydrates | 18g |
| Fiber | 4g |
| Sugar | 8g |
| Protein | 38g |
| Sodium | 720mg |
| Cholesterol | 92mg |
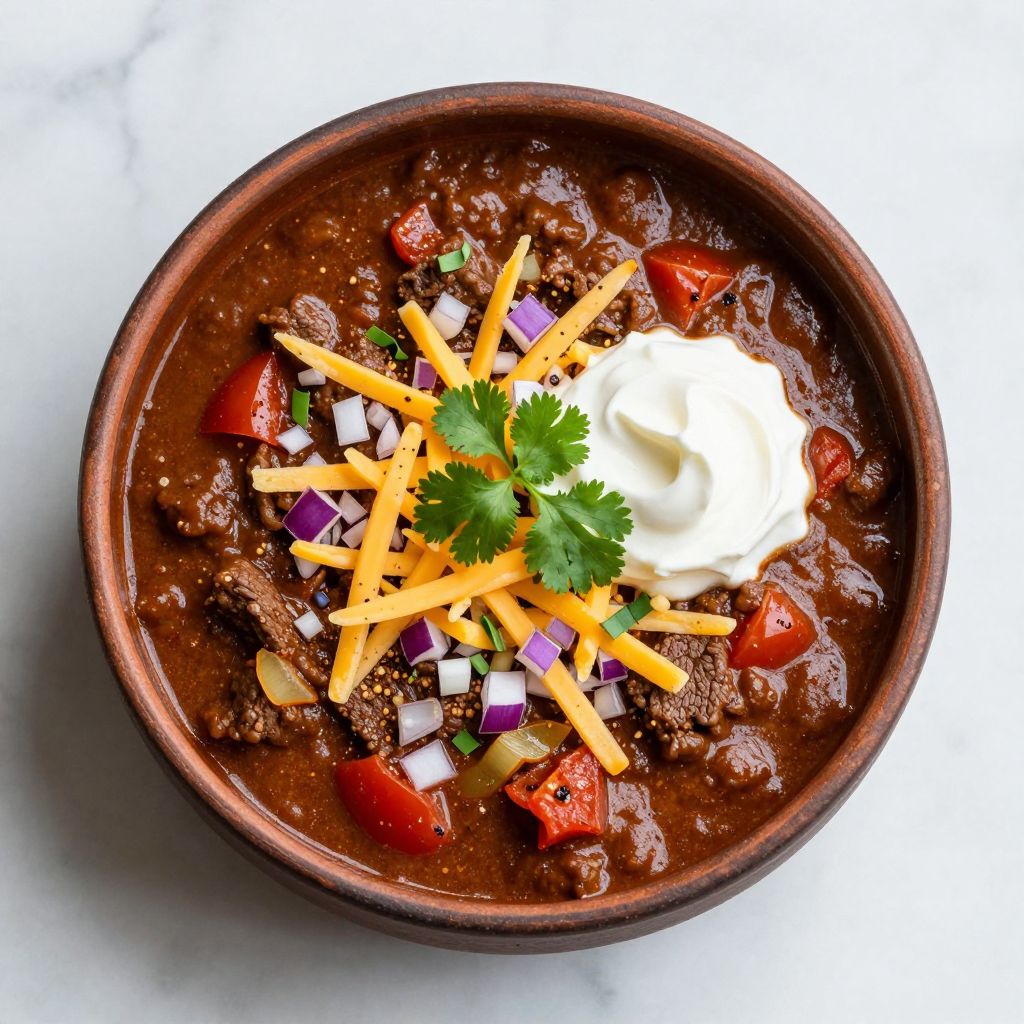
Cowboy Chili
Ingredients
Equipment
Method
- Heat the pot over medium-high heat and add the olive oil. Once it shimmers, add the ground beef in batches, breaking it into small pieces with your spoon and cooking until deeply browned and no pink remains, about 8 to 10 minutes total.
- Remove all but 2 tablespoons of excess fat from the pot. Add the diced onions and cook, stirring occasionally, until they become soft and translucent, about 5 minutes.
- Stir in the minced garlic and cook for about 1 minute, until fragrant.
- Add the chili powder, cumin, smoked paprika, cayenne, oregano, salt, and pepper all at once. Stir constantly for about 1 to 2 minutes until the spices become fragrant and coat the meat and vegetables.
- Stir in the tomato paste, coating everything evenly, and let it cook undisturbed for about 2 minutes until it deepens in color.
- Pour in the crushed tomatoes, diced tomatoes with their liquid, beef broth, Worcestershire sauce, and hot sauce if using. Stir well, scraping up any browned bits stuck to the bottom of the pot.
- Bring the chili to a gentle boil, then reduce the heat to low, creating just a few lazy bubbles breaking the surface. Partially cover the pot with a lid, leaving it slightly ajar so steam can escape.
- Let the chili simmer for about 2 hours, stirring occasionally to prevent sticking. Taste at the 90-minute mark and adjust salt or spices if needed.
- The chili is done when it reaches a rich, deep brown color and has thickened to your preferred consistency. If too thin, simmer uncovered for another 15 minutes; if too thick, add beef broth a half-cup at a time.
- Remove from heat and let the chili rest for 5 to 10 minutes before serving.