
There’s something magical about the smell of fresh granola bars baking in the oven, isn’t there? This Baked Granola Bar Recipe is perfect for busy mornings or afternoon snacks, offering a delightful mix of chewy and crunchy textures that will keep you coming back for more.
Not only are these bars incredibly easy to make, but they’re also packed with wholesome ingredients that you can customize to your liking. Whether you go for chocolate chips, dried fruit, or nuts, these bars will be a family favorite in no time.
Why You’ll Love This Recipe
These granola bars are a fantastic addition to your snack rotation.
- Quick to whip up, making them perfect for busy schedules.
- Customizable with your favorite mix-ins for endless flavor options.
- They store well, so you can always have a healthy snack on hand.
- Great for kids and adults alike, satisfying everyone’s cravings.
My Experience Making This Recipe
The first time I made these granola bars, my kitchen smelled like a cozy café. As I took them out of the oven, I couldn’t wait to dive in.
They turned out perfectly chewy with a hint of sweetness, and my family devoured them within days. Each bite felt like a little hug, and I knew I had found a new go-to recipe.
Recipe Overview
- Recipe Name: Baked Granola Bar
- Servings: 12 bars
- Prep Time: 15 minutes
- Cook Time: 25 minutes
- Total Time: 40 minutes
- Course: Snack
- Cuisine: American
- Calories per Serving: 150 calories
Equipment You Will Need
- Mixing bowl
- Baking dish (9×9-inch)
- Spatula
- Measuring cups and spoons
- Oven
Ingredients for Baked Granola Bar
- 2 cups rolled oats
- 1 cup nut butter (like almond or peanut butter)
- 1/2 cup honey or maple syrup
- 1/2 cup brown sugar
- 1 teaspoon vanilla extract
- 1/2 teaspoon salt
- 1/2 cup chocolate chips (optional)
- 1/2 cup dried fruit or nuts (optional)
Ingredient Notes and Substitutions
- Rolled oats: They provide a hearty base. Quick oats can be used for a quicker texture.
- Nut butter: Adds creaminess and flavor. Sunflower seed butter works for nut-free options.
- Honey or maple syrup: These sweeteners help bind the ingredients. Agave syrup can be used as a substitute.
- Brown sugar: This gives a rich flavor. Coconut sugar is a great alternative.
How to Make Baked Granola Bar
Step 1: Preheat the Oven
Start by preheating your oven to 350°F (175°C). This ensures your granola bars bake evenly and set properly.
Step 2: Prepare the Baking Dish
Grease a 9×9-inch baking dish with non-stick spray or line it with parchment paper. This step prevents the bars from sticking and makes for easy removal.
Step 3: Mix Dry Ingredients
In a large mixing bowl, combine rolled oats, brown sugar, and salt. This helps distribute the sweetness and flavor evenly throughout the bars.
Step 4: Combine Wet Ingredients
In another bowl, whisk together nut butter, honey or maple syrup, and vanilla extract. Mixing these ingredients first creates a smooth consistency.
Step 5: Combine Wet and Dry Mixtures
Pour the wet mixture into the dry ingredients and stir until well combined. Ensure that all oats are coated for the best texture.
Step 6: Add Mix-Ins
If desired, fold in chocolate chips and dried fruit or nuts. These add extra flavor and texture to your bars.
Step 7: Spread the Mixture
Transfer the mixture to the prepared baking dish and press it down firmly. Compacting the mixture ensures that the bars hold together once baked.
Step 8: Bake the Bars
Bake in the preheated oven for 25 minutes or until golden brown. The baking time is crucial for achieving that perfect chewy texture.
Pro Tip: Allow the bars to cool completely before cutting them for clean edges.
Tips for the Best Baked Granola Bar
- Use fresh ingredients for the best flavor.
- Press the mixture firmly into the baking dish for sturdier bars.
- Experiment with different nut butters for unique flavors.
- Store in an airtight container to maintain freshness.
- Feel free to double the recipe if you want extra snacks on hand.
Common Mistakes to Avoid
- Not measuring the ingredients accurately can lead to poor texture.
- Skipping the cooling time results in crumbly bars.
- Overbaking will make the bars too hard and dry.
- Using too many wet ingredients can lead to soggy bars.
Serving Suggestions
These granola bars are delicious on their own or as part of a snack platter.
- Pair them with yogurt for a wholesome breakfast.
- Serve with fresh fruit for a balanced snack.
- Drizzle with extra nut butter for added richness.
- Enjoy with a cup of tea or coffee for an afternoon pick-me-up.
Variations to Try
- Add coconut flakes for a tropical twist.
- Incorporate pumpkin seeds for crunch and nutrition.
- Mix in cinnamon for a warm spice flavor.
- Use dark chocolate chips instead of milk chocolate for a richer taste.
Dietary Adaptations
- Gluten-free: Use certified gluten-free oats.
- Dairy-free: Ensure your nut butter is dairy-free.
- Vegan: Substitute honey with maple syrup.
- Low-carb/Keto: Use a sugar substitute like erythritol.
Storage and Reheating
Refrigerator
Store granola bars in an airtight container in the fridge.
- They will last up to 2 weeks.
- Make sure to separate layers with parchment paper to prevent sticking.
Freezer
For longer storage, freeze the bars in an airtight container.
- They can be frozen for up to 3 months.
- Thaw at room temperature before enjoying.
Reheating
Reheat in the microwave for a few seconds if you prefer them warm.
- Be careful not to overheat, or they may become too soft.
Nutrition Information
| Nutrient | Amount |
|---|---|
| Calories | 150 |
| Total Fat | 6g |
| Saturated Fat | 1g |
| Carbohydrates | 22g |
| Fiber | 2g |
| Sugar | 8g |
| Protein | 4g |
| Sodium | 60mg |
| Cholesterol | 0mg |
Nutrition values may vary based on ingredient brands and preparation methods.
Frequently Asked Questions
Can I substitute the nut butter?
Yes, feel free to use any nut butter or seed butter you prefer.
Can I make these granola bars ahead of time?
Absolutely! They store well in the fridge or freezer, making them perfect for meal prep.
How should I store the granola bars?
Keep them in an airtight container in the fridge for optimal freshness.
Why are my granola bars too crumbly?
This usually happens if you haven’t pressed the mixture down firmly enough before baking.
Can I add protein powder to the recipe?
Yes, adding protein powder can boost the nutritional value, just be aware it may alter the texture slightly.
Final Thoughts
These homemade granola bars are not just tasty; they’re a fun way to control what goes into your snacks. I hope you give this Baked Granola Bar Recipe a try and enjoy every bite as much as I do.
For more delicious recipes, check out my Peanut Butter Granola Recipe and Protein Granola Recipe.
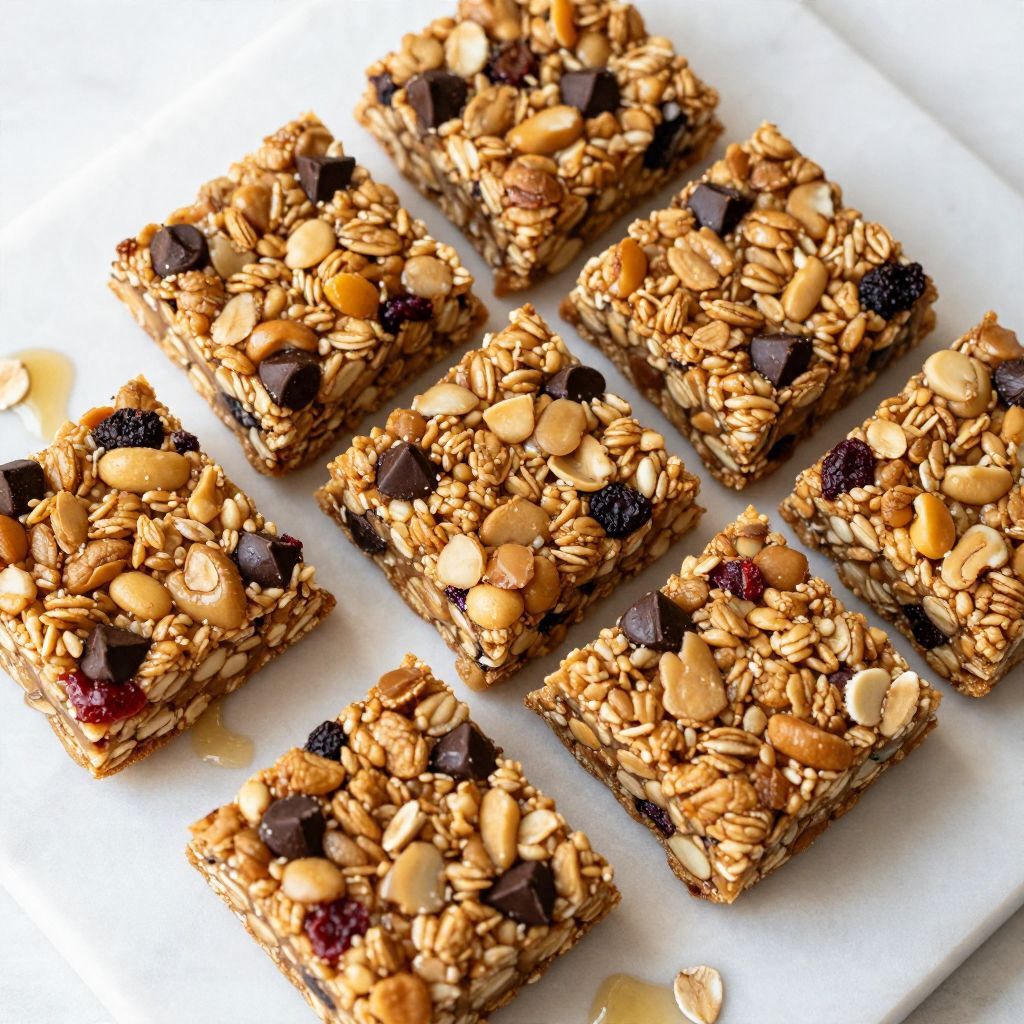
Baked Granola Bar
Ingredients
Equipment
Method
- Preheat the oven to 350°F (175°C).
- Grease a 9x9-inch baking dish with non-stick spray or line with parchment paper.
- In a large mixing bowl, combine rolled oats, brown sugar, and salt.
- In another bowl, whisk together nut butter, honey or maple syrup, and vanilla extract.
- Pour the wet mixture into the dry ingredients and stir until well combined.
- Fold in chocolate chips and dried fruit or nuts if desired.
- Transfer the mixture to the prepared baking dish and press it down firmly.
- Bake in the preheated oven for 25 minutes or until golden brown.
- Allow the bars to cool completely before cutting them for clean edges.