
There’s something magical about pulling a loaf of freshly baked sourdough bread from the oven, with its crispy crust and soft, chewy interior. This High Altitude Sourdough Bread Recipe is crafted specifically for those of us living at elevations where yeast can be a bit tricky, ensuring you get that perfect rise and flavor every time.
This recipe is special because it embraces the unique challenges of high-altitude baking, making your bread-making journey a breeze. With a delightful tang and a golden crust, it’s not just any bread; it’s a warm hug straight from your kitchen.
Why You’ll Love This Recipe
This recipe stands out for its adaptability and flavor. You can enjoy a slice with breakfast or as the star of your dinner table.
- Perfectly rises even at high altitudes.
- Rich, tangy flavor that improves with time.
- Simple ingredients you likely already have.
- Great for sandwiches, toast, or simply with butter.
- Can be made ahead and stored for later use.
My Experience Making This Recipe
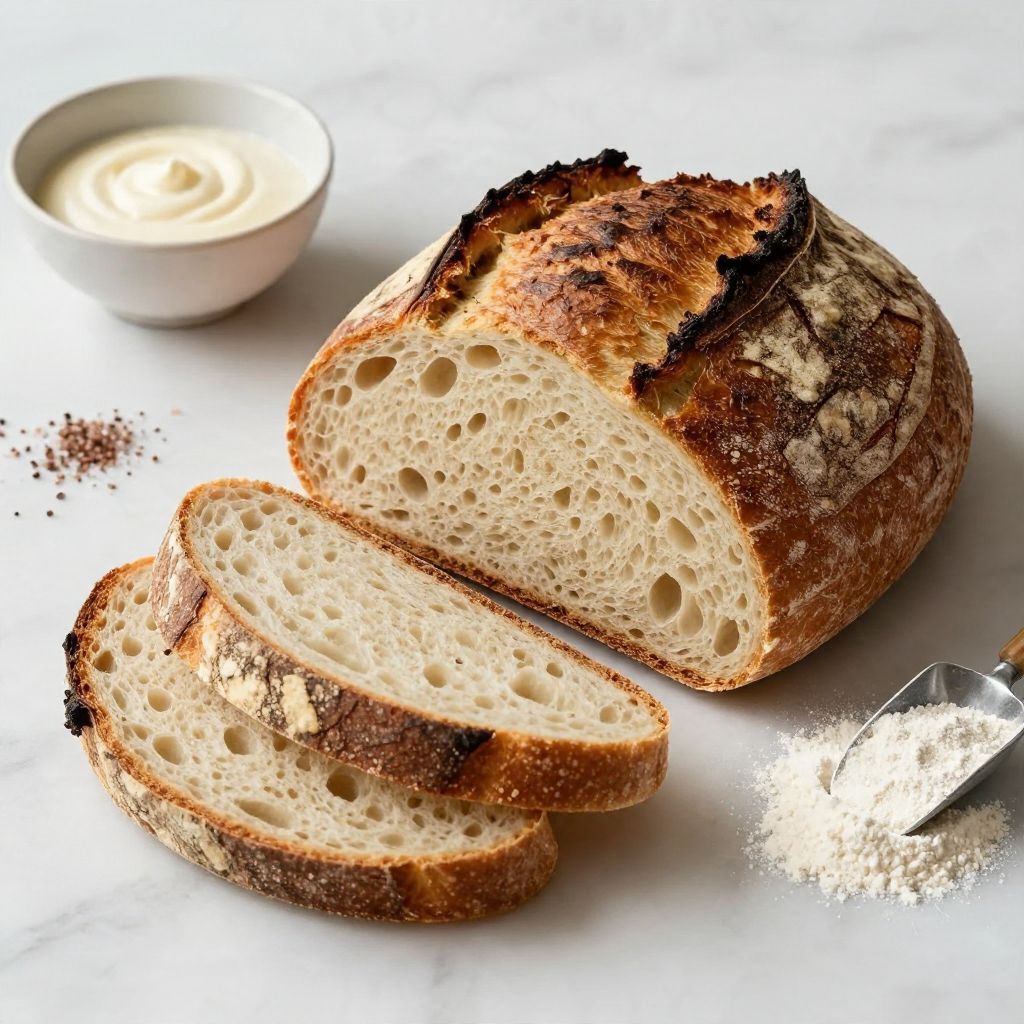
As I attempted this recipe for the first time, the aroma of the dough fermenting filled my kitchen, making it feel like a cozy bakery. The moment I cut into the finished loaf, the sound of the crust crackling was music to my ears.
Each slice revealed a beautiful open crumb structure, and the taste was better than I had hoped for. Friends who gathered around the table couldn’t get enough, asking for their own loaf to take home.
Recipe Overview
- Recipe Name: High Altitude Sourdough Bread
- Servings: 12
- Prep Time: 30 minutes (plus rising time)
- Cook Time: 45 minutes
- Total Time: 12 hours (including fermentation)
- Course: Bread
- Cuisine: American
- Calories per Serving: 150
Equipment You Will Need
- Large mixing bowl
- Dough scraper
- Instant-read thermometer
- Loaf pan or baking stone
- Kitchen scale (optional but recommended)
- Sharp knife or bread lame for scoring
Ingredients for High Altitude Sourdough Bread
- 500g bread flour
- 350g water, at room temperature
- 100g active sourdough starter, at peak activity
- 10g salt
Ingredient Notes and Substitutions
- Bread flour: Provides structure and chewiness; all-purpose flour can be used but may yield a softer loaf.
- Water: Hydrates the flour and activates the gluten; filtered water is best if your tap water is heavily chlorinated.
- Sourdough starter: Adds flavor and rise; you can use a commercial yeast if you’re in a pinch, but the flavor will differ.
- Salt: Enhances flavor and controls fermentation; sea salt or kosher salt can work as alternatives.
How to Make High Altitude Sourdough Bread
Step 1: Mix the Ingredients
In a large mixing bowl, combine the bread flour and water. Mix until no dry flour remains; this is called the autolyse stage and helps develop gluten.
Step 2: Add the Starter
Once the flour and water are combined, add your active sourdough starter. Mix it in until fully incorporated for a well-balanced dough.
Step 3: Incorporate the Salt
Add the salt to the dough and mix it thoroughly. Salt strengthens the dough’s structure and enhances flavor.
Step 4: Bulk Fermentation
Cover the bowl with a damp cloth and let it sit at room temperature for about 6 hours. This is when the dough ferments and develops its unique sour flavor.
Step 5: Stretch and Fold
Every 30 minutes during the first 3 hours of bulk fermentation, perform a stretch and fold. This technique helps to strengthen the gluten without kneading.
Step 6: Shape the Dough
After bulk fermentation, gently transfer the dough onto a floured surface. Shape it into a round or oval loaf, depending on your pan or baking stone.
Step 7: Final Proofing
Place your shaped dough into a floured proofing basket or bowl. Cover it and let it rise for another 1-2 hours until it has noticeably puffed up.
Step 8: Preheat the Oven
About 30 minutes before baking, preheat your oven to 450°F (230°C). A hot oven is key to achieving that crispy crust.
Step 9: Score and Bake
Carefully transfer the dough to your prepared baking surface. Score the top with a sharp knife or bread lame to allow for expansion during baking.
Step 10: Bake
Bake for 30-45 minutes, until the bread is golden brown and sounds hollow when tapped. This is when the magic happens, transforming your dough into a beautiful loaf.
Pro Tip: Make sure your sourdough starter is bubbly and active for the best results.
Tips for the Best High Altitude Sourdough Bread
- Use a kitchen scale for precise measurements; baking is a science.
- Allow your dough to rise slowly; it enhances the flavor and texture.
- Experiment with different flours for varied flavors and textures.
- Keep your kitchen warm; colder environments can slow fermentation.
- Practice patience; great bread takes time, but the results are worth it.
Common Mistakes to Avoid
- Not using an active starter can lead to poor rise and flavor.
- Over-kneading or under-kneading will affect the dough’s texture.
- Skipping the autolyse step can lead to dense bread.
- Baking at too low a temperature results in a pale crust.
- Not scoring the dough can cause it to burst unexpectedly.
Serving Suggestions
This sourdough bread is fantastic on its own, but it pairs beautifully with a variety of dishes. Try it with soup, salads, or as a base for sandwiches.
- Tomato basil soup
- Classic grilled cheese
- Avocado toast
- Charcuterie board
- Bruschetta with fresh tomatoes
Variations to Try
- Add herbs like rosemary or thyme for a fragrant twist.
- Incorporate seeds such as sunflower or pumpkin for added texture.
- Mix in dried fruits like cranberries or figs for a sweet touch.
- Use whole wheat flour for a heartier flavor.
- Experiment with different types of sourdough starters for unique taste profiles.
Dietary Adaptations
- Gluten-free: Use a gluten-free flour blend, though texture will vary.
- Dairy-free: This recipe is naturally dairy-free; no adjustments needed.
- Vegan: No animal products are used, so it’s already vegan-friendly.
- Low-carb/Keto: Substitute with almond flour and adjust hydration accordingly.
Storage and Reheating
Refrigerator
Store leftover bread in a paper bag or wrapped in a kitchen towel. This keeps it from getting soggy while maintaining the crust.
- Best consumed within 3-5 days.
- For longer storage, slice and freeze.
Freezer
Wrap the cooled bread tightly in plastic wrap and aluminum foil. This protects it from freezer burn.
- Can be stored for up to 3 months.
- Thaw at room temperature before reheating.
Reheating
To restore the crust, reheat in a preheated oven at 350°F (175°C) for about 10-15 minutes. This revives the bread’s crispy exterior.
- Microwaving is not recommended as it can make the bread chewy.
Nutrition Information
| Nutrient | Amount |
|---|---|
| Calories | 150 |
| Total Fat | 1g |
| Saturated Fat | 0g |
| Carbohydrates | 32g |
| Fiber | 1g |
| Sugar | 0g |
| Protein | 5g |
| Sodium | 300mg |
| Cholesterol | 0mg |
This nutrition information is an estimate and may vary based on ingredients used and portion sizes.
Frequently Asked Questions
Can I use all-purpose flour instead of bread flour?
Yes, but the texture will be softer, and it may not rise as well.
How long can I store the sourdough starter?
If kept in the refrigerator, it can last for weeks; just feed it weekly.
Can I freeze the dough before baking?
Yes, you can freeze the shaped dough before the final proof; just allow it to thaw and rise before baking.
What should I do if my bread is too dense?
This can be due to an inactive starter or insufficient fermentation; ensure your starter is bubbly and give the dough enough rise time.
What makes high altitude baking different?
At high altitudes, lower air pressure affects yeast activity and moisture, requiring adjustments in ingredients and techniques.
Final Thoughts
Making sourdough bread at high altitude is a rewarding experience that can fill your home with warmth and delicious aromas. Give this recipe a try, and soon you’ll be enjoying your own homemade bread.
If you loved this recipe, explore more delicious options like this sourdough baguette recipe or indulge in some sourdough French toast for breakfast. Happy baking!
High Altitude Sourdough Bread
Ingredients
Equipment
Method
- In a large mixing bowl, combine the bread flour and water. Mix until no dry flour remains.
- Add the active sourdough starter and mix until fully incorporated.
- Add the salt to the dough and mix thoroughly.
- Cover the bowl with a damp cloth and let it sit at room temperature for about 6 hours.
- Every 30 minutes during the first 3 hours of bulk fermentation, perform a stretch and fold.
- After bulk fermentation, gently transfer the dough onto a floured surface and shape it into a round or oval loaf.
- Place your shaped dough into a floured proofing basket or bowl and let it rise for another 1-2 hours.
- About 30 minutes before baking, preheat your oven to 450°F (230°C).
- Carefully transfer the dough to your prepared baking surface and score the top with a sharp knife.
- Bake for 30-45 minutes, until the bread is golden brown and sounds hollow when tapped.