
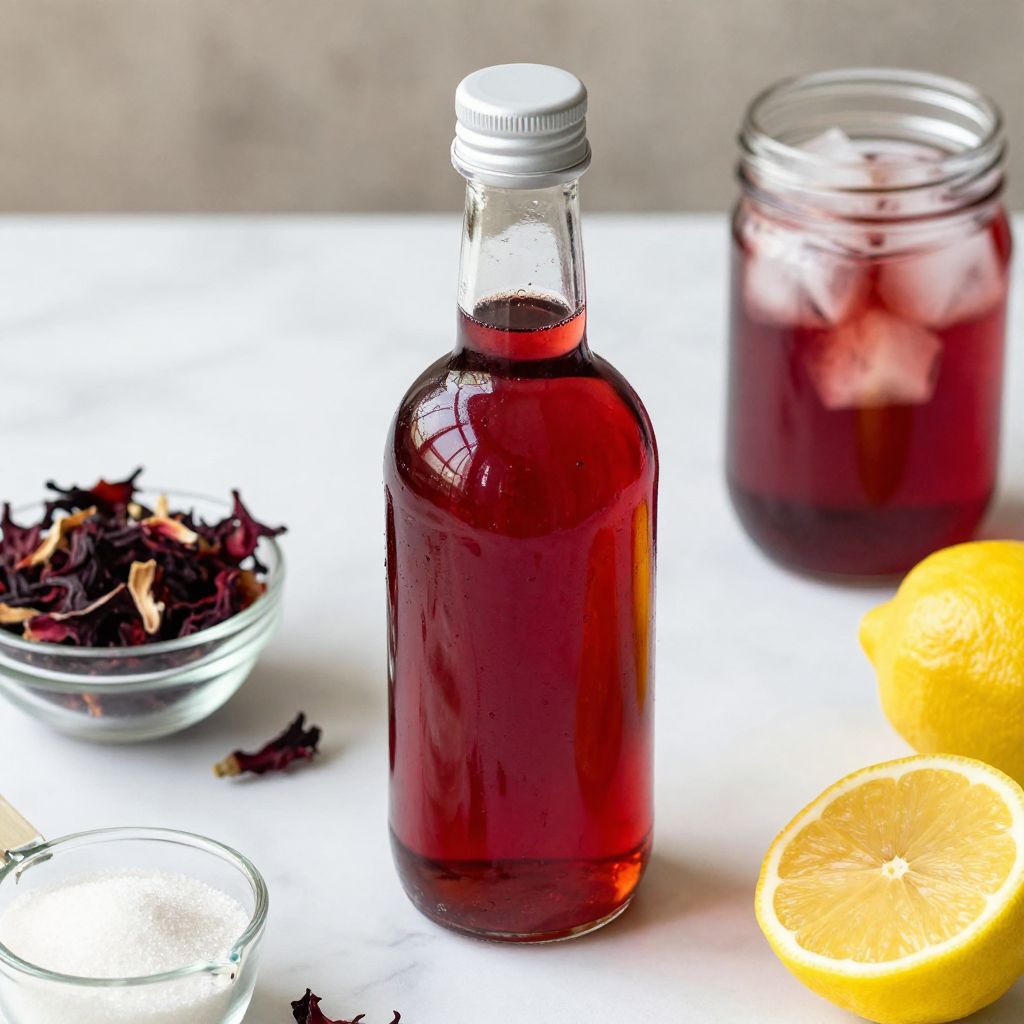
Picture this: a warm summer afternoon, the sun shining, and a refreshing drink in hand that dances with vibrant flavors. That’s the magic of homemade Hibiscus Syrup, a delightful concoction that’s not just a treat for your taste buds but also a feast for the eyes. This syrup is a breeze to make and elevates everything from cocktails to desserts with its tangy sweetness and stunning ruby color. If you’re ready to add a splash of color and a hint of tartness to your drinks and dishes, let’s jump into this easy recipe!
Why You’ll Love This Recipe
The simplicity of making Hibiscus Syrup is just one of its many charms.
- Quick preparation time means you can whip it up whenever the craving strikes.
- Versatile enough to use in drinks, desserts, and even savory dishes.
- Natural ingredients create a refreshing flavor without artificial additives.
- Its vibrant color makes any dish look gourmet.
My Experience Making This Recipe
The first time I made Hibiscus Syrup, I was amazed by how the dried flowers transformed into such a beautiful deep red liquid. The aroma filled my kitchen with a floral scent that was simply intoxicating.
After pouring it over ice and tasting that first sip, I knew I had found a new favorite ingredient. Whether in iced tea or drizzled over pancakes, it never fails to impress guests and brighten my day.
Recipe Overview
- Recipe Name: Hibiscus Syrup
- Servings: About 1 cup
- Prep Time: 5 minutes
- Cook Time: 15 minutes
- Total Time: 20 minutes
- Course: Condiment
- Cuisine: International
- Calories per Serving: 50
Equipment You Will Need
- Small saucepan
- Measuring cups
- Strainer or cheesecloth
- Glass jar or bottle for storage
Ingredients for Hibiscus Syrup
- 1 cup dried hibiscus flowers
- 1 cup water
- 1 cup granulated sugar
- 1 tablespoon lemon juice (optional)
Ingredient Notes and Substitutions
- Dried hibiscus flowers: They provide a tart flavor and vibrant color. You can substitute with hibiscus tea bags if needed, but adjust the quantity based on strength.
- Granulated sugar: Helps to sweeten and preserve the syrup. For a healthier option, try using honey or agave syrup.
- Lemon juice: Adds a bright acidity. If you prefer a sweeter syrup, you can skip this ingredient.
How to Make Hibiscus Syrup
Step 1: Combine Ingredients
In a small saucepan, combine the dried hibiscus flowers and water. This mixture will create the base of your syrup.
Step 2: Bring to a Boil
Heat the saucepan over medium-high heat until it comes to a boil. Boiling helps to extract the flavors and colors from the hibiscus flowers.
Step 3: Simmer
Once boiling, reduce the heat and let it simmer for about 10 minutes. This allows the hibiscus to fully infuse its flavor into the water.
Step 4: Strain the Mixture
After simmering, remove the pan from heat and strain the mixture through a fine mesh strainer or cheesecloth. This step separates the liquid from the hibiscus flowers, leaving you with a beautiful infusion.
Step 5: Add Sugar
Return the strained liquid to the saucepan and add the granulated sugar. Stir over low heat until the sugar completely dissolves, creating a sweet syrup.
Step 6: Add Lemon Juice
If using, add the lemon juice now and stir well. This adds a lovely brightness to the syrup.
Step 7: Cool the Syrup
Remove the syrup from heat and let it cool to room temperature. Cooling helps to thicken the syrup slightly.
Step 8: Store the Syrup
Transfer the cooled syrup into a glass jar or bottle and seal tightly. This syrup can be stored in the refrigerator for up to two weeks.
Pro Tip: Make sure to let the syrup cool completely before storing it to avoid condensation in the jar.
Tips for the Best Hibiscus Syrup
- Use high-quality dried hibiscus flowers for the best flavor and color.
- Adjust the sweetness to your taste; feel free to start with less sugar and add more if needed.
- Infuse for longer if you prefer a stronger flavor; just keep an eye on it to prevent bitterness.
- Experiment with adding spices like cinnamon or ginger for a unique twist.
- Label your jar with the date to keep track of freshness.
Common Mistakes to Avoid
- Not straining the mixture well can leave gritty bits in your syrup, which is not pleasant.
- Using too much heat can cause the syrup to caramelize; keep it at a gentle simmer.
- Skipping the cooling step before storing can lead to spoilage due to condensation.
- Not tasting the syrup before storing may result in an overly sweet or bland syrup.
Serving Suggestions
This syrup is incredibly versatile and can jazz up many dishes.
- Drizzle over pancakes or waffles for a delightful breakfast treat.
- Mix into iced tea or lemonade for a refreshing summer drink.
- Add to cocktails for a unique flavor twist.
- Use as a topping for yogurt or ice cream.
Variations to Try
- Add a splash of vanilla extract for a sweeter, more aromatic syrup.
- Mix in fresh herbs like mint or basil for an herbal note.
- Try using different citrus juices such as lime or orange for varied acidity.
- Incorporate spices like cardamom for added warmth and complexity.
Dietary Adaptations
- Gluten-free: This recipe is naturally gluten-free, so enjoy it worry-free.
- Dairy-free: No dairy is involved, making it suitable for dairy-free diets.
- Vegan/Vegetarian: The syrup is vegan-friendly as it uses sugar instead of honey.
- Low-carb/Keto: Substitute sugar with a low-carb sweetener like erythritol.
Storage and Reheating
Refrigerator
Store the syrup in an airtight container in the refrigerator.
- It will keep for up to two weeks.
Freezer
If you want to store it longer, you can freeze the syrup.
- Pour it into ice cube trays for easy portioning.
Reheating
To use frozen syrup, simply thaw in the refrigerator or at room temperature.
- Reheat gently on the stove if you prefer it warm.
Nutrition Information
| Nutrient | Amount |
|---|---|
| Calories | 50 |
| Total Fat | 0g |
| Saturated Fat | 0g |
| Carbohydrates | 13g |
| Fiber | 0g |
| Sugar | 12g |
| Protein | 0g |
| Sodium | 0mg |
| Cholesterol | 0mg |
This nutritional information is approximate and can vary based on the specific ingredients used.
Frequently Asked Questions
Can I use fresh hibiscus instead of dried?
Fresh hibiscus flowers can be used, but you will need to adjust the quantity since they have a different moisture content.
How long can I store the syrup?
The syrup can be stored in the refrigerator for up to two weeks, or in the freezer for several months.
Can I make this syrup ahead of time?
Absolutely! This syrup keeps well, making it perfect for preparing in advance for parties or gatherings.
What if my syrup is too thick?
If your syrup thickens too much, simply add a little hot water and stir until you reach your desired consistency.
Is this syrup good for cocktails?
Yes, this syrup adds a beautiful flavor and color to cocktails, making them extra special.
Final Thoughts
Making your own Hibiscus Syrup is a fun and rewarding experience. With just a few simple ingredients, you can create something that brightens up your kitchen and your palate.
So go ahead, give this recipe a try, and enjoy the delightful burst of flavor it brings to your favorite dishes and drinks. For more delicious ideas, check out our Ginger Syrup Recipe and Honey Syrup Recipe.
Hibiscus Syrup
Ingredients
Equipment
Method
- In a small saucepan, combine the dried hibiscus flowers and water.
- Heat the saucepan over medium-high heat until it comes to a boil.
- Once boiling, reduce the heat and let it simmer for about 10 minutes.
- After simmering, remove the pan from heat and strain the mixture through a fine mesh strainer or cheesecloth.
- Return the strained liquid to the saucepan and add the granulated sugar.
- Stir over low heat until the sugar completely dissolves.
- If using, add the lemon juice now and stir well.
- Remove the syrup from heat and let it cool to room temperature.
- Transfer the cooled syrup into a glass jar or bottle and seal tightly.