
As I took my first bite of Warabi Mochi, the delicate, chewy texture melted in my mouth, transporting me to a quiet Japanese tea house. This traditional treat is not just a dessert; it’s a celebration of simple, natural flavors and a delightful way to enjoy a moment of stillness in our busy lives.
This recipe is special because it brings together minimal ingredients, creating a subtle sweetness that’s truly refreshing. The soft and slightly powdery texture, paired with the nutty flavor of kinako, makes it a unique experience worth trying at home.
Let’s dive into how to make this delightful treat!
Why You’ll Love This Recipe
Warabi Mochi is a unique dessert that offers a delightful combination of texture and flavor.
- Simple ingredients create complex flavors.
- Gluten-free and vegan-friendly.
- Perfect for sharing at gatherings or enjoying alone.
- Quick to prepare, making it a great last-minute treat.
- Customizable with various toppings and sauces.
My Experience Making This Recipe
Making Warabi Mochi in my kitchen was a joy. The moment I mixed the bracken starch and water, I could already sense the chewy delight waiting to be formed.
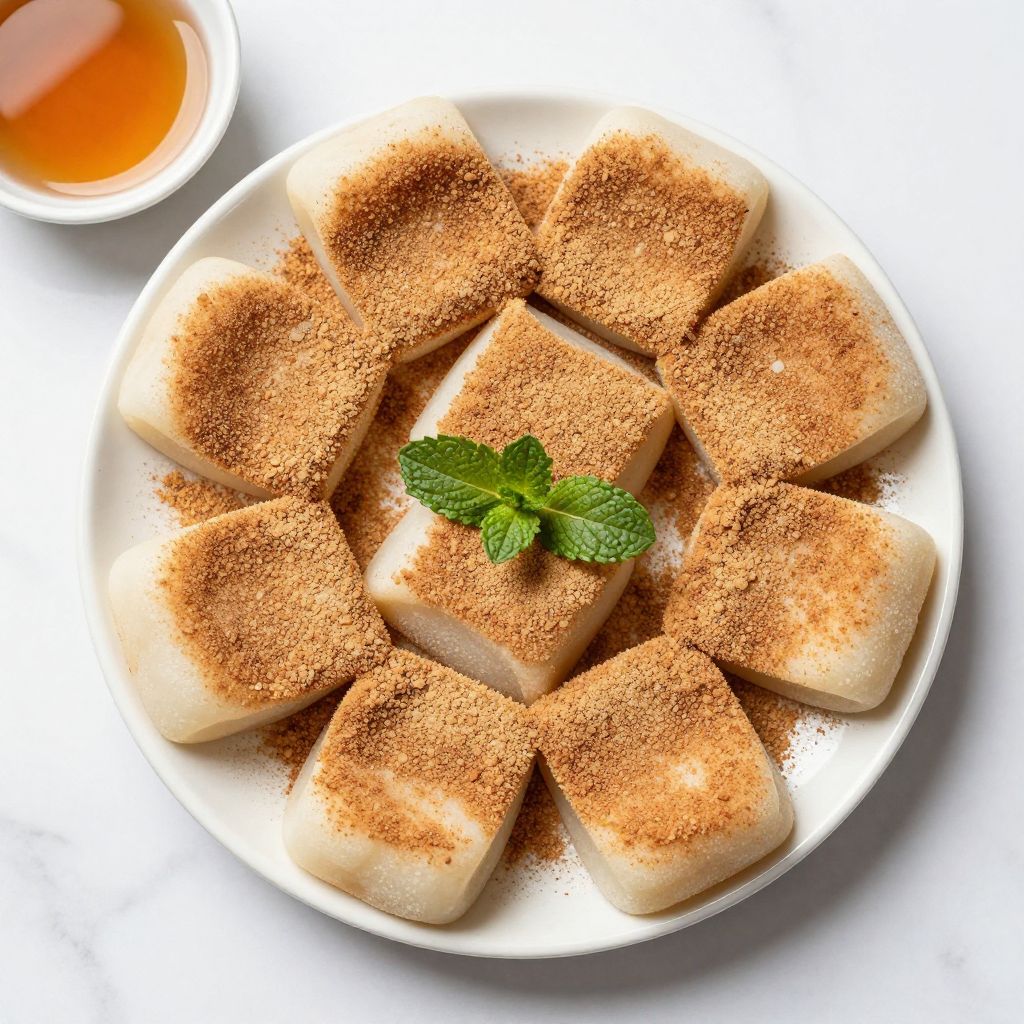
When I finished, the mochi was beautifully dusted with kinako. The first bite was a soft, sweet escape that instantly became a new favorite.
Recipe Overview
- Recipe Name: Warabi Mochi
- Servings: 4
- Prep Time: 10 minutes
- Cook Time: 10 minutes
- Total Time: 20 minutes
- Course: Dessert
- Cuisine: Japanese
- Calories per Serving: 120
Equipment You Will Need
- Mixing bowl
- Whisk
- Non-stick pot
- Spatula
- Serving plate
- Fine sieve or mesh strainer
Ingredients for Warabi Mochi
- 100g bracken starch (warabi starch)
- 300ml water
- 60g sugar
- Kinako (roasted soybean flour) for dusting
- Sweet syrup (optional) for serving
Ingredient Notes and Substitutions
- Bracken starch: This gives Warabi Mochi its unique texture. If unavailable, you can use potato starch, but the texture will differ slightly.
- Sugar: Used for sweetness. You can substitute with agave syrup or honey for a different flavor.
- Kinako: Adds a nutty flavor. For a change, you can use coconut flour as a dusting option.
- Sweet syrup: Enhances flavor. Maple syrup or honey can serve as alternatives.
How to Make Warabi Mochi
Step 1: Prepare the Mixture
In a mixing bowl, combine the bracken starch, sugar, and water. Whisk until smooth to avoid any lumps, ensuring that the starch dissolves completely.
Step 2: Cook the Mixture
Transfer the mixture to a non-stick pot over medium heat. Stir continuously to prevent sticking and ensure even cooking.
Step 3: Thicken the Mixture
Continue stirring until the mixture thickens and becomes translucent. This can take about 5-7 minutes, and the change in color is a good sign!
Step 4: Transfer to a Mold
Once thickened, pour the mixture into a serving plate or a mold. Spread it evenly for uniform thickness, then let it cool to room temperature.
Step 5: Cut the Mochi
After cooling, lightly dust your hands with kinako and cut the mochi into bite-sized pieces. Use a knife dusted with kinako to prevent sticking.
Step 6: Dust with Kinako
Coat each piece generously with kinako. This adds flavor and helps to keep the mochi from sticking together.
Step 7: Serve with Sweet Syrup
If you like, drizzle sweet syrup over the mochi before serving. This adds an extra layer of sweetness and flavor.
Step 8: Enjoy!
Serve your Warabi Mochi chilled or at room temperature. Take a moment to savor each delicious bite.
Pro Tip: The key to perfect Warabi Mochi is stirring continuously during cooking to achieve that delightful chewy texture.
Tips for the Best Warabi Mochi
- Use a non-stick pot to prevent the mixture from sticking and burning.
- Keep stirring while cooking for an even texture; no one likes lumpy mochi.
- Let the mochi cool completely before cutting for the best results.
- Dust generously with kinako to enhance flavor and prevent sticking.
- Experiment with different toppings like sweet red bean paste or matcha powder for variety.
Common Mistakes to Avoid
- Not stirring enough: This can cause lumps and uneven cooking, ruining the texture.
- Using too high heat: Cooking too quickly can burn the mochi; stick to medium heat.
- Cutting too soon: Cutting before it cools can result in a sticky mess.
- Skipping the kinako: Forgetting this step means missing out on flavor and texture.
Serving Suggestions
Warabi Mochi shines on its own, but pairing it with other treats elevates the experience.
- Enjoy with a cup of matcha tea.
- Pair with sweet red bean paste for a traditional touch.
- Serve alongside fresh fruit for a refreshing contrast.
- Top with a drizzle of honey or maple syrup.
- Accompany with mochi ice cream for a delightful fusion.
Variations to Try
- Add matcha powder to the mixture for a green tea flavor.
- Incorporate fruit puree for a fruity twist, like strawberry or mango.
- Mix in a pinch of salt to balance the sweetness.
- Use flavored syrups, like coconut or pandan, for unique tastes.
- Experiment with different dustings, such as cocoa powder or powdered sugar.
Dietary Adaptations
- Gluten-free: Using bracken starch ensures this dessert is gluten-free.
- Dairy-free: This recipe is naturally dairy-free, making it suitable for vegans.
- Low-carb/keto: Substitute sugar with a keto-friendly sweetener for a low-carb option.
Storage and Reheating
Refrigerator
Store leftover mochi in an airtight container in the refrigerator.
- It will last for up to 3 days.
- Dust with kinako before sealing to keep it from sticking.
Freezer
For longer storage, freeze the mochi wrapped in plastic wrap and then placed in an airtight container.
- It can last for up to a month in the freezer.
- Thaw in the refrigerator before serving.
Reheating
Reheat in the microwave for a few seconds if you prefer it warm.
- Watch closely to avoid overheating.
- Dust with kinako again after reheating if needed.
Nutrition Information
| Nutrient | Amount |
|---|---|
| Calories | 120 |
| Total Fat | 0g |
| Saturated Fat | 0g |
| Carbohydrates | 30g |
| Fiber | 1g |
| Sugar | 10g |
| Protein | 1g |
| Sodium | 5mg |
| Cholesterol | 0mg |
This information is approximate and will vary based on specific ingredients used.
Frequently Asked Questions
Can I substitute bracken starch with something else?
Yes, you can use potato starch, but the texture will differ slightly.
Can I make Warabi Mochi ahead of time?
Absolutely! It stores well in the refrigerator for up to 3 days.
What should I do if my mochi is too sticky?
If it’s sticky, dust with additional kinako to help separate the pieces.
Can I add flavors to the mochi?
Yes, adding matcha powder or fruit puree can enhance the flavor.
Is Warabi Mochi gluten-free?
Yes, made with bracken starch, it is naturally gluten-free.
Final Thoughts
Creating Warabi Mochi is not just about the end result, but also about enjoying the process. Each bite offers a gentle reminder of life’s simple pleasures.
I encourage you to give this recipe a try; you might just find a new favorite treat to share with friends and family.
If you enjoyed this recipe, explore more delicious ideas like mochi waffles or the fun of making dalgona candy. Your kitchen adventures await!
Warabi Mochi
Ingredients
Equipment
Method
- In a mixing bowl, combine the bracken starch, sugar, and water. Whisk until smooth to avoid any lumps.
- Transfer the mixture to a non-stick pot over medium heat. Stir continuously to prevent sticking.
- Continue stirring until the mixture thickens and becomes translucent, about 5-7 minutes.
- Once thickened, pour the mixture into a serving plate or mold and let it cool to room temperature.
- After cooling, lightly dust your hands with kinako and cut the mochi into bite-sized pieces.
- Coat each piece generously with kinako.
- If desired, drizzle sweet syrup over the mochi before serving.
- Serve your Warabi Mochi chilled or at room temperature.