
The rich, golden aroma of simmering turkey broth filling your kitchen is the kind of comfort that makes a house feel like home. Turkey broth is one of those kitchen staples that transforms leftovers into liquid gold, giving you a versatile base for soups, gravies, and risottos.
Making your own broth is cheaper than store-bought, packed with collagen and gelatin for joint health, and tastes infinitely better than anything in a box. Once you taste homemade broth, you’ll never look at the canned version the same way again.
Why You’ll Love This Recipe
This recipe takes what you might normally throw away and turns it into something genuinely delicious and nourishing. You’ll get a silky, flavorful broth that costs just pennies to make.
- Uses leftover turkey carcass and bones, making it incredibly budget-friendly
- Extracts deep, savory flavor through slow simmering and proper technique
- Rich in collagen and minerals that support bone and joint health
- Freezes beautifully for months of convenient cooking ahead
- Becomes the secret weapon for soups, sauces, and grain dishes
My Experience Making This Recipe
I started making turkey broth by accident after Thanksgiving dinner, not wanting to waste a perfectly good carcass. My first batch simmered for only three hours, and while it tasted decent, it lacked that deep, rich mouthfeel I was after.
Once I bumped the time up to eight hours and added vegetables in stages, everything changed. The broth turned into this beautiful amber color, and when it cooled, a layer of golden fat solidified on top, telling me I’d done something right.
My kids actually asked for turkey soup the next week, which is the highest compliment a parent can receive. Now I make a big batch whenever I roast a turkey, and I always have containers in the freezer ready to go.
Recipe Overview
- Recipe Name: Turkey Broth
- Servings: 8 cups
- Prep Time: 15 minutes
- Cook Time: 8 hours
- Total Time: 8 hours 15 minutes
- Course: Base/Stock
- Cuisine: American
- Calories per Serving: 35
Equipment You Will Need
- Large stockpot or Dutch oven (at least 12 quarts)
- Sharp chef’s knife
- Cutting board
- Fine-mesh strainer or cheesecloth
- Large bowl for straining
- Wooden spoon for stirring
- Measuring cups and spoons
- Storage containers or freezer bags
- Skimmer or slotted spoon
Ingredients for Turkey Broth
- Turkey carcass, broken into pieces (from 1 whole roasted turkey)
- Water, 4 gallons (16 cups)
- Yellow onion, 2 medium, halved with skin on
- Carrots, 3 medium, cut into 3-inch chunks
- Celery stalks, 3, cut into 3-inch pieces
- Fresh thyme sprigs, 4
- Fresh parsley sprigs, 5
- Bay leaves, 2
- Black peppercorns, 1 tablespoon
- Sea salt, 1 teaspoon (for cooking, plus more to taste at end)
- Garlic cloves, 4, crushed
Ingredient Notes and Substitutions
- Turkey carcass: The bones and leftover meat create the collagen and gelatin that make broth silky and nutritious. If you don’t have a roasted carcass, raw turkey bones work fine, though roasted adds more depth of flavor.
- Onion with skin on: The papery skin adds color and compounds that deepen the broth’s flavor. Yellow onion is milder than red; white onion works but tastes slightly sharper.
- Carrots: They sweeten the broth naturally and contribute minerals. If you only have baby carrots, use 6 to 8 and extend cooking time by 30 minutes.
- Fresh herbs: Thyme and parsley add aromatic complexity without overpowering the turkey flavor. Dried herbs are one-third as potent, so use only 1 teaspoon of each if fresh is unavailable.
- Bay leaves: These add subtle earthy notes that round out the broth. Skip them if you dislike their flavor, but they make a noticeable difference.
- Black peppercorns: Whole peppercorns release flavor slowly over hours without the heat or bitterness of ground pepper. White peppercorns are gentler if you prefer a more delicate taste.
How to Make Turkey Broth
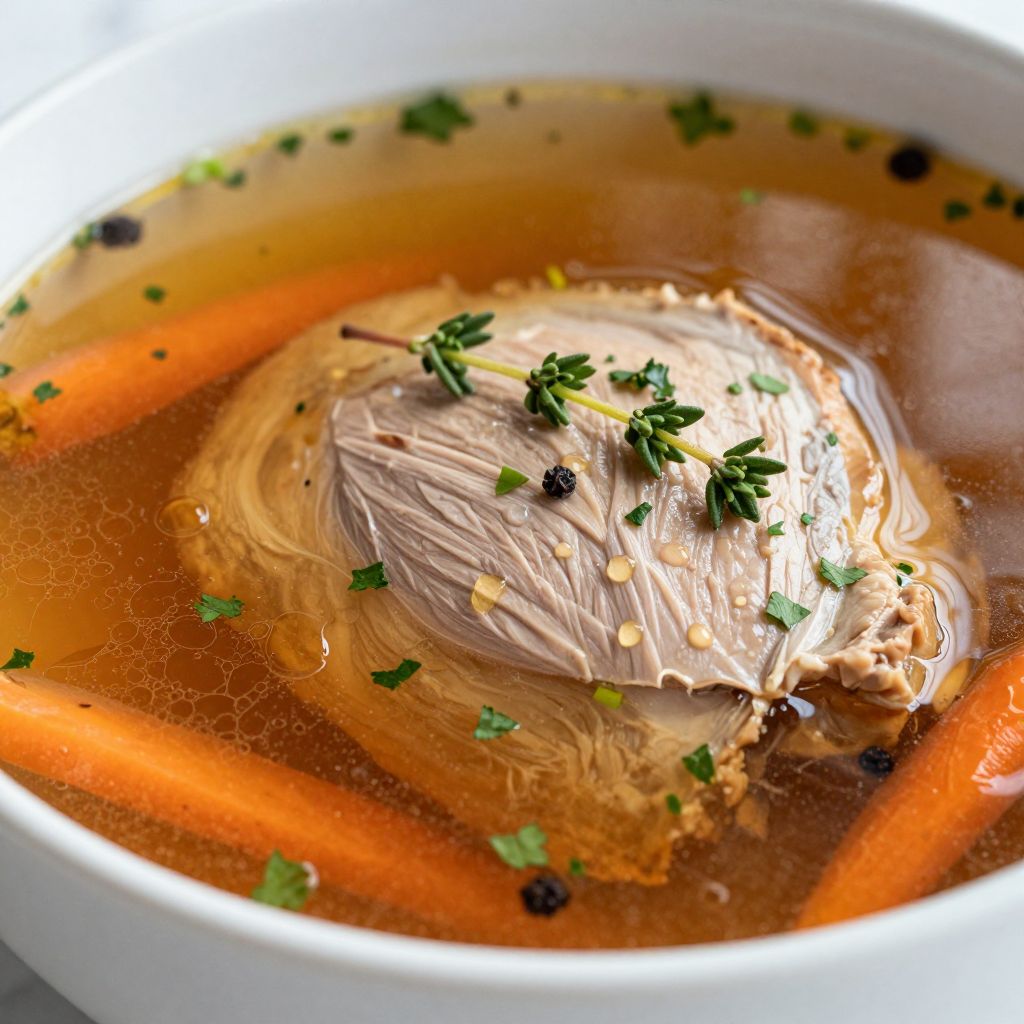
Step 1: Prepare Your Turkey Carcass
Break your roasted turkey carcass into 4 to 6 large pieces so they’ll fit into your stockpot and release their gelatin more efficiently. Discard any large chunks of skin or visible excess fat, but leave the bones and any clinging meat, as these are what you’re after.
Step 2: Fill Your Pot with Water
Place your carcass pieces into the stockpot and cover completely with 4 gallons of cold water. Cold water allows you to start the extraction process gently and helps prevent cloudiness that happens when you scald the bones immediately.
Step 3: Bring to a Boil and Skim
Set the heat to high and bring the water to a rolling boil, which takes about 20 to 25 minutes. Once it reaches a boil, you’ll see gray and brown foam rise to the surface; use a skimmer or slotted spoon to remove this impurity, as it clouds your broth.
Skim for the first 5 minutes of boiling, then check occasionally as more foam rises. You want a clear, beautiful broth, not a murky one.
Step 4: Reduce Heat and Add First Aromatics
Turn the heat down to low so the broth maintains a bare simmer, with just the occasional bubble breaking the surface. Add your onion halves, crushed garlic, bay leaves, peppercorns, and 1 teaspoon of salt.
A gentle simmer extracts flavor without boiling away water quickly or breaking down the bones into powdery sediment. This is the sweet spot for broth making.
Step 5: Simmer for Four Hours
Let the broth simmer undisturbed for 4 hours, which allows the bones to release their collagen and minerals into the liquid. Resist the urge to stir; you want minimal agitation so the broth stays as clear as possible.
After 4 hours, the bones should feel soft enough to crumble slightly between your fingers. If they still feel hard, add another hour to the simmer time.
Step 6: Add Vegetables and Herbs
Add your carrots, celery, thyme sprigs, and parsley sprigs to the pot. Adding vegetables halfway through prevents them from breaking down into mush and keeps the flavor fresh rather than cooked-down and dull.
Stir gently to distribute the vegetables, and return to a bare simmer if the heat has crept up. The goal is for these vegetables to soften and give up their flavor over the next 4 hours without falling apart.
Step 7: Simmer for Four More Hours
Let the broth continue at a bare simmer for another 4 hours, for a total of 8 hours of cooking. The longer cooking time extracts maximum gelatin, making the broth silky and rich.
You’ll notice the broth turning a deeper amber color as the hours pass. This is exactly what you want to see.
Step 8: Strain Your Broth
Place a fine-mesh strainer lined with cheesecloth over a large bowl and carefully ladle the broth through, leaving the solids behind. Work slowly and don’t press down on the vegetables or bones, as this forces cloudy sediment into your broth.
Discard the solids and let the strained broth cool to room temperature before refrigerating or freezing. This usually takes 2 to 3 hours on the counter.
Step 9: Taste and Adjust Salt
Once cooled, taste the broth and add more salt if needed, starting with just 1/4 teaspoon and tasting after each addition. You want to enhance the turkey flavor, not make it taste salty.
If you plan to use this broth in dishes that already have salt, hold back slightly on seasoning now. You can always add more salt to individual recipes.
Pro Tip: For the clearest, most elegant broth, never stir during cooking and strain through cheesecloth rather than pressing solids through a regular strainer.
Tips for the Best Turkey Broth
- Roast your turkey carcass in a 400-degree oven for 30 minutes before making broth if you want deeper, darker color and richer flavor. Roasting caramelizes the bones and adds complexity.
- Save turkey bones in the freezer from any meal and accumulate them until you have enough for a batch. You don’t need one whole carcass; scraps work fine and actually make broth making more economical.
- Keep the simmer bare and gentle throughout the entire process. A rolling boil breaks down bones too quickly and clouds the broth with excess sediment.
- Don’t skip the skimming step in the first 5 minutes. Those impurities make a huge difference in the clarity and final taste of your finished broth.
- Resist the urge to cover the pot. Uncovered simmering allows some water to evaporate naturally, which concentrates flavor and creates a more gelatinous final product.
- Make a double or triple batch when you’re already committed to the time. The effort is identical, and you’ll have broth in the freezer for months.
Common Mistakes to Avoid
- Boiling instead of simmering: A rolling boil clouds the broth with sediment and makes it taste thin and muddied rather than silky and deep.
- Skipping the skim: Impurities that rise to the surface in the first few minutes stay in your broth if you don’t remove them, creating a cloudy, off-tasting final product.
- Adding vegetables too early: Vegetables simmered for 8 hours break down completely and make the broth taste overcooked and muddy. Halfway through is the perfect timing.
- Using hot water from the tap: Tap water often contains minerals and sediment that cloud the broth. Use filtered or cold tap water and let it come to temperature naturally.
- Pressing solids through the strainer: This forces sediment and vegetable pulp into your broth, making it cloudy. Patience during straining pays off in crystal-clear results.
Serving Suggestions
Turkey broth is the ultimate secret weapon in your cooking arsenal, adding richness and depth to dishes that would otherwise taste flat. Use it anywhere you’d reach for chicken or vegetable broth, but expect better results.
- Turkey and wild rice soup with fresh thyme and diced roasted vegetables
- Creamy turkey and mushroom bisque finished with a splash of white wine
- Risotto made with turkey broth, roasted butternut squash, and sage
- Gravy for turkey, beef, or vegetables that tastes restaurant-quality
- Sipped warm in a mug as a healing, collagen-rich beverage on its own
Variations to Try
- Roasted garlic broth: Roast 1 whole garlic bulb cut in half alongside your turkey carcass, then add it to the pot. This creates a deeper, more savory broth with subtle sweetness from the roasted garlic.
- Asian-inspired turkey broth: Replace the thyme and parsley with 2-inch piece of fresh ginger, 3 dried red chilies, 2 star anise, and 1 cinnamon stick. The result is a warming broth perfect for noodle dishes.
- Herb-forward broth: Use 6 thyme sprigs, 8 parsley sprigs, and 4 rosemary sprigs instead of the standard herb amounts. This creates a more intensely herbaceous broth that shines in soups.
- Bone broth style: Add 2 tablespoons of apple cider vinegar after the first hour of simmering. The vinegar helps extract more minerals and gelatin from the bones, creating an extra silky final product.
- Vegetable-forward broth: Add 2 leeks (white and light green parts only), 4 mushroom stems, and 1 bunch of spinach added in the last 30 minutes. This makes the broth earthier and adds minerals.
Dietary Adaptations
- Gluten-free: This recipe is naturally gluten-free, though verify that any store-bought herbs you add are certified gluten-free if that matters for your kitchen.
- Low-sodium: Omit the salt entirely during cooking and salt individual dishes made with the broth instead. You lose some seasoning opportunity, but the broth remains deeply flavorful from the bones.
- Paleo: This broth is paleo-friendly and actually benefits from the gelatin and minerals that paleo diets emphasize. No modifications needed.
- Keto: Turkey broth is keto-friendly and provides minerals and fat that support a ketogenic diet. Sip it plain or use it as a base for creamy soups finished with heavy cream.
Storage and Reheating
Refrigerator
Cooled broth keeps in an airtight container for up to 5 days in the refrigerator. The fat will solidify on top; you can leave it there for extra richness or skim it off if you prefer leaner broth.
- Pour into glass containers with lids for easy identification and stacking
- Leave 1 inch of headspace so the broth has room to expand slightly as it chills
- Label the container with the date so you remember when you made it
Freezer
Frozen broth keeps for up to 3 months in the freezer with no quality loss. Freeze it in various container sizes depending on how you use it.
- Pour into ice cube trays for small portions, then pop cubes into freezer bags once frozen
- Use quart-sized containers for soup-making batches
- Try freezing in muffin tins for medium portions that thaw quickly
- Always leave headspace for expansion, or your containers will crack
Reheating
Thaw broth overnight in the refrigerator, then gently reheat on the stovetop over medium heat, stirring occasionally. Never thaw at room temperature, as this invites bacterial growth.
- Heat until steaming but not boiling to preserve delicate gelatin structure
- Microwave individual portions in a mug for 2 to 3 minutes for quick sipping broth
- Add broth directly from the freezer to soups and stews; it will thaw as you cook
Nutrition Information
| Nutrient | Amount |
|---|---|
| Calories | 35 |
| Total Fat | 2g |
| Saturated Fat | 0.5g |
| Carbohydrates | 1g |
| Fiber | 0g |
| Sugar | 0g |
| Protein | 5g |
| Sodium | 380mg |
| Cholesterol | 15mg |
Nutrition information is estimated for 1 cup of unsalted broth with fat rendered from the bones. Actual values vary based on your specific carcass and cooking method.
Frequently Asked Questions
Can I use raw turkey bones instead of roasted carcass?
Yes, raw bones work fine and actually create a lighter, more delicate broth than roasted bones. You’ll miss the deeper caramelized flavor, but roasting the bones for 30 minutes before starting the broth fixes this.
How do I make my broth gel when cooled?
Gelatin content depends on the ratio of bones to water and cooking time; use at least 8 hours of gentle simmering for maximum extraction. If your broth still doesn’t gel, reduce it by simmering an additional 2 to 3 hours after straining.
Can I make this in a slow cooker or instant pot?
A slow cooker works beautifully on low for 12 to 16 hours, though you can’t skim as effectively. An Instant Pot takes only 2 to 3 hours under pressure, but the result is less gelatinous and complex than slow-simmered broth.
What’s the difference between broth and stock?
Broth is simmered for shorter periods (under 8 hours) with vegetables and seasonings, while stock simmers longer with mostly bones and no aromatics. This recipe is technically a broth because it includes vegetables and herbs.
Should I add any acid like vinegar to extract more minerals?
Apple cider vinegar added in the first hour does help extract minerals, though the effect is subtle in turkey broth compared to beef or pork broth. If you want extra mineralization, add 1 to 2 tablespoons of raw apple cider vinegar after the first hour.
Why is my broth cloudy?
Cloudiness comes from sediment stirred up during cooking or solids pressed through the strainer during the skim step. Avoid stirring, maintain a bare simmer, and strain slowly without pressing solids.
Final Thoughts
Making turkey broth from scratch is genuinely one of the easiest ways to add restaurant-quality depth to your everyday cooking. The hands-on time is just 15 minutes, and the simmering does all the work while you live your life.
Your freezer will thank you, your soups will taste infinitely better, and you’ll feel good knowing you wasted nothing from your roasted turkey. Give this recipe a try, and you’ll understand why homemade broth is worth every minute of simmer time.
Explore More Turkey Recipes
Turkey is incredibly versatile, and once you master broth, you’ll want to explore other ways to use this lean, flavorful meat. Check out these complementary recipes to expand your turkey cooking skills and create impressive meals for your family.
For smoking turkey, discover how a proper turkey brine recipe can enhance your smoked turkey with incredible depth of flavor. If you want to use every part of the bird, learn how to prepare delicious turkey neck recipe that transforms an overlooked cut into something truly memorable.
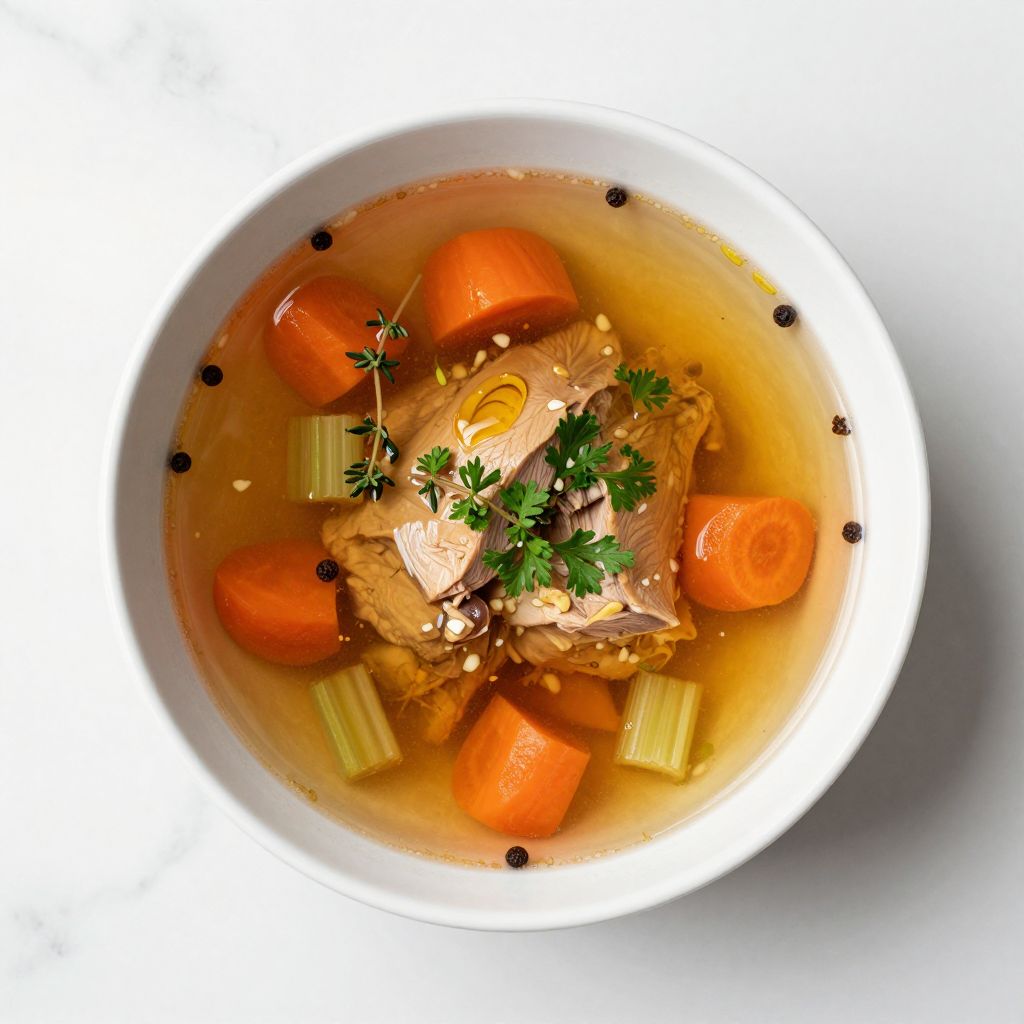
Turkey Broth
Ingredients
Equipment
Method
- Break the roasted turkey carcass into 4 to 6 large pieces, discarding excess fat and skin.
- Place the turkey pieces in a large stockpot and cover with 16 cups of cold water.
- Bring to a rolling boil over high heat (about 20 to 25 minutes), then skim off foam from the surface for the first 5 minutes.
- Reduce heat to low to maintain a bare simmer, then add halved onions, crushed garlic, bay leaves, peppercorns, and 1 teaspoon of salt.
- Simmer gently, uncovered, for 4 hours without stirring.
- Add carrots, celery, thyme sprigs, and parsley sprigs; stir gently to combine.
- Continue simmering gently, uncovered, for an additional 4 hours.
- Strain the broth through a fine-mesh strainer lined with cheesecloth into a large bowl, discarding solids.
- Let the broth cool to room temperature for 2 to 3 hours, then refrigerate or freeze.
- Taste the cooled broth and adjust seasoning with additional salt if needed.