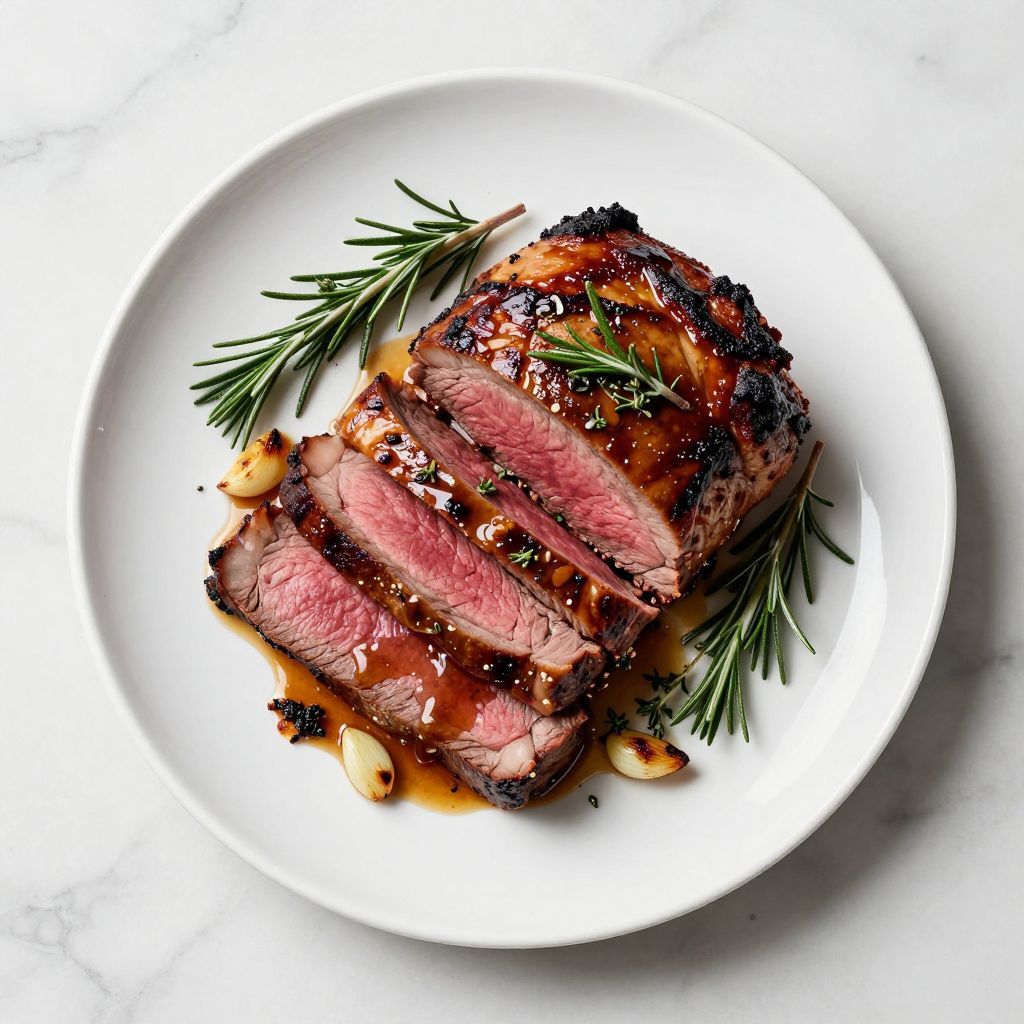
Top round roast recipe delivers a budget-friendly beef centerpiece that rivals pricier cuts when you cook it right. This lean cut from the cow’s hindquarters transforms into a tender, flavorful main course perfect for Sunday dinners or holiday gatherings when you use proper seasoning and cooking techniques.
The secret lies in slow roasting at low temperatures and letting the meat rest properly before slicing. You’ll end up with juicy, medium-rare slices that prove you don’t need to spend a fortune on beef to impress your guests.
Why You’ll Love This Recipe
This top round roast combines affordability with impressive presentation and flavor. The straightforward method works every single time.
- Costs significantly less than prime rib or tenderloin while feeding a crowd beautifully
- Requires just five basic ingredients plus your favorite seasonings
- Produces enough leftovers for sandwiches, salads, and quick weeknight meals
- Takes minimal hands-on time with most of the work happening in the oven
- Works equally well for casual family dinners or special occasions
My Experience Making This Recipe
I started making top round roast after getting tired of overpaying for premium cuts that my family devoured in minutes. The first time I pulled this roast from the oven, the crust had developed into a gorgeous mahogany color, and the aroma of garlic and herbs filled my entire kitchen.
My biggest lesson came from slicing too early during my second attempt. The juices ran all over the cutting board, leaving the meat noticeably drier.
Now I religiously wait the full 20 minutes, and the difference is remarkable. My family requests this roast at least once a month, and guests always ask for the recipe, genuinely surprised when I tell them it’s one of the most economical beef cuts available.
Recipe Overview
- Recipe Name: Top Round Roast
- Servings: 8
- Prep Time: 15 minutes
- Cook Time: 90 minutes
- Total Time: 2 hours 25 minutes (includes resting)
- Course: Main Course
- Cuisine: American
- Calories per Serving: 285
Equipment You Will Need
- Roasting pan with rack
- Meat thermometer (instant-read preferred)
- Sharp carving knife
- Cutting board with juice groove
- Small mixing bowl
- Paper towels
- Aluminum foil
- Kitchen twine (optional, for tying)
Ingredients for Top Round Roast Recipe
- 4 pounds top round roast, trimmed with a thin fat cap
- 3 tablespoons olive oil
- 6 cloves garlic, minced
- 2 tablespoons fresh rosemary, chopped (or 1 tablespoon dried)
- 2 tablespoons fresh thyme, chopped (or 1 tablespoon dried)
- 2 teaspoons kosher salt
- 1 teaspoon black pepper, freshly ground
- 1 teaspoon smoked paprika
- 1 cup beef broth, for the pan
Ingredient Notes and Substitutions
- Top round roast: This lean cut benefits from low, slow cooking to stay tender. You can substitute with bottom round or eye of round, though cooking times may vary slightly.
- Olive oil: Creates the base for the herb crust and helps seasonings adhere to the meat. Avocado oil or melted butter work equally well.
- Fresh garlic: Provides aromatic depth that penetrates the meat during cooking. Garlic powder (1 tablespoon) works in a pinch but delivers less punch.
- Fresh rosemary and thyme: These hardy herbs hold up to extended cooking and complement beef beautifully. Dried herbs work but use half the amount since they concentrate flavor.
- Smoked paprika: Adds a subtle smoky complexity without overwhelming the beef. Regular paprika or a pinch of cayenne can substitute.
- Beef broth: Keeps the roasting environment moist and creates pan drippings for gravy. Chicken broth or water with a bouillon cube works if needed.
How to Make Top Round Roast Recipe
Step 1: Prepare the Roast
Remove the roast from the refrigerator 60 minutes before cooking to bring it to room temperature. Pat the entire surface completely dry with paper towels, as moisture prevents proper browning.
Room temperature meat cooks more evenly from edge to center, reducing the gray band of overcooked meat. Dry surfaces develop better crusts because water must evaporate before browning can begin.
Step 2: Make the Herb Rub
Combine olive oil, minced garlic, rosemary, thyme, salt, pepper, and smoked paprika in a small bowl. Mix thoroughly until the mixture forms a paste.
The oil acts as a vehicle to distribute the seasonings evenly and helps them stick to the meat during cooking. This paste also creates a protective barrier that seals in moisture.
Step 3: Season the Roast
Rub the herb paste all over the roast, covering every surface including the ends. Press the mixture firmly into the meat so it adheres well.
Getting seasonings into every crevice means every bite carries flavor, not just the outer slices. The garlic and herbs will mellow and caramelize during roasting, creating complex flavors.
Step 4: Preheat and Prepare the Pan
Preheat your oven to 475°F for the initial sear. Place a roasting rack in your pan and pour the beef broth into the bottom, making sure it doesn’t touch the meat.
The high initial temperature creates a flavorful crust quickly, while the broth prevents drippings from burning. The rack elevates the roast so hot air circulates completely around it for even cooking.
Step 5: Sear the Roast
Place the roast fat side up on the rack and immediately put it in the preheated oven. Roast at 475°F for exactly 15 minutes to develop a deep brown crust.
This high-heat blast caramelizes the sugars in the herbs and creates the Maillard reaction on the meat surface. The crust locks in juices and provides textural contrast to the tender interior.
Step 6: Reduce Temperature and Continue Roasting
After 15 minutes, reduce the oven temperature to 325°F without opening the door. Continue roasting for approximately 60 to 75 minutes, depending on your desired doneness.
The lower temperature gently brings the interior to the right temperature without overcooking the outer layers. For medium-rare, you’re targeting an internal temperature of 130°F to 135°F.
Step 7: Check Temperature and Remove
Begin checking the internal temperature at the 60-minute mark by inserting your thermometer into the thickest part of the roast. Remove the roast when it reaches 130°F for medium-rare or 140°F for medium.
The temperature will rise another 5 to 10 degrees during resting due to carryover cooking. Removing it early prevents the dreaded overcooked, dry roast that gives this cut a bad reputation.
Step 8: Rest Before Slicing
Transfer the roast to a cutting board and tent loosely with aluminum foil. Let it rest undisturbed for 20 minutes before carving.
Resting allows the muscle fibers to relax and reabsorb the juices that have been pushed to the center during cooking. Skipping this step results in all those precious juices flooding your cutting board instead of staying in the meat.
Step 9: Slice and Serve
Using a sharp carving knife, slice the roast against the grain into thin slices, about 1/4 inch thick. Arrange on a warmed platter and spoon any accumulated juices over the top.
Slicing against the grain shortens the muscle fibers, making each bite more tender. Thin slices maximize tenderness for this lean cut, while thick slices can seem chewy.
Pro Tip: Chill any leftover roast completely before slicing for sandwiches. Cold meat slices much thinner and cleaner than warm meat, giving you deli-quality results at home.
Tips for the Best Top Round Roast Recipe
- Invest in a reliable instant-read thermometer rather than relying on timing alone. Oven temperatures vary wildly, and meat thickness affects cooking time more than weight does.
- Let the roast sit at room temperature for a full hour before cooking. Cold meat from the fridge develops a greater temperature difference between the exterior and interior, resulting in uneven doneness.
- Don’t skip the high-heat sear at the beginning. Those 15 minutes at 475°F create flavor compounds that slow roasting alone cannot achieve.
- Position your oven rack in the center position for the most even heat circulation. Top or bottom positions create hot spots that can dry out parts of the roast.
- Use the pan drippings to make a simple gravy by whisking in a flour slurry and simmering until thickened. Those browned bits carry concentrated beefy flavor.
- If your roast has an uneven thickness, tuck the thinner tail end underneath and tie it with kitchen twine. This creates a more uniform shape that cooks evenly.
Common Mistakes to Avoid
- Cooking straight from the refrigerator causes the exterior to overcook before the center reaches temperature. Always allow time for the meat to come to room temperature.
- Cutting into the roast immediately after removing it from the oven releases all the juices you worked to preserve. Patience during the resting period makes all the difference.
- Using high heat throughout the entire cooking time creates a thick band of gray, overcooked meat around a small rare center. The two-temperature method solves this problem.
- Slicing with the grain instead of against it leaves you with chewy, stringy meat no matter how perfectly you cooked it. Always identify the direction of the muscle fibers first.
- Overcooking because you’re nervous about undercooking ruins this lean cut faster than any other mistake. Trust your thermometer and remember that carryover cooking adds degrees.
Serving Suggestions
Top round roast pairs beautifully with classic steakhouse sides and fresh vegetables. The mild beef flavor complements both rich and light accompaniments.
- Creamy mashed potatoes or roasted garlic mashed cauliflower for a lower-carb option
- Roasted root vegetables like carrots, parsnips, and Brussels sprouts tossed in olive oil
- Classic Caesar salad or a simple arugula salad with lemon vinaigrette to cut the richness
- Yorkshire pudding or popovers to soak up the pan juices and gravy
- Sautéed green beans with almonds or roasted asparagus with parmesan
Variations to Try
- Coffee-Crusted Roast: Replace the herbs with a rub made from finely ground coffee, brown sugar, and chili powder. The coffee creates an earthy, slightly bitter crust that contrasts beautifully with the beef’s natural sweetness.
- Mediterranean Style: Use oregano, lemon zest, and crushed fennel seeds in place of rosemary and thyme. Add kalamata olives and sun-dried tomatoes to the roasting pan for a Greek-inspired variation.
- Asian-Inspired: Marinate the roast for 4 hours in soy sauce, ginger, garlic, and sesame oil before roasting. Serve sliced thin over rice or in lettuce wraps.
- Peppercorn Crusted: Press a mixture of cracked black, white, and pink peppercorns into the oiled roast for a steakhouse-style preparation. The variety of peppercorns adds complex heat and visual appeal.
- Herb and Mustard: Spread a thick layer of Dijon mustard over the roast before applying the herb rub. The mustard adds tanginess and helps the crust adhere even better.
Dietary Adaptations
- Gluten-Free: This recipe is naturally gluten-free as written. Just verify that your beef broth doesn’t contain any hidden gluten if you’re highly sensitive.
- Dairy-Free: The recipe contains no dairy products, making it suitable for lactose-intolerant diners without any modifications needed.
- Low-Carb/Keto: Top round roast is an excellent keto protein choice with zero carbs. Skip any sides with starches and serve with low-carb vegetables and a butter-based sauce.
- Paleo: This recipe aligns perfectly with paleo guidelines. Use grass-fed beef if possible and skip any sides containing grains or legumes.
Storage and Reheating
Refrigerator
Store leftover roast properly to maintain quality for up to four days. Proper storage prevents drying and preserves flavor.
- Let the roast cool to room temperature before refrigerating, but don’t leave it out longer than 2 hours
- Wrap tightly in aluminum foil or place in an airtight container with any leftover pan juices
- Slice only what you need and keep the remaining roast in one piece to minimize moisture loss
Freezer
Frozen top round roast maintains quality for up to three months when stored correctly. Freezing works better for the whole roast rather than individual slices.
- Wrap the roast tightly in plastic wrap, then again in heavy-duty aluminum foil
- Label with the date and contents before placing in the freezer
- Thaw overnight in the refrigerator rather than at room temperature for food safety
Reheating
Gentle reheating preserves the texture and prevents further moisture loss. Avoid high heat or microwaving if possible.
- For slices, arrange in a baking dish with a few tablespoons of broth, cover with foil, and warm at 275°F for 10 to 15 minutes
- For sandwiches, use the cold slices directly from the refrigerator without reheating
- If using a microwave, use 50% power and heat in 30-second intervals to avoid rubbery texture
Nutrition Information
| Nutrient | Amount |
|---|---|
| Calories | 285 |
| Total Fat | 12g |
| Saturated Fat | 3g |
| Carbohydrates | 2g |
| Fiber | 0g |
| Sugar | 0g |
| Protein | 42g |
| Sodium | 480mg |
| Cholesterol | 105mg |
Nutritional values are estimates based on standard ingredient databases and may vary based on specific brands used and portion sizes. This recipe provides an excellent protein-to-calorie ratio, making it suitable for high-protein diets.
Frequently Asked Questions
Can I make this roast ahead of time for meal prep?
Absolutely, and it actually slices better when cold. Cook the roast completely, let it cool, then refrigerate overnight before slicing for meal prep containers or sandwiches.
What’s the best way to tell when the roast is done without a thermometer?
Honestly, you really need a thermometer for consistent results with lean cuts like top round. The finger test or timing methods are too unreliable and often result in overcooked meat.
Why did my roast turn out tough even though I followed the recipe?
The most common culprit is overcooking past medium doneness or slicing with the grain instead of against it. Top round has very little marbling, so every degree past 145°F internal temperature makes it noticeably tougher.
Can I cook this roast in a slow cooker instead?
You can, but the result will be completely different with a pot roast texture rather than a sliceable roast. For slow cooker preparation, add liquid to cover halfway and cook on low for 6 to 8 hours until fork-tender.
How do I prevent the garlic from burning during the high-heat sear?
Minced garlic mixed into the oil paste and pressed into the meat surface is protected by the oil and meat juices. If you’re concerned, you can add the garlic only after reducing the temperature, though you’ll sacrifice some flavor development.
What should I do if my roast is cooking faster than expected?
Remove it from the oven as soon as it reaches your target temperature, even if that’s earlier than the recipe suggests. Oven variations and roast thickness affect timing, so temperature is always more reliable than the clock.
Is top round roast the same as London broil?
London broil refers to a cooking method (marinating
Top Round Roast
Ingredients
Equipment
Method
- Remove the roast from the refrigerator 60 minutes before cooking to bring it to room temperature. Pat the entire surface completely dry with paper towels.
- Combine olive oil, minced garlic, rosemary, thyme, salt, pepper, and smoked paprika in a small bowl. Mix thoroughly until the mixture forms a paste.
- Rub the herb paste all over the roast, covering every surface including the ends. Press the mixture firmly into the meat so it adheres well.
- Preheat your oven to 475°F. Place a roasting rack in your pan and pour the beef broth into the bottom, making sure it doesn't touch the meat.
- Place the roast fat side up on the rack and immediately put it in the preheated oven. Roast at 475°F for exactly 15 minutes to develop a deep brown crust.
- After 15 minutes, reduce the oven temperature to 325°F without opening the door. Continue roasting for approximately 60 to 75 minutes, depending on your desired doneness.
- Begin checking the internal temperature at the 60-minute mark by inserting your thermometer into the thickest part of the roast. Remove the roast when it reaches 130°F for medium-rare or 140°F for medium.
- Transfer the roast to a cutting board and tent loosely with aluminum foil. Let it rest undisturbed for 20 minutes before carving.
- Using a sharp carving knife, slice the roast against the grain into thin slices, about 1/4 inch thick. Arrange on a warmed platter and spoon any accumulated juices over the top.