
There’s something magical about the aroma of freshly steamed idlis wafting through the kitchen, isn’t there? This Quinoa Idli Recipe not only brings a delightful twist to a classic breakfast staple but also packs in a healthy punch, making it a perfect option for any time of the day.
Why You’ll Love This Recipe
This recipe is a must-try for its unique flavor and health benefits.
- Made with protein-rich quinoa, providing a nutritious boost.
- Steamed to perfection, offering a light and fluffy texture.
- Perfectly spiced to tantalize your taste buds.
- Quick to prepare, making it ideal for busy mornings.
- Versatile enough to pair with various chutneys and sambar.
My Experience Making This Recipe
When I first attempted to make quinoa idlis, I was skeptical. However, the moment I lifted the steamer lid to reveal those fluffy, soft idlis, I was completely sold.
Each bite was a delightful blend of flavors and textures, which left my family asking for seconds. Watching them enjoy this healthy spin on a traditional dish was incredibly rewarding.
Recipe Overview
- Recipe Name: Quinoa Idli
- Servings: 4
- Prep Time: 15 minutes
- Cook Time: 20 minutes
- Total Time: 35 minutes
- Course: Breakfast
- Cuisine: Indian
- Calories per Serving: 120
Equipment You Will Need
- Idli steamer or a large pot with a steaming rack
- Blender or food processor
- Mixing bowl
- Measuring cups and spoons
- Spatula
Ingredients for Quinoa Idli
- 1 cup quinoa (soaked for 4-6 hours)
- 1/4 cup urad dal (split black gram, soaked for 4-6 hours)
- 1/2 teaspoon fenugreek seeds
- 1 teaspoon salt
- 1/2 teaspoon baking soda
- 1 cup water (adjust for consistency)
- 1 tablespoon oil (for greasing the idli molds)
Ingredient Notes and Substitutions
- Quinoa: Provides protein and a nutty flavor. You can use brown rice as a substitute.
- Urad dal: Adds softness and texture. Moong dal can be a good alternative.
- Fenugreek seeds: Enhance flavor and aid fermentation. You can skip it if unavailable.
- Baking soda: Helps the idlis rise. Baking powder can work too.
How to Make Quinoa Idli
Step 1: Prepare the Ingredients
Start by soaking the quinoa and urad dal for 4 to 6 hours. This step is crucial as it softens the grains for blending.
Step 2: Blend the Mixture
Drain the quinoa and urad dal, then add them to your blender with fenugreek seeds and a little water. Blend until you have a smooth batter, adding water gradually to reach the right consistency.
Step 3: Ferment the Batter
Transfer the batter to a mixing bowl and cover it. Let it sit in a warm place for 8 to 12 hours to ferment, which gives idlis their characteristic tangy flavor.
Step 4: Add Baking Soda and Salt
Once fermented, add salt and baking soda to the batter. This helps in making the idlis fluffy and light.
Step 5: Prepare the Steamer
While the batter rests, heat your idli steamer or pot with water. Grease the idli molds with oil to prevent sticking.
Step 6: Pour the Batter into Molds
Fill each mold about three-quarters full with the batter. This allows space for the idlis to rise as they steam.
Step 7: Steam the Idlis
Place the molds in the steamer and cover. Steam for about 10 to 15 minutes, or until a toothpick inserted comes out clean.
Step 8: Cool and Serve
Once done, remove the idlis from the molds and let them cool slightly. Serve warm with your favorite chutneys or sambar for a delightful experience.
Pro Tip: Ensure the batter is neither too thick nor too runny for the best texture.
Tips for the Best Quinoa Idli
- Soak the quinoa and dal overnight for optimal fermentation.
- Use a warm place for fermentation; a sunny kitchen works wonders.
- Don’t skip the baking soda; it’s key for fluffiness.
- Experiment with adding grated vegetables to the batter for added nutrition.
- Serve idlis immediately for the best taste; they are best fresh.
Common Mistakes to Avoid
- Not soaking the grains long enough can result in a gritty texture.
- Over-blending the batter may lead to a sticky consistency.
- Skipping fermentation can make the idlis dense and flat.
- Using too much water in the batter can lead to soggy idlis.
Serving Suggestions
Quinoa idlis are versatile and can be paired with various condiments.
- Coconut chutney for a classic touch.
- Mint chutney for a fresh kick.
- Sambar for a hearty option.
- Spicy tomato chutney for those who love heat.
Variations to Try
- Add grated carrots to the batter for a sweet crunch.
- Incorporate spinach for a nutrient boost and vibrant color.
- Mix in chopped cilantro for an aromatic twist.
- Use different lentils, like red lentils, for a unique flavor.
Dietary Adaptations
- Gluten-free: Naturally gluten-free, making it safe for those with gluten intolerance.
- Dairy-free: This recipe is dairy-free as it doesn’t require any dairy ingredients.
- Vegan: The idlis are vegan; no animal products are used.
- Low-carb: Quinoa is higher in carbs, so consider portion control for low-carb diets.
Storage and Reheating
Refrigerator
Store leftover idlis in an airtight container in the refrigerator.
- They can last for up to 3 days.
Freezer
To freeze, place idlis in a single layer on a baking sheet until firm, then transfer to a freezer bag.
- They will keep well for up to a month.
Reheating
Reheat idlis in a steamer or microwave until warm.
- Steaming keeps them moist, while microwaving is faster.
Nutrition Information
| Nutrient | Amount |
|---|---|
| Calories | 120 |
| Total Fat | 2g |
| Saturated Fat | 0g |
| Carbohydrates | 22g |
| Fiber | 3g |
| Sugar | 0g |
| Protein | 5g |
| Sodium | 250mg |
| Cholesterol | 0mg |
Nutrition values may vary based on specific ingredients and brands used.
Frequently Asked Questions
Can I use regular rice instead of quinoa?
Yes, you can substitute with regular rice, but the texture and flavor will differ.
How far in advance can I make the batter?
You can make the batter a day in advance and refrigerate it before steaming.
How do I store leftover idlis?
Store them in an airtight container in the refrigerator for up to 3 days.
Why did my idlis turn out dense?
Dense idlis often result from not soaking the grains long enough or skipping fermentation.
Can I make these idlis spicy?
Absolutely! Adding chopped green chilies to the batter can provide a nice heat.
Final Thoughts
This Quinoa Idli Recipe is a delightful way to enjoy a traditional dish with a modern twist. I encourage you to give it a try and experience the joy of healthy eating.
For more delicious recipes, check out my Dhokla Recipe or try the refreshing Chia Pudding Recipe. Happy cooking!
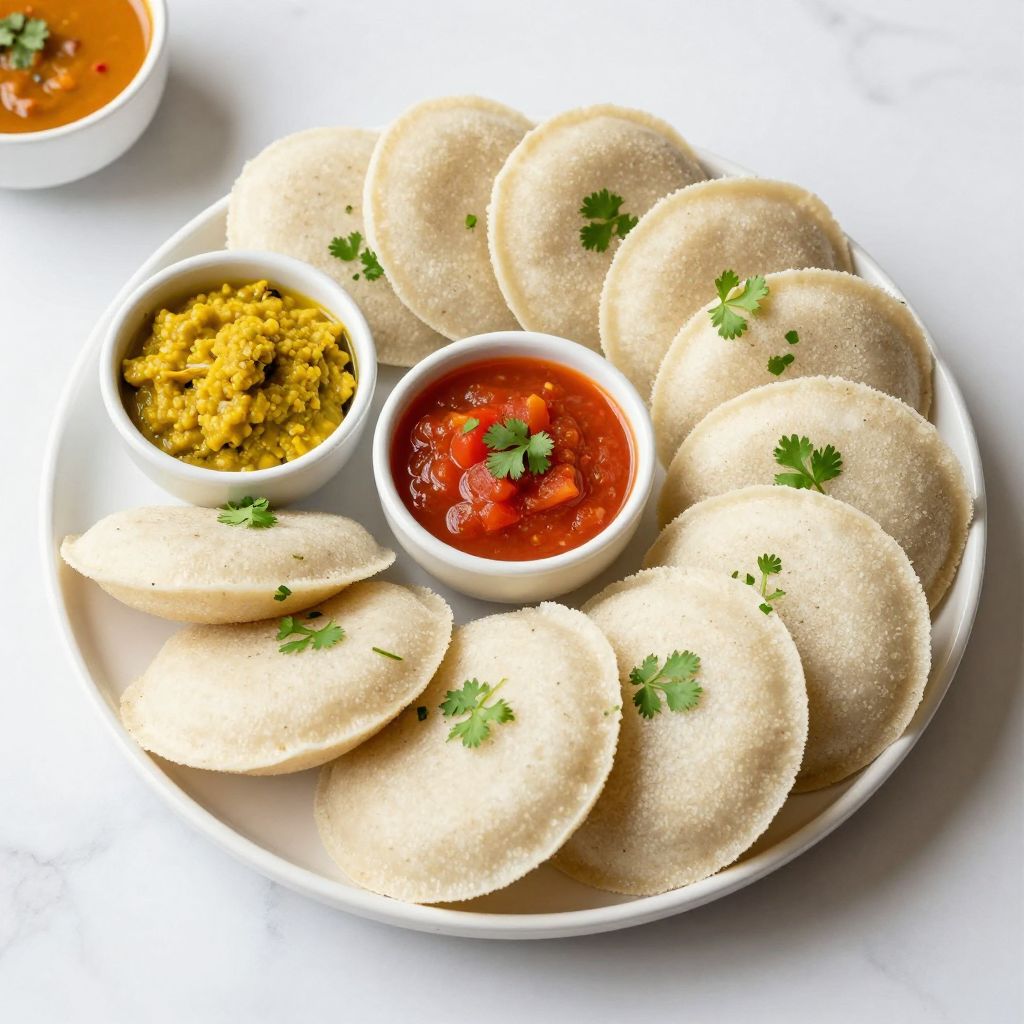
Quinoa Idli
Ingredients
Equipment
Method
- Soak the quinoa and urad dal for 4 to 6 hours to soften the grains.
- Drain the quinoa and urad dal, then add them to your blender with fenugreek seeds and a little water. Blend until you have a smooth batter, gradually adding water to reach the right consistency.
- Transfer the batter to a mixing bowl and cover it. Let it sit in a warm place for 8 to 12 hours to ferment.
- Once fermented, add salt and baking soda to the batter.
- Heat your idli steamer or pot with water while greasing the idli molds with oil.
- Fill each mold about three-quarters full with the batter.
- Place the molds in the steamer and cover. Steam for about 10 to 15 minutes, or until a toothpick inserted comes out clean.
- Once done, remove the idlis from the molds and let them cool slightly. Serve warm with your favorite chutneys or sambar.