
The smell of cinnamon and baked apples wafting through your kitchen is pure comfort, and Pillsbury apple pie delivers that magic with minimal fuss. This recipe transforms a ready-made crust into a showstopper dessert that tastes like you spent hours in the kitchen when you barely broke a sweat.
What makes this pie special is the combination of convenience and genuine homemade flavor. The flaky, buttery crust paired with spiced apples creates that nostalgic dessert everyone craves, whether you’re feeding a crowd or just treating yourself to a slice.
Ready to make a pie that impresses without the stress? Let’s get started.
Why You’ll Love This Recipe
This approach strikes the perfect balance between shortcuts and quality results. You get restaurant-worthy flavor with a fraction of the work, making it ideal for busy home cooks who refuse to skip dessert.
- Uses Pillsbury pie crust for a perfectly flaky, buttery foundation you can trust
- Comes together in under 20 minutes of prep time, leaving the oven to do the heavy lifting
- Fills your home with an irresistible aroma that makes everyone want a slice
- Works for weeknight dinners, holiday tables, and everything in between
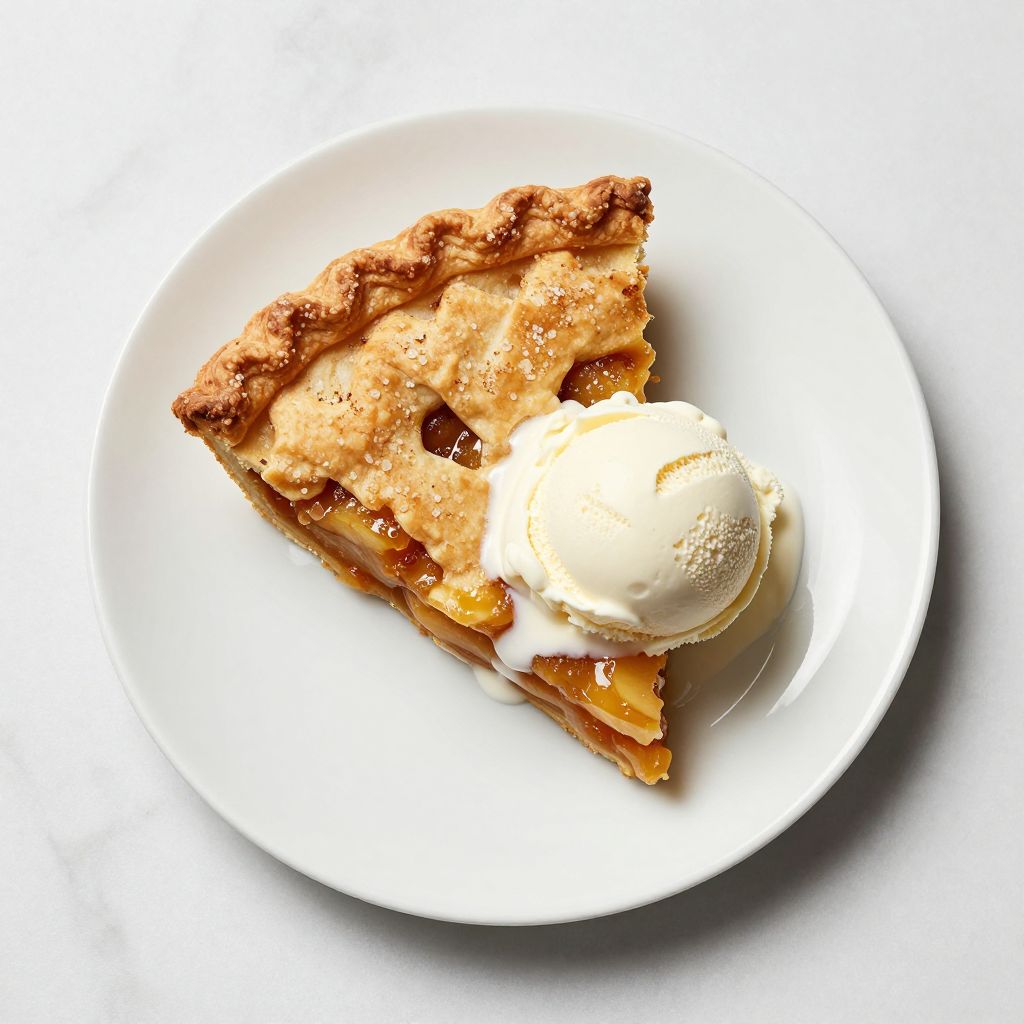
- Tastes incredible warm with vanilla ice cream or whipped cream
My Experience Making This Recipe
I first made this pie on a random Tuesday when I craved apple dessert but had zero energy for scratch baking. The moment I pulled it from the oven, I knew I’d found my new shortcut for looking like a kitchen wizard.
What surprised me most was how well the spices balanced the sweetness of the apples. The cinnamon and nutmeg created depth that made people ask if I’d used fresh fruit, and I got to smile knowing my secret weapon was Pillsbury.
My family devoured half the pie while it was still warm, and the rest disappeared by the next morning. Now it’s my go-to when I want to impress without spending my entire day prepping.
Recipe Overview
- Recipe Name: Pillsbury Apple Pie
- Servings: 8 servings
- Prep Time: 15 minutes
- Cook Time: 45 minutes
- Total Time: 60 minutes
- Course: Dessert
- Cuisine: American
- Calories per Serving: 285 calories
Equipment You Will Need
- 9-inch pie dish
- Large mixing bowl
- Medium mixing bowl
- Wooden spoon or rubber spatula
- Measuring cups and spoons
- Knife for slicing apples
- Cutting board
- Fork or pastry brush
- Oven
- Baking sheet or oven rack
Ingredients for Pillsbury Apple Pie
- 2 Pillsbury pie crusts (one for bottom, one for top), thawed
- 6 cups fresh apples, peeled, cored, and sliced thin (about 6 medium apples)
- 1/2 cup granulated sugar
- 1/4 cup brown sugar
- 2 tablespoons all-purpose flour
- 1 teaspoon ground cinnamon
- 1/4 teaspoon ground nutmeg
- 1/4 teaspoon ground allspice
- 1/4 teaspoon salt
- 1 tablespoon lemon juice
- 1/2 teaspoon vanilla extract
- 1 egg yolk mixed with 1 tablespoon water (for egg wash)
- 1 tablespoon coarse sugar (optional, for topping)
Ingredient Notes and Substitutions
- Pillsbury pie crusts: These frozen crusts give you a head start and bake up golden and flaky without the fuss of making dough from scratch. You can substitute homemade pie dough if you prefer, though you’ll need about 2.5 cups of flour and more prep time.
- Fresh apples: Choose a mix of tart and sweet varieties like Granny Smith and Honeycrisp for balanced flavor. Canned apple pie filling works in a pinch, though fresh apples create better texture and taste.
- Granulated and brown sugar: The blend creates caramel notes that enhance the spices. You can use all granulated if brown sugar isn’t available, though you’ll lose some depth.
- Spices: Ground cinnamon, nutmeg, and allspice form the signature warm flavor profile. If you only have cinnamon, use it alone, but the blend is worth seeking out.
- Lemon juice: This brightens the apples and prevents them from tasting too heavy. Lemon zest works too, or skip it if you prefer pure apple flavor.
How to Make Pillsbury Apple Pie
Step 1: Preheat Your Oven and Prepare Your Crust
Set your oven to 400 degrees Fahrenheit and let it reach temperature for about 10 minutes. Place one thawed Pillsbury crust into your 9-inch pie dish, letting it settle into the corners gently.
Step 2: Prepare and Season Your Apples
Peel, core, and slice your apples into thin, even pieces about 1/4-inch thick. Even slices cook at the same rate, giving you tender apples throughout rather than some mushy and some crunchy pieces.
Step 3: Mix Your Dry Ingredients
In a medium bowl, whisk together the granulated sugar, brown sugar, flour, cinnamon, nutmeg, allspice, and salt. The flour thickens the apple juices so you don’t end up with a soupy pie, while the spices create that cozy apple pie flavor everyone loves.
Step 4: Combine Apples With Seasonings
Place your sliced apples in a large bowl and pour the sugar and spice mixture over them. Add the lemon juice and vanilla extract, then toss everything gently until each apple slice is coated evenly.
Step 5: Fill Your Pie Crust
Pour the apple mixture into your prepared pie crust, mounding it slightly in the center. Don’t pack it down too tightly, as the apples need room to soften and release their juices during baking.
Step 6: Add Your Top Crust
Place your second thawed Pillsbury crust on top of the filling. You can lay it flat and cut decorative vents, or crimp the edges for a more rustic look.
Step 7: Crimp the Edges and Apply Egg Wash
Press the edges of the top and bottom crusts together firmly, then crimp with a fork to seal and create a decorative border. Mix your egg yolk with water and brush the entire top of the pie with this mixture, which gives you that gorgeous golden brown color.
Step 8: Add Finishing Touches and Bake
Sprinkle coarse sugar over the top if desired for a subtle sparkle and slight crunch. Bake for 45 to 50 minutes, until the crust turns deep golden brown and you see the apple filling bubbling slightly at the edges.
Step 9: Cool Before Serving
Let your pie cool for at least 15 minutes before cutting, which allows the filling to set slightly so it doesn’t run all over the plate. If you can wait 30 minutes, the pie will slice even more cleanly.
Pro Tip: Place your pie on a baking sheet before sliding it into the oven to catch any drips and prevent oven mess.
Tips for the Best Pillsbury Apple Pie
- Thaw your Pillsbury crusts in the refrigerator for at least 40 minutes before using them, which makes them easier to work with and less likely to crack when you handle them.
- Slice your apples uniformly so they cook evenly, preventing some pieces from turning to mush while others stay firm.
- Don’t skip the egg wash, as it creates that professional-looking shiny golden crust that makes your pie look bakery-bought.
- If your crust edges start browning too quickly, cover them loosely with foil for the last 15 minutes of baking to prevent burning.
- Use a mix of apple varieties instead of one type, as combining tart and sweet apples creates more complex flavor than either alone.
- Let the pie rest before cutting so the filling sets and you get clean slices instead of a runny mess.
Common Mistakes to Avoid
- Using frozen crusts straight from the freezer without thawing causes them to crack and tear as you handle them, potentially ruining your pie before it even hits the oven.
- Packing the apples too tightly into the crust prevents them from cooking evenly and creates a dense, compressed filling instead of tender apple pieces.
- Skipping the flour in your filling mixture results in a watery, runny pie that leaks all over your plate because the apple juices have nothing to absorb into.
- Cutting into the pie too soon before it cools causes the filling to pour out everywhere and makes plating a disaster.
- Using only one apple variety limits your flavor profile, as single varieties tend to taste flat and one-dimensional compared to a mix of tart and sweet.
Serving Suggestions
This pie shines on its own, but a few simple additions make it unforgettable. The warm spiced filling pairs beautifully with cold, creamy toppings that contrast with the flaky crust.
- Serve warm with a generous scoop of vanilla ice cream melting over the top
- Add a dollop of freshly whipped cream and a sprinkle of cinnamon on each slice
- Pour warm caramel sauce over the slice for extra richness and depth
- Pair with a cup of black coffee or hot apple cider for a cozy dessert moment
- Top with candied pecans or walnuts for added crunch and nutty flavor
Variations to Try
- Salted Caramel Apple Pie: Add 1/4 teaspoon of sea salt to your filling and drizzle the finished pie with warm salted caramel sauce for a sweet and salty contrast that elevates the whole experience.
- Bourbon Apple Pie: Replace the vanilla extract with 1/2 teaspoon of bourbon extract or add 2 tablespoons of actual bourbon to your filling for a sophisticated, grown-up twist on the classic.
- Cranberry Apple Pie: Mix 1 cup of fresh or frozen cranberries with your apples for bright, tart notes that cut through the sweetness and add visual appeal with their deep red color.
- Pecan Streusel Top: Skip the top crust and instead make a crumbly topping with 1 cup pecans, 1/2 cup flour, 1/3 cup brown sugar, and 1/4 cup butter for a texture change that’s equally delicious.
- Maple Apple Pie: Swap 1/4 cup of the granulated sugar for maple syrup and add 1/4 teaspoon of maple extract to the filling for a deeper, more complex sweetness that feels special.
Dietary Adaptations
- Gluten-Free: Use a gluten-free Pillsbury crust or make your own with a gluten-free flour blend, and substitute the all-purpose flour in the filling with cornstarch for the same thickening power without gluten.
- Dairy-Free: Pillsbury crusts contain dairy, so look for a dairy-free version or use a store-bought vegan crust, and serve with coconut whipped cream instead of traditional whipped cream.
- Vegan: Choose a vegan pie crust and skip the egg wash entirely, or brush the top with a simple plant-based milk mixed with a tablespoon of cornstarch for similar browning results.
- Low-Carb or Keto: Use a keto-friendly almond flour crust and replace the sugars with a 1:1 keto sweetener blend, though the bake time may need slight adjustment depending on your specific ingredients.
Storage and Reheating
Refrigerator
Store your cooled pie in an airtight container or cover it tightly with plastic wrap and refrigerate for up to 4 days. The crust softens slightly from moisture, but the pie remains delicious and convenient for quick slices.
- Keep it in the coldest part of your refrigerator, away from the door where temperature fluctuates
- Don’t slice the entire pie before storing, as cut edges dry out faster than a whole pie
Freezer
Wrap your cooled pie well in plastic wrap and then foil before freezing for up to 2 months. Proper wrapping prevents freezer burn and keeps your pie tasting fresh when you thaw it.
- Freeze the whole pie uncut for better texture when you thaw it
- Label your package with the date so you know when you made it
Reheating
Thaw your frozen pie in the refrigerator overnight, then warm it in a 350-degree oven for 10 to 15 minutes to restore that fresh-baked crust texture. Microwaving works in a pinch but softens the crust, so the oven is worth the extra time.
- Cover the pie loosely with foil while reheating to prevent the crust from over-browning
- Serve warm for the best flavor and texture
Nutrition Information
| Nutrient | Amount |
|---|---|
| Calories | 285 |
| Total Fat | 12g |
| Saturated Fat | 5g |
| Carbohydrates | 42g |
| Fiber | 2g |
| Sugar | 28g |
| Protein | 2g |
| Sodium | 240mg |
| Cholesterol | 20mg |
These values are approximate and based on standard ingredient brands and serving sizes. Individual nutrition may vary depending on specific ingredients and portion sizes you use.
Pillsbury Apple Pie
Ingredients
Equipment
Method
- Preheat your oven to 400°F (200°C) and let it reach temperature for about 10 minutes.
- Place one thawed Pillsbury pie crust into a 9-inch pie dish, pressing it gently into the corners.
- Peel, core, and slice the apples into 1/4-inch thick slices for even cooking.
- In a medium bowl, whisk together granulated sugar, brown sugar, all-purpose flour, ground cinnamon, ground nutmeg, ground allspice, and salt.
- In a large bowl, toss the sliced apples with the sugar and spice mixture, lemon juice, and vanilla extract until evenly coated.
- Pour the apple mixture into the prepared crust, mounding slightly in the center without packing tightly.
- Cover the filling with the second thawed pie crust, trim excess dough, and seal edges by crimping with a fork or pinching decoratively.
- Brush the top crust with the egg yolk and water mixture, then sprinkle with coarse sugar if desired.
- Bake on a baking sheet or oven rack for 45 to 50 minutes, until the crust is deep golden brown and the filling is bubbling.
- Let the pie cool for at least 15 minutes (up to 30 minutes for cleaner slices) before cutting and serving.
Notes
Frequently Asked Questions
Can I make this pie ahead of time?
Yes, you can assemble the entire unbaked pie up to 8 hours ahead and refrigerate it covered, then bake it when you’re ready. You may need to add 5 to 10 minutes to the bake time if you’re baking from cold.
What if my crust cracks when I’m placing it in the pie dish?
Small cracks patch easily by pinching the dough together with your fingers or pressing a small piece of extra crust over the crack. The crimped edges will hide minor imperfections, and they seal as the pie bakes.
Do I need to use fresh apples or can I use canned?
Fresh apples give you the best texture and flavor, but canned apple pie filling works in a pinch and cuts your prep time to almost nothing. If using canned filling, drain excess liquid and skip the sugar mixture since the filling is already sweetened.
Why is my pie filling runny after baking?
A runny filling usually means insufficient flour or not enough cooling time before cutting. Make sure you include the full 2 tablespoons of flour in your filling, and let the pie rest at least 15 minutes after baking so the starch can set.
Can I use Pillsbury crescent roll dough instead of pie crust?
Crescent dough is too flaky and delicate for a pie and won’t hold the filling properly. Stick with Pillsbury pie crusts, which are designed for pies and have the right thickness and structure.
Should I vent the top crust?
Yes, cut a few small slits or use a knife to make decorative vents so steam can escape during baking. This prevents the crust from puffing up too much and helps the filling cook evenly.
Final Thoughts
Pillsbury apple pie proves that you don’t need to spend hours in the kitchen to make something truly special. The combination of flaky crust and spiced apples creates a dessert that tastes like pure comfort, and the shortcut of using prepared crusts means you actually have time to enjoy making it.
Pull this pie from the oven, let it cool just enough to serve warm, and watch everyone’s faces light up when they take that first bite. You’ve earned the compliments, and your secret is safe.
Explore More Apple Desserts
If you loved making this pie, you might enjoy exploring other apple-based desserts that bring the same cozy, satisfying flavors to your table. Check out these related recipes to expand your apple dessert repertoire and impress your guests with variety.
Try making a homemade apple pie filling recipe to control every ingredient and flavor note perfectly. You can also elevate your dessert game with a stunning apple puff pastry recipe that offers a lighter, more elegant take on classic apple treats.