
There’s nothing quite like the smell of pear bread baking in the oven, filling your kitchen with warm spice and the sweetness of ripe fruit. Pear bread is a tender, moist quick bread that sits perfectly between comfort food and elegant enough for company, delivering that homemade feeling without demanding hours of your time.
This recipe shines because it’s forgiving, reliable, and uses simple pantry staples you likely already have at home. The pears add natural moisture and subtle flavor that makes each bite feel special, while the warm spices create that cozy autumn vibe no matter what season it is.
Why You’ll Love This Recipe
Pear bread hits that sweet spot between easy and impressive, making it perfect for breakfast, dessert, or bringing to a gathering. Here’s what makes it stand out.
- Incredibly moist crumb that stays tender for days, not dry and crumbly like some quick breads
- Simple one-bowl mixing method means less cleanup and fewer dishes
- Uses fresh or canned pears, so you can make it whenever the craving strikes
- Warm spices like cinnamon and nutmeg elevate the flavor without overpowering the delicate pear taste
- Naturally sweetened by fruit, so you can skip the icing if you prefer
My Experience Making This Recipe
I first made pear bread on a rainy afternoon when I had three perfectly ripe pears sitting on my counter and no concrete plan for them. Within twenty minutes, the batter was ready, and the oven’s warmth turned my whole house into a fragrant bakery.
What surprised me most was how the bread tasted even better the next day, with flavors melding together and that crumb becoming almost impossibly moist. My neighbor popped over after smelling it baking and left with a warm slice, and her feedback was immediate: “This is restaurant quality.”
I’ve made this recipe at least a dozen times now, and it’s never disappointed, whether I’ve used farmer’s market pears or a can from my pantry when fresh ones weren’t available. It’s become my go-to recipe when I want something homemade that feels like I spent more effort than I actually did.
Recipe Overview
- Recipe Name: Pear Bread
- Servings: 12 slices
- Prep Time: 15 minutes
- Cook Time: 50 to 60 minutes
- Total Time: 65 to 75 minutes
- Course: Breakfast, Dessert, Snack
- Cuisine: American
- Calories Per Serving: 245 calories
Equipment You Will Need
- 9×5 inch loaf pan
- Parchment paper or cooking spray
- Large mixing bowl
- Medium mixing bowl
- Whisk
- Wooden spoon or rubber spatula
- Measuring cups and spoons
- Toothpick or cake tester
- Cooling rack
Ingredients for Pear Bread
- 2 cups all-purpose flour
- 1 teaspoon baking powder
- 1/2 teaspoon baking soda
- 1/2 teaspoon salt
- 1 teaspoon ground cinnamon
- 1/2 teaspoon ground nutmeg
- 1/4 teaspoon ground ginger
- 1/2 cup vegetable oil
- 3/4 cup granulated sugar
- 2 large eggs
- 1 teaspoon vanilla extract
- 2 cups fresh pears, peeled, cored, and finely chopped (about 4 medium pears)
- 1/2 cup chopped walnuts or pecans (optional)
Ingredient Notes and Substitutions
- Fresh pears: They add natural moisture and delicate flavor that makes the bread tender. You can substitute with 1 can (15 ounces) of pears in juice, drained and finely chopped, though fresh will give you better texture and a more pronounced pear taste.
- Vegetable oil: Oil keeps the crumb incredibly moist compared to butter, which tends to make quick breads drier. You can use melted coconut oil or butter, but reduce the amount slightly to 1/3 cup to avoid an overly greasy result.
- All-purpose flour: It provides structure without being too heavy. Whole wheat flour works but will make the bread denser and less tender; use half whole wheat and half all-purpose if you want to try it.
- Ground spices: Cinnamon, nutmeg, and ginger are what give pear bread its signature warmth. You can swap the ginger for allspice if you prefer, or skip it entirely for a more subtle spice profile.
- Walnuts or pecans: They add texture and richness to the bread. Skip them if you have a nut allergy, or substitute with chopped dried cranberries or chocolate chips for a different flavor direction.
How to Make Pear Bread
Step 1: Prepare Your Pan and Oven
Preheat your oven to 350 degrees Fahrenheit and position the rack to the middle. Line a 9×5 inch loaf pan with parchment paper, letting it hang over the sides for easy removal, or spray it generously with cooking spray; this prevents sticking and ensures your bread releases cleanly.
Step 2: Combine the Dry Ingredients
In a medium bowl, whisk together the flour, baking powder, baking soda, salt, cinnamon, nutmeg, and ginger. Whisking these ingredients together instead of just stirring helps distribute the baking powder and spices evenly, which prevents dense pockets and ensures consistent flavor throughout every slice.
Step 3: Mix the Wet Base
In a large bowl, pour the vegetable oil and add the granulated sugar, then whisk them together until the mixture looks slightly lighter and feels smooth. This step helps suspend the sugar throughout the batter rather than having it settle at the bottom of the pan.
Step 4: Add Eggs and Vanilla
Crack the eggs directly into the oil and sugar mixture, add the vanilla extract, and whisk vigorously for about one minute until the mixture looks well combined and slightly foamy. Adding eggs at this stage helps them incorporate smoothly into the oil base, which is harder to do if you wait.
Step 5: Fold in the Dry Ingredients
Pour the dry ingredient mixture into the wet mixture and stir gently with a wooden spoon or rubber spatula until just barely combined. Do not overmix here; lumps are your friend because overmixing develops gluten, which makes quick breads tough and dense rather than tender and crumbly.
Step 6: Add the Pears and Nuts
Fold in the chopped pears and nuts (if using) until they’re evenly distributed throughout the batter. The pears should be finely chopped so they break down slightly during baking and release their moisture, creating that signature tender crumb pear bread is known for.
Step 7: Pour into the Pan
Transfer the batter to your prepared loaf pan, using a spatula to spread it evenly into the corners. Tap the pan on the counter a few times to release any air pockets and settle the batter, which helps the bread rise evenly and prevents large holes.
Step 8: Bake Until Golden
Place the pan in the preheated oven and bake for 50 to 60 minutes, until the top is golden brown and a toothpick inserted into the center comes out clean or with just a few moist crumbs clinging to it. If the top starts browning too quickly, loosely tent it with aluminum foil for the last 10 to 15 minutes.
Step 9: Cool Properly
Remove the bread from the oven and let it rest in the pan for 10 minutes; this cooling period lets the structure set so it won’t fall apart when you turn it out. Then carefully turn the bread out onto a cooling rack and let it cool completely before slicing, which takes about an hour.
Pro Tip: Let your pear bread sit overnight before slicing it; the flavors meld together and the crumb becomes even more moist and tender, making it taste noticeably better than eating it fresh from the cooling rack.
Tips for the Best Pear Bread
- Use pears that are ripe but still firm, not mushy; ripe pears provide sweetness and moisture without falling apart completely during the chopping and mixing process. If your pears are very soft, they’ll release too much liquid and make the batter soggy.
- Chop your pears into small, even pieces so they cook through and distribute their flavor evenly. Large chunks will leave pockets of uncooked fruit and create an uneven texture.
- Don’t skip the cooling step in the pan; it sounds like a minor detail, but those 10 minutes make the difference between bread that holds together beautifully and bread that falls apart when you slice it.
- Room temperature ingredients mix together more smoothly and create a better crumb structure. Pull your eggs and oil out of the fridge 30 minutes before you bake if you have the time.
- Test for doneness with a toothpick in the center of the bread rather than near the edges, where it might cook faster and trick you into thinking the whole loaf is done.
- Store the baked bread in an airtight container at room temperature, where it will actually taste better on day two or three as the crumb settles and flavors develop.
Common Mistakes to Avoid
- Overmixing the batter: Stirring too much after combining wet and dry ingredients develops gluten, turning your tender quick bread into something tough and rubbery. Stir just until no dry flour streaks remain.
- Using pears that are too wet or mushy: Overripe pears release excess liquid into the batter, making it too wet and resulting in a dense, gummy crumb instead of a tender one. Choose pears that yield slightly to pressure but still have some firmness.
- Not chopping pears finely enough: Large pear chunks don’t cook through properly and create uneven texture, plus they’re harder to distribute evenly through the batter. Aim for pieces about the size of a pea.
- Baking at too high a temperature: A hotter oven browns the outside too quickly before the inside finishes cooking, leaving you with a burnt crust and an underbaked center. Stick to 350 degrees for consistent results.
- Slicing before the bread is completely cool: Warm bread is still setting internally, so cutting into it tears the crumb and makes it crumbly. Let it cool all the way on the rack, which takes about an hour.
Serving Suggestions
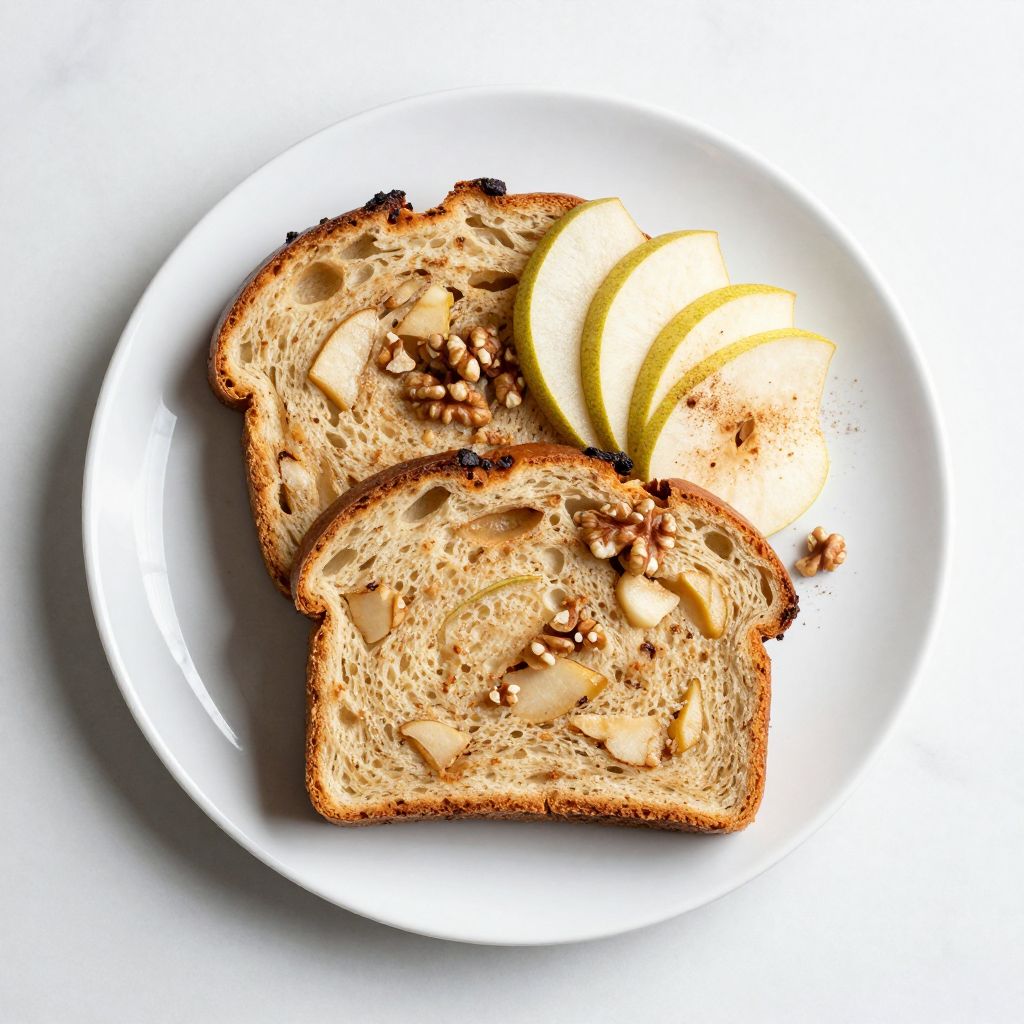
Pear bread is versatile enough to serve at breakfast with coffee, as an afternoon snack, or as a light dessert after dinner. Here are some ways to serve it that bring out its best qualities.
- Toast a thick slice and spread it with cream cheese for a slightly tangy contrast to the sweet pear and warm spices
- Serve at room temperature with a cup of hot tea or coffee, no butter or toppings needed
- Top a slice with a dollop of whipped cream or Greek yogurt for added richness and a touch of tartness
- Drizzle warm pear bread with a simple glaze made from powdered sugar and milk if you want to make it feel more dessert-like
- Pack a slice in your lunchbox or bring it to work as a homemade treat that’s way better than anything from a bakery case
Variations to Try
- Chocolate chip pear bread: Fold 1 cup of chocolate chips into the batter before baking; the chocolate adds richness and slight bitterness that balances the fruit’s sweetness beautifully. This variation feels more indulgent without needing frosting.
- Almond extract pear bread: Replace 1/4 teaspoon of vanilla extract with 1/4 teaspoon of almond extract for a nuttier, more complex flavor. Almond and pear are a classic pairing that creates a more sophisticated taste.
- Brown butter pear bread: Swap the vegetable oil for 1/2 cup of browned butter for a deeper, nuttier flavor that makes the bread taste more gourmet. Brown butter adds richness and a subtle toasted quality.
- Glazed pear bread: Mix powdered sugar with pear juice or milk to create a simple glaze and drizzle it over the cooled bread; this adds sweetness and makes it look bakery-quality. The glaze sets in about 30 minutes for a nice finish.
- Spiced pear bread with cardamom: Add 1/4 teaspoon of ground cardamom to the dry ingredients for a more exotic spice blend that’s popular in Scandinavian baking. Cardamom adds floral notes that pair beautifully with pears.
Dietary Adaptations
- Gluten-free: Use a one-to-one gluten-free flour blend in place of all-purpose flour; the bread will be slightly denser but still moist and delicious. Some gluten-free blends are thirstier than wheat flour, so monitor the batter consistency.
- Dairy-free: This recipe is already dairy-free since it uses oil instead of butter; just make sure your baking powder is aluminum-free if that matters to you. All the other ingredients are naturally dairy-free.
- Vegan: Replace the two eggs with two flax eggs (2 tablespoons ground flaxseed mixed with 5 tablespoons water, left to sit for 5 minutes) to bind the batter. The bread will be slightly less tender but still moist and delicious.
- Low-carb or keto: Use almond flour instead of all-purpose flour and replace sugar with monk fruit sweetener or erythritol in equal amounts; the texture will be different but still acceptable for a keto-friendly treat. Be aware that the bread may not rise as high or be quite as tender.
Storage and Reheating
Refrigerator
Pear bread keeps beautifully in the fridge, where it actually improves with time as flavors meld together. Wrap it tightly in plastic wrap or aluminum foil and refrigerate for up to 5 days.
- Slice as needed and eat cold or warm it slightly in the toaster oven
- The bread will stay moist even after several days in the fridge
- If you notice it drying out, wrap a paper towel around the plastic wrap to help retain moisture
Freezer
Pear bread freezes exceptionally well, making it perfect for baking ahead or storing for later. Wrap the entire cooled loaf tightly in plastic wrap and then aluminum foil, then freeze for up to 3 months.
- You can also slice the bread before freezing and store individual slices in a freezer bag for grab-and-go breakfast
- Frozen slices thaw at room temperature in about 2 hours or toast directly from frozen
- The texture remains tender even after freezing thanks to the moisture from the pears
Reheating
Reheat pear bread gently to avoid drying it out, especially if it’s been refrigerated or frozen. The best method depends on how much time you have and how you want to serve it.
- Toast slices in a toaster or toaster oven until warm and the edges are lightly crispy, about 2 to 3 minutes
- Microwave a slice wrapped in a damp paper towel for 15 to 20 seconds for a quick warm-up
- Wrap the whole loaf in aluminum foil and warm in a 350-degree oven for 10 minutes if you’re serving it to multiple people
Nutrition Information
| Nutrient | Amount |
|---|---|
| Calories | 245 |
| Total Fat | 10g |
| Saturated Fat | 1.5g |
| Carbohydrates | 38g |
| Fiber | 2g |
| Sugar | 24g |
| Protein | 3g |
| Sodium | 220mg |
| Cholesterol | 31mg |
These values are approximate and based on the main recipe using fresh pears and optional nuts. Actual nutrition will vary depending on ingredient brands and substitutions you make.
Frequently Asked Questions
Can I use canned pears instead of fresh ones?
Absolutely, canned pears work great and are actually convenient since you don’t have to peel them. Drain them well, chop them finely, and use about 1 can (15 ounces) to replace the 2 cups of fresh pears; the bread will be slightly softer but still delicious.
Can I make this recipe ahead of time?
Yes, you can prepare the batter up to 4 hours in advance and store it in the fridge, then bake when you’re ready. The pears will release a bit more liquid the longer the batter sits, so you might need to add a tablespoon or two of extra flour if it seems too wet.
What if my pear bread sinks in the middle?
A sunken center usually means the oven temperature was too high or the bread came out before it was fully baked. Use an oven thermometer to verify your temperature, and always test with a toothpick in the very center before removing it.
Why is my pear bread too dense?
Overmixing the batter is the most common cause of dense quick bread; stir just until the dry ingredients are barely combined. Too much baking soda, old baking powder, or pears that release too much liquid can also make the crumb heavy.
Can I add more spices to this recipe?
Yes, you can increase the cinnamon, nutmeg, or ginger if you like a stronger spice flavor, but add them gradually and taste the batter to avoid overpowering the delicate pear taste. You can go up to 1.5 teaspoons of cinnamon without problems, but add other spices in quarter-teaspoon increments.
Is this recipe nut-free?
The base recipe is nut-free, but many versions include walnuts or pecans, which this recipe lists as optional. Simply omit the nuts entirely if you have allergies, and the bread will still be moist and delicious without them.
Final Thoughts
Pear bread is one of those recipes that tastes homemade in the very best way, delivering warmth and comfort in every slice without requiring you to be an experienced baker. The combination of tender crumb, subtle pear flavor, and warm spices makes it something you’ll find yourself baking again and again.
Give this recipe a try and you’ll understand why pear bread deserves a permanent spot in your baking rotation. Your kitchen will smell amazing, and you’ll have a beautiful loaf to share or enjoy all week long.
Explore More Pear Recipes
If you love this pear bread recipe, you might enjoy exploring other ways to use fresh pears in your baking and cooking. Check out our collection of pear-inspired recipes that will make the most of this delicious fruit whenever it’s in season.
Try our pear pie recipe for a more formal dessert, or discover the deep, concentrated flavors in our pear butter recipe for a homemade spread that’s perfect on toast or stirred into yogurt.
Pear Bread
Ingredients
Equipment
Method
- Preheat the oven to 350°F (175°C) and line a 9x5 inch loaf pan with parchment paper or grease it well.
- In a medium bowl, whisk together flour, baking powder, baking soda, salt, cinnamon, nutmeg, and ginger until evenly combined.
- In a large bowl, whisk vegetable oil and granulated sugar together until smooth and slightly lightened in color.
- Add eggs and vanilla extract to the oil mixture and whisk vigorously for one minute until well combined and a bit foamy.
- Pour the dry ingredients into the wet ingredients and stir gently with a wooden spoon or rubber spatula until just combined; do not overmix.
- Fold in the chopped pears and nuts until evenly distributed throughout the batter.
- Transfer the batter to the prepared loaf pan, spread evenly, and tap on the counter to release air pockets.
- Bake for 50 to 60 minutes at 350°F until the top is golden brown and a toothpick inserted in the center comes out clean or with a few moist crumbs.
- Let the bread rest in the pan for 10 minutes, then transfer to a cooling rack and cool completely before slicing.