
Picture a backyard full of friends, the smell of smoky meat drifting through the air, and everyone reaching for just one more rib. Party ribs are the ultimate crowd-pleaser that transforms any gathering into something memorable.
This recipe delivers fall-off-the-bone tenderness with a caramelized glaze that tastes like you’ve been tending a smoker all day, even though you haven’t. The beauty of these ribs is their simplicity paired with maximum flavor impact and the ability to feed a crowd without breaking a sweat.
Why You’ll Love This Recipe
This approach to ribs works because it combines low-and-slow cooking with a sticky-sweet glaze that caramelizes perfectly in the oven. You get restaurant-quality results without needing specialized equipment or hours of hands-on time.
- Tender, juicy meat that pulls cleanly from the bone with minimal effort
- A glossy, caramelized glaze with balanced sweetness and savory depth
- Works for both small family dinners and large parties without scaling issues
- Requires just one pan and basic kitchen tools
- Can be prepped ahead and reheated without losing quality
My Experience Making This Recipe
The first time I made these ribs for a summer party, I was genuinely nervous about feeding twelve people with something I’d never tested. I followed this exact method and pulled them from the oven about an hour before guests arrived, which meant I could actually enjoy the party instead of panic-cooking.
What struck me most was how the kitchen filled with this incredible smoky-sweet aroma that had people hovering near the kitchen before we’d even set the table. My friend Marcus, who considers himself a rib expert, took one bite and asked for the recipe on the spot.
The ribs stayed moist even sitting out for several hours, and the leftovers (which there barely were) tasted even better the next day. I’ve made them at least a dozen times since, and they’ve become my go-to for any gathering where I want to impress without stress.
Recipe Overview
- Recipe Name: Party Ribs
- Servings: 8 to 10 people
- Prep Time: 20 minutes
- Cook Time: 3 hours 30 minutes
- Total Time: 3 hours 50 minutes
- Course: Main Course
- Cuisine: American
- Calories per Serving: 520
Equipment You Will Need
- Two large rimmed baking sheets
- Aluminum foil
- Sharp knife for trimming
- Paper towels
- Small mixing bowl
- Spoon for stirring and basting
- Meat thermometer (optional but helpful)
- Oven mitts
Ingredients for Party Ribs
For the Ribs and Dry Rub
- 4 racks of baby back ribs (approximately 6 to 7 pounds total)
- 3 tablespoons brown sugar
- 2 tablespoons paprika
- 1 tablespoon garlic powder
- 1 tablespoon onion powder
- 2 teaspoons black pepper
- 2 teaspoons salt
- 1 teaspoon cayenne pepper
- 1/2 teaspoon ground cumin
For the Glaze
- 1 1/2 cups barbecue sauce (your preferred brand)
- 1/3 cup honey
- 3 tablespoons butter
- 2 tablespoons apple cider vinegar
- 1 tablespoon Worcestershire sauce
- 1 teaspoon smoked paprika
- 1/2 teaspoon garlic powder
Ingredient Notes and Substitutions
- Baby back ribs: These are smaller and more tender than spare ribs, making them ideal for parties. St. Louis-style ribs work too, though they’ll need an extra 15 to 20 minutes of cooking.
- Brown sugar: It dissolves into the rub and adds caramelization. Use coconut sugar as a one-to-one swap if you prefer.
- Paprika: Creates color and mild smoke flavor. Smoked paprika can replace regular paprika, but use only half the amount since it’s stronger.
- Barbecue sauce: Pick one you actually enjoy eating, whether it’s sweet, spicy, or tangy. Any major brand works fine here.
- Honey: Adds sweetness and helps the glaze caramelize. Maple syrup or agave work as replacements with slightly different flavor profiles.
- Worcestershire sauce: Brings umami depth to the glaze. Skip it if you need the recipe vegetarian, or use soy sauce for a different but tasty result.
How to Make Party Ribs
Step 1: Prepare the Ribs
Remove the ribs from the refrigerator and let them sit at room temperature for about 15 minutes. Pat them completely dry with paper towels because moisture prevents the dry rub from adhering properly.
Trim away any loose membrane or excess fat from the surface. Check the back of each rack and peel away the thin silver skin if it’s still there, using a paper towel for better grip.
Step 2: Mix the Dry Rub
Combine brown sugar, paprika, garlic powder, onion powder, black pepper, salt, cayenne, and cumin in a small bowl. Stir everything together until the mixture is evenly combined with no lumps.
The dry rub creates the flavorful crust on the ribs and works together with the glaze to build complex taste. Make this while the ribs are coming to room temperature.
Step 3: Apply the Rub
Coat each rib rack generously on both sides with the dry rub, pressing it gently into the meat so it adheres. Use all the rub you’ve mixed; this is what creates the caramelized exterior.
Don’t be shy here. The rub needs to fully cover the surface to develop that savory crust that contrasts beautifully with the sweet glaze.
Step 4: Set Up for Cooking
Preheat your oven to 275 degrees Fahrenheit. Line two large rimmed baking sheets with aluminum foil for easy cleanup.
Arrange the rib racks on the prepared baking sheets, bone side down. You can overlap them slightly if needed, but try to give them some breathing room.
Step 5: Cook Low and Slow
Cover each baking sheet tightly with foil and place both sheets in the preheated oven. This low temperature allows the collagen in the ribs to break down slowly, creating that tender texture.
Bake for 2 hours and 30 minutes without opening the oven door. Opening it releases heat and extends cooking time, so resist the urge to peek.
Step 6: Prepare the Glaze
While the ribs cook, combine barbecue sauce, honey, butter, apple cider vinegar, Worcestershire sauce, smoked paprika, and garlic powder in a small bowl. Stir until smooth and well incorporated.
The glaze should be thick but pourable. If you made it too thick, add a tablespoon of vinegar to loosen it slightly.
Step 7: Apply the Glaze
After 2 hours and 30 minutes, carefully remove the ribs from the oven and pull back the foil. Brush both sides of each rib rack generously with the glaze, reserving about 1/4 cup for a final coat.
Return the ribs to the oven uncovered and bake for another 45 minutes. The glaze will caramelize and stick to the meat, creating that irresistible sticky coating.
Step 8: Final Glaze and Rest
After 45 minutes, remove the ribs from the oven and apply your reserved glaze in a second coat. Return them to the oven for the final 15 minutes of cooking.
The ribs are done when the meat pulls back from the bones and a fork slides through easily. Remove them from the oven and let them rest for 5 minutes before cutting and serving.
Pro Tip: The 2 hours and 30 minutes of covered cooking is non-negotiable for tender ribs, but the final uncovered time is flexible; if you want a thicker, stickier glaze, extend the uncovered cooking to 90 minutes instead of 60.
Tips for the Best Party Ribs
- Use a meat thermometer to check doneness at the thickest part of the ribs; they’re ready at 195 to 203 degrees Fahrenheit. This removes all guesswork from the timing.
- Keep your barbecue sauce at room temperature before brushing it on, as cold sauce won’t spread as smoothly or caramelize as effectively.
- Make the dry rub the night before and store it in an airtight container. You can rub the ribs several hours ahead and cover them loosely in the refrigerator.
- Cut the ribs between the bones before serving, which makes them easier for guests to grab and eat. A sharp serrated knife works best for this.
- If cooking for a crowd, you can assemble and rub the ribs the morning of your party, then start cooking 4 hours before you want to serve them.
- Let any leftover ribs cool completely before wrapping and refrigerating, which prevents condensation from making them soggy.
Common Mistakes to Avoid
- Cooking too hot: High heat dries out the meat and causes the glaze to burn before the collagen breaks down, leaving you with tough ribs instead of tender ones.
- Skipping the dry rub step: The rub creates the flavor foundation and the caramelized crust; skipping it loses depth and makes the ribs taste one-dimensional.
- Opening the oven during the first 2.5 hours: Every time you open the door, you release heat and add cooking time, making the ribs dry and disappointing.
- Using cold glaze: Cold sauce won’t spread evenly and won’t caramelize properly, leaving patchy coverage and less flavor development.
- Overcrowding the baking sheets: Ribs need space for air circulation; too many on one sheet steams them instead of allowing proper browning.
Serving Suggestions
Party ribs are substantial on their own but shine when paired with sides that balance their richness and richness. Set them out with simple, cool sides that let the ribs remain the star.
- Creamy coleslaw with a vinegar-based dressing cuts through the richness and refreshes the palate between bites
- Cornbread or jalapeño cheddar cornbread provides a slightly sweet, buttery contrast
- Baked beans or slow-cooked beans add earthiness and complement the smoky glaze
- Pickled vegetables or pickles offer bright, acidic contrast that cleanses the palate
- Fresh corn on the cob or corn salad brings sweetness and texture variety to the plate
Variations to Try
- Spicy Chipotle Ribs: Add 2 tablespoons of chipotle powder to the dry rub and mix 2 tablespoons of chipotle paste into the glaze. This transforms them into something with serious heat and smoky complexity.
- Maple Bourbon Ribs: Replace half the honey in the glaze with bourbon and add 3 tablespoons of pure maple syrup. The result is deeper, more sophisticated, and perfect for fall gatherings.
- Asian-Style Ribs: Mix the glaze with soy sauce, ginger, and a touch of sesame oil instead of Worcestershire, and use Sriracha instead of cayenne in the dry rub.
- Coffee Rubbed Ribs: Add 2 tablespoons of finely ground coffee to the dry rub for an unexpected depth that pairs beautifully with the sweet glaze.
- Mustard Glazed Ribs: Replace half the barbecue sauce in the glaze with whole-grain mustard for a tangy, less sweet version that appeals to mustard lovers.
Dietary Adaptations
- Gluten-Free: Use a certified gluten-free barbecue sauce and verify your Worcestershire sauce is gluten-free; most other ingredients are naturally safe. The ribs themselves contain no gluten.
- Dairy-Free: Swap the butter in the glaze for olive oil or coconut oil in equal amounts; the flavor will shift slightly but remain delicious.
- Lower Sodium: Use low-sodium barbecue sauce and skip the salt from the dry rub, relying on the other spices for flavor. You’ll lose some punch but reduce sodium significantly.
- Low-Carb or Keto: Replace the honey with monk fruit sweetener or erythritol using the brand’s conversion ratio, and verify your barbecue sauce has minimal sugar; total carbs will depend on your sauce choice.
Storage and Reheating
Refrigerator
Wrap cooled ribs tightly in plastic wrap or place them in an airtight container. They keep for 3 to 4 days in the refrigerator.
- Store any remaining glaze separately in a covered container for up to one week
- Let refrigerated ribs come to room temperature for 15 minutes before reheating for more even warming
Freezer
Wrap cooked ribs individually in plastic wrap, then place them in a freezer-safe bag with the air pressed out. They freeze successfully for up to 3 months.
- Label the bag with the date so you know how long they’ve been stored
- Thaw overnight in the refrigerator before reheating for best results
Reheating
Preheat your oven to 325 degrees Fahrenheit and wrap the ribs loosely in foil. Bake for 15 to 20 minutes if they’re at room temperature, or 25 to 30 minutes if they’re coming straight from the refrigerator.
- For a moisture boost, add a splash of apple juice or broth before wrapping
- Unwrap and brush with extra glaze in the last 5 minutes if you want them sticky again
- Avoid microwaving, which dries them out quickly and unevenly
Nutrition Information
| Nutrient | Amount |
|---|---|
| Calories | 520 |
| Total Fat | 28g |
| Saturated Fat | 11g |
| Carbohydrates | 32g |
| Fiber | 0g |
| Sugar | 24g |
| Protein | 42g |
| Sodium | 920mg |
| Cholesterol | 125mg |
Nutrition values are approximate and based on USDA data for baby back ribs with the glaze applied. Individual results vary based on the specific brands of sauce and other ingredients used.
Frequently Asked Questions
Can I cook these ribs on a grill instead of in the oven?
Yes, you can use a grill on its lowest setting with indirect heat. Set up your grill for two-zone cooking, keep the ribs on the cooler side, cover them loosely with foil, and follow the same timing (2.5 hours covered, then 1 hour with glaze).
How far ahead can I prep the ribs?
You can apply the dry rub and refrigerate the ribs up to 12 hours in advance. Let them come to room temperature for 15 minutes before cooking, or add about 10 minutes to the cooking time if you skip this step.
What if my glaze is too runny?
Brush on what you have as it will still caramelize in the oven. If you need it thicker for the second coat, mix in a tablespoon of cornstarch mixed with a tablespoon of cold water to thicken it.
Why are my ribs falling apart before they’re done?
This usually means they’re either cooked too hot or cooked too long. Check that your oven temperature is actually 275 degrees with an oven thermometer, and don’t exceed 4 hours total cooking time.
Can I double this recipe for a larger party?
Absolutely. Simply double all ingredients and use more baking sheets, arranging them in single layers. The cooking time stays the same since the oven temperature remains constant.
Is there a vegetarian version of this recipe?
Not really, since the entire point is the ribs themselves.
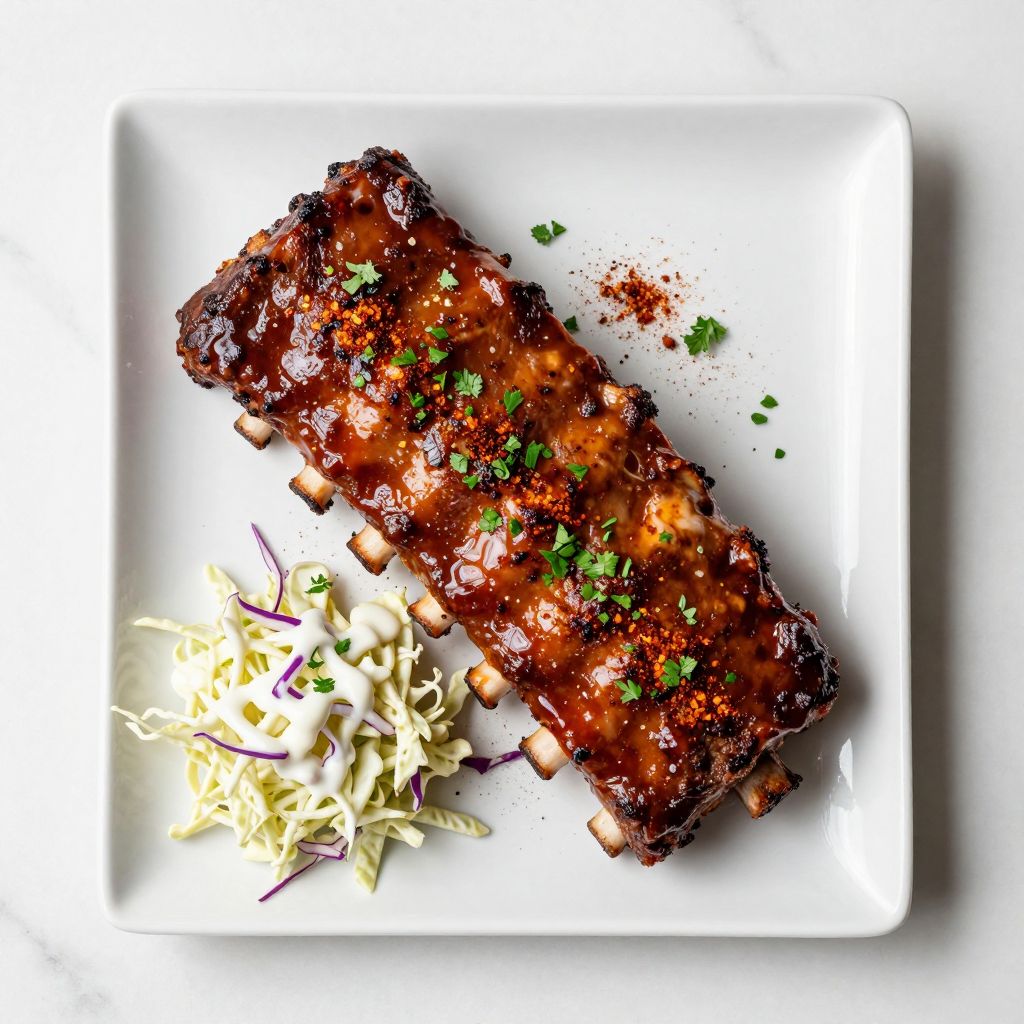
Party Ribs
Ingredients
Equipment
Method
- Remove the ribs from the refrigerator and let them sit at room temperature for about 15 minutes. Pat them completely dry with paper towels.
- Trim away any loose membrane or excess fat from the surface. Check the back of each rack and peel away the thin silver skin if it's still there, using a paper towel for better grip.
- Combine brown sugar, paprika, garlic powder, onion powder, black pepper, salt, cayenne, and cumin in a small bowl. Stir everything together until the mixture is evenly combined with no lumps.
- Coat each rib rack generously on both sides with the dry rub, pressing it gently into the meat so it adheres. Use all the rub you've mixed.
- Preheat your oven to 275 degrees Fahrenheit. Line two large rimmed baking sheets with aluminum foil for easy cleanup.
- Arrange the rib racks on the prepared baking sheets, bone side down. You can overlap them slightly if needed, but try to give them some breathing room.
- Cover each baking sheet tightly with foil and place both sheets in the preheated oven. Bake for 2 hours and 30 minutes without opening the oven door.
- While the ribs cook, combine barbecue sauce, honey, butter, apple cider vinegar, Worcestershire sauce, smoked paprika, and garlic powder in a small bowl. Stir until smooth and well incorporated.
- After 2 hours and 30 minutes, carefully remove the ribs from the oven and pull back the foil. Brush both sides of each rib rack generously with the glaze, reserving about 1/4 cup for a final coat.
- Return the ribs to the oven uncovered and bake for another 45 minutes. The glaze will caramelize and stick to the meat.
- After 45 minutes, remove the ribs from the oven and apply your reserved glaze in a second coat. Return them to the oven for the final 15 minutes of cooking.
- Remove them from the oven and let them rest for 5 minutes before cutting and serving. The ribs are done when the meat pulls back from the bones and a fork slides through easily.