
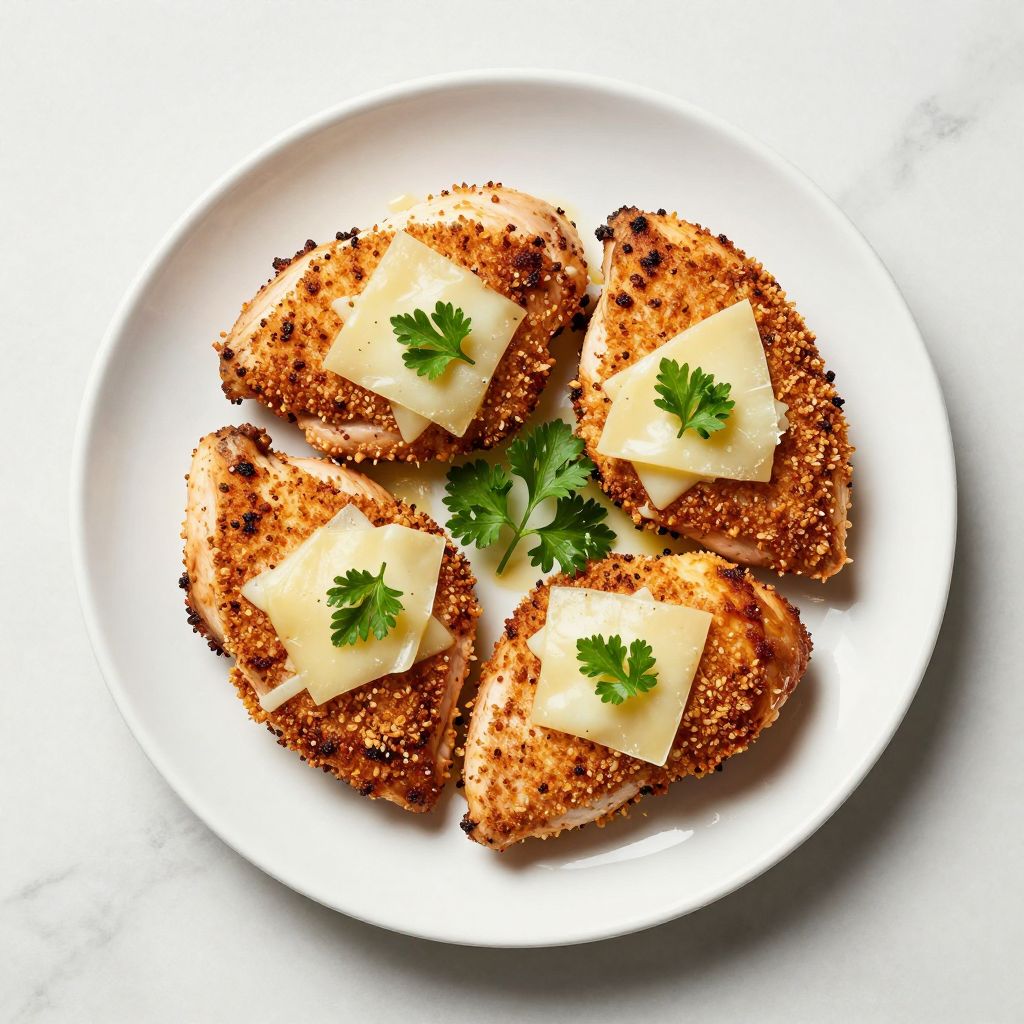
Picture this: golden, crispy chicken that shatters under your fork, revealing tender, juicy meat inside with a rich parmesan crust that tastes like it came straight from a steakhouse kitchen. Longhorn Parmesan Crusted Chicken delivers that restaurant-quality experience at home, and honestly, it’s become one of my go-to weeknight dinners because it feels fancy without the fuss.
This recipe combines thin-pounded chicken breasts with a savory parmesan coating that gets wonderfully crunchy in the pan, all finished with melted cheese and a touch of that signature Longhorn appeal. The best part is that you can have it on the table in under 30 minutes, making it perfect for busy nights when you still want something impressive.
Why You’ll Love This Recipe
This dish checks every box for home cooks who want flavor without complexity.
- Crispy, golden crust that stays crunchy even after the cheese melts on top
- Ready in under 30 minutes from start to finish
- Pairs beautifully with pasta, vegetables, or a fresh salad
- Impresses guests without requiring special skills or hard-to-find ingredients
- Tastes better than most restaurant versions at a fraction of the cost
My Experience Making This Recipe
The first time I made this, I was skeptical that pounding chicken thin and coating it in parmesan would taste as good as it looked. After the first bite, I became a believer instantly.
My family devoured it in minutes, and the kitchen smelled incredible while it cooked. The combination of the crispy coating with melted cheese created this amazing texture that kept everyone coming back for seconds.
Since then, I’ve made it at least a dozen times, and each time I discover new side dishes to pair with it. It’s one of those recipes that feels fresh every time because the variations are endless.
Recipe Overview
- Recipe Name: Longhorn Parmesan Crusted Chicken
- Servings: 4
- Prep Time: 15 minutes
- Cook Time: 15 minutes
- Total Time: 30 minutes
- Course: Main Dish
- Cuisine: Italian-American
- Calories per Serving: 380
Equipment You Will Need
- Meat mallet or rolling pin
- Three shallow bowls or plates for breading station
- Large skillet or frying pan
- Paper towels
- Instant-read meat thermometer (optional but recommended)
- Tongs or a spatula
- Cutting board
- Chef’s knife
Ingredients for Longhorn Parmesan Crusted Chicken
- 4 boneless, skinless chicken breasts (about 6 ounces each)
- 1 cup grated parmesan cheese (use freshly grated if possible)
- 1 cup all-purpose flour
- 2 large eggs
- 1/2 cup whole milk
- 1 teaspoon salt
- 1/2 teaspoon black pepper
- 1/2 teaspoon garlic powder
- 1/2 teaspoon dried Italian seasoning
- 1/2 cup vegetable oil for frying
- 4 slices provolone or mozzarella cheese (optional, for topping)
- Fresh parsley (optional, for garnish)
Ingredient Notes and Substitutions
- Parmesan Cheese: Freshly grated parmesan has better flavor and texture than pre-shredded versions because it doesn’t contain anti-caking agents. If you only have pre-shredded, it will still work but may not brown quite as evenly.
- Chicken Breasts: Use chicken breasts that are roughly the same thickness so they cook evenly. If some are thicker, pound them down to match the others for consistent results.
- Oil: Vegetable oil or canola oil works best because they have high smoke points. Olive oil can work but may smoke excessively at the high heat needed for crispness.
- Eggs: This is your binding agent, and you cannot skip it without risking the coating falling off during cooking. There’s no direct substitute here.
- Flour: You can swap this for gluten-free all-purpose flour if needed, though the texture may be slightly different.
How to Make Longhorn Parmesan Crusted Chicken
Step 1: Prepare Your Chicken
Place each chicken breast on a cutting board and cover it loosely with plastic wrap or a ziplock bag. Using a meat mallet or the bottom of a heavy pan, pound the chicken to an even thickness of about 1/4 inch.
Even thickness ensures that every piece cooks at the same rate, preventing dry edges while the centers catch up. This step takes just a minute but makes all the difference in the final texture.
Step 2: Set Up Your Breading Station
Arrange three shallow bowls in a line on your counter. In the first bowl, mix together the flour, 1/2 teaspoon salt, 1/4 teaspoon black pepper, and garlic powder.
In the second bowl, whisk together the eggs and milk until well combined. In the third bowl, mix the grated parmesan cheese with the remaining 1/2 teaspoon salt, 1/4 teaspoon black pepper, and Italian seasoning.
Step 3: Coat Each Chicken Breast
Take one pounded chicken breast and dredge it in the flour mixture, shaking off any excess. The flour creates a base layer that helps the egg adhere better and creates crispness.
Next, dip the floured chicken into the egg mixture, coating both sides completely. Finally, press the chicken firmly into the parmesan mixture, making sure both sides are well covered with the cheese coating.
Step 4: Heat Your Oil
Pour the vegetable oil into your large skillet and heat it over medium-high heat. Let it heat for about 2 minutes until you see it shimmer slightly, or until it reaches around 350 degrees Fahrenheit if using a thermometer.
Properly heated oil is essential for achieving that golden, crispy crust without the coating burning or the oil smoking excessively. If the oil isn’t hot enough, the coating absorbs oil instead of crisping up.
Step 5: Fry the Chicken
Carefully place the parmesan-coated chicken breasts into the hot oil, working in batches if needed to avoid overcrowding the pan. The oil should sizzle immediately when the chicken hits it, which tells you the temperature is right.
Let each side cook for about 6 to 7 minutes until it turns deep golden brown. Resist the urge to move the chicken around too much during cooking, as this breaks the crust and allows oil to seep in.
Step 6: Check for Doneness
Using tongs, carefully flip the chicken and cook the second side for another 6 to 7 minutes until it reaches the same golden brown color. The chicken is done when an instant-read thermometer inserted into the thickest part reads 165 degrees Fahrenheit.
If you don’t have a thermometer, cut into the thickest part and check that the juices run clear with no pink remaining. Overcooked chicken becomes dry, so hitting that 165-degree mark is your target.
Step 7: Add Cheese Topping (Optional)
If you want to add provolone or mozzarella cheese on top, place a slice on each chicken breast while it’s still in the pan. Cover the skillet with a lid or tent it with foil for about 2 minutes to allow the cheese to melt into a delicious topping.
This step is optional but transforms the dish from impressive to absolutely restaurant-worthy. The melted cheese combines beautifully with the crispy parmesan crust underneath.
Step 8: Transfer and Rest
Use tongs or a slotted spatula to transfer the cooked chicken to a paper towel-lined plate. This absorbs excess oil and keeps the crust crispy rather than getting soggy from sitting in residual oil.
Let the chicken rest for 2 to 3 minutes before serving. This brief rest allows the juices to redistribute inside the meat, keeping it tender and moist.
Pro Tip: Don’t skip the pounding step, and make sure your oil is properly heated to medium-high before you start frying. These two things alone determine whether your crust turns out restaurant-quality crispy or disappointing and soggy.
Tips for the Best Longhorn Parmesan Crusted Chicken
- Use a meat mallet to pound the chicken evenly, not a rolling pin, because the mallet breaks down the fibers better and tenderizes the meat at the same time.
- Pat the chicken dry with paper towels before breading to remove surface moisture, which prevents the coating from sticking properly.
- Let the breaded chicken sit in the fridge for 15 to 30 minutes before frying, as this helps the coating adhere better and creates a crispier texture.
- Don’t overcrowd your pan because this lowers the oil temperature and causes the coating to absorb oil instead of getting crispy.
- Fresh parmesan makes a noticeably better crust than pre-shredded because it contains less starch and coats more evenly.
- If your parmesan starts browning too quickly, lower the heat slightly to medium and increase the cooking time by a minute per side.
Common Mistakes to Avoid
- Uneven chicken thickness: Thick spots cook slower than thin spots, leaving you with dry edges and undercooked centers. Always pound to uniform 1/4-inch thickness.
- Skipping the egg wash: Without the egg mixture binding the parmesan to the flour, your coating slides right off during cooking and you’re left with bare chicken.
- Oil that’s not hot enough: Cold oil gets absorbed into the coating instead of crisping, resulting in a greasy, soggy exterior rather than that satisfying crunch.
- Moving the chicken too much while cooking: Constantly flipping or adjusting the chicken breaks the crust and prevents even browning on the bottom side.
- Overcrowding the pan: Too much chicken at once drops the oil temperature, and the pieces steam instead of fry, losing the crispy texture you’re after.
Serving Suggestions
This chicken shines alongside bright, fresh sides that balance the richness of the parmesan crust. Think about what flavors and textures will round out the meal and make it feel complete.
- Serve over a bed of al dente spaghetti or fettuccine with marinara sauce or brown butter and sage
- Pair with roasted vegetables like zucchini, bell peppers, or asparagus drizzled with lemon and olive oil
- Add a fresh arugula salad dressed with lemon vinaigrette to cut through the richness
- Serve alongside mashed potatoes or roasted garlic potatoes for comfort food vibes
- Plate it with garlic bread and a simple caprese salad for a complete Italian-inspired meal
Variations to Try
- Add Italian breadcrumbs to the parmesan mixture for extra crunch and texture. Mix about 1/2 cup breadcrumbs with the cheese, and you’ll get a more textured crust that stays crispy longer.
- Create a spicy version by adding 1/4 teaspoon cayenne pepper and 1/2 teaspoon red pepper flakes to the parmesan coating. This gives the dish a nice heat that builds with each bite.
- Make it lemon-forward by zesting one lemon into the parmesan mixture and serving the chicken with fresh lemon wedges. The brightness cuts through the richness beautifully.
- Try an herb-crusted version by mixing 2 tablespoons of fresh basil, oregano, or thyme into the parmesan coating. Fresh herbs add aromatic complexity that takes the dish to the next level.
- Create a baked version by placing the breaded chicken on a greased baking sheet and baking at 400 degrees Fahrenheit for 12 to 15 minutes. You won’t get quite the same crispness, but it reduces oil content and works great for lighter meals.
Dietary Adaptations
- Gluten-Free: Swap the all-purpose flour for gluten-free all-purpose flour or cornstarch to maintain a similar texture and crispness without the gluten.
- Dairy-Free: Replace the parmesan with nutritional yeast mixed with salt and garlic powder for a cheesy flavor, and use a plant-based milk instead of regular milk in the egg wash.
- Vegan: Use a chickpea flour and plant-based milk mixture instead of eggs, and combine nutritional yeast with panko breadcrumbs for the coating to get a crispy, flavorful result.
- Low-Carb/Keto: Skip the flour entirely and coat the chicken directly in an egg wash, then the parmesan mixture, which cuts carbs to nearly zero while keeping the crust crispy.
Storage and Reheating
Refrigerator
Store leftover chicken in an airtight container for up to 3 days. The coating will soften slightly as moisture accumulates, but the chicken stays safe and edible for this timeframe.
- Let chicken come to room temperature for 10 minutes before reheating for more even warming
- Store any melted cheese topping separately if possible to keep the crust as crispy as it can be
Freezer
Freeze cooked chicken in a single layer on a baking sheet for 2 hours, then transfer to a freezer bag for up to 2 months. This prevents the pieces from sticking together in a frozen lump.
- You can also freeze uncooked breaded chicken before frying, which is convenient for quick weeknight meals
Reheating
Reheat in a 350-degree Fahrenheit oven for 8 to 10 minutes to restore crispness without drying out the meat. The oven is your best bet for reheating because a microwave will make the coating soggy.
- For uncooked frozen chicken, add 2 to 3 extra minutes to the original frying time
- An air fryer at 350 degrees for 6 to 8 minutes also works beautifully if you have one available
Nutrition Information
| Nutrient | Amount |
|---|---|
| Calories | 380 |
| Total Fat | 18g |
| Saturated Fat | 6g |
| Carbohydrates | 14g |
| Fiber | 0g |
| Sugar | 1g |
| Protein | 42g |
| Sodium | 720mg |
| Cholesterol | 145mg |
These values are approximate and calculated based on standard ingredient sizes. Individual nutrition may vary depending on specific brands and preparation methods used.
Frequently Asked Questions
Can I Use Boneless, Skinless Chicken Thighs Instead of Breasts?
Yes, you can, though they’ll need slightly longer cooking time and a bit more oil. Thighs have more fat, so they stay juicier and more forgiving than breasts, making this a great option if you prefer darker meat.
How Far in Advance Can I Bread the Chicken?
You can bread the chicken up to 8 hours ahead and refrigerate it on a plate covered with plastic wrap. Chilling the breaded chicken actually helps the coating stick better and creates a crispier crust when fried.
What If the Parmesan Coating Starts Burning?
Lower your heat to medium and increase the cooking time slightly if you notice dark browning or burning on the parmesan. This prevents the coating from charring while the chicken cooks through to proper doneness.
Can I Make This in the Oven Instead of on the Stovetop?
You can bake it at 400 degrees Fahrenheit for 12 to 15 minutes on a greased baking sheet, though the crust won’t be quite as crispy as pan-fried. Brush the tops lightly with oil before baking to help the parmesan brown nicely.
Does the Cheese Topping Really Make a Difference?
Absolutely, it takes the dish from great to restaurant-quality by adding another layer of creamy, melted cheese that contrasts beautifully with the crispy parmesan crust. It’s optional, but I recommend it every single time.
What’s the Difference Between This and Regular Chicken Parmesan?
Traditional chicken parmesan involves sauce and often baking, while this version is pan-fried for maximum crispness without sauce. The Longhorn version emphasizes the savory parmesan crust itself rather than relying on marinara to carry the flavor.
Final Thoughts
This recipe proves that you don’t need a culinary degree or fancy equipment to make restaurant-quality chicken at home. With a few simple ingredients and proper technique, you’ll create something that impresses your family night after night.
Give it a try this week, and I promise you’ll be making it again soon. The combination of crispy, savory, and juicy is hard to beat, and once you master this basic technique, the variations and sides you can pair with it are endless.
If you love this recipe, explore more chicken dishes to expand your weeknight dinner options. Try our chicken cutlet recipe for a lighter take, or discover new flavor profiles with our chicken thigh marinade recipe for bolder, richer tastes.
Longhorn Parmesan Crusted Chicken
Ingredients
Equipment
Method
- Place each chicken breast on a cutting board, cover loosely with plastic wrap or a ziplock bag, and pound to an even 1/4-inch thickness.
- In the first shallow bowl, combine flour, 1/2 teaspoon salt, 1/4 teaspoon black pepper, and garlic powder.
- In the second bowl, whisk together eggs and milk until well combined.
- In the third bowl, mix grated parmesan cheese with remaining 1/2 teaspoon salt, 1/4 teaspoon black pepper, and dried Italian seasoning.
- Dredge each chicken breast in the flour mixture, shaking off excess, dip in the egg mixture, then press into the parmesan mixture to coat both sides.
- Heat vegetable oil in a large skillet over medium-high heat until shimmering or registers 350°F on a thermometer.
- Fry chicken breasts in the hot oil for 6 to 7 minutes per side until deep golden brown, working in batches to avoid overcrowding.
- Check doneness with an instant-read thermometer inserted into the thickest part, ensuring it reads 165°F, or cut to verify juices run clear.
- For an optional cheese topping, place a slice of provolone or mozzarella on each breast, cover skillet or tent with foil, and cook for 2 minutes until cheese melts.
- Transfer cooked chicken to a paper towel-lined plate to absorb excess oil and let rest for 2 to 3 minutes before serving.