
The aroma of warm lavash bread fresh off the griddle is something that transports you instantly to a sun-drenched kitchen in the Middle East or Armenia.
Lavash bread is a thin, soft flatbread that appears simple on the surface but delivers incredible versatility and texture when made right. This recipe takes just 30 minutes from start to finish, making it perfect for weeknight dinners, meal prep, or whenever you crave something warm and pillowy straight from your stovetop.
What makes this bread special is how it puffs up during cooking, creating those beautiful air pockets that make it ideal for wrapping around grilled meats, scooping up dips, or simply tearing and dipping in olive oil and za’atar.
Why You’ll Love This Recipe
Lavash bread checks every box for home cooks who want impressive results without fussy techniques or long fermentation times. The dough comes together in minutes, and you’ll have beautiful, restaurant-quality bread on your table faster than ordering takeout.
- Ready in under 30 minutes from mixing to eating
- Requires just 5 basic ingredients with no special equipment
- Soft, pliable texture perfect for wraps or dipping
- Naturally vegan and easily customizable with toppings
- Makes about 8 pieces, enough for a family meal or leftovers
My Experience Making This Recipe
I first made lavash bread years ago at a friend’s dinner party, and I was shocked at how something so impressive could be so straightforward. The dough felt silky and forgiving, nothing like the temperamental bread doughs I’d tackled before.
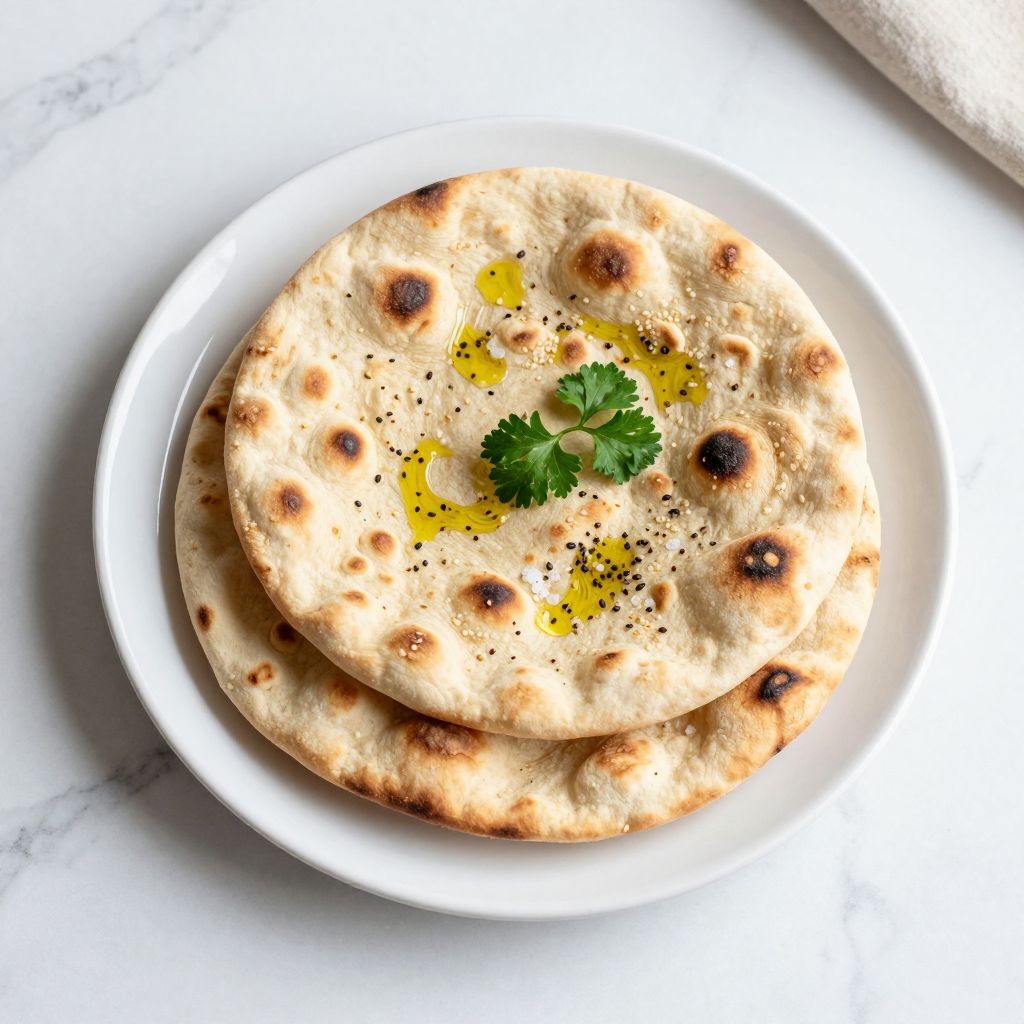
When that first piece came off the skillet, it puffed up like magic, and I watched my guests tear into it with genuine excitement. The bread was still warm and steaming, with just a hint of char on the bottom and a tender, chewy interior that made every other store-bought flatbread feel like cardboard.
Now I make it at least twice a month, sometimes adding nigella seeds or sesame on top for extra flavor and visual interest. My kids will actually choose this over potato chips for snacking, which tells you something about how good it is.
Recipe Overview
- Recipe Name: Lavash Bread
- Servings: 8 pieces
- Prep Time: 10 minutes
- Cook Time: 15 minutes
- Total Time: 25 minutes
- Course: Bread
- Cuisine: Middle Eastern, Armenian
- Calories per Serving: 150
Equipment You Will Need
- Large mixing bowl
- Measuring cups and spoons
- Whisk or fork
- Rolling pin
- Flat surface for rolling (cutting board or countertop)
- Cast iron skillet or non-stick griddle
- Tongs or spatula
- Kitchen towel or paper towels
Ingredients for Lavash Bread
- 2 cups all-purpose flour
- 3/4 cup warm water
- 1/2 teaspoon salt
- 1/2 teaspoon instant yeast
- 1 tablespoon olive oil, plus more for brushing
Ingredient Notes and Substitutions
- All-purpose flour is the standard choice because it provides enough gluten structure to create that signature chewy texture without being too dense. Bread flour will make the dough slightly tougher, while whole wheat flour creates a nuttier flavor but heavier crumb; use no more than 25% whole wheat if substituting.
- Warm water (around 110 degrees Fahrenheit) activates the yeast efficiently and speeds up dough development. Cold water will work but may add 5 to 10 minutes to the rising time.
- Salt seasons the dough and strengthens the gluten network for better structure. You can’t really substitute this, but you can reduce it slightly if watching sodium intake.
- Instant yeast provides the lift that creates those beautiful air pockets during cooking. Active dry yeast works fine as a 1-to-1 swap, though it may take a couple of minutes longer to activate.
- Olive oil adds richness and helps keep the dough tender and pliable. Neutral oils like canola or vegetable oil work if you prefer a less pronounced flavor.
How to Make Lavash Bread
Step 1: Mix the Dough
In a large bowl, whisk together the flour, salt, and instant yeast until evenly distributed. The yeast needs to be fully mixed with the flour so it activates uniformly when water is added.
Create a small well in the center of the flour mixture and pour in the warm water and olive oil. Stir with a fork or whisk until a shaggy dough forms with no dry flour remaining.
Step 2: Knead the Dough
Turn the dough out onto a lightly floured countertop and knead for 5 to 7 minutes until it becomes smooth and elastic. You’re looking for a soft, supple dough that springs back when you poke it, not a stiff or dry one.
The dough should be slightly sticky but not wet; if it sticks excessively to your hands, dust with a tiny bit more flour. This dough is intentionally softer than bread dough, which helps it cook quickly and stay tender.
Step 3: Let the Dough Rest
Place the dough back in the bowl, cover it with a kitchen towel, and let it rest for 10 minutes at room temperature. This resting period allows the gluten to relax, making the dough easier to roll out and shape.
You’ll notice the dough will feel noticeably softer and more extensible after this brief rest, which is exactly what you want.
Step 4: Divide the Dough
Turn the dough out onto the counter and divide it into 8 equal pieces using a bench scraper or knife. Rolling each piece into a ball and keeping them under a towel for 2 to 3 minutes helps them relax further before rolling.
If you skip this step, the dough pieces may resist rolling and spring back constantly, which is frustrating and unnecessary.
Step 5: Roll Out the Lavash
Take one piece of dough and roll it out on a lightly floured surface into a thin, oval shape about 1/8-inch thick. The thickness is important: too thin and the bread becomes crispy rather than chewy, too thick and it won’t cook through properly.
Don’t worry about it being perfectly uniform; rustic, slightly uneven pieces actually look more appealing and cook more interestingly.
Step 6: Preheat and Heat Your Skillet
Place a cast iron skillet or non-stick griddle over medium-high heat and let it warm for 2 to 3 minutes. A hot cooking surface is essential because it creates that light char and helps the dough puff slightly from the moisture turning to steam.
You’ll know it’s ready when a drop of water sizzles immediately on the surface.
Step 7: Cook the Lavash
Carefully lay one rolled piece of dough onto the hot skillet and cook for about 1 to 2 minutes until the bottom develops light golden-brown spots and the dough begins to puff. Flip it carefully with tongs or a spatula and cook the other side for another 1 to 2 minutes until set.
You want both sides to have a light golden color with some charred spots, but the bread should still feel soft and pliable, not crispy. Some puffing is normal and beautiful; it means the moisture is creating steam pockets.
Step 8: Stack and Serve
Transfer each cooked piece of lavash to a plate or clean kitchen towel and brush lightly with olive oil to keep it soft and pliable. Stack them on top of each other and cover with the towel to keep them warm.
The bread continues to soften as it rests, which is why stacking and covering is important. Serve warm, either plain or with your favorite toppings and accompaniments.
Pro Tip: If your skillet is too hot, the dough will char before cooking through; if it’s not hot enough, the bread becomes tough and chewy in the wrong way. Medium-high heat is your sweet spot, and the bread should sizzle audibly when it hits the pan.
Tips for the Best Lavash Bread
- Use warm water close to 110 degrees Fahrenheit for reliable yeast activation; water that’s too hot kills the yeast, while water that’s too cold slows fermentation unnecessarily.
- Roll the dough thin enough that you can almost see light through it, but not so thin that it tears; around 1/8-inch is the target thickness.
- Keep uncooked dough pieces under a towel while you cook the others; exposed dough dries out and becomes hard to work with.
- Don’t skip the 10-minute rest after mixing; it makes an enormous difference in how easily the dough rolls and how tender the final bread becomes.
- Brush finished lavash with olive oil immediately while still hot; this keeps it soft and adds a subtle richness that makes people ask for the recipe.
- If you have a wood-fired oven or outdoor grill, lavash cooks beautifully there too, taking just 30 to 45 seconds per side over high heat.
Common Mistakes to Avoid
- Using dough that’s too stiff makes rolling nearly impossible and results in tough, dense bread rather than the tender, pliable texture you’re after.
- Cooking at too high a temperature causes the outside to burn before the inside cooks through, creating a bitter taste and hard texture.
- Skipping the initial rest period means the dough stays tight and elastic, fighting you during rolling and producing shrunken pieces that puff unevenly.
- Not brushing with oil after cooking allows moisture to escape, turning the soft bread into something more like a cracker as it cools.
- Stacking the bread while it’s still steaming without covering it causes condensation to make it soggy rather than keeping it tender.
Serving Suggestions
Lavash bread is wonderfully versatile and works equally well as a side to a full meal or as the star of a casual dinner. Tear it, wrap it, dip it, or simply enjoy it warm with nothing but a sprinkle of salt.
- Wrap around grilled chicken, fresh vegetables, and yogurt sauce for a quick wrap dinner
- Serve alongside hummus, baba ganoush, and other Mediterranean dips for appetizers
- Tear into pieces and serve with soup or stew for dipping instead of crackers or traditional bread
- Brush with garlic oil and fresh herbs for a simple but stunning side dish to grilled meats
- Top with cheese and fresh herbs, roll into a log, and slice for a fun appetizer or snack
Variations to Try
- Seeded Lavash: Brush the rolled dough with water and sprinkle nigella seeds, sesame seeds, or a combination before cooking for added flavor and texture contrast.
- Herb Lavash: Mix fresh or dried herbs like oregano, thyme, or za’atar directly into the dough for a Mediterranean twist that pairs beautifully with cheese and olives.
- Garlic and Herb Topping: Brush the cooked bread with a mixture of melted butter, minced garlic, and fresh parsley for a richer, more savory version.
- Whole Wheat Version: Replace up to 25% of the all-purpose flour with whole wheat flour for a nuttier flavor and added fiber, though the texture will be slightly less delicate.
- Spiced Lavash: Add a pinch of sumac, cumin, or black sesame seeds to the dough for more complexity and visual interest.
Dietary Adaptations
- Gluten-Free: Substitute a high-quality gluten-free all-purpose flour blend that includes xanthan gum; the dough may be slightly stickier, so add flour a tablespoon at a time until you reach the right consistency, though the final texture will be less chewy.
- Dairy-Free: This recipe is naturally dairy-free as written, though you can brush with dairy-free oil or vegan butter if desired without any trade-offs.
- Vegan: This recipe is already fully vegan; simply ensure your yeast is vegan-certified, though most instant yeast naturally is.
- Low-Carb or Keto: Use almond flour or a keto-specific flour blend in place of all-purpose flour, but expect a denser, less pliable texture and the bread won’t puff as dramatically.
Storage and Reheating
Refrigerator
Wrap cooled lavash bread in plastic wrap or store in an airtight container for up to 4 days in the refrigerator. The bread will firm up slightly but remains perfectly edible and can be reheated easily.
- Stack the pieces with parchment paper between them to prevent sticking
- Store in an airtight container to prevent it from absorbing fridge odors
Freezer
Frozen lavash bread keeps for up to 3 months when wrapped tightly in plastic wrap and stored in a freezer bag. Thaw it at room temperature for 30 minutes or reheat straight from frozen.
- Wrap each piece individually for easy thawing and reheating
- Label the bag with the date so you remember when you made it
Reheating
To reheat, warm the bread in a dry skillet over medium heat for 30 to 45 seconds per side, or wrap it in a damp paper towel and microwave for 20 to 30 seconds. Either method restores the soft, pliable texture beautifully without drying it out.
- Skillet reheating gives you a chance to toast it lightly if you prefer more texture
- Microwave is fastest if you’re in a hurry but can sometimes make the bread slightly chewy
Nutrition Information
| Nutrient | Amount |
|---|---|
| Calories | 150 |
| Total Fat | 2.5g |
| Saturated Fat | 0.4g |
| Carbohydrates | 29g |
| Fiber | 1g |
| Sugar | 0g |
| Protein | 4.5g |
| Sodium | 290mg |
| Cholesterol | 0mg |
These values are approximate and based on standard all-purpose flour and olive oil; actual nutrition will vary slightly depending on your specific ingredients and cooking method.
Frequently Asked Questions
Can I make lavash bread ahead of time?
Yes, you can prepare the dough up to 2 hours ahead and keep it covered at room temperature, or refrigerate it overnight for a slower fermentation that develops more flavor. Just bring it back to room temperature for 15 to 20 minutes before rolling if using from the fridge.
Why didn’t my lavash puff up during cooking?
Puffing depends on steam generation, which requires a hot enough skillet and dough rolled thin enough to allow moisture to turn to steam quickly. Make sure your pan is screaming hot and your dough is rolled to about 1/8-inch thickness, and the puffing should happen naturally.
Can I freeze the uncooked dough?
Yes, you can freeze individual dough balls in plastic wrap for up to 3 weeks; thaw overnight in the refrigerator and bring to room temperature before rolling and cooking. The flavor will actually be slightly better from the slow fermentation.
What’s the difference between lavash and naan bread?
Lavash is thinner, more delicate, and uses minimal or no yeast, creating a softer bread that puffs minimally, while naan is thicker, uses more yeast or yogurt for tang, and often puffs dramatically. Both are delicious, just different in texture and application.
Can I cook lavash bread in the oven instead of on a skillet?
You can place rolled lavash on a preheated baking sheet in a 450-degree Fahrenheit oven for 3 to 4 minutes, but you’ll lose the nice charred spots and some of the chewy texture that stovetop cooking provides. The skillet method is really the best way to achieve the traditional result.
How do I know when the water is the right temperature for activating yeast?
Aim for water around 110 degrees Fahrenheit; it should feel warm to the touch but not hot enough to be uncomfortable for more than a few seconds. If you don’t have a thermometer, test it on your wrist like you would a baby’s bottle.
Final Thoughts
Lavash bread deserves a permanent place in your cooking rotation because it’s reliable, fast, and makes you look like a skilled baker without requiring actual skill or patience. Once you master this recipe, you’ll stop buying flatbreads at the grocery store and start making your own, which tastes infinitely better and costs almost nothing.
I hope you make this bread soon and experience that moment when it puffs beautifully on the hot skillet, filling your kitchen with the most wonderful aroma. Your family or dinner guests will be impressed, but the real magic is knowing you created something this good in less than half an hour from basic pantry ingredients.
If you loved this recipe and want to explore more homemade bread options, check out our fry bread recipe for another quick and delicious stovetop option. For those interested in thicker, puffier fried breads, our Navajo fry bread recipe offers a heartier alternative that uses similar techniques with wonderful results.
Lavash Bread
Ingredients
Equipment
Method
- In a large mixing bowl, whisk together the flour, salt, and instant yeast until evenly distributed.
- Make a small well in the center and pour in the warm water and olive oil; stir until a shaggy dough forms with no dry flour remaining.
- Turn the dough onto a lightly floured countertop and knead for 5 to 7 minutes until smooth and elastic.
- Place the dough back in the bowl, cover with a kitchen towel, and let rest for 10 minutes at room temperature.
- Divide the dough into 8 equal pieces, shape into balls, and let them rest under a towel for 2 to 3 minutes.
- Roll each piece on a floured surface into a thin oval about 1/8-inch thick.
- Preheat a cast iron skillet or non-stick griddle over medium-high heat for 2 to 3 minutes until a drop of water sizzles on contact.
- Cook each lavash on the hot skillet for 1 to 2 minutes per side until light golden brown spots and some puffing appear.
- Brush cooked lavash with olive oil, stack, and cover with a towel to keep warm.