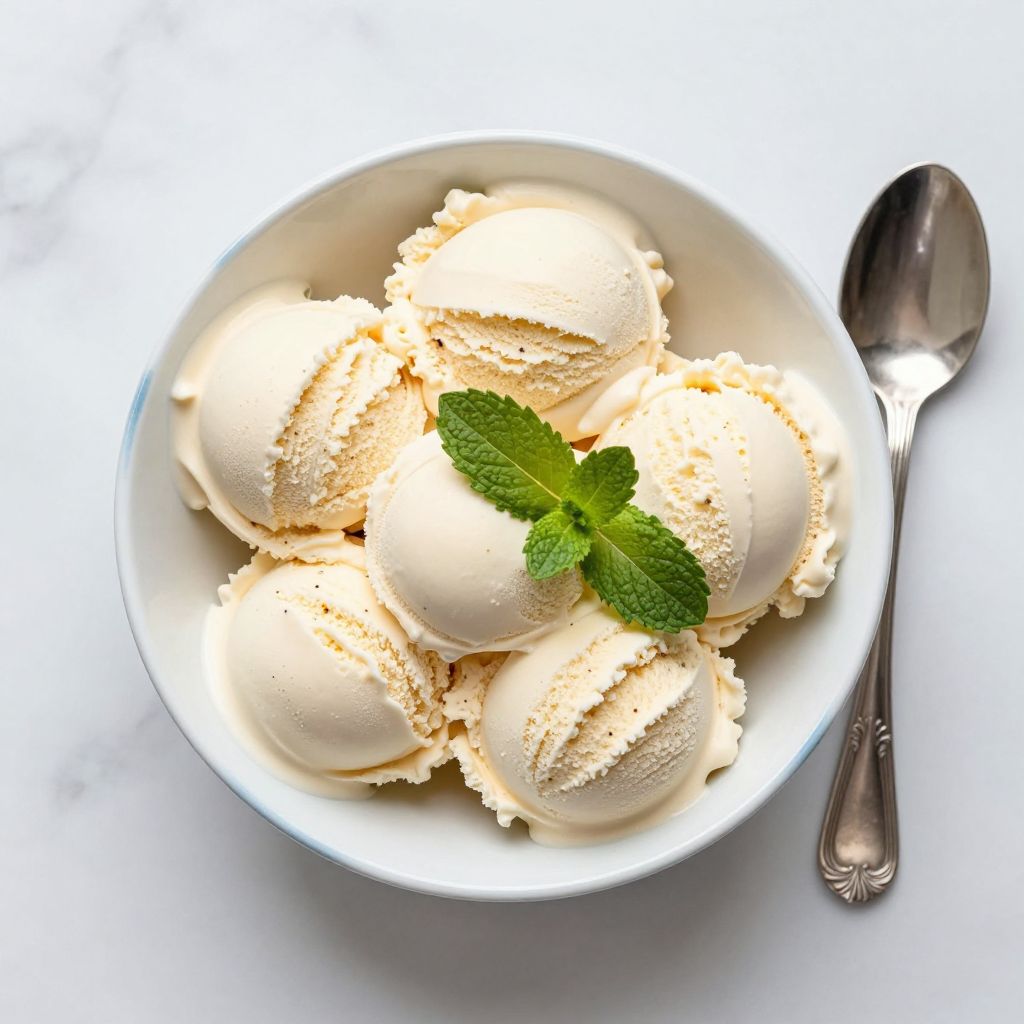
There’s something magical about the soft whir of a KitchenAid ice cream maker transforming simple cream and sugar into silky perfection right in your own kitchen.
Homemade ice cream made with a KitchenAid attachment tastes nothing like store-bought, and the whole process takes less time than you’d expect. This recipe gives you creamy, indulgent ice cream with a smooth texture that rivals any ice cream parlor, and you control every ingredient. Best of all, once you master the base, you can spin up endless flavors in under 30 minutes.
Why You’ll Love This Recipe
This KitchenAid ice cream recipe delivers restaurant-quality results at home with minimal effort and maximum flavor.
- Ready in under 30 minutes from start to finish with no special equipment beyond your KitchenAid mixer.
- Incredibly creamy texture with no ice crystals thanks to the constant churning action.
- Full control over sweetness and ingredient quality without additives or stabilizers.
- Endlessly customizable with flavoring options from vanilla to fruit to chocolate.
- Impresses guests and satisfies cravings without heating up your kitchen.
My Experience Making This Recipe
The first time I used my KitchenAid ice cream maker attachment, I honestly expected disappointment. I’d heard the frozen bowl attachment was just okay and not worth the hype.
Within five minutes of turning on the mixer, I realized I was completely wrong. The paddle worked steadily, and the mixture transformed into soft-serve consistency right before my eyes. The texture came out silky smooth, nothing like the grainy batches I’d made in my old ice cream maker.
My family demolished that first batch of vanilla in under an hour, and I’ve made it at least twice a month ever since. The best part? Cleanup is ridiculously easy, and you feel like a kitchen wizard for barely lifting a finger.
Recipe Overview
- Recipe Name: KitchenAid Ice Cream
- Servings: 4 to 6 servings
- Prep Time: 10 minutes
- Cook Time: 0 minutes
- Total Time: 30 minutes plus freezing time
- Course: Dessert
- Cuisine: American
- Calories per Serving: 285 calories
Equipment You Will Need
- KitchenAid stand mixer
- KitchenAid ice cream maker attachment
- Frozen bowl insert (freezer-safe)
- Flat paddle attachment for mixer
- Measuring cups and spoons
- Medium mixing bowl
- Whisk
- Thermometer (optional but helpful)
- Storage container with lid
Ingredients for KitchenAid Ice Cream
- Heavy cream, 2 cups, cold
- Whole milk, 1 cup, cold
- Granulated sugar, 3/4 cup
- Vanilla extract, 2 teaspoons
- Salt, 1/4 teaspoon
Ingredient Notes and Substitutions
- Heavy cream creates the rich, creamy base that gives ice cream its luxurious mouthfeel. You can substitute half and half, but the texture will be lighter and less dense.
- Whole milk balances richness with flavor and helps achieve the ideal consistency. Low-fat milk will make the ice cream icier and less smooth.
- Granulated sugar sweetens the base and lowers the freezing point so the mixture stays soft and scoopable. Honey or agave nectar works as a substitute, though you’ll need to use slightly less since they’re sweeter.
- Vanilla extract provides the classic flavor note that rounds out the cream. Pure vanilla bean paste creates more intense flavor and visible specks if you prefer a fancier touch.
- Salt enhances the overall flavor profile and prevents the ice cream from tasting one-dimensional. You can omit it if avoiding sodium, but your ice cream will taste flatter.
How to Make KitchenAid Ice Cream
Step 1: Freeze Your Bowl Attachment
Place your KitchenAid ice cream maker bowl in the freezer for at least 24 hours before you plan to make ice cream. A properly frozen bowl is the secret to smooth, creamy results because it constantly chills the mixture as it churns.
Step 2: Combine Cream and Milk
Pour 2 cups of cold heavy cream and 1 cup of cold whole milk into a clean mixing bowl. Cold ingredients are crucial because they freeze faster and churn more evenly in the mixer attachment.
Step 3: Add Sugar and Salt
Whisk in 3/4 cup of granulated sugar and 1/4 teaspoon of salt until the sugar dissolves completely. Dissolving the sugar beforehand ensures a smoother texture and prevents grittiness in the final ice cream.
Step 4: Stir in Vanilla Extract
Add 2 teaspoons of vanilla extract to the mixture and whisk it in thoroughly. Vanilla acts as both a flavoring and a liquid base that distributes evenly throughout the cream.
Step 5: Remove the Frozen Bowl
Take your frozen bowl attachment out of the freezer right before you’re ready to churn. A frozen bowl that sits out even a few minutes will warm up and won’t freeze the mixture efficiently.
Step 6: Attach the Paddle to Your Mixer
Secure the flat paddle attachment to your KitchenAid mixer and fit the frozen bowl onto the mixer base. Make sure everything is locked in place securely so the bowl doesn’t slip during churning.
Step 7: Pour and Begin Churning
Pour the ice cream mixture into the frozen bowl and turn the mixer to medium speed. The paddle will begin churning, and you’ll notice the mixture thickening within 5 minutes as it freezes.
Step 8: Churn Until Soft-Serve Consistency
Continue churning for 20 to 25 minutes until the ice cream reaches soft-serve consistency with a scoopable texture. The mixture should look pale, fluffy, and thick, similar to soft-serve from an ice cream truck.
Step 9: Transfer to a Storage Container
Once your ice cream reaches the desired texture, stop the mixer and scoop the ice cream into a freezer-safe container. Working quickly prevents melting, and the faster you transfer, the better the final texture.
Step 10: Freeze Until Firm
Cover your container and place it in the freezer for at least 4 hours or overnight for the ice cream to firm up to scooping consistency. Patience at this stage rewards you with perfectly scoopable ice cream that holds its shape.
Pro Tip: Always freeze your bowl attachment the night before you plan to make ice cream; a half-frozen bowl won’t churn efficiently and you’ll end up with grainy results.
Tips for the Best KitchenAid Ice Cream
- Keep all ingredients as cold as possible before churning. You can chill your mixing bowl in the freezer for 15 minutes before combining ingredients if you want extra insurance.
- Don’t overchurn past the soft-serve stage. Once it looks like soft-serve ice cream, stop immediately because churning longer won’t make it better and may warm it up.
- Add mix-ins like cookie pieces or fruit during the last 2 to 3 minutes of churning so they distribute evenly without getting pulverized. Wait too long and they’ll freeze solid and be hard to scoop.
- Taste the mixture before freezing in the bowl and adjust sweetness or vanilla as needed. Once it’s frozen, adjusting flavor becomes much harder.
- Use your ice cream within 2 weeks of making it for the best texture and flavor. Ice cream stored longer develops freezer burn and ice crystals.
- Let scooped ice cream sit on the counter for 2 to 3 minutes before eating if it’s too hard straight from the freezer. A quick soften makes scooping easier and eating more enjoyable.
Common Mistakes to Avoid
- Using a bowl that isn’t frozen solid will result in ice crystals and a grainy texture. Freezing your bowl for less than 24 hours creates the same problem, so always freeze it the night before.
- Adding warm or room temperature ingredients curbs the freezing process and slows churning drastically. Cold ingredients churn faster and produce smoother results every time.
- Churning for too long overworks the mixture and can cause separation where butter solids start to form. Stop as soon as you reach soft-serve consistency to keep everything emulsified.
- Skipping the final freezing step produces ice cream that’s too soft and melts instantly on a spoon. The 4-hour freeze is non-negotiable for proper scooping consistency.
- Using low-fat milk creates a icy texture because there’s not enough fat to coat ice crystals smoothly. Stick with whole milk or heavy cream for creamy results.
Serving Suggestions
Homemade KitchenAid ice cream shines on its own but pairs beautifully with almost any dessert or topping you can imagine. Here are my favorite ways to serve it.
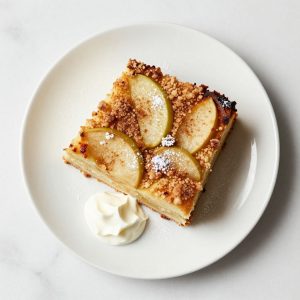
- Alongside warm apple pie or peach cobbler for a classic contrast of warm and cold.
- Topped with hot fudge sauce, crushed cookies, and whipped cream for an indulgent sundae.
- Sandwiched between two soft sugar cookies or brownies for a homemade ice cream sandwich.
- Served with fresh berries, honey drizzle, and granola for a lighter parfait-style dessert.
- Scooped into a cone and topped with sprinkles for simple, nostalgic enjoyment.
Variations to Try
- Chocolate Ice Cream: Add 3/4 cup of unsweetened cocoa powder whisked into the mixture before churning. The result is rich, deep chocolate flavor that melts on your tongue.
- Strawberry Ice Cream: Blend 1 cup of fresh or frozen strawberries with the mixture before churning and reduce sugar slightly. Fresh fruit creates a bright, summery flavor with natural color.
- Salted Caramel Ice Cream: Replace 1/4 cup of sugar with 1/4 cup of caramel sauce stirred into the cold mixture before churning. The sweet, buttery caramel flavor with a hint of salt creates an irresistible combination.
- Coffee Ice Cream: Dissolve 2 tablespoons of instant espresso powder in 1 tablespoon of hot water and add to the mixture after it cools. Coffee flavor is bold and pairs beautifully with vanilla undertones.
- Mint Chocolate Chip: Add 1/2 teaspoon of peppermint extract and reduce vanilla to 1 teaspoon, then fold in 1/2 cup of mini chocolate chips during the last minute of churning. The cooling mint with chocolate creates a refreshing treat.
Dietary Adaptations
- Dairy-Free: Use coconut cream and coconut milk in equal parts instead of heavy cream and whole milk. The result is creamy but slightly less rich, with subtle coconut flavor that complements vanilla well.
- Vegan: Substitute cashew cream made from soaked raw cashews blended with water for heavy cream, and use plant-based milk. Add 1 tablespoon of cornstarch to improve texture, and the ice cream will taste just as creamy.
- Low-Sugar: Use monk fruit sweetener or erythritol in place of sugar using the package’s conversion ratio. Lower sugar content affects freezing slightly, so your ice cream may stay softer than the original.
- Gluten-Free: This recipe is naturally gluten-free as written. Just verify your vanilla extract and any mix-ins don’t contain hidden gluten.
Storage and Reheating
Refrigerator
Homemade ice cream doesn’t keep well in the fridge because it will melt and separate. Store it in the freezer instead for best results.
- If your ice cream has melted and you want to save it, scoop it into a container and refreeze immediately.
Freezer
Properly stored ice cream keeps well in the freezer and tastes great for up to 2 weeks. After that, ice crystals form and texture degrades.
- Use an airtight container to prevent freezer burn and odor absorption.
- Keep the container at the back of the freezer where temperature stays most consistent.
- Cover the surface with plastic wrap before sealing the lid to minimize ice crystal formation.
Reheating
Since ice cream is served frozen, you don’t reheat it. If it’s too hard straight from the freezer, let it sit on the counter for 2 to 3 minutes to soften slightly.
- Never microwave ice cream, as it will melt unevenly and separate.
- Transfer it to the fridge for 10 to 15 minutes if you want it very soft throughout.
Nutrition Information
| Nutrient | Amount |
|---|---|
| Calories | 285 |
| Total Fat | 24g |
| Saturated Fat | 15g |
| Carbohydrates | 18g |
| Fiber | 0g |
| Sugar | 17g |
| Protein | 3g |
| Sodium | 95mg |
| Cholesterol | 85mg |
Nutrition values are approximate and based on 5 servings. Actual values vary based on specific brands and portion sizes.
Frequently Asked Questions
Can I make this recipe without a KitchenAid mixer?
Technically yes, but you’d need an ice cream maker with its own freezing mechanism. The KitchenAid attachment is affordable and requires no electricity of its own, making it one of the easiest methods available.
How long does the bowl need to freeze?
At least 24 hours is ideal for a solid freeze throughout. If you’re in a rush, 12 hours minimum works, but you might notice the churn time increases slightly.
Can I make a double batch?
The KitchenAid ice cream maker bowl has a capacity of about 1.5 quarts, so you can make slightly more than one batch at a time but not quite double. Make two consecutive batches instead for best results.
Why did my ice cream come out grainy?
A grainy texture usually means the bowl wasn’t frozen solid, the ingredients weren’t cold enough, or you churned too long. Always freeze your bowl 24 hours in advance and use ice-cold ingredients for smooth, creamy results.
Can I use this recipe to make gelato?
Yes, but gelato typically uses more milk and less cream than ice cream. Use 1.5 cups of milk and 1.5 cups of cream, and reduce sugar to 1/2 cup for a lighter texture that still churns beautifully in your KitchenAid.
What’s the difference between soft-serve and hard-pack ice cream?
Soft-serve consistency happens right after churning, when ice cream is scoopable but still creamy and loose. Hard-pack forms after 4 or more hours in the freezer, when ice cream becomes firm enough to hold its shape perfectly.
Can I add alcohol to this recipe?
Yes, add up to 2 tablespoons of liqueur or spirits to the mixture before churning. Alcohol lowers the freezing point, so your ice cream will stay slightly softer than usual.
Final Thoughts
Making ice cream with your KitchenAid mixer proves that restaurant-quality desserts don’t require fancy equipment or complicated techniques. This recipe proves that simplicity wins every time.
Once you nail the basic vanilla version, you’ll find yourself spinning up new flavors constantly. Your friends and family will think you’ve discovered some secret culinary magic, but you and I know it’s just cold cream and a great attachment doing the heavy lifting.
KitchenAid Ice Cream
Ingredients
Equipment
Method
- Place your KitchenAid ice cream maker bowl in the freezer for at least 24 hours before you plan to make ice cream.
- Pour 2 cups of cold heavy cream and 1 cup of cold whole milk into a clean mixing bowl.
- Whisk in 3/4 cup of granulated sugar and 1/4 teaspoon of salt until the sugar dissolves completely.
- Add 2 teaspoons of vanilla extract to the mixture and whisk it in thoroughly.
- Take your frozen bowl attachment out of the freezer right before you're ready to churn.
- Secure the flat paddle attachment to your KitchenAid mixer and fit the frozen bowl onto the mixer base.
- Pour the ice cream mixture into the frozen bowl and turn the mixer to medium speed.
- Continue churning for 20 to 25 minutes until the ice cream reaches soft-serve consistency with a scoopable texture.
- Once your ice cream reaches the desired texture, stop the mixer and scoop the ice cream into a freezer-safe container.
- Cover your container and place it in the freezer for at least 4 hours or overnight for the ice cream to firm up to scooping consistency.