
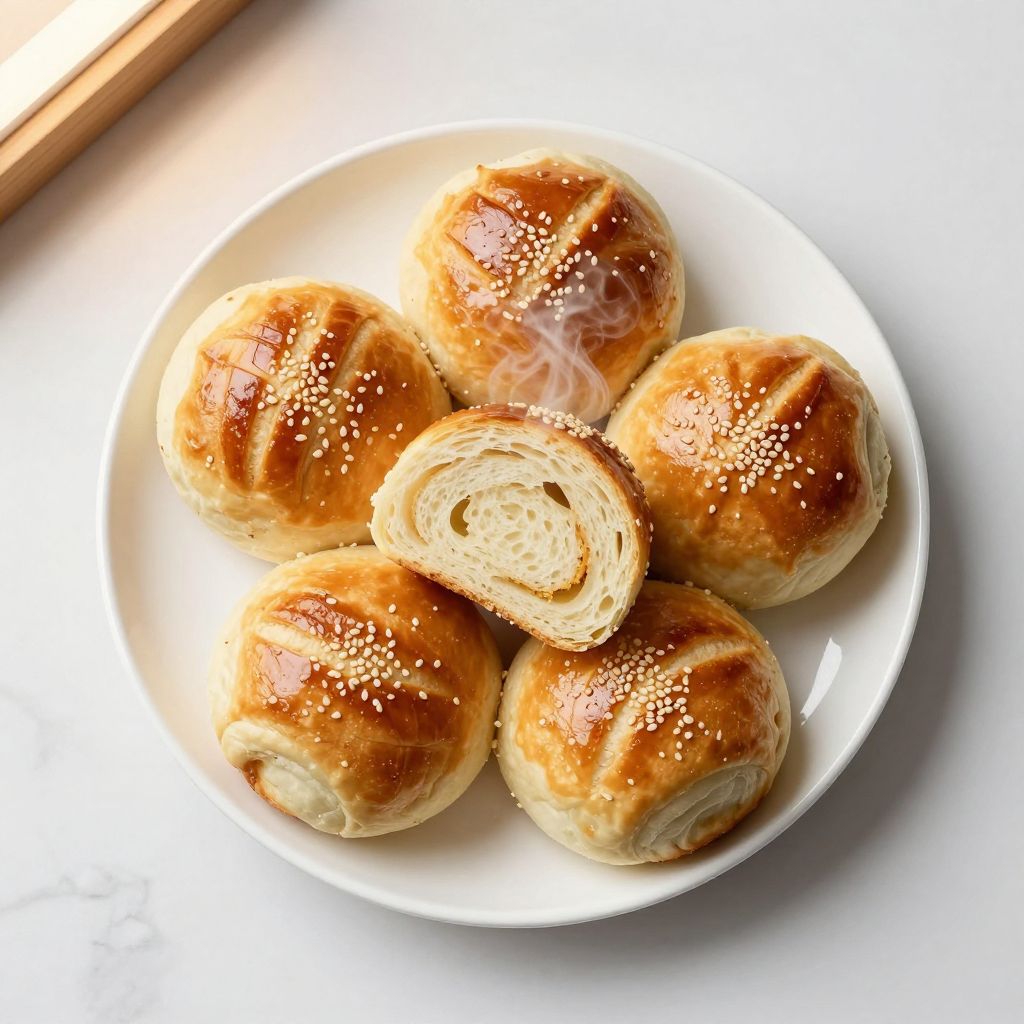
There’s nothing quite like biting into a warm kaiser roll fresh from the oven, with that crispy exterior giving way to a soft, pillowy interior.
These distinctive rolls, with their signature crown-like top, are a bakery staple for good reason. A homemade kaiser roll beats the store-bought version every single time, and once you master this recipe, you’ll understand why bakeries charge what they do.
What makes this recipe special is how approachable it is, combined with the impressive results that will make your kitchen smell like a professional bakery. The rolls are sturdy enough for hearty sandwiches yet tender enough to enjoy plain with butter.
Why You’ll Love This Recipe
Making kaiser rolls at home sounds intimidating, but this recipe breaks down the process into manageable steps that even bread beginners can follow.
- Produces a golden, crispy crust with a soft, airy crumb that rivals any bakery
- The distinctive crown shape looks impressive and impresses everyone at the table
- Perfect for sandwiches, sliders, or serving alongside soup and stew
- Makes about a dozen rolls, so there’s plenty to share or freeze
- The dough is forgiving and actually improves with a slow overnight rise
My Experience Making This Recipe
I discovered kaiser rolls during a trip to Vienna years ago, and I’ve been chasing that memory ever since. The first time I attempted them at home, my kitchen filled with that unmistakable bakery aroma, and my family gathered around before they even came out of the oven.
The shaping takes a bit of practice, but by roll number three or four, your hands figure out the rhythm. I love how the sesame seeds catch the light when they’re golden brown, and the contrast between that snappy crust and tender interior is absolutely worth the effort.
These rolls have become my go-to for hosting brunch and for packed lunches throughout the week. My kids actually request these instead of regular bread, which tells you everything you need to know about how good they taste.
Recipe Overview
- Recipe Name: Kaiser Roll Recipe
- Servings: 12 rolls
- Prep Time: 30 minutes (plus rising time)
- Cook Time: 20 minutes
- Total Time: 2 hours 30 minutes (plus overnight rise)
- Course: Bread
- Cuisine: Austrian/European
- Calories per Serving: 180 calories
Equipment You Will Need
- Stand mixer with dough hook attachment
- Large mixing bowl
- Kitchen scale (recommended for accuracy)
- Measuring cups and spoons
- Baking sheets
- Parchment paper
- Bench scraper or dough cutter
- Proofing box or warm area for rising
- Spray bottle for steam
- Oven thermometer
- Sharp knife or bread lame for scoring
Ingredients for Kaiser Roll Recipe
- All-purpose flour: 500 grams (about 4 cups)
- Warm water: 325 milliliters (about 1 and 1/3 cups)
- Instant yeast: 7 grams (2 and 1/4 teaspoons)
- Sea salt: 10 grams (2 teaspoons)
- Sugar: 5 grams (1 teaspoon)
- Vegetable oil: 15 milliliters (1 tablespoon)
- Sesame seeds: 30 grams (3 tablespoons) for topping
- Malt powder: 5 grams (1 teaspoon) optional, for deeper crust color
Ingredient Notes and Substitutions
- All-purpose flour: This provides the right balance of protein for structure without being too dense. Bread flour works beautifully if you want a chewier crumb, but use 5 percent less water.
- Instant yeast: Also called rapid-rise or bread machine yeast, it ferments slightly faster than active dry yeast. You can substitute active dry yeast at a 1:1 ratio, but add 5 to 10 minutes to rising times.
- Sea salt: This enhances flavor and strengthens gluten development in the dough. Kosher salt works fine; use the same volume and adjust if using table salt, which is denser.
- Vegetable oil: Keeps the rolls tender and prevents sticking. Olive oil adds flavor but can overpower the delicate taste; reserve it for finishing instead.
- Malt powder: Creates a deeper, more complex crust color and subtle sweetness. Skip it if unavailable; the rolls will still be excellent, just slightly lighter in color.
How to Make Kaiser Roll Recipe
Step 1: Mix the Dough
Combine the flour, instant yeast, sugar, and sea salt in the bowl of your stand mixer fitted with the dough hook. Mixing the dry ingredients first ensures the salt and yeast distribute evenly, which prevents the yeast from dying if it contacts too much salt in one spot.
Pour in the warm water and vegetable oil, then mix on low speed for 2 minutes until a shaggy dough forms. This hydration level creates an open, airy crumb structure that makes the rolls pillowy rather than dense.
Step 2: Knead the Dough
Increase the mixer speed to medium and knead for 8 to 10 minutes until the dough becomes smooth, elastic, and springs back when poked. You’ll notice the dough climbing the dough hook; this indicates proper gluten development.
The dough should feel soft but not sticky; if it sticks to the bowl sides, add a tablespoon of flour at a time. Proper kneading creates the network that traps steam during baking, which gives the rolls their characteristic light texture.
Step 3: First Rise
Transfer the dough to a lightly oiled bowl, turning it to coat all sides. This prevents a skin from forming on top, which would trap moisture and create an uneven rise.
Cover the bowl with a damp kitchen towel and let it rise in a warm place for 1 hour until doubled in size. Alternatively, place it in the refrigerator overnight; the slow fermentation develops deeper flavor and makes the dough easier to shape.
Step 4: Divide the Dough
Turn the dough out onto a lightly floured work surface and divide it into 12 equal pieces using a bench scraper. Weighing each piece on a scale ensures uniformity, so all rolls bake at the same rate and look professional.
Work gently to avoid deflating the dough too much; you want to preserve those gas bubbles that create the tender crumb. Roll each piece into a loose ball and let them rest for 10 minutes, which relaxes the gluten and makes final shaping easier.
Step 5: Shape the Rolls
Take one ball of dough and flatten it into a disk about 3 inches across. Using your fingers or a small tool, press down firmly at the center, creating a crater.
Fold the edges toward the center, slightly overlapping them like you’re closing a envelope, then flip it seam-side down on the work surface. Roll it gently until it forms a smooth ball, then place it seam-side up on a parchment-lined baking sheet. The folded, seam-side-up orientation creates the traditional kaiser crown shape when the dough expands.
Step 6: Create the Crown Pattern
Here’s where the magic happens. Using a small knife or scissors held at a 45-degree angle, make five shallow cuts radiating from the center point of each roll, creating a crown or star pattern.
Don’t cut too deep; a quarter-inch depth is enough to guide the rise without weakening the structure. This scoring determines how the steam escapes and shapes the roll as it bakes, resulting in the iconic crown appearance.
Step 7: Second Rise
Cover the shaped rolls with a damp towel and let them rise for 45 minutes to 1 hour until they’re puffy and nearly doubled in size. The rolls should hold a slight indent when you poke them gently with your finger.
Avoid over-proofing, which causes the dough to spread sideways rather than rise upward. If they rise too much, the rolls lose their structure and don’t bake as evenly.
Step 8: Prepare for Baking
About 30 minutes before baking, preheat your oven to 450 degrees Fahrenheit and place a baking stone or inverted sheet pan on the lowest rack. This creates steam in the oven, which gelatinizes the starch on the dough’s surface and creates that crispy crust.
Prepare an egg wash by whisking 1 egg with 1 tablespoon of water. Lightly brush this onto each roll just before baking, which gives them that glossy, golden appearance.
Step 9: Add Toppings and Score
After applying the egg wash, sprinkle sesame seeds generously onto each roll, pressing them gently so they stick. The seeds add visual appeal and a subtle nutty flavor.
For authentic kaiser rolls, make one final gentle score across the top of each roll with a sharp knife. This guides the steam release and adds to the finished appearance.
Step 10: Bake
Carefully transfer the baking sheet to the oven and pour about half a cup of hot water into the preheated baking stone or pan below. This creates steam that keeps the crust from setting too quickly, allowing the rolls to expand fully.
Bake for 18 to 22 minutes until the rolls are deep golden brown and sound hollow when tapped on the bottom. The internal temperature should reach 205 degrees Fahrenheit when measured with an instant-read thermometer.
Step 11: Cool
Transfer the rolls to a wire rack and let them cool for at least 30 minutes before slicing. The crumb continues to set as they cool, so cutting into them too early results in a gummy texture.
Serve them warm with butter, or let them cool completely if you plan to make sandwiches. The rolls actually taste even better the next day as the flavors meld and mellow.
Pro Tip: If you don’t have a proofing box, create a warm environment by turning your oven on for just 30 seconds, then turning it off and placing your dough inside with the door closed. This maintains steady warmth without any risk of overheating.
Tips for the Best Kaiser Roll Recipe
- Use an oven thermometer to ensure your oven is at the correct temperature; even a 25-degree difference affects browning and crust texture. Most home ovens run hot or cold, so this simple tool eliminates guesswork.
- Invest in a scale for measuring flour and other ingredients, especially once you start making bread regularly. Volume measurements can vary by 10 to 15 percent depending on how you scoop, so weight guarantees consistency.
- Don’t skip the overnight cold fermentation if you have the time; it develops more complex flavor and makes the dough less sticky and easier to handle. The slow rise also allows the gluten to relax naturally without aggressive kneading.
- Watch the rolls during the final five minutes of baking and rotate the pan if one side is browning faster than the other. Every oven has hot spots, and rotating ensures even color on all rolls.
- Create steam in the oven by pouring water into a preheated pan on the lower rack rather than directly onto the oven floor, which is unsafe. The steam gelatinizes the starch and gelatinizes the exterior, creating that crispy, restaurant-quality crust.
- Score the rolls consistently and at the same angle so they bake uniformly and look professional on the plate. Inconsistent scoring creates uneven steam release and can result in some rolls splitting awkwardly.
Common Mistakes to Avoid
- Using water that’s too hot (above 120 degrees Fahrenheit) kills the yeast and results in dense, unleavened rolls. Aim for water that feels comfortably warm to the touch, around 105 to 110 degrees.
- Adding too much flour during shaping makes the dough tough and ruins the tender crumb. Use just enough flour to prevent sticking, and brush excess flour off before baking.
- Over-proofing the rolls causes them to collapse in the oven or spread sideways instead of rising upward. Trust the visual cues: they should feel airy but still hold their shape when poked gently.
- Skipping the steam step results in a thick, hard crust instead of a crispy, thin one. The steam is essential for proper crust development, so don’t skip this part of the process.
- Cutting into the rolls before they’ve cooled traps steam inside and turns the interior gummy and dense. Let them cool for at least 30 minutes, even though it’s tempting to eat them warm.
Serving Suggestions
Kaiser rolls are incredibly versatile and work beautifully in countless ways beyond the traditional sandwich. Their sturdy yet tender structure makes them ideal for both casual weeknight meals and more formal gatherings.
- Classic deli sandwiches with roast beef, horseradish cream, and arugula
- Hearty sliders with beef patties, caramelized onions, and melted cheese
- Pulled pork or chicken sandwiches with coleslaw and a tangy sauce
- Breakfast sandwiches with fried eggs, bacon, and aged cheddar
- Toasted with butter and jam for breakfast, or dipped in soup for lunch
Variations to Try
- Whole Wheat Kaiser Rolls: Substitute 150 grams of whole wheat flour for 150 grams of all-purpose flour for a nuttier flavor and denser texture. The rolls will require slightly more water and a bit more rising time, but the earthy taste is wonderful.
- Everything Bagel Rolls: Skip the sesame seeds and instead top the egg wash with a mixture of sesame seeds, poppy seeds, dried garlic, dried onion, and fleur de sel. The savory seasoning transforms these into a bold, flavorful roll perfect for deli sandwiches.
- Herb and Cheese Rolls: Brush the shaped rolls with a mixture of melted butter, fresh thyme, and minced garlic before proofing, then top with grated Gruyere or Emmental cheese instead of sesame seeds. The cheese melts into the roll during baking, adding richness and aroma.
- Multigrain Kaiser Rolls: Replace 50 grams of all-purpose flour with a multigrain flour blend or mix of oats, flax seeds, and sunflower seeds mixed into the dough. This adds texture, nutrition, and a subtle grain flavor that pairs well with hearty fillings.
- Spelt Kaiser Rolls: Use spelt flour in place of all-purpose flour at a 1:1 ratio; spelt produces a slightly sweeter, nuttier roll with a unique flavor profile. Spelt dough behaves a bit differently, so start checking for doneness about two minutes earlier.
Dietary Adaptations
- Gluten-Free: Replace the all-purpose flour with a high-quality gluten-free bread flour blend that includes xanthan gum. Add 2 tablespoons of psyllium husk powder to improve structure, though the crumb will be slightly denser than the original.
- Dairy-Free: This recipe contains no dairy, so it’s already vegan and dairy-free. Simply confirm that your yeast is vegan and check any malt powder for hidden dairy.
- Lower-Carb: Replace half the all-purpose flour with almond flour or coconut flour, though this significantly changes the texture and requires extra water. The rolls will be denser and less authentic, so this adaptation works better for those seeking moderate carb reduction rather than strict low-carb baking.
- High-Protein: Add 2 tablespoons of vital wheat gluten to the dough to increase protein content and create a chewier texture. This also strengthens the dough structure, allowing for slightly longer fermentation times without over-proofing.
Storage and Reheating
Refrigerator
Store cooled rolls in an airtight container or resealable bag for up to 5 days in the refrigerator. The rolls gradually firm up as they sit, but they remain perfectly good for sandwiches and toast.
- Keep them in their original container to retain moisture and prevent them from drying out
- Place a paper towel in the container to absorb excess moisture and prevent mold
- If they harden, toast them or steam them gently to restore softness
Freezer
Freeze completely cooled rolls in a freezer bag for up to 3 months, which is perfect for having fresh bread on hand anytime. Freezing halts staling almost completely, so thawed rolls taste nearly as fresh as the day they were baked.
- Wrap individual rolls in parchment paper before bagging to prevent freezer burn and make them easy to grab one at a time
- Remove as much air as possible from the freezer bag to minimize ice crystal formation
- Thaw at room temperature for 1 to 2 hours, or overnight in the refrigerator for best results
Reheating
Refresh refrigerated or frozen rolls by wrapping them in foil and warming in a 350-degree Fahrenheit oven for 5 to 10 minutes until heated through. This method restores their soft interior and crispy exterior without drying them out.
- For a quicker option, split the roll and toast the cut sides in a skillet with a bit of butter for a crispy exterior
- Never microwave rolls directly, as this makes them tough and rubbery within seconds
- Steaming split rolls in a covered pot over simmering water for 2 to 3 minutes also works beautifully if you don’t want to use the oven
Nutrition Information
| Nutrient | Amount |
|---|---|
| Calories | 180 |
| Total Fat | 2.5 grams |
| Saturated Fat | 0.5 grams |
| Carbohydrates | 34 grams |
| Fiber | 1.2 grams |
| Sugar | 1 gram |
| Protein | 6 grams |
| Sodium | 380 milligrams |
| Cholesterol | 0 milligrams |
These values are approximate and calculated for one roll without any fillings or spreads. Nutritional content varies slightly based on your specific ingredients and baking method.
Kaiser Roll Recipe
Ingredients
Equipment
Method
- Combine flour, instant yeast, sugar, and sea salt in the bowl of a stand mixer fitted with the dough hook.
- Pour in warm water and vegetable oil and mix on low speed for 2 minutes until a shaggy dough forms.
- Increase mixer speed to medium and knead for 8 to 10 minutes until the dough is smooth, elastic, and springs back when poked.
- Transfer the dough to a lightly oiled bowl, cover with a damp towel, and let rise in a warm place for 1 hour until doubled in size.
- Turn the dough onto a floured surface and divide into 12 equal pieces; shape each into a loose ball and let rest for 10 minutes.
- Flatten each ball into a 3-inch disk, fold edges toward the center, flip seam-side down, and roll into a smooth ball.
- Place rolls seam-side up on a parchment-lined baking sheet and make five shallow cuts radiating from the center to form a crown pattern.
- Cover the rolls with a damp towel and let rise for 45 to 60 minutes until puffy and nearly doubled.
- Preheat the oven to 450°F and place a baking stone or inverted pan on the lowest rack; whisk 1 egg with 1 tablespoon water for egg wash.
- Brush each roll with egg wash, sprinkle with sesame seeds, and make one final gentle score across the top.
- Pour 1/2 cup hot water into the preheated pan to create steam and bake rolls for 18 to 22 minutes until deep golden brown and hollow sounding.
- Transfer the rolls to a wire rack and cool for at least 30 minutes before slicing and serving.