
There’s nothing quite like a slice of Icebox Cake on a warm day, is there? This no-bake dessert combines layers of creamy goodness with crunchy cookies, creating a delightful treat that feels both nostalgic and refreshingly modern.
Perfect for gatherings or a casual family dinner, this recipe shines with its rich flavor and smooth texture. Plus, it’s a breeze to whip together, making it a go-to when you need a crowd-pleaser without spending hours in the kitchen.
Why You’ll Love This Recipe
This Icebox Cake is a winner for so many reasons.
- No baking required, making it a quick and easy dessert.
- Layers of flavor with creamy filling and crunchy cookies.
- Perfect for warm weather gatherings or potlucks.
- Customizable with your favorite flavors and toppings.
- It tastes even better the next day, if it lasts that long!
My Experience Making This Recipe
Making this Icebox Cake is like taking a trip down memory lane. I remember my grandmother preparing it on hot summer days, and the anticipation of that first slice was always thrilling.
The combination of rich cream and soft cookies is simply divine, and watching the layers come together brings a sense of accomplishment. Every bite reminds me why this cake is such a beloved classic.
Recipe Overview
- Recipe Name: Icebox Cake
- Servings: 8
- Prep Time: 20 minutes
- Cook Time: 0 minutes
- Total Time: 4 hours (including chilling)
- Course: Dessert
- Cuisine: American
- Calories per Serving: 300
Equipment You Will Need
- 9-inch springform pan
- Mixing bowls
- Electric mixer or whisk
- Spatula
- Measuring cups and spoons
Ingredients for Icebox Cake
- 2 cups heavy whipping cream
- 1/2 cup powdered sugar
- 1 teaspoon vanilla extract
- 1 package (14 oz) chocolate wafer cookies
- 1/2 cup chocolate shavings or grated chocolate (optional)
Ingredient Notes and Substitutions
- Heavy whipping cream: Used for a rich and creamy texture, but you can substitute with coconut cream for a dairy-free option.
- Powdered sugar: Adds sweetness and helps stabilize the cream; granulated sugar can work but may not dissolve as well.
- Chocolate wafer cookies: These provide the classic texture; you can use graham crackers for a different flavor.
- Chocolate shavings: Optional for garnish, but they add a lovely finishing touch; use crushed nuts for extra crunch.
How to Make Icebox Cake
Step 1: Whip the Cream
Begin by pouring the heavy whipping cream into a mixing bowl. Beat it with an electric mixer or whisk until soft peaks form, which usually takes 2-3 minutes.
Step 2: Add Sugar and Vanilla
Next, add the powdered sugar and vanilla extract to the whipped cream. Continue mixing until stiff peaks form, ensuring your cream is light and fluffy.
Step 3: Layer the Cookies
Take your springform pan and arrange a single layer of chocolate wafer cookies on the bottom. Overlap them slightly for full coverage.
Step 4: Spread the Cream
Spread a layer of the whipped cream mixture over the cookies, smoothing it out evenly. This creamy layer is what makes the cake so decadent.
Step 5: Repeat Layers
Continue layering cookies and whipped cream until you reach the top of the pan. Aim for at least three layers, finishing with a layer of whipped cream.
Step 6: Chill in the Refrigerator
Cover the springform pan with plastic wrap and place it in the refrigerator. Chill for at least 4 hours, but overnight is even better to let the flavors meld.
Step 7: Prepare for Serving
Once chilled, remove the cake from the pan. Use a sharp knife to gently release the sides before removing the springform.
Step 8: Garnish and Serve
Top the cake with chocolate shavings or any desired garnish just before serving. Slice and enjoy the delightful combination of textures and flavors!
Pro Tip: For best results, let the cake chill overnight to achieve optimal flavor and texture.
Tips for the Best Icebox Cake
- Use cold cream for whipping; this helps it whip up better.
- Don’t rush the chilling process; it’s crucial for the cookies to soften.
- Experiment with flavors by adding in fruit or flavored extracts.
- Store leftovers covered in the fridge for up to three days.
- Consider using a mix of cookies for added texture and taste.
Common Mistakes to Avoid
- Not whipping the cream enough can lead to a runny cake.
- Layering too many cookies can make it hard to slice.
- Skipping the chill time makes the cake less cohesive.
- Using warm cream will not whip properly; always start cold.
Serving Suggestions
This Icebox Cake pairs wonderfully with a variety of flavors and beverages.
- Serve with fresh berries for a pop of color and tartness.
- Pair with a rich coffee to balance the sweetness.
- Add a drizzle of chocolate or caramel sauce on top.
- Offer a scoop of vanilla ice cream on the side.
Variations to Try
- Use strawberry wafers and fresh strawberries for a fruity twist.
- Try a mint chocolate version by adding peppermint extract.
- Incorporate layers of peanut butter for a nutty flavor.
- Make it a coffee lover’s dream by adding espresso powder to the cream.
Dietary Adaptations
- Gluten-free: Use gluten-free cookies to make this dessert accessible.
- Dairy-free: Coconut cream is a great substitute for heavy cream.
- Vegan: Use plant-based whipping cream and dairy-free cookies.
- Low-carb/keto: Opt for sugar-free whipped cream and low-carb cookies.
Storage and Reheating
Refrigerator
Store the icebox cake in the fridge, covered tightly.
- It will last up to three days.
- Keep it in the springform pan for easy slicing.
Freezer
You can freeze this cake for longer storage if needed.
- Wrap it tightly in plastic wrap and foil.
- It can last up to a month in the freezer.
Reheating
No need to reheat; serve it cold straight from the fridge.
- Let it sit for a few minutes after taking it out for easier slicing.
Nutrition Information
| Nutrient | Amount |
|---|---|
| Calories | 300 |
| Total Fat | 22g |
| Saturated Fat | 13g |
| Carbohydrates | 24g |
| Fiber | 1g |
| Sugar | 14g |
| Protein | 3g |
| Sodium | 30mg |
| Cholesterol | 80mg |
This nutritional information is approximate and may vary based on specific ingredients used.
Frequently Asked Questions
Can I make this cake ahead of time?
Absolutely! This cake is perfect for making a day in advance, as the flavors meld beautifully overnight.
What can I substitute for chocolate wafer cookies?
Graham crackers or even vanilla wafers can work well if you want a different flavor profile.
How should I store leftover icebox cake?
Keep the leftover cake covered in the refrigerator for up to three days for the best texture.
Why is my whipped cream not stiff?
If the cream is warm or if it hasn’t been whipped long enough, it won’t achieve the right texture.
Can I use flavored extracts in the cream?
Yes! Vanilla, almond, or even coffee extracts can add a delightful twist to your whipped cream.
Final Thoughts
This Icebox Cake is more than just a dessert; it’s a nostalgic treat that brings back memories of summer gatherings and family celebrations. Don’t hesitate to customize it to your tastes—this is your chance to get creative!
I encourage you to try this recipe and share it with friends and family. You might just find it becomes a staple at your gatherings!
If you’re looking for more delicious recipes, check out this lemon icebox pie recipe or try making cherries in the snow for another delightful dessert!
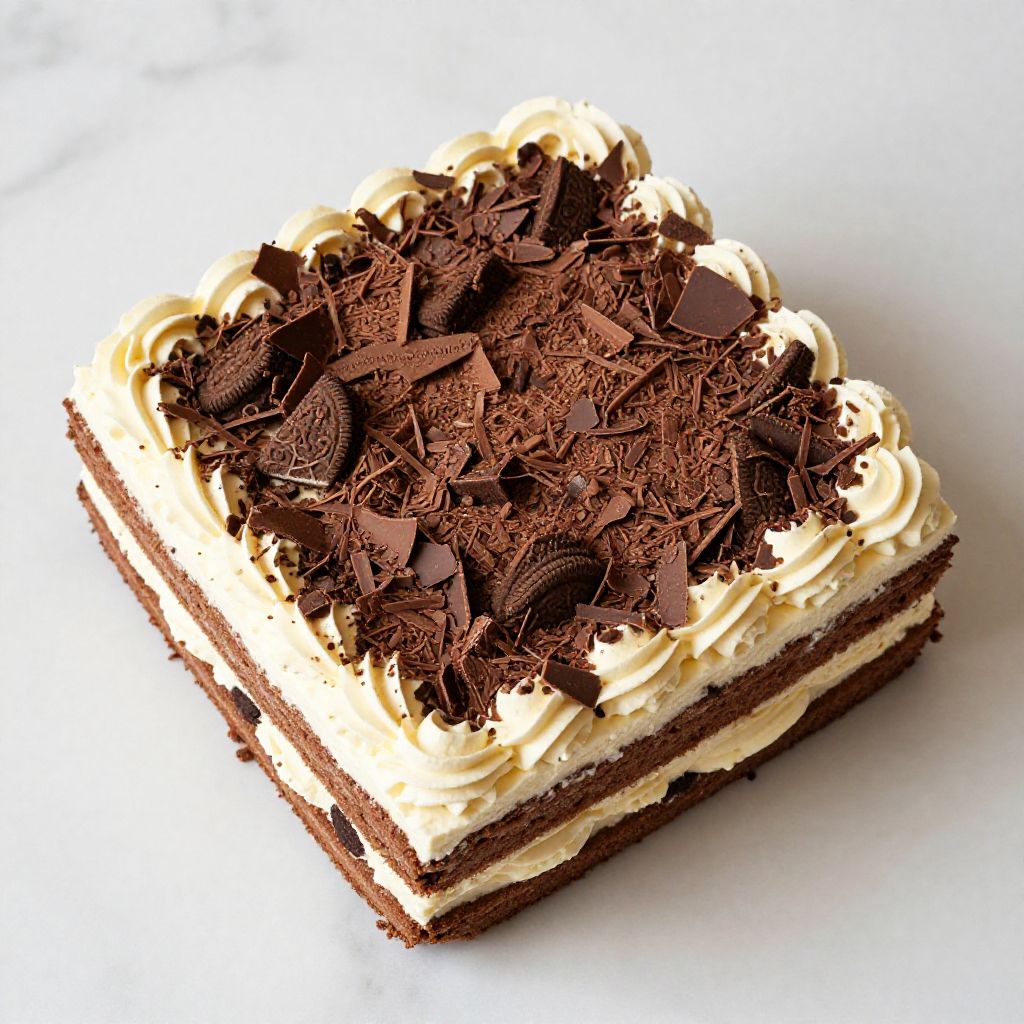
Icebox Cake
Ingredients
Equipment
Method
- Begin by pouring the heavy whipping cream into a mixing bowl. Beat it with an electric mixer or whisk until soft peaks form, which usually takes 2-3 minutes.
- Next, add the powdered sugar and vanilla extract to the whipped cream. Continue mixing until stiff peaks form, ensuring your cream is light and fluffy.
- Take your springform pan and arrange a single layer of chocolate wafer cookies on the bottom. Overlap them slightly for full coverage.
- Spread a layer of the whipped cream mixture over the cookies, smoothing it out evenly.
- Continue layering cookies and whipped cream until you reach the top of the pan, finishing with a layer of whipped cream.
- Cover the springform pan with plastic wrap and place it in the refrigerator. Chill for at least 4 hours, but overnight is even better.
- Once chilled, remove the cake from the pan. Use a sharp knife to gently release the sides before removing the springform.
- Top the cake with chocolate shavings or any desired garnish just before serving. Slice and enjoy.