
There’s something undeniably comforting about a bowl of Homemade Vanilla Pudding. The creamy texture and rich flavor take me back to my childhood, where dessert was always a sweet ending to a busy day. This pudding is not just easy to make; it’s the kind of treat that can bring joy to any table. With its silky-smooth consistency and delightful vanilla notes, it’s perfect for both special occasions and everyday indulgence. Let’s dive into the magic as we whip up this classic favorite!
Why You’ll Love This Recipe
This recipe will quickly become a go-to in your kitchen for several reasons.
- Simple ingredients you likely already have at home.
- Versatile enough to enjoy on its own or as a base for other desserts.
- Creamy and delicious, it’s a timeless favorite for all ages.
- Quick to prepare, making it a perfect last-minute dessert.
My Experience Making This Recipe
Making this pudding always feels like a little dose of nostalgia for me. As I whisk the ingredients together, the sweet aroma of vanilla fills my kitchen, and I can’t help but smile as I think of serving it to my family.
When I first presented it, my kids’ eyes lit up as they dug in. The joy on their faces reminded me of my own childhood, making this recipe truly special.
Recipe Overview
- Recipe Name: Homemade Vanilla Pudding
- Servings: 4
- Prep Time: 10 minutes
- Cook Time: 10 minutes
- Total Time: 20 minutes
- Course: Dessert
- Cuisine: American
- Calories per Serving: 180
Equipment You Will Need
- Medium saucepan
- Whisk
- Measuring cups and spoons
- Heatproof bowl
- Spoon or spatula for stirring
- Serving bowls
Ingredients for Homemade Vanilla Pudding
- 2 cups milk
- 1/2 cup granulated sugar
- 1/4 cup cornstarch
- 1/4 teaspoon salt
- 1 teaspoon pure vanilla extract
- 2 tablespoons unsalted butter
Ingredient Notes and Substitutions
- Milk: Used for its creaminess and flavor; substitute with any plant-based milk for a dairy-free version.
- Sugar: Sweetens the pudding; coconut sugar can be used for a different flavor profile.
- Cornstarch: Thickens the pudding; arrowroot powder can serve as a substitute.
- Vanilla extract: Adds depth; vanilla bean paste or fresh vanilla beans can enhance flavor.
- Butter: Provides richness; omit for a dairy-free version or use a vegan butter substitute.
How to Make Homemade Vanilla Pudding
Step 1: Combine Dry Ingredients
In a medium saucepan, whisk together the granulated sugar, cornstarch, and salt. This ensures an even distribution of the dry ingredients, preventing lumps.
Step 2: Add Milk
Slowly pour in the milk, whisking continuously until smooth. This step is crucial to avoid clumping and to guarantee a creamy texture.
Step 3: Cook Over Medium Heat
Place the saucepan over medium heat, stirring constantly. This helps to gradually heat the mixture, activating the cornstarch to thicken the pudding.
Step 4: Watch for the Boil
Continue stirring until the mixture begins to boil. Boiling is essential as it signals that the pudding is thickening properly.
Step 5: Boil for One Minute
Once boiling, cook for an additional minute while stirring. This final cooking time solidifies the pudding’s texture.
Step 6: Remove from Heat
Take the saucepan off the heat and stir in the butter and vanilla extract. This not only adds richness but also enhances the overall flavor profile.
Step 7: Cool Down
Transfer the pudding to a heatproof bowl and cover with plastic wrap, pressing it directly onto the surface. This prevents a skin from forming as it cools.
Step 8: Chill and Serve
Refrigerate for at least 2 hours before serving. Chilling allows the flavors to meld and the pudding to set perfectly.
Pro Tip: For an extra smooth texture, strain the pudding through a fine-mesh sieve before chilling.
Tips for the Best Homemade Vanilla Pudding
- Use fresh vanilla extract for the best flavor; it makes a noticeable difference.
- Be patient while whisking; this helps avoid any lumps.
- Keep stirring as it cooks to prevent scorching on the bottom.
- Let it cool completely before serving for the best texture.
- Experiment with toppings like whipped cream or fresh fruit for added flair.
Common Mistakes to Avoid
- Not whisking continuously can lead to lumps; keep that whisk moving.
- Overcooking can cause the pudding to become too thick; stick to the one-minute boil.
- Forgetting to cover while cooling can create a skin; be sure to press the plastic wrap onto the surface.
- Using low-quality vanilla can dull the flavor; opt for pure vanilla extract.
Serving Suggestions
Homemade vanilla pudding is delightful on its own, but it pairs beautifully with a few extras.
- Top with whipped cream for added richness.
- Add fresh berries for a pop of color and flavor.
- Serve with crumbled cookies for a delightful crunch.
- Drizzle with chocolate sauce for a decadent twist.
Variations to Try
- Add a splash of almond extract for a unique flavor twist.
- Incorporate cocoa powder for chocolate pudding.
- Mix in a spoonful of peanut butter for a nutty richness.
- Try infusing the milk with mint leaves for a fresh mint pudding.
Dietary Adaptations
- Gluten-Free: This recipe is already gluten-free as it uses cornstarch.
- Dairy-Free: Substitute milk with almond milk or any plant-based option.
- Vegan: Use a plant-based butter substitute and dairy-free milk.
- Low-Carb/Keto: Replace sugar with a keto-friendly sweetener.
Storage and Reheating
Refrigerator
Store any leftovers in an airtight container in the fridge for up to 3 days.
- Cover the pudding with plastic wrap to prevent it from absorbing other flavors.
Freezer
Freezing is not recommended, as the texture may change upon thawing.
- For best results, enjoy fresh or refrigerated only.
Reheating
If you prefer warm pudding, gently reheat on the stove over low heat while stirring.
- Add a splash of milk to restore creaminess if needed.
Nutrition Information
| Nutrient | Amount |
|---|---|
| Calories | 180 |
| Total Fat | 7g |
| Saturated Fat | 4g |
| Carbohydrates | 27g |
| Fiber | 0g |
| Sugar | 20g |
| Protein | 3g |
| Sodium | 100mg |
| Cholesterol | 20mg |
This nutritional information is approximate and can vary based on ingredients used.
Frequently Asked Questions
Can I substitute the sugar in this recipe?
Yes, you can use alternatives like honey or stevia, but the taste and texture may vary slightly.
Can I make this pudding ahead of time?
Absolutely! This pudding keeps well in the refrigerator for up to 3 days.
How do I store leftover pudding?
Store leftovers in an airtight container in the fridge, ensuring you cover the surface with plastic wrap.
Why did my pudding not thicken?
If the pudding didn’t thicken, it may not have reached a full boil, which is crucial for activating the cornstarch.
Can I use non-dairy milk?
Yes, non-dairy milk works well, but choose one that is unsweetened for the best results.
Final Thoughts
Making Homemade Vanilla Pudding is a delightful experience that brings back memories of simpler times. I encourage you to give this recipe a try, and I promise you won’t regret it.
For more delicious ideas, check out my vanilla wafer recipe or whip up a batch of vanilla simple syrup to complement your pudding.
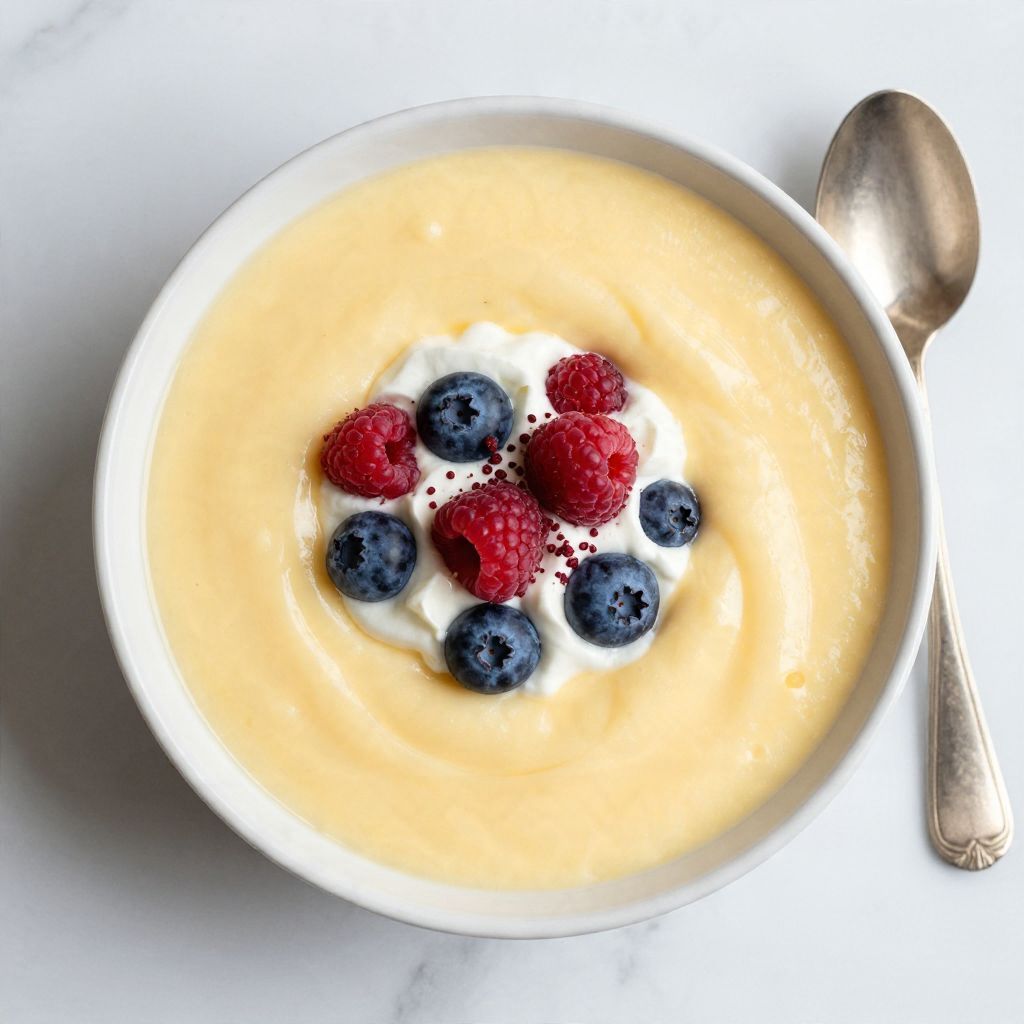
Homemade Vanilla Pudding
Ingredients
Equipment
Method
- In a medium saucepan, whisk together the granulated sugar, cornstarch, and salt.
- Slowly pour in the milk, whisking continuously until smooth.
- Place the saucepan over medium heat, stirring constantly.
- Continue stirring until the mixture begins to boil.
- Once boiling, cook for an additional minute while stirring.
- Take the saucepan off the heat and stir in the butter and vanilla extract.
- Transfer the pudding to a heatproof bowl and cover with plastic wrap.
- Refrigerate for at least 2 hours before serving.