
There’s something utterly enchanting about the silky, melt-in-your-mouth texture of homemade lox. This recipe transforms a simple piece of salmon into a *gourmet delight* that captures the essence of brunch indulgence, and it’s surprisingly easy to make at home.
With its rich flavor and versatility, you can enjoy lox on a bagel, in salads, or even as part of a charcuterie board. Let’s roll up our sleeves and dive into making this exquisite dish from scratch, shall we?
Why You’ll Love This Recipe
Homemade lox is a culinary adventure that brings a taste of the deli to your kitchen.
- Extraordinary flavor with a perfect balance of saltiness and sweetness.
- Simple preparation that requires minimal hands-on time.
- Impressive enough for brunch gatherings or as a delightful treat for yourself.
- Customizable with different herbs and spices to suit your palate.
My Experience Making This Recipe
When I first attempted to make lox, I was pleasantly surprised by how easy it was. The aroma of the curing salmon filled my kitchen, and I felt like a culinary wizard.
Serving it to friends was a joy, as their expressions of delight affirmed that homemade lox was a winner. Watching them savor each bite made all the effort worth it!
Recipe Overview
- Recipe Name: Homemade Lox
- Servings: 4-6
- Prep Time: 15 minutes
- Cook Time: 48 hours curing
- Total Time: 48 hours 15 minutes
- Course: Breakfast/Brunch
- Cuisine: Jewish
- Calories per Serving: 250
Equipment You Will Need
- Refrigerator
- Large baking dish or glass dish
- Plastic wrap
- Sharp knife
- Mixing bowl
Ingredients for Homemade Lox
- 1 pound of fresh salmon fillet, skin on
- 1/4 cup of kosher salt
- 1/4 cup of sugar
- 1 tablespoon of black pepper
- 1 tablespoon of dill (fresh or dried)
Ingredient Notes and Substitutions
- Salmon: Fresh salmon is key for lox; substitute with trout for a unique flavor.
- Kosher salt: Used for its coarse texture; sea salt can also work but adjust the amount.
- Sugar: Balances saltiness; brown sugar can add a deeper flavor.
- Black pepper: Adds a kick; use white pepper for a milder flavor.
- Dill: A classic herb for lox; try other herbs like juniper berries for a twist.
How to Make Homemade Lox
Step 1: Prepare the Salmon
Start with a high-quality salmon fillet, ensuring it is fresh and free from any browning. This is crucial to achieve the best flavor and texture.
Step 2: Mix the Cure
In a mixing bowl, combine the kosher salt, sugar, black pepper, and dill. This mixture forms the curing base that will preserve and flavor the salmon.
Step 3: Coat the Salmon
Place the salmon skin-side down in a large dish and generously coat the top with the cure mixture. Make sure every inch is covered to ensure even curing.
Step 4: Wrap the Salmon
Cover the salmon tightly with plastic wrap, pressing it down to keep the cure against the fish. This helps the flavors penetrate the salmon effectively.
Step 5: Weigh it Down
Place a heavy object, like another dish or a few cans, on top of the wrapped salmon. This pressure aids in the curing process and draws moisture out.
Step 6: Refrigerate
Put the salmon in the refrigerator and let it cure for 48 hours. This time allows the flavors to develop and the salmon to firm up beautifully.
Step 7: Rinse and Pat Dry
After 48 hours, remove the salmon from the fridge and rinse off the cure under cold water. Pat it dry gently with paper towels to avoid excess moisture.
Step 8: Slice and Serve
Using a sharp knife, slice the salmon thinly at an angle. This technique gives you those lovely, delicate pieces perfect for serving.
Pro Tip: For the best texture, slice the lox just before serving.
Tips for the Best Homemade Lox
- Use high-quality salmon for the best flavor and safety.
- Experiment with different herbs and spices in the cure for varied flavor profiles.
- Make sure to use a sharp knife for clean, thin slices.
- Allow the lox to rest for a few hours after slicing for flavors to meld.
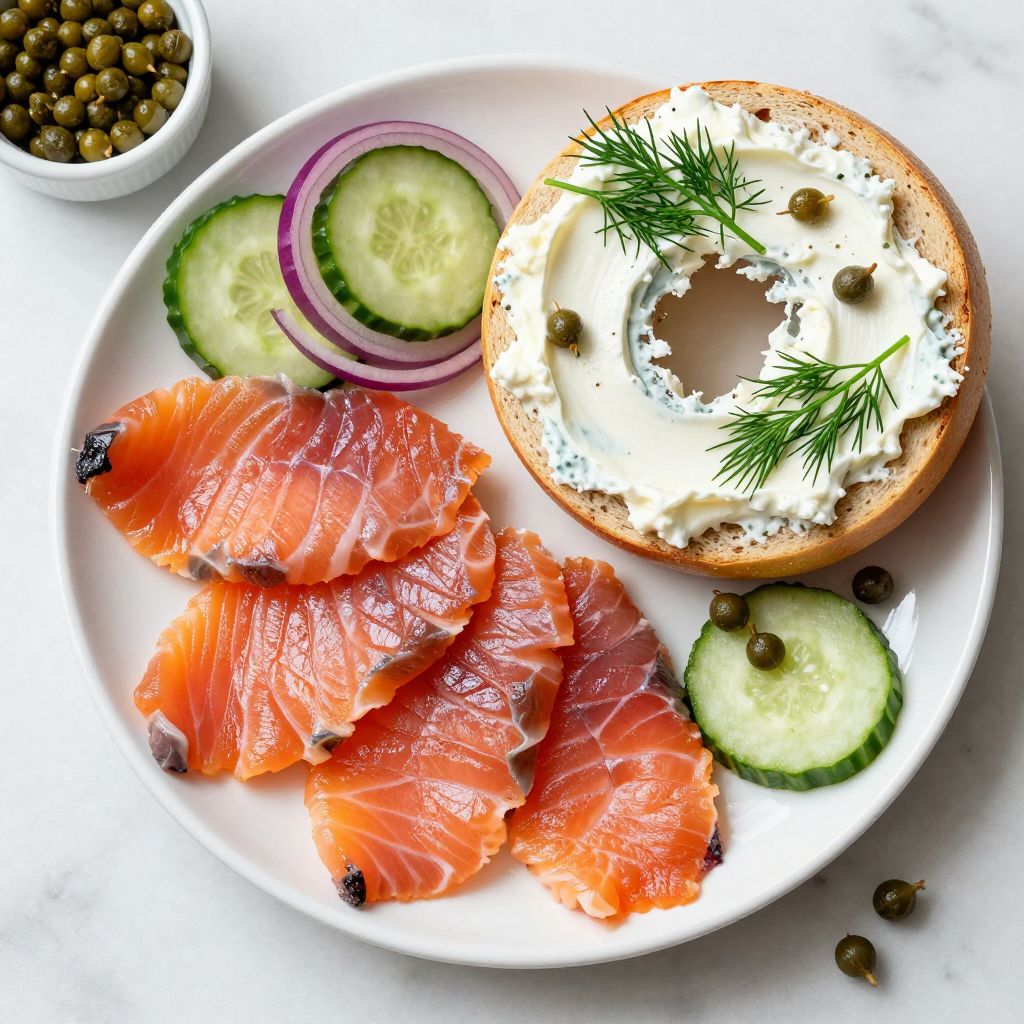
- Pair with fresh bagels, cream cheese, and capers for a classic presentation.
Common Mistakes to Avoid
- Not using enough salt in the cure can lead to bland lox.
- Skipping the weighting step results in uneven curing.
- Rushing the curing time will negatively affect texture and flavor.
- Using previously frozen salmon can alter the quality; always opt for fresh.
- Not rinsing off the cure thoroughly can lead to overly salty lox.
Serving Suggestions
Homemade lox is versatile and pairs beautifully with various accompaniments.
- Serve on toasted bagels with cream cheese and capers.
- Top a salad with lox for a savory twist.
- Incorporate it into brunch platters with eggs and avocado.
- Pair with thinly sliced cucumbers and red onions as a light appetizer.
- Include in a charcuterie board for an elegant touch.
Variations to Try
- Try a citrus cure by adding lemon or orange zest for a refreshing flavor.
- Use smoked salt instead of regular salt for a unique smoky profile.
- Add crushed juniper berries to the cure for an aromatic twist.
- Incorporate spices like coriander or garlic for additional depth.
- Experiment with different types of fish, like trout or arctic char.
Dietary Adaptations
- Gluten-free: This recipe is naturally gluten-free; enjoy it on gluten-free bread.
- Dairy-free: Pair with dairy-free cream cheese alternatives.
- Low-carb/keto: Lox is perfect for keto diets; skip the bagel and add to salads.
- Vegetarian: Consider using a smoked carrot or beetroot for a similar flavor profile.
Storage and Reheating
Refrigerator
Store leftover lox in an airtight container in the fridge.
- Keep for up to one week.
- Ensure it is tightly wrapped to maintain freshness.
Freezer
You can freeze lox for longer storage if needed.
- Wrap tightly in plastic wrap and then in aluminum foil.
- Use within three months for the best quality.
Reheating
Reheat lox gently, if desired, but it is best enjoyed cold.
- Defrost in the refrigerator if frozen.
- Never microwave, as it can change the texture.
Nutrition Information
| Nutrient | Amount |
|---|---|
| Calories | 250 |
| Total Fat | 15g |
| Saturated Fat | 3g |
| Carbohydrates | 2g |
| Fiber | 0g |
| Sugar | 0g |
| Protein | 25g |
| Sodium | 800mg |
| Cholesterol | 60mg |
This nutrition information is an estimate and can vary based on ingredient brands and quantities used.
Frequently Asked Questions
Can I use frozen salmon for this recipe?
Using fresh salmon is preferred for texture and flavor, but if using frozen, ensure it is thoroughly thawed and at a high quality.
How long can I store homemade lox?
Homemade lox can be stored in the refrigerator for up to one week, or frozen for up to three months.
Can I make lox ahead of time?
Absolutely! Lox can be made up to two days in advance, making it a great choice for meal prep.
What if my lox is too salty?
If your lox turns out too salty, try slicing it thinly and serving it with cream cheese or cucumbers to balance the flavor.
Can I add other flavors to the curing mixture?
Yes! Feel free to experiment with other herbs and spices, like garlic or citrus zest, to customize the flavor to your liking.
Final Thoughts
Making homemade lox is an incredibly rewarding experience that elevates any meal. The rich flavors and satisfying textures will have you coming back for more.
So why not give this a try? I promise you’ll impress yourself and anyone lucky enough to share in your lox-making adventure. For more delicious ideas, check out this lox recipe or try a tasty lox bagel recipe for a delightful twist!
Homemade Lox
Ingredients
Equipment
Method
- Start with a high-quality salmon fillet, ensuring it is fresh and free from any browning.
- In a mixing bowl, combine the kosher salt, sugar, black pepper, and dill.
- Place the salmon skin-side down in a large dish and generously coat the top with the cure mixture.
- Cover the salmon tightly with plastic wrap, pressing it down to keep the cure against the fish.
- Place a heavy object on top of the wrapped salmon.
- Put the salmon in the refrigerator and let it cure for 48 hours.
- After 48 hours, remove the salmon from the fridge and rinse off the cure under cold water.
- Pat it dry gently with paper towels.
- Using a sharp knife, slice the salmon thinly at an angle.