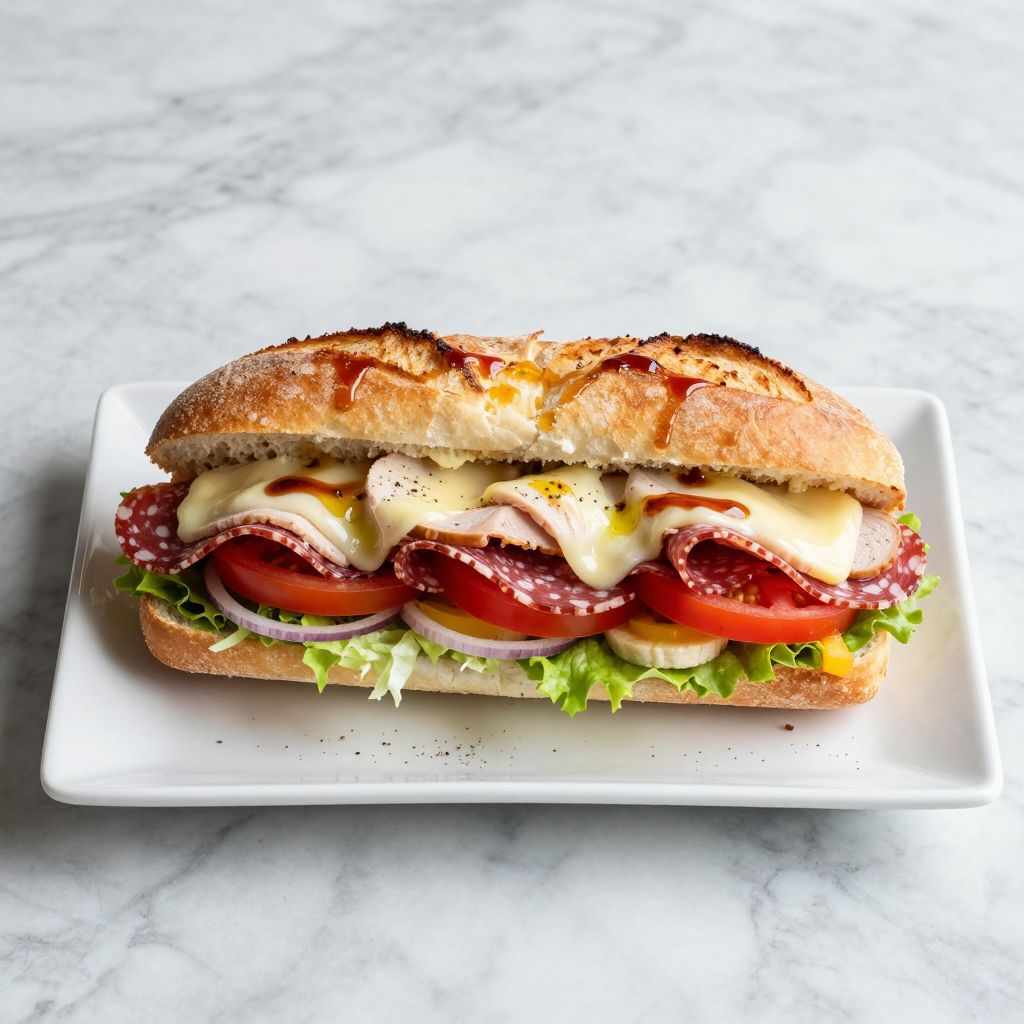
The first time I bit into a properly made grinder sandwich, I understood why entire regions argue about sandwich names. This Italian American classic delivers layers of cured meats, melted cheese, and tangy peppers on a toasted sub roll that shatters just right.
The grinder sandwich earned its name from the crusty bread that requires serious chewing. Unlike its softer cousins, this sandwich brings texture and bold flavors that make it a deli counter legend.
What sets a great grinder apart is the balance between savory meats, sharp provolone, and that signature vinegary crunch from pickled vegetables. Whether you call it a grinder, sub, hoagie, or hero, the technique remains the same.
Today I am sharing my tested method for building the ultimate version at home. Grab your favorite cold cuts and let us make something worth bragging about.
Why You Will Love This Recipe
This grinder sandwich recipe transforms simple deli ingredients into something that rivals your favorite sandwich shop. The toasted bread and layered fillings create a satisfying meal that works for lunch, dinner, or game day crowds.
- Ready in under 30 minutes with minimal cooking required
- Completely customizable to your favorite meats and toppings
- Feeds a crowd easily when made on a full length sub roll
- The toasting step elevates ordinary deli meats to restaurant quality
- Budget friendly compared to ordering out
My Experience Making This Recipe
I have made this grinder sandwich more times than I can count, tweaking the meat ratios and perfecting the toasting technique. The moment when melted provolone meets crispy bread edges never gets old.
My family now requests this for every football Sunday and most summer picnics. The smell of toasting bread and warming Italian meats fills the kitchen in the best possible way.
Guests always ask for the recipe, usually while reaching for a second helping. The combination of hot, melty cheese against cool, crunchy vegetables creates a textural experience that keeps people coming back.
Recipe Overview
- Recipe Name: Classic Italian Grinder Sandwich
- Servings: 4 sandwiches
- Prep Time: 15 minutes
- Cook Time: 10 minutes
- Total Time: 25 minutes
- Course: Main Dish, Lunch
- Cuisine: Italian American
- Calories per Serving: 680 calories
Equipment You Will Need
- Baking sheet or sheet pan
- Sharp serrated bread knife
- Cutting board
- Oven or toaster oven
- Small mixing bowl for dressing
- Measuring spoons
- Aluminum foil (optional for easy cleanup)
Ingredients for Grinder Sandwich
For the Sandwich Base
- 4 sub rolls or hoagie rolls, about 8 inches each
- 8 slices Genoa salami
- 8 slices capicola or spicy ham
- 8 slices deli turkey or mortadella
- 8 slices provolone cheese
- 1 cup shredded iceberg lettuce
- 2 medium Roma tomatoes, thinly sliced
- 1/2 medium red onion, thinly sliced
- 1/2 cup banana pepper rings or pepperoncini
For the Grinder Dressing
- 3 tablespoons red wine vinegar
- 1/4 cup olive oil
- 1 teaspoon dried oregano
- 1/2 teaspoon garlic powder
- 1/4 teaspoon black pepper
- Pinch of salt
Ingredient Notes and Substitutions
- Sub rolls: Crusty Italian bread is essential for authentic texture. Soft hoagie rolls work but skip calling it a grinder.
- Genoa salami: This adds the classic peppery, garlicky flavor. Substitute with hard salami or sopressata.
- Capicola: The spicy, cured pork shoulder brings heat and richness. Peppered ham or prosciutto makes a decent swap.
- Provolone: Sharp provolone melts beautifully and adds tang. Mozzarella works for a milder version.
- Banana peppers: These provide the signature tangy crunch. Pickled jalapenos or giardiniera can substitute.
- Red wine vinegar: The acidic bite cuts through the rich meats. White wine vinegar or apple cider vinegar work in a pinch.
How to Make Grinder Sandwich
Step 1: Preheat Your Oven
Set your oven to 400 degrees Fahrenheit and let it fully preheat. A hot oven ensures the bread gets crispy without drying out the meats.
Step 2: Prepare the Grinder Dressing
Whisk together the red wine vinegar, olive oil, oregano, garlic powder, black pepper, and salt in a small bowl. This dressing needs time to let the dried herbs bloom, so make it first.
Step 3: Slice and Prep the Rolls
Use a serrated knife to slice each sub roll lengthwise, leaving a hinge on one side so it opens like a book. Removing a small amount of bread from the inside creates more room for fillings.
Step 4: Layer the Meats
Place two slices each of salami, capicola, and turkey on the bottom half of each roll, overlapping slightly. Folding the meats rather than laying them flat creates air pockets that crisp up nicely during toasting.
Step 5: Add the Cheese
Layer two slices of provolone over the meats on each sandwich. The cheese acts as a moisture barrier once melted, preventing soggy bread.
Step 6: Toast the Sandwiches
Place the open sandwiches on a baking sheet and toast in the oven for 5 to 7 minutes. Watch for the cheese to melt and bubble while the bread edges turn golden brown.
Step 7: Prep the Fresh Toppings
While the sandwiches toast, slice your tomatoes and onions thinly and shred the lettuce. Having everything ready ensures quick assembly while the bread is still warm.
Step 8: Dress the Top Half
Drizzle the grinder dressing generously on the inside of the top bread portion. The vinegar and oil will soak into the warm bread, adding flavor throughout.
Step 9: Add Fresh Vegetables
Layer the shredded lettuce, tomato slices, red onion, and banana peppers on top of the melted cheese. The cool vegetables against warm meat creates the signature grinder contrast.
Step 10: Close and Serve
Press the top of the roll firmly onto the fillings and slice each sandwich in half at an angle if desired. Serve immediately while the bread is still crispy and the cheese remains melty.
Pro Tip: Toast the meats and cheese until the cheese just starts to brown at the edges for maximum flavor development and that perfect stringy pull when you bite in.
Tips for the Best Grinder Sandwich
- Buy your meats fresh sliced from the deli counter rather than pre packaged for better flavor and texture.
- Let cold meats sit at room temperature for 10 minutes before assembling so they heat more evenly.
- Do not skip the dressing step because dry grinders taste flat no matter how good your meats are.
- Use day old bread if possible since slightly stale rolls crisp up better than fresh ones.
- Press the sandwich gently after assembly to help everything stick together without squishing.
- Slice vegetables paper thin so they layer nicely and do not overwhelm each bite.
Common Mistakes to Avoid
- Using soft bread: A true grinder requires crusty bread that crunches when you bite through it.
- Skipping the toasting: Warm, melted cheese and crispy bread separate a great grinder from a boring cold sub.
- Over stuffing the sandwich: Too many fillings make the sandwich impossible to eat without everything falling out.
- Adding wet vegetables before toasting: Tomatoes and lettuce go on after toasting to prevent soggy bread.
- Forgetting acid: The vinegar in the dressing balances the fatty meats and makes each bite sing.
Serving Suggestions
A grinder sandwich makes a complete meal on its own, but the right sides take it to the next level. These pairings complement the bold Italian flavors without competing.
- Crispy kettle cooked potato chips
- Classic creamy coleslaw
- Marinated olive and artichoke salad
- Crunchy dill pickle spears
- Simple mixed green salad with Italian dressing
Variations to Try
- Chicken Parm Grinder: Replace cold cuts with breaded chicken cutlets, marinara sauce, and mozzarella for a hot version.
- Veggie Grinder: Layer roasted red peppers, marinated artichokes, fresh mozzarella, and olive tapenade for a meatless option.
- Spicy Grinder: Add sliced hot cherry peppers, spicy capicola, and a drizzle of hot honey for heat lovers.
- Breakfast Grinder: Swap meats for scrambled eggs, crispy bacon, and American cheese with a touch of hot sauce.
- Turkey Club Grinder: Use smoked turkey, crispy bacon, avocado, and ranch dressing for a California twist.
Dietary Adaptations
- Gluten Free: Use certified gluten free sub rolls, which are widely available but may not achieve the same crunch.
- Dairy Free: Skip the provolone or use dairy free cheese slices, though the melt will differ.
- Vegetarian: Replace meats with grilled vegetables, marinated tofu, or plant based deli slices.
- Low Carb: Wrap all the fillings in large lettuce leaves instead of bread for a keto friendly version.
Storage and Reheating
Refrigerator
Assembled grinders do not store well because the bread loses its crunch. Store components separately for up to 3 days.
- Keep sliced meats and cheese in airtight containers
- Store dressing in a jar and shake before using
- Prep vegetables and store covered with damp paper towels
Freezer
Freezing assembled sandwiches is not recommended. You can freeze the bread rolls for up to 2 months.
- Wrap individual rolls tightly in plastic wrap then foil
- Thaw at room temperature before using
- Re crisp in a 350 degree oven for 5 minutes
Reheating
If you have leftover toasted sandwiches without vegetables, you can revive them. Remove any fresh toppings first.
- Reheat in a 350 degree oven for 5 to 8 minutes
- Add fresh vegetables and dressing after warming
- Avoid the microwave as it makes bread rubbery
Nutrition Information
| Nutrient | Amount |
|---|---|
| Calories | 680 kcal |
| Total Fat | 38g |
| Saturated Fat | 14g |
| Carbohydrates | 48g |
| Fiber | 3g |
| Sugar | 5g |
| Protein | 35g |
| Sodium | 1850mg |
| Cholesterol | 85mg |
Nutritional values are estimates based on standard ingredients and may vary depending on specific brands and portion sizes used.
Frequently Asked Questions
What is the difference between a grinder and a sub sandwich?
The main difference is regional naming and bread style. Grinders traditionally use crustier bread and are often toasted, while subs can be served cold on softer rolls.
Can I make grinder sandwiches ahead for a party?
Prepare and toast the meat and cheese portion up to an hour ahead, then add fresh vegetables and dressing just before serving. This keeps the bread crispy while making hosting easier.
How do I keep my grinder from getting soggy?
Apply dressing to the top bread only and add it right before eating. The melted cheese on the bottom acts as a waterproof layer against wet vegetables.
What bread works best for a grinder sandwich?
Look for Italian sub rolls with a crispy crust and soft interior, or use a fresh baguette cut to size. Avoid overly soft bread that cannot hold up to hearty fillings.
Can I use different meats in my grinder?
Absolutely, the beauty of a grinder is its flexibility. Try roast beef, pastrami, prosciutto, or even meatballs depending on your preference.
Final Thoughts
The grinder sandwich proves that simple ingredients done right beat complicated recipes every time. With quality meats, proper toasting, and that essential tangy dressing, you have a sandwich worth making again and again.
Give this recipe a try for your next lunch or casual dinner and taste the difference homemade makes. Once you master the basic technique, you can customize endlessly to match whatever is in your fridge.
Classic Italian Grinder Sandwich
Ingredients
Equipment
Method
- Preheat your oven to 400 degrees Fahrenheit and let it fully preheat. A hot oven ensures the bread gets crispy without drying out the meats.
- Whisk together the red wine vinegar, olive oil, oregano, garlic powder, black pepper, and salt in a small bowl. This dressing needs time to let the dried herbs bloom, so make it first.
- Use a serrated knife to slice each sub roll lengthwise, leaving a hinge on one side so it opens like a book. Remove a small amount of bread from the inside to create more room for fillings.
- Place two slices each of salami, capicola, and turkey on the bottom half of each roll, overlapping slightly. Fold the meats rather than laying them flat to create air pockets that crisp up nicely during toasting.
- Layer two slices of provolone over the meats on each sandwich. The cheese acts as a moisture barrier once melted, preventing soggy bread.
- Place the open sandwiches on a baking sheet and toast in the oven for 5 to 7 minutes. Watch for the cheese to melt and bubble while the bread edges turn golden brown.
- While the sandwiches toast, slice your tomatoes and onions thinly and shred the lettuce. Have everything ready for quick assembly while the bread is still warm.
- Drizzle the grinder dressing generously on the inside of the top bread portion. The vinegar and oil will soak into the warm bread, adding flavor throughout.
- Layer the shredded lettuce, tomato slices, red onion, and banana peppers on top of the melted cheese. The cool vegetables against warm meat creates the signature grinder contrast.
- Press the top of the roll firmly onto the fillings and slice each sandwich in half at an angle if desired. Serve immediately while the bread is still crispy and the cheese remains melty.