Ginger bug is the secret starter culture behind homemade ginger beer, root beer, and naturally fermented sodas. This fizzy, probiotic powerhouse takes just three ingredients and about a week of patience to create. Once you have an active ginger bug bubbling away on your counter, you hold the key to endless naturally carbonated drinks.
Think of it as a sourdough starter, but for sodas. The wild yeasts and beneficial bacteria living on fresh ginger do all the heavy lifting. Let me show you exactly how to make and maintain your own ginger bug at home.
Why You’ll Love This Recipe
Making your own ginger bug feels like kitchen magic, and the rewards go far beyond the satisfying bubbles. Here’s why this simple fermentation project deserves a spot in your routine.
- Only three ingredients needed: fresh ginger, sugar, and water
- Creates natural carbonation without any special equipment or CO2 tanks
- Packed with probiotics that support gut health
- Costs pennies compared to store bought kombucha or ginger beer
- Lives indefinitely with minimal maintenance, like a low key kitchen pet
My Experience Making This Recipe
I started my first ginger bug on a rainy Tuesday afternoon with zero expectations. By day three, tiny bubbles appeared at the surface, and I felt unreasonably proud of myself.
The smell is incredible: sharp, zingy, and slightly yeasty in the best possible way. My family thought I was running a speakeasy when I started bottling homemade ginger beer every week.
After six months of keeping my bug alive, I can confirm this is the easiest fermentation project I have ever tackled. It forgives neglect, bounces back from the fridge, and rewards you with genuinely delicious fizzy drinks.
Recipe Overview
- Recipe Name: Ginger Bug
- Servings: Makes approximately 2 cups starter
- Prep Time: 10 minutes
- Fermentation Time: 5 to 7 days
- Total Time: 7 days
- Course: Fermented Starter Culture
- Cuisine: Global
- Calories per Serving: 15 per tablespoon used
Equipment You Will Need
- Quart sized glass jar or mason jar
- Breathable cover such as cheesecloth, coffee filter, or paper towel
- Rubber band or jar ring
- Wooden or plastic spoon for stirring
- Measuring spoons
- Cutting board and knife or grater
- Fine mesh strainer
Ingredients for Ginger Bug
- 2 cups filtered water at room temperature
- 2 tablespoons fresh ginger root, roughly chopped or grated with skin on
- 2 tablespoons granulated sugar, white or raw cane
For Daily Feedings
- 1 tablespoon fresh ginger, chopped or grated
- 1 tablespoon sugar
Ingredient Notes and Substitutions
- Fresh ginger: The skin contains wild yeasts essential for fermentation, so never peel it. Organic ginger works best since conventional ginger may be irradiated, which kills the beneficial microbes.
- Sugar: Feeds the yeast and bacteria during fermentation. You can substitute raw cane sugar, turbinado, or coconut sugar, though white sugar produces the most reliable activity.
- Water: Chlorine and chloramine in tap water can inhibit fermentation. Use filtered, spring, or well water, or let tap water sit uncovered for 24 hours to off gas chlorine.
How to Make Ginger Bug
Step 1: Prepare Your Jar
Start with a clean quart sized glass jar. You do not need to sterilize it, but make sure no soap residue remains since soap can harm the beneficial bacteria.
Step 2: Chop or Grate the Ginger
Roughly chop or grate 2 tablespoons of fresh ginger, keeping the skin intact. The skin houses the wild yeasts that will drive your fermentation, so scrub it clean but leave it on.
Step 3: Combine Initial Ingredients
Add the ginger, 2 tablespoons of sugar, and 2 cups of room temperature filtered water to your jar. Stir vigorously for about 30 seconds to dissolve the sugar and incorporate oxygen.
Step 4: Cover and Place in a Warm Spot
Cover the jar with cheesecloth or a coffee filter and secure it with a rubber band. Place it in a warm area of your kitchen, ideally between 70 and 80 degrees Fahrenheit, away from direct sunlight.
Step 5: Feed Your Bug Daily
Every day for the next 5 to 7 days, add 1 tablespoon of fresh ginger and 1 tablespoon of sugar. Stir vigorously each time to introduce oxygen and distribute the new food.
Step 6: Watch for Signs of Life
After 2 to 3 days, you should notice tiny bubbles forming at the surface and along the sides of the jar. The mixture will smell pleasantly yeasty and gingery, not foul or moldy.
Step 7: Test for Readiness
Your ginger bug is ready when it bubbles actively within minutes of stirring and has a slightly cloudy appearance. You should see consistent effervescence and hear a faint fizzing sound when you bring your ear close to the jar.
Step 8: Strain and Use or Store
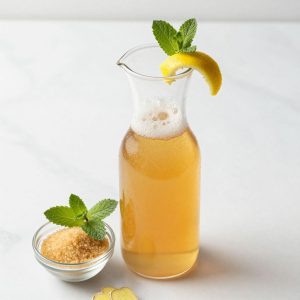
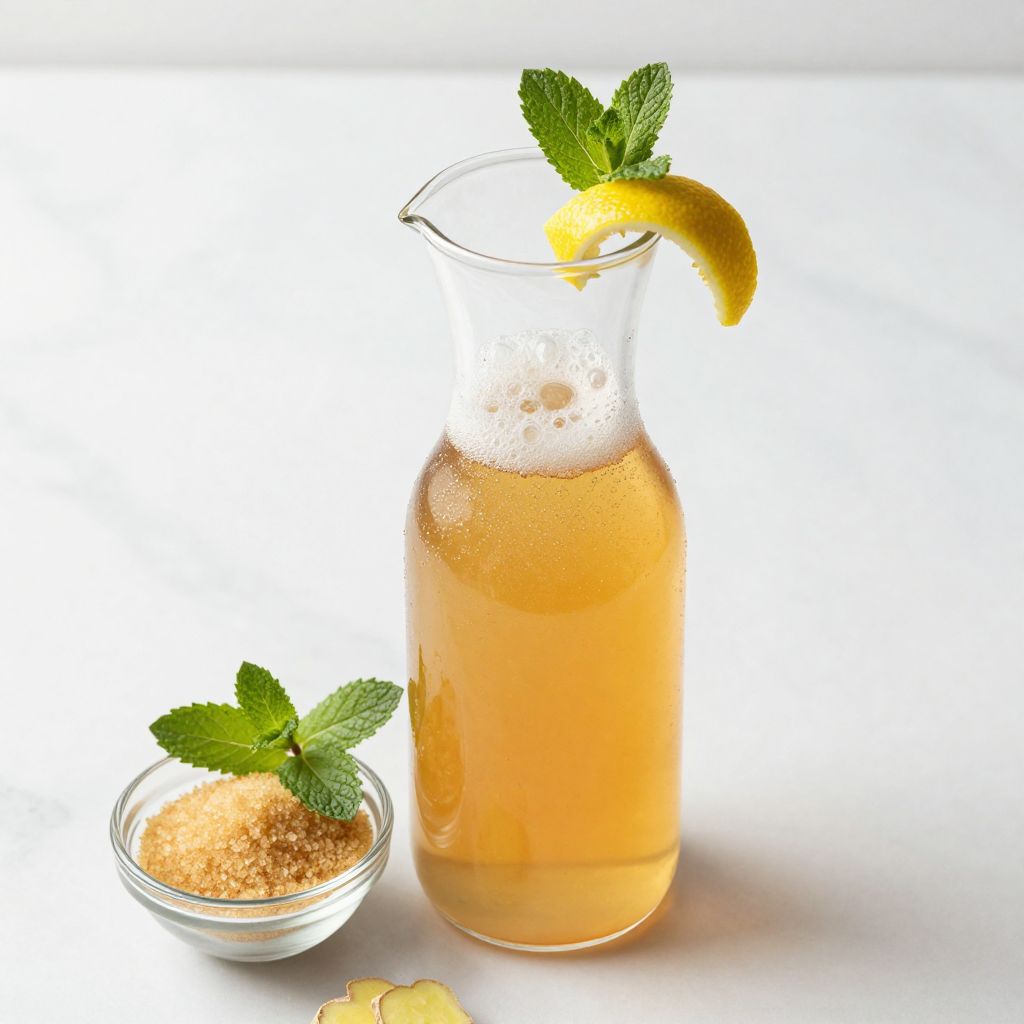
When your bug is active, strain out the ginger pieces through a fine mesh strainer if desired, or leave them in for continued feeding. Use the liquid to ferment homemade sodas, or store the bug in the refrigerator for later use.
Pro Tip: If your ginger bug seems sluggish, move it to a warmer spot and add a pinch of dried ginger along with your daily feeding to jump start the yeast activity.
Tips for the Best Ginger Bug
- Always use organic ginger when possible since conventional ginger is often irradiated and lacks the wild yeasts needed for fermentation.
- Stir your bug vigorously at least once daily to introduce oxygen, which keeps the yeast happy and active.
- Keep the jar in a consistently warm spot, as temperatures below 65 degrees dramatically slow fermentation.
- Use a wide mouth jar to make stirring and feeding easier and to allow better oxygen exposure.
- If you see white sediment at the bottom of the jar, celebrate: that is yeast accumulation and a sign of healthy activity.
- Never seal your ginger bug with an airtight lid during active fermentation, as pressure buildup can cause the jar to crack.
Common Mistakes to Avoid
- Using chlorinated tap water: Chlorine kills the beneficial microbes you are trying to cultivate.
- Peeling the ginger: The skin contains most of the wild yeasts, so removing it cripples your fermentation potential.
- Forgetting to feed daily: Skipping feedings starves the yeast and can cause your bug to go dormant or die.
- Keeping it in a cold room: Low temperatures stall fermentation and may prevent your bug from ever becoming active.
- Using metal utensils or containers: Reactive metals can interfere with the fermentation process and introduce off flavors.
Serving Suggestions
Your active ginger bug is a starting point, not a final product. Use it to create naturally carbonated beverages that taste far better than anything from a store.
- Homemade ginger beer with fresh lemon juice and extra ginger
- Fermented lemonade or limeade with herbs like mint or basil
- Fruit sodas using berry, apple, or grape juice
- Root beer made with sassafras, sarsaparilla, or wintergreen
- Turmeric tonic with black pepper and honey
Variations to Try
- Turmeric bug: Add fresh turmeric root alongside the ginger for a golden colored starter with extra anti inflammatory properties.
- Citrus bug: Include organic lemon or orange zest to introduce citrus notes and additional wild yeasts from the peel.
- Spiced bug: Toss in a cinnamon stick, a few cloves, or star anise during fermentation for a warming, chai inspired flavor profile.
- Honey bug: Replace half the sugar with raw honey for a slightly floral sweetness, though fermentation may take a day or two longer.
Dietary Adaptations
- Gluten free: Ginger bug is naturally gluten free as it contains no grains or wheat products.
- Dairy free: This recipe contains no dairy whatsoever.
- Vegan: Completely plant based; just avoid the honey variation if strict about bee products.
- Low carb and keto: Most of the sugar gets consumed by the yeast during fermentation, but some remains. For very low sugar content, ferment longer before using.
Storage and Reheating
Refrigerator
A well fed ginger bug can live in the refrigerator for weeks or even months. Feed it once a week with a tablespoon each of ginger and sugar to keep it alive.
- Store in a loosely covered glass jar
- Bring to room temperature and feed daily for 2 to 3 days before using
Freezer
You can freeze portions of your ginger bug as a backup. Thaw completely and revive with daily feedings for about a week before expecting full activity.
- Freeze in ice cube trays for easy portioning
- Activity may take longer to return after freezing
Reheating
Ginger bug is never heated since heat kills the beneficial bacteria and yeast. Always use it at room temperature for best fermentation results.
- Never microwave or boil your ginger bug
- Allow refrigerated bug to warm naturally before using
Nutrition Information
| Nutrient | Amount |
|---|---|
| Calories | 15 |
| Total Fat | 0g |
| Saturated Fat | 0g |
| Carbohydrates | 4g |
| Fiber | 0g |
| Sugar | 4g |
| Protein | 0g |
| Sodium | 0mg |
| Cholesterol | 0mg |
Nutrition values are estimates based on a 1 tablespoon serving of ginger bug liquid. Actual sugar content decreases as fermentation progresses.
Frequently Asked Questions
Can I use ground ginger instead of fresh?
Ground ginger lacks the wild yeasts found on fresh ginger skin. You can add a small pinch to boost flavor, but you must use fresh ginger as your primary ingredient.
How do I know if my ginger bug has gone bad?
Mold growth, especially black, green, or pink fuzzy patches, means you should discard everything and start over. A healthy bug smells yeasty and gingery, while a bad one smells rotten or like nail polish remover.
Can I make ginger bug ahead of time?
Absolutely. Once active, store it in the refrigerator and feed it weekly. Revive it with 2 to 3 days of room temperature feeding before using.
Why is my ginger bug not bubbling?
The most common causes are cold temperatures, chlorinated water, or irradiated ginger. Move it somewhere warmer, switch to filtered water, and try organic ginger.
How much ginger bug do I use to make soda?
A general ratio is 1/4 cup of strained ginger bug liquid per quart of sweetened juice or tea. Adjust based on how active your bug is and how fizzy you want your final drink.
Final Thoughts
A ginger bug is one of those kitchen projects that gives far more than it takes. With just a few minutes of attention each day, you get a lifetime supply of natural carbonation for homemade sodas, tonics, and fermented drinks.
Start your ginger bug this week and taste the difference real fermentation makes. Your gut will thank you, and your taste buds will wonder why you ever bought soda from a store.
Ginger Bug
Ingredients
Equipment
Method
- Start with a clean quart sized glass jar. You do not need to sterilize it, but make sure no soap residue remains since soap can harm the beneficial bacteria.
- Roughly chop or grate 2 tablespoons of fresh ginger, keeping the skin intact. The skin houses the wild yeasts that will drive your fermentation, so scrub it clean but leave it on.
- Add the ginger, 2 tablespoons of sugar, and 2 cups of room temperature filtered water to your jar. Stir vigorously for about 30 seconds to dissolve the sugar and incorporate oxygen.
- Cover the jar with cheesecloth or a coffee filter and secure it with a rubber band. Place it in a warm area of your kitchen, ideally between 70 and 80 degrees Fahrenheit, away from direct sunlight.
- Every day for the next 5 to 7 days, add 1 tablespoon of fresh ginger and 1 tablespoon of sugar. Stir vigorously each time to introduce oxygen and distribute the new food.
- After 2 to 3 days, you should notice tiny bubbles forming at the surface and along the sides of the jar. The mixture will smell pleasantly yeasty and gingery, not foul or moldy.
- Your ginger bug is ready when it bubbles actively within minutes of stirring and has a slightly cloudy appearance. You should see consistent effervescence and hear a faint fizzing sound when you bring your ear close to the jar.
- When your bug is active, strain out the ginger pieces through a fine mesh strainer if desired, or leave them in for continued feeding. Use the liquid to ferment homemade sodas, or store the bug in the refrigerator for later use.