
There’s something magical about the aroma of freshly baked Filipino Cassava Cake wafting through the house. This delightful dessert is not only a staple at family gatherings but also a comforting reminder of home with its rich, sweet flavor and chewy texture.
It’s a crowd-pleaser, easy to make, and oh-so-versatile. Whether you enjoy it as a snack or a sweet treat after dinner, this cassava cake is bound to bring smiles to your loved ones’ faces.
Why You’ll Love This Recipe
This recipe is a must-try for anyone who enjoys unique desserts. Here are a few reasons to whip it up:
- Rich, buttery flavor that is simply irresistible.
- Chewy texture that makes each bite satisfying.
- Easy-to-follow steps that require minimal effort.
- Perfect for any occasion, from casual snacks to festive celebrations.
My Experience Making This Recipe
Making Filipino Cassava Cake is like taking a trip down memory lane. I remember helping my mom mix the ingredients, eager to taste the sweet batter.
When I finally took that first bite, the nostalgia hit me hard, reminding me of family gatherings and laughter. It was a hit, and I knew I had to share this recipe with others.
Recipe Overview
- Recipe Name: Filipino Cassava Cake
- Servings: 12
- Prep Time: 15 minutes
- Cook Time: 45 minutes
- Total Time: 1 hour
- Course: Dessert
- Cuisine: Filipino
- Calories per Serving: 180
Equipment You Will Need
- Mixing bowl
- Whisk or spatula
- 9×13 inch baking dish
- Oven
- Measuring cups and spoons
Ingredients for Filipino Cassava Cake
- 2 cups grated cassava (fresh or frozen)
- 1 cup coconut milk
- 1 cup sugar
- 1/2 cup evaporated milk
- 2 eggs
- 1/2 teaspoon baking powder
- 1/4 cup butter, melted
- 1/2 cup grated cheese (optional, for topping)
Ingredient Notes and Substitutions
- Grated cassava: This is the star ingredient that gives the cake its unique texture. If unavailable, you can use frozen grated cassava.
- Coconut milk: Adds a rich flavor and creaminess. Almond or oat milk can be used for a dairy-free version but will change the taste.
- Evaporated milk: Contributes richness to the batter. You can replace it with cream for a richer taste or use full-fat coconut milk for a dairy-free option.
- Cheese: Optional but adds a nice savory contrast to the sweetness. You can skip it or use a dairy-free cheese alternative if needed.
How to Make Filipino Cassava Cake
Step 1: Preheat the Oven
Preheat your oven to 350°F (175°C). This ensures that your cake starts baking at the right temperature for even cooking.
Step 2: Prepare the Baking Dish
Grease your 9×13 inch baking dish with butter. This will prevent the cake from sticking and make serving easier.
Step 3: Mix Wet Ingredients
In a mixing bowl, combine the grated cassava, coconut milk, evaporated milk, and melted butter. Mixing these first helps to incorporate the flavors evenly.
Step 4: Add Sugar and Eggs
Stir in the sugar and eggs until fully combined. This provides sweetness and binds the mixture together.
Step 5: Incorporate Dry Ingredients
Add the baking powder to the mixture and stir until just combined. This step is crucial for the cake to rise properly.
Step 6: Pour into the Baking Dish
Pour the batter into the prepared baking dish, spreading it evenly. This ensures that the cake bakes uniformly.
Step 7: Bake the Cake
Bake in the preheated oven for about 45 minutes, or until the top is golden brown and a toothpick comes out clean. Keep an eye on it to avoid overbaking.
Step 8: Add Cheese Topping
If using cheese, sprinkle it on top during the last 10 minutes of baking. This adds a deliciously gooey layer that complements the cake’s sweetness.
Pro Tip: Let the cake cool completely before slicing to allow it to firm up for better slices.
Tips for the Best Filipino Cassava Cake
- Use fresh cassava if possible for the best texture and flavor.
- Allow the cake to cool completely before serving to improve slicing.
- Experiment with different toppings like grated coconut or nuts for added flavor.
- Adjust the sweetness by adding more or less sugar according to your preference.
- Consider using a glass baking dish for a beautiful golden crust.
Common Mistakes to Avoid
- Not greasing the baking dish can lead to a stuck cake, making it hard to serve.
- Overmixing the batter can result in a dense texture instead of a light, fluffy cake.
- Skipping the cooling time can lead to messy slices that fall apart.
- Using too much sugar can overpower the natural flavors of the cassava.
Serving Suggestions
This cake shines on its own, but pairing it with a hot cup of coffee or tea makes for a delightful experience. Here are some ideas:
- Serve with a scoop of vanilla ice cream.
- Pair with fresh fruit for a refreshing contrast.
- Top with whipped cream for extra indulgence.
- Enjoy with a drizzle of sweetened condensed milk.
Variations to Try
- Swap in sweet potato for a different flavor profile while keeping a similar texture.
- Add pandan extract for a lovely, fragrant twist.
- Mix in chocolate chips for a sweet surprise.
- Incorporate nuts like cashews for a delightful crunch.
Dietary Adaptations
- Gluten-free: This recipe is naturally gluten-free since it uses cassava.
- Dairy-free: Use coconut milk and skip the cheese for a dairy-free option.
- Vegan: Replace eggs with flax eggs or applesauce for a plant-based version.
- Low-carb/keto: Use a sugar substitute to lower carbs while maintaining sweetness.
Storage and Reheating
Refrigerator
Store any leftovers in an airtight container in the fridge. This will keep the cake fresh for several days.
- Can be stored for up to 5 days.
Freezer
Cassava cake freezes well for longer storage. Just ensure it is completely cool before wrapping.
- Can be frozen for up to 3 months.
Reheating
Reheat slices in the microwave or oven until warmed through. This helps to revive the flavors and texture.
- Microwave for 20-30 seconds per slice.
- Oven at 350°F for about 10 minutes.
Nutrition Information
| Nutrient | Amount |
|---|---|
| Calories | 180 |
| Total Fat | 8g |
| Saturated Fat | 5g |
| Carbohydrates | 24g |
| Fiber | 1g |
| Sugar | 10g |
| Protein | 3g |
| Sodium | 80mg |
| Cholesterol | 30mg |
This nutritional information is approximate and can vary based on specific ingredients used.
Frequently Asked Questions
Can I use fresh cassava instead of frozen?
Yes, fresh cassava works perfectly and can enhance the flavor and texture.
Can I make this cake ahead of time?
Absolutely! It stores well in the fridge for a few days, or you can freeze it for later enjoyment.
What should I do if the texture is too dense?
Make sure not to overmix the batter, as this can lead to a dense cake.
Is it possible to reduce the sugar?
Yes, you can reduce the sugar to your taste, but it may affect the overall sweetness.
Can I add other flavors to the batter?
Definitely! You can experiment with vanilla extract, pandan, or even cocoa powder for a twist.
Final Thoughts
Making Filipino Cassava Cake is not just about baking; it’s about creating memories and sharing joy. I encourage you to give this recipe a try and experience the deliciousness yourself.
If you want to explore more delightful recipes, check out Mama’s Secret Recipes or try the Sweet Potato Cornbread Recipe for more inspiration. Enjoy your cooking adventure!
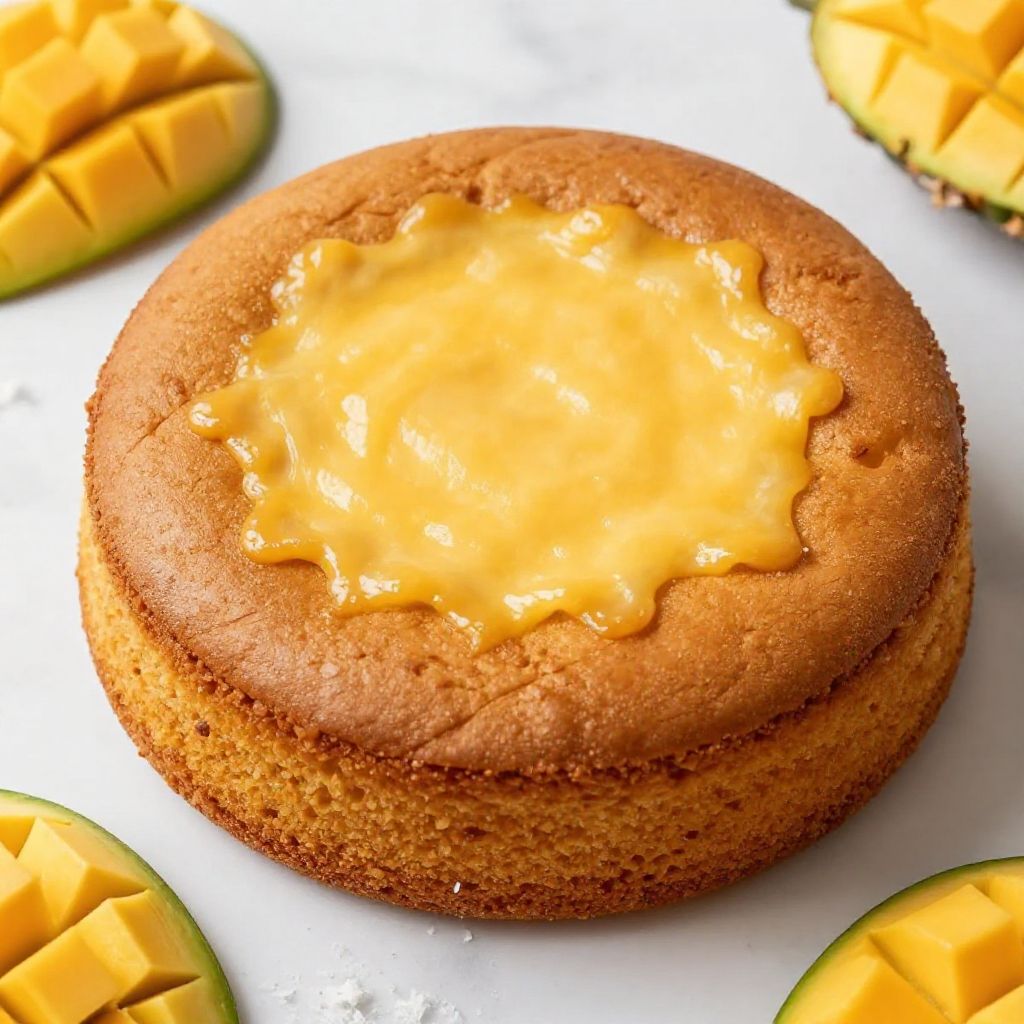
Filipino Cassava Cake
Ingredients
Equipment
Method
- Preheat the oven to 350°F (175°C).
- Grease a 9x13 inch baking dish with butter to prevent sticking.
- In a mixing bowl, combine grated cassava, coconut milk, evaporated milk, and melted butter.
- Stir in sugar and eggs until the mixture is smooth and fully combined.
- Add baking powder and gently mix until just incorporated.
- Pour the batter into the prepared baking dish and spread it evenly.
- Bake for 45 minutes or until the top is golden brown and a toothpick inserted in the center comes out clean.
- If using cheese, sprinkle grated cheese on top during the last 10 minutes of baking.
- Allow the cake to cool completely before slicing to ensure clean, firm slices.