
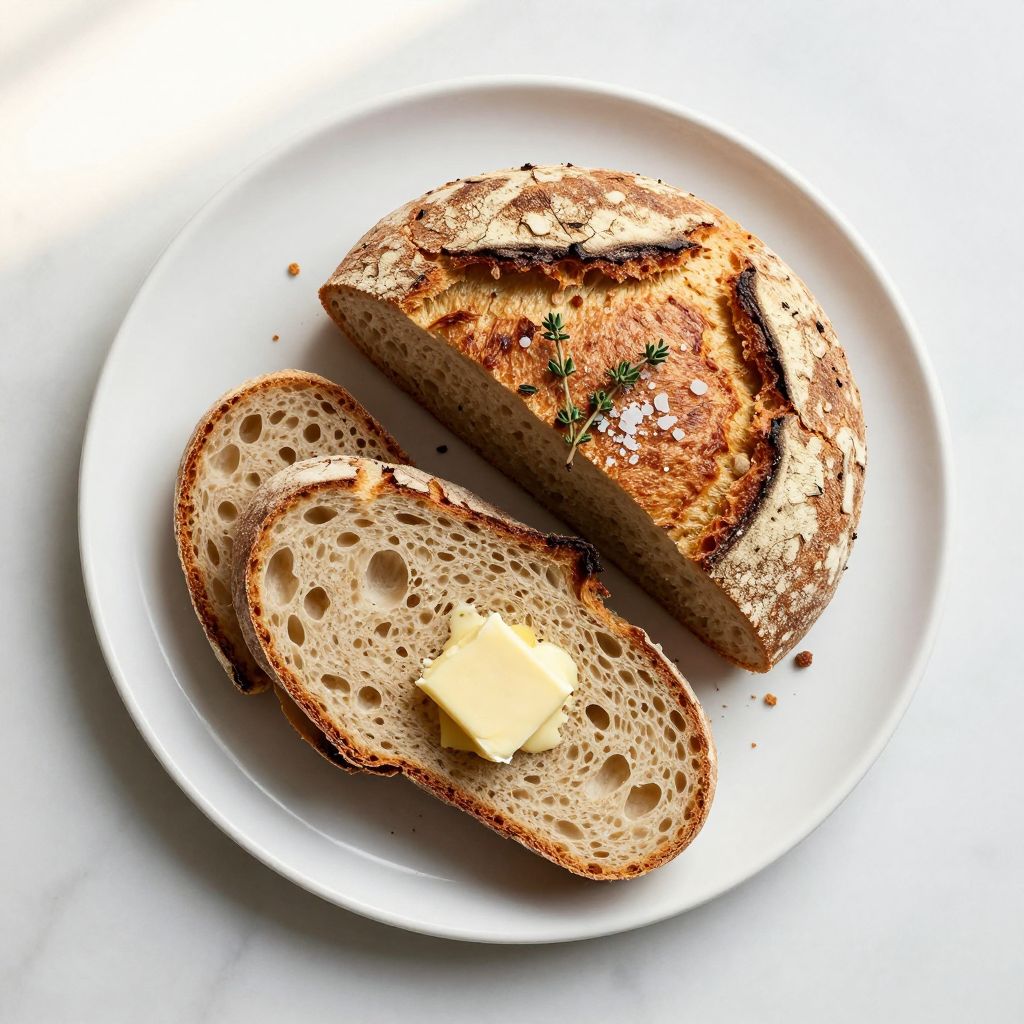
There’s something almost magical about pulling a golden loaf of einkorn bread from the oven, the crust crackling under your fingers as steam rises into your kitchen.
Einkorn bread deserves your attention because this ancient grain produces a loaf with remarkable flavor complexity and a tender crumb that feels less heavy than modern wheat breads. Many home bakers find einkorn easier to work with than they expect, since the dough behaves differently and actually rewards a gentler touch. The result tastes nutty, slightly sweet, and genuinely satisfying in a way that feels connected to bread from decades past.
Whether you’re chasing better digestion, exploring heritage grains, or simply want bread that tastes like something real, this recipe walks you through every step with confidence.
Why You’ll Love This Recipe
This einkorn bread recipe delivers results that feel like a win, whether you’re a seasoned baker or picking up a loaf pan for the first time. The ancient grain brings genuine depth to every slice.
- Rich, complex flavor that tastes nutty and naturally sweet without added sugar
- Tender, open crumb with a satisfying chew that stays fresh longer than most breads
- Lower gluten content makes it easier to digest for many people
- Works beautifully with minimal shaping, so you skip the stress of tight tension
- Creates a rustic crust that shatters beautifully when you bite into it
My Experience Making This Recipe
The first time I baked einkorn, I was frankly skeptical. I expected the dough to feel strange and unpredictable, but instead it surprised me with how forgiving it actually was.
My kitchen smelled incredible as the loaf rose and baked, filling the house with a toasted grain aroma that my kids could smell from the living room. When I sliced into the loaf that evening, the crumb fell open with those gorgeous irregular holes that tell you the fermentation worked perfectly.
My partner took one bite and asked why we’d been buying bread from the store all these years. That reaction sealed it for me: this recipe belongs in regular rotation.
Recipe Overview
- Recipe Name: Einkorn Bread
- Servings: One 800g loaf (about 12 slices)
- Prep Time: 15 minutes
- First Rise: 4-5 hours
- Final Proof: 8-12 hours (overnight)
- Cook Time: 35-40 minutes
- Total Time: 13-17 hours (mostly hands-off)
- Course: Bread
- Cuisine: Mediterranean/Heritage
- Calories per Serving: 145
Equipment You Will Need
- Large mixing bowl
- Kitchen scale (highly recommended for accuracy)
- Wooden spoon or dough whisk
- Dutch oven with lid (5-6 quart capacity)
- Banneton proofing basket or bowl lined with a well-floured kitchen towel
- Bench scraper or dough knife
- Instant-read thermometer (optional but helpful)
- Bread lame or sharp serrated knife for scoring
- Parchment paper
Ingredients for Einkorn Bread
- Einkorn flour: 500g (about 4 cups, spooned and leveled)
- Water: 350ml (about 1.5 cups)
- Sea salt: 10g (about 2 teaspoons)
- Active dry yeast: 1/4 teaspoon (or 50g active starter if using sourdough)
Ingredient Notes and Substitutions
- Einkorn flour brings complexity and lower gluten that prevents overdevelopment. You cannot substitute all-purpose flour without changing results, though you can blend 50% all-purpose with 50% einkorn if needed.
- Water hydration matters with einkorn since this grain absorbs liquid differently than modern wheat. Start with 350ml and add up to 25ml more if your dough looks too stiff after mixing.
- Sea salt adds subtle mineral flavor and controls fermentation speed. Table salt works but adds a slight metallic edge.
- Active dry yeast provides predictable rise, while sourdough starter (50g fed starter) adds tanginess and uses up excess culture.
How to Make Einkorn Bread
Step 1: Mix Your Dough
Combine 500g einkorn flour, 350ml water, and 1/4 teaspoon yeast in a large bowl, stirring until all flour is hydrated and you have a shaggy, wet mass with no dry pockets. This mixing style (called the autolyse phase when skipped, but here done quickly) gives the flour time to fully absorb water and activates gluten naturally.
Let this mixture rest for 15 minutes before adding salt. This rest period allows the starches to swell and creates better dough structure without aggressive mixing.
Step 2: Add Salt and Develop the Dough
Sprinkle 10g sea salt over the rested dough and fold it in using a wet hand, working the salt into the mass with gentle motions for about 3-4 minutes. The dough will feel firmer as the salt dissolves and begins strengthening the gluten network.
Einkorn develops differently than modern wheat. Work gently and stop when the dough feels cohesive but still slightly sticky, since overworking actually weakens this delicate gluten structure.
Step 3: Begin the First Rise
Cover the bowl with a damp kitchen towel and let the dough rest at room temperature (70-75F is ideal) for 30 minutes. This initial rest gives the yeast time to activate and the dough time to relax after mixing.
After 30 minutes, perform one set of stretch and folds by lifting the edge of the dough and folding it over itself, rotating the bowl and repeating this four times around. This builds strength without the intensity of kneading.
Step 4: Continue Building Strength with Stretch and Folds
Return the bowl to the counter and let it rest 30 minutes. Repeat the stretch and fold sequence two more times, with 30-minute rests between each set, for a total of three stretch-and-fold sessions over 90 minutes.
Watch how the dough changes texture. It should feel progressively smoother and hold its shape better, showing that gluten development is happening naturally.
Step 5: Complete the Bulk Fermentation
After your final stretch and fold, let the dough rise undisturbed for 2-3 more hours at room temperature until it’s puffy and jiggles slightly when you gently shake the bowl. Einkorn rises faster than modern wheat, so watch timing carefully.
You’re looking for about 50-75% volume increase, not a doubling like you’d expect with stronger modern flour. This restraint prevents the dough from overproofing and collapsing.
Step 6: Shape and Transfer to Your Proofing Basket
Gently tip the dough onto a lightly floured work surface. Shape it into a round boule by folding the far edge toward you, then the sides in, creating tension on the surface without aggressive handling.
Place the shaped dough seam-side up into a banneton or bowl lined with a floured towel. Cover loosely with plastic wrap or a shower cap.
Step 7: Cold Overnight Proof
Place the basket in your refrigerator and let the dough proof for 8-12 hours overnight. Cold fermentation develops flavor beautifully and makes the dough easier to score without tearing.
You can also proof at room temperature for 2-3 hours if you need bread the same day, but the overnight cold proof produces superior flavor and more open crumb structure.
Step 8: Preheat and Score
About 45 minutes before baking, place your Dutch oven in the oven and preheat to 450F. This gives the pot time to heat through and creates steam for that beautiful crackling crust.
Remove the dough from the fridge and carefully invert it onto parchment paper. Score the top with a sharp blade in a simple cross or oval slash, cutting about 1/4-inch deep to allow controlled expansion.
Step 9: Bake in the Dutch Oven
Carefully transfer the parchment with the dough into the preheated Dutch oven, then cover with the lid. Bake covered for 25 minutes to trap steam and create that crackling crust.
Remove the lid and bake for 12-15 more minutes until the loaf is deep golden brown. The internal temperature should reach 205-210F when you insert a thermometer into the center.
Step 10: Cool Before Slicing
Transfer the bread to a wire rack and let it cool completely, at least 1 hour, before slicing. This cooling time allows the crumb to set properly and makes slicing cleaner and easier.
Cutting into warm bread releases too much steam and leaves a gummy texture, so patience here makes all the difference in the final result.
Pro Tip: Einkorn dough feels wetter and stickier than modern wheat dough, and that’s completely normal. Trust the process instead of adding extra flour, since the lower protein content means it behaves differently but produces incredible results when you stop fighting it.
Tips for the Best Einkorn Bread
- Keep your kitchen between 70-75F during fermentation, since einkorn rises noticeably faster in warmth. If your kitchen runs cool, proof near a warm spot or use a proofing box.
- Use a kitchen scale instead of cups, since einkorn flour settles differently and cup measurements vary wildly. Scaling takes the guesswork out and guarantees consistency.
- Watch the dough behavior rather than following strict timing. Fermentation varies with temperature and humidity, so adjust based on how puffy your dough looks, not the clock.
- Don’t skip the cold overnight proof. This step transforms the flavor and opens up the crumb dramatically compared to same-day baking.
- Score decisively with confidence. A confident slash expands properly and creates that beautiful ear, while hesitant cuts tear unpredictably.
- Let the bread cool fully before slicing, even if the smell drives you crazy. Warm bread slices into gummy mush, while cooled bread cuts cleanly.
Common Mistakes to Avoid
- Adding too much water because the dough feels wetter than expected. Einkorn absorbs liquid more slowly, so resist the urge to add extra water right away.
- Over-fermenting during bulk rise by letting it double or more. Einkorn peaks at 50-75% volume increase, and overproofing collapses the gluten structure.
- Using a dull knife to score, which tears the dough instead of creating a clean opening for controlled expansion.
- Skipping the Dutch oven or not preheating it fully. Steam creation is what produces that crackling crust, so this step truly matters.
- Slicing while the bread is warm, which ruins the texture and makes the crumb gummy and impossible to slice cleanly.
Serving Suggestions
Warm einkorn bread stands beautifully on its own, needing nothing but a moment to cool so you can actually taste the grain complexity. It also pairs wonderfully with simple toppings that let the flour shine.
- Sliced thick and toasted with good butter and sea salt for breakfast
- Torn into pieces for soaking up soup or stew broth
- Alongside soft cheese and a drizzle of honey for a simple snack
- Rubbed with garlic and olive oil for a rustic crostini base
- Alongside cured meats and stone fruit for a casual lunch
Variations to Try
- Einkorn Whole Grain: Replace 100g of white einkorn flour with 100g einkorn whole grain flour for deeper, earthier flavor and added nutrition. The crumb will be slightly denser and more rustic.
- Einkorn with Seeds: Add 50g total of mixed seeds (sunflower, sesame, flax) during the bulk fermentation for texture and nuttiness that complements the grain flavor beautifully.
- Sourdough Version: Replace the 1/4 teaspoon yeast with 50g active sourdough starter fed 4-6 hours before mixing for tangier flavor and longer shelf life without commercial yeast.
- Einkorn with Herbs: Mix in 1 teaspoon dried herbs like thyme or oregano after the salt incorporates for Mediterranean flavor that pairs perfectly with olive oil.
- Enriched Einkorn: Add 15g honey and 1 egg after the initial rest but before salt for a slightly sweeter, richer loaf that toasts beautifully.
Dietary Adaptations
- Gluten-free: Einkorn still contains gluten, so this recipe won’t work. Use a certified gluten-free flour blend designed for artisan bread instead, though flavor and texture will differ significantly.
- Vegan: This recipe is already vegan if you use water only and commercial yeast instead of sourdough starter made with any animal products.
- Lower Carb: Einkorn is still a grain and won’t fit strict keto diets. Swap 50% of the flour with almond flour and add 1 egg to bind, though results become more like quick bread.
- Dairy-free: This recipe contains no dairy, so it’s naturally dairy-free as written.
Storage and Reheating
Refrigerator
Wrapped tightly in plastic wrap or an airtight container, einkorn bread stays fresh for up to 5 days in the refrigerator. The cool temperature actually extends freshness by slowing mold growth.
- Cool completely before wrapping to avoid condensation
- Slice after cooling to prevent compression of the warm crumb
- Store cut-side down on a cutting board if you prefer not to wrap for some air circulation
Freezer
Einkorn bread freezes beautifully for up to 3 months without flavor loss. Wrap it whole or slice first so you can grab individual pieces.
- Cool completely, wrap tightly in plastic wrap, then place in a freezer bag
- Label with the date so you know what you have
- Slice before freezing for grab-and-go convenience
Reheating
Refresh refrigerated or frozen bread by wrapping it loosely in foil and heating at 350F for 10-15 minutes until warmed through. A quick spritz of water before wrapping adds steam and restores crust crispness.
- Toast slices directly in a toaster for quick texture restoration
- Unwrap the loaf and place directly on oven racks for maximum crust recrisping
- Avoid microwaving, which makes the crumb rubbery and soggy
Nutrition Information
| Nutrient | Amount |
|---|---|
| Calories | 145 |
| Total Fat | 1g |
| Saturated Fat | 0.2g |
| Carbohydrates | 30g |
| Fiber | 1.5g |
| Sugar | 0.5g |
| Protein | 5g |
| Sodium | 340mg |
| Cholesterol | 0mg |
This nutrition information is calculated per slice based on a 12-slice loaf and uses standard USDA data for einkorn flour and the basic ingredients listed. Actual values may vary based on your specific flour brand and hydration adjustments.
Einkorn Bread
Ingredients
Equipment
Method
- Combine 500 g einkorn flour, 350 ml water, and 1/4 teaspoon yeast in a large bowl, stirring until a shaggy mass forms; let rest for 15 minutes.
- Sprinkle 10 g sea salt over the dough and fold with a wet hand for 3–4 minutes until cohesive but still slightly sticky.
- Cover the bowl with a damp towel and rest at room temperature for 30 minutes.
- Perform a set of stretch-and-folds: lift one edge and fold over, rotating bowl to repeat four times; rest 30 minutes and repeat two more times (total three sets over 90 minutes).
- Let dough rise undisturbed for 2–3 hours at 70–75°F until puffy with a 50–75% volume increase.
- Gently shape dough into a round boule on a floured surface and place seam-side up in a floured banneton; cover and refrigerate 8–12 hours.
- Preheat Dutch oven with lid to 450°F (230°C) for 45 minutes.
- Invert dough onto parchment, score a 1/4"-deep slash, and carefully transfer into the preheated Dutch oven.
- Bake covered at 450°F (230°C) for 25 minutes, then remove lid and bake 12–15 more minutes until deep golden and internal temperature reaches 205–210°F.
- Transfer loaf to a wire rack and cool completely for at least 1 hour before slicing.