
There’s something magical about sinking your teeth into a Dream Bars treat. These delightful squares boast a buttery crust, a creamy filling, and a sweet topping that feels like a comforting hug. Perfect for gatherings or just a cozy afternoon snack, they blend the rich flavors of sweetened condensed milk and chocolate in every bite. You’ll find that they’re not just easy to make, but they’ll have everyone asking for the recipe. Let’s gather our ingredients and get started!
Why You’ll Love This Recipe
This recipe is a true crowd-pleaser and is as simple as it gets.
- Quick prep time means you can whip them up in no time.
- Rich flavors create a dessert that feels indulgent.
- Versatile enough for any occasion, from parties to potlucks.
- Minimal ingredients make it easy to have on hand.
- Perfect for satisfying that sweet tooth!
My Experience Making This Recipe
I remember the first time I made these Dream Bars; the kitchen smelled incredible. As they baked, I could hardly wait for them to cool before diving in.
When I finally took a bite, the layers melted together in a symphony of sweetness. My friends were instantly hooked, and now they’re a staple in my baking repertoire.
Recipe Overview
- Recipe Name: Dream Bars
- Servings: 16 bars
- Prep Time: 15 minutes
- Cook Time: 25 minutes
- Total Time: 40 minutes
- Course: Dessert
- Cuisine: American
- Calories per Serving: 200
Equipment You Will Need
- 9×13 inch baking dish
- Mixing bowls
- Whisk
- Spatula
- Measuring cups and spoons
Ingredients for Dream Bars
- 1 cup all-purpose flour
- 1/2 cup unsalted butter, softened
- 1/4 cup granulated sugar
- 1/2 cup sweetened condensed milk
- 1 cup semi-sweet chocolate chips
- 1/2 cup shredded coconut (optional)
- 1/2 cup chopped nuts (optional)
Ingredient Notes and Substitutions
- All-purpose flour: This forms the base for the crust; you can substitute with gluten-free flour for a gluten-free version.
- Unsalted butter: Adds richness; coconut oil can be a dairy-free alternative.
- Granulated sugar: Sweetens the crust; brown sugar can add a deeper flavor.
- Sweetened condensed milk: Gives that creamy texture; try evaporated milk with added sugar as a substitute.
- Semi-sweet chocolate chips: For a classic taste; milk chocolate can be used for a sweeter result.
How to Make Dream Bars
Step 1: Preheat the Oven
Start by preheating your oven to 350°F (175°C). This ensures your Dream Bars bake evenly.
Step 2: Prepare the Baking Dish
Grease a 9×13 inch baking dish with butter or cooking spray. This will help the bars release easily after baking.
Step 3: Make the Crust
In a mixing bowl, combine the softened butter and granulated sugar until creamy. This creates a rich base for your bars.
Step 4: Add the Flour
Gradually mix in the all-purpose flour until well combined. The mixture should be crumbly but hold together when pressed.
Step 5: Press the Crust into the Dish
Evenly press the crust mixture into the bottom of the greased baking dish. This forms a solid base for the layers above.
Step 6: Bake the Crust
Bake the crust in the preheated oven for 15 minutes, until lightly golden. This sets the foundation for the creamy filling.
Step 7: Prepare the Filling
While the crust bakes, whisk together the sweetened condensed milk with half of the chocolate chips. This creates a luscious filling.
Step 8: Assemble and Bake
Pour the filling over the baked crust and sprinkle the remaining chocolate chips on top. Bake for an additional 10 minutes until bubbly.
Pro Tip: For an extra special touch, add a sprinkle of sea salt on top right after baking to enhance the flavors.
Tips for the Best Dream Bars
- Ensure butter is softened to room temperature for easy mixing.
- Don’t skip the pre-baking step; it keeps the crust from becoming soggy.
- Feel free to experiment with different chocolate types for varied flavors.
- Let the bars cool completely before cutting; this helps them set properly.
- Store in an airtight container to maintain freshness.
Common Mistakes to Avoid
- Using cold butter: It won’t mix well, leading to a dense crust.
- Overbaking the crust: This can dry it out, making it less enjoyable.
- Skipping the cooling time: Cutting while warm can result in messy bars.
- Not greasing the pan: This will make it difficult to remove the bars.
Serving Suggestions
These Dream Bars are fantastic on their own, but you can elevate them even more.
- Pair with a scoop of vanilla ice cream.
- Serve with fresh berries for a tart contrast.
- Drizzle with caramel sauce for added sweetness.
- Accompany with a cup of coffee or tea.
Variations to Try
- Add peanut butter to the filling for a nutty twist.
- Incorporate toffee bits for a delightful crunch.
- Swap chocolate chips for white chocolate for a sweeter profile.
- Mix in some dried fruits for an unexpected flavor burst.
Dietary Adaptations
- Gluten-free: Use a gluten-free flour blend instead of all-purpose flour.
- Dairy-free: Replace butter with coconut oil and use dairy-free chocolate chips.
- Vegan: Follow the dairy-free suggestions and use a plant-based condensed milk.
- Low-carb/keto: Substitute flour with almond flour and use sugar-free chocolate.
Storage and Reheating
Refrigerator
Store leftover Dream Bars in an airtight container in the fridge. They can last up to a week.
- Keep them in a single layer to prevent sticking.
- Cover with plastic wrap for extra freshness.
Freezer
For longer storage, freeze the bars wrapped tightly in plastic wrap. They can last up to three months.
- Thaw in the fridge before serving for best texture.
- Cut into squares before freezing for easy access.
Reheating
To enjoy warm Dream Bars, microwave for a few seconds. They are best enjoyed fresh but still delicious warmed up.
- Start with 10 seconds and check to avoid overheating.
- Pair with ice cream for a delightful treat.
Nutrition Information
| Nutrient | Amount |
|---|---|
| Calories | 200 |
| Total Fat | 10g |
| Saturated Fat | 6g |
| Carbohydrates | 26g |
| Fiber | 1g |
| Sugar | 15g |
| Protein | 2g |
| Sodium | 150mg |
| Cholesterol | 30mg |
This nutritional information is approximate and can vary based on specific ingredients used.
Frequently Asked Questions
Can I make these bars ahead of time?
Absolutely! They store well in the fridge or freezer, making them great for meal prep.
What can I substitute for sweetened condensed milk?
You can use evaporated milk with added sugar or make your own version using milk and sugar.
Why are my Dream Bars too crumbly?
This could be due to overbaking or not using enough butter. Make sure to follow the recipe closely.
Can I use different flavors of chocolate?
Yes! Feel free to experiment with dark, milk, or even white chocolate for different flavor profiles.
How do I store leftovers?
Keep them in an airtight container in the refrigerator for up to a week or freeze for longer storage.
Final Thoughts
Making these Dream Bars is a delightful way to satisfy your sweet cravings. I hope you enjoy every delicious bite as much as I do.
For more tasty treats, check out my Cosmic Brownie Recipe and Protein Brownies Recipe for a bit of variety in your dessert lineup.
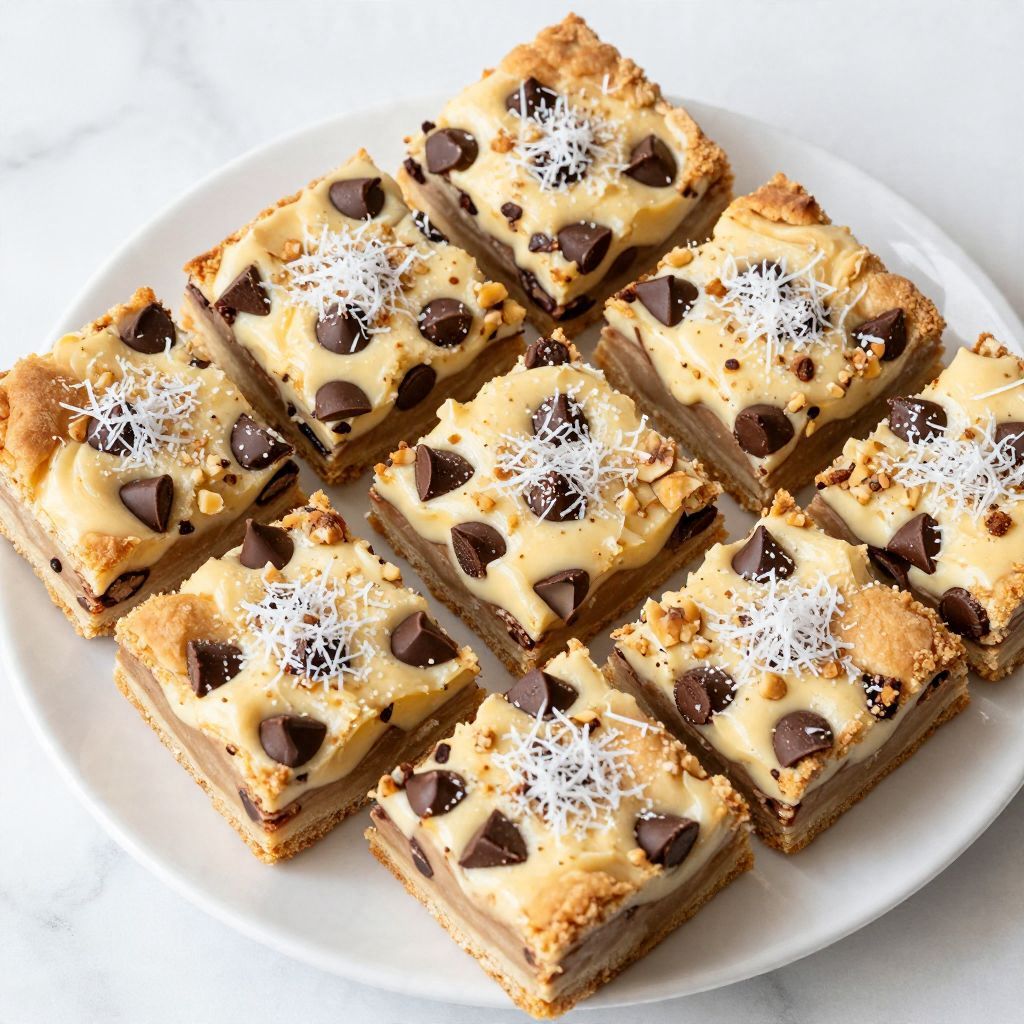
Dream Bars
Ingredients
Equipment
Method
- Preheat the oven to 350°F (175°C).
- Grease a 9x13 inch baking dish with butter or cooking spray.
- In a mixing bowl, combine the softened butter and granulated sugar until creamy.
- Gradually mix in the all-purpose flour until well combined.
- Evenly press the crust mixture into the bottom of the greased baking dish.
- Bake the crust in the preheated oven for 15 minutes.
- While the crust bakes, whisk together the sweetened condensed milk with half of the chocolate chips.
- Pour the filling over the baked crust and sprinkle the remaining chocolate chips on top.
- Bake for an additional 10 minutes until bubbly.