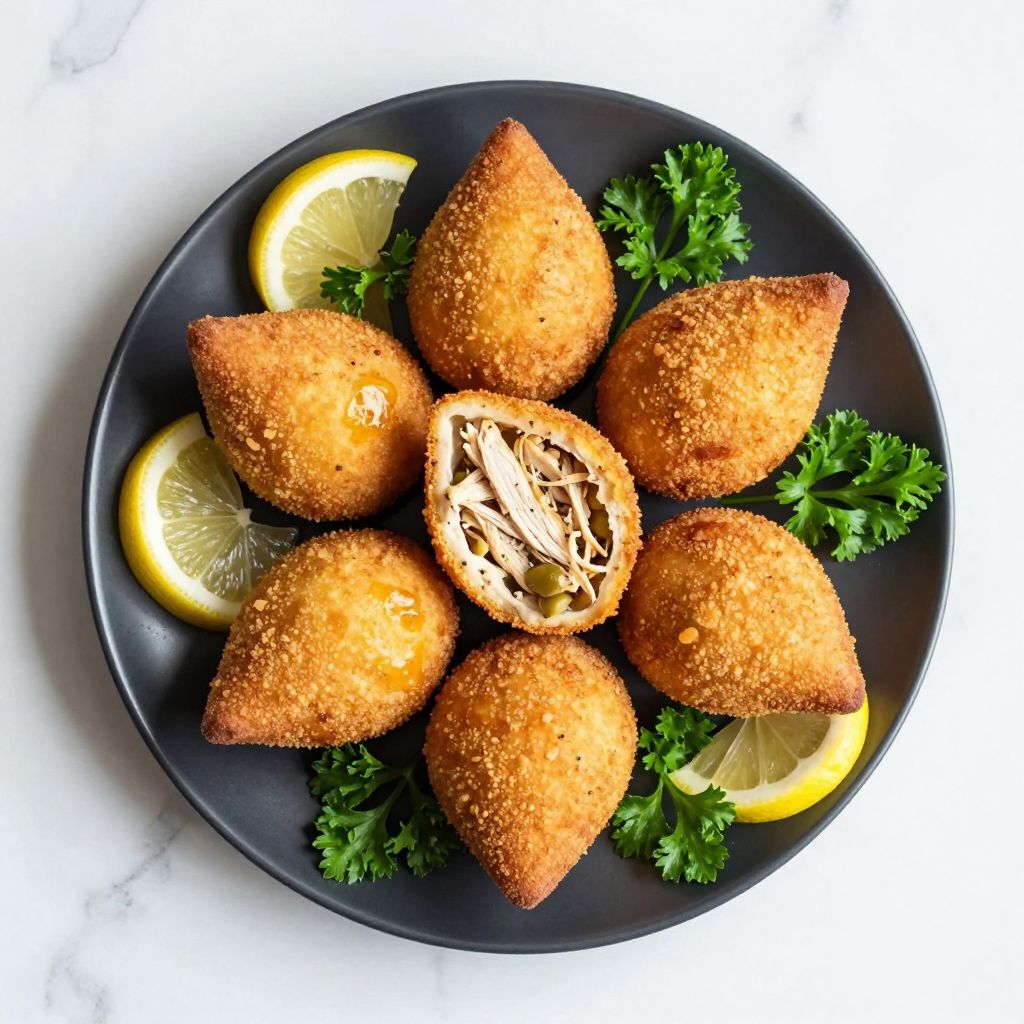
The first time I bit into a warm coxinha, I understood why these golden, teardrop-shaped Brazilian snacks vanish from party platters in minutes. The crispy exterior shatters between your teeth, giving way to creamy, savory chicken filling studded with olives and herbs that make you reach for another one immediately.
Coxinha is a beloved Brazilian street food and appetizer that feels fancy enough for dinner parties yet simple enough for weeknight cooking. The magic lies in its contrast: a silky potato-based dough exterior that crisps up beautifully, paired with a flavorful filling that’s rich without being heavy.
Why You’ll Love This Recipe
These little pockets of joy deliver restaurant-quality results in your own kitchen. They’re perfect for feeding a crowd, make-ahead friendly, and genuinely addictive.
- Crispy golden exterior with a tender, creamy interior that satisfies every texture craving
- Filled with seasoned shredded chicken, olives, and herbs for bold, savory flavor
- Make-ahead and freezer-friendly, so you can fry them whenever you need appetizers
- Naturally gluten-free when made with the right flour, opening doors for dietary needs
- Requires basic ingredients most home cooks already have on hand
My Experience Making This Recipe
The first batch I made, I was honestly nervous. Hand-forming dough around filling sounded fussy, but after the second coxinha, my hands understood the motion and speed picked up naturally.
What surprised me most was how the potato dough behaves differently from traditional bread dough. It’s more forgiving, actually, since you’re not fighting gluten development or worrying about overworking it.
When I pulled the first batch from the hot oil, my kitchen filled with this incredible savory aroma. My partner ate three before they cooled down enough to handle, which told me everything I needed to know about whether this recipe was worth the effort.
Recipe Overview
- Recipe Name: Coxinha (Brazilian Chicken Fritters)
- Servings: Makes about 20 coxinhas (4 to 5 servings as appetizer)
- Prep Time: 40 minutes
- Cook Time: 30 minutes
- Total Time: 1 hour 10 minutes
- Course: Appetizer, Snack
- Cuisine: Brazilian
- Calories per Serving: 185 calories
Equipment You Will Need
- Large pot or deep skillet for frying
- Candy or deep-fry thermometer
- Medium saucepan for making the filling
- Large mixing bowl for the dough
- Wooden spoon or silicone spatula
- Paper towels for draining
- Small bowl of water for wet hands
- Shallow bowls for breadcrumbs and beaten eggs
- Slotted spoon for removing from oil
Ingredients for Coxinha
For the Filling
- 2 tablespoons butter
- 1/2 medium onion, finely diced
- 3 cups shredded cooked chicken (rotisserie chicken works great)
- 1/2 cup pitted green olives, chopped
- 2 tablespoons fresh parsley, chopped
- 1/4 teaspoon black pepper
- 1/2 teaspoon salt (adjust to taste)
- 1/4 cup chicken broth
For the Dough
- 3 cups chicken broth
- 4 tablespoons butter
- 1 teaspoon salt
- 2 cups all-purpose flour
- 1 egg yolk (for the dough, not for breading)
For Coating and Frying
- 2 eggs, beaten
- 1.5 cups panko breadcrumbs
- Oil for frying (vegetable or canola oil)
Ingredient Notes and Substitutions
- Shredded Chicken: I use rotisserie chicken for speed and tenderness. Store-bought is completely legitimate here. You can poach chicken breasts at home if you prefer, but the time savings of rotisserie chicken makes this recipe genuinely manageable on a busy weeknight.
- Green Olives: These add briny, savory depth to the filling. If you dislike olives, you can substitute chopped sun-dried tomatoes or roasted red peppers for similar umami without the olive flavor, though the result will taste noticeably different.
- Panko Breadcrumbs: Panko creates that signature crispy, ultra-golden crust. Regular breadcrumbs work but produce a finer, less crunchy coating, so stick with panko if you can find it.
- All-Purpose Flour: This is the base for your dough and creates the right structure. Whole wheat flour will make a denser dough and requires more liquid, so I don’t recommend substituting it entirely.
- Chicken Broth: The liquid brings everything together while adding seasoning. You can use vegetable broth for a lighter result, though chicken broth delivers better flavor for this dish.
How to Make Coxinha
Step 1: Make the Filling
Heat butter in a medium saucepan over medium heat and add the diced onion. Saute for about 2 to 3 minutes until the onion softens and becomes translucent, which develops its natural sweetness.
Stir in the shredded chicken, chopped olives, parsley, salt, pepper, and chicken broth. Cook for 3 to 4 minutes, stirring occasionally, until most of the liquid absorbs and the mixture feels thick and cohesive rather than wet.
Spread the filling on a clean plate to cool completely. Cold filling is essential because it won’t melt through your dough while you’re shaping, and it sets up firm enough to handle without falling apart.
Step 2: Prepare the Dough Base
Pour the chicken broth, butter, and salt into a medium saucepan and bring to a rolling boil over medium-high heat. The heat activates the flour’s starches and cooks the dough partially, which gives coxinha its signature creamy interior.
Once boiling, remove from heat and add the flour all at once, stirring vigorously with a wooden spoon until a thick, paste-like dough forms. Work it for about 30 seconds until flour is completely incorporated and no dry bits remain.
Step 3: Cool and Mix the Dough
Let the dough rest for 2 to 3 minutes until it’s cool enough to handle but still warm. This cooling window matters because you need dough warm enough to work with smoothly but cool enough to not burn your hands.
Once cooled slightly, mix in the egg yolk, stirring vigorously until the dough becomes smooth, shiny, and holds together as one mass. The egg yolk enriches the dough and helps bind everything together.
Step 4: Set Up Your Assembly Station
Place the cooled filling, beaten eggs, and panko breadcrumbs into separate shallow bowls. Have a small bowl of water nearby and keep paper towels handy so you can wipe your hands between shaping to prevent sticking.
Keep everything within arm’s reach because once you start shaping, you’ll want to move quickly and maintain a steady rhythm. Setting up before you start saves frustration.
Step 5: Shape the Coxinhas
Wet your hands lightly with water and grab about 2 tablespoons of dough, rolling it into a ball roughly the size of a plum. Flatten it gently between your palms into a small disc about 2 inches across.
Place about 1 teaspoon of filling in the center of the dough disc. Fold the dough up and over the filling, sealing the edges by gently pressing them together, then roll the whole thing between your palms to form a smooth, teardrop shape about 2 inches long.
Place each shaped coxinha on a clean plate or baking sheet. If you work quickly and keep your hands wet, this becomes almost meditative rather than fussy.
Step 6: Bread the Coxinhas
Dip each shaped coxinha into the beaten egg, letting any excess drip off back into the bowl. This egg wash acts as the glue that holds breadcrumbs onto your surface, creating that crispy exterior.
Immediately roll the egg-coated coxinha in panko breadcrumbs, pressing gently so they adhere evenly. Place each breaded coxinha on a plate, and leave them uncovered to let the coating dry slightly for 5 to 10 minutes, which helps the coating crisp up better.
Step 7: Heat Your Oil
Fill a large pot or deep skillet with oil to about 3 inches deep and attach a candy thermometer to the side. Heat the oil to 350 degrees Fahrenheit, which is the sweet spot for frying coxinhas without them browning too fast on the outside while staying raw inside.
Maintaining temperature is crucial, so let the oil stabilize at 350 for at least 2 minutes before you start frying. If your oil is too cool, the coating will absorb oil and feel greasy rather than crispy.
Step 8: Fry the Coxinhas
Carefully place 4 to 5 coxinhas into the hot oil, working in batches to avoid crowding the pan. Crowding drops the temperature and creates greasy, unevenly cooked results, so patience pays off here.
Fry for 2 to 3 minutes per side until the coating is deep golden brown and the coxinha floats to the surface. Use a slotted spoon to gently turn them halfway through and monitor color carefully.
Transfer fried coxinhas to a plate lined with paper towels to drain excess oil. Serve warm or at room temperature, and eat them within an hour of frying for the crispiest texture.
Pro Tip: Make the filling and dough the day before, keep them refrigerated in separate containers, and assemble and fry the coxinhas fresh whenever you need them for a crowd. This breaks the recipe into manageable chunks and delivers hot, crispy results every single time.
Tips for the Best Coxinha
- Use cold filling when shaping so it doesn’t leak through the dough or create holes that let oil seep in during frying.
- Keep your hands wet but not dripping while shaping, since this prevents sticking without making the dough soggy.
- Check your oil temperature with a thermometer rather than guessing, since temperature control is the biggest factor in achieving crispy, non-greasy results.
- Don’t skip the cooling step after breading, as it lets the coating set and adhere better, creating extra crunch.
- Work in small batches when frying so each coxinha gets plenty of space, ensuring even browning and preventing temperature swings in the oil.
- Taste your filling before shaping and adjust seasoning aggressively since cold filling tastes less seasoned than hot filling.
Common Mistakes to Avoid
- Warm filling leaking through dough: This ruins texture and lets oil seep into the filling instead of just the exterior, creating greasy results. Always cool your filling completely before shaping.
- Oil temperature too low: Cool oil means a greasy, soggy coxinha with a pale, limp coating. Use a thermometer and maintain 350 degrees throughout frying.
- Dough too thick or thin: Thick dough creates an oversized, doughy interior that overpowers the filling, while thin dough breaks apart during shaping. Aim for about the thickness of a coin when flattened.
- Overcrowding the frying pan: Too many coxinhas at once drops oil temperature and creates uneven, pale browning. Fry 4 to 5 at a time maximum.
- Skipping the egg wash: Breadcrumbs won’t stick properly without egg, leading to uncoated patches and disappointing texture contrast.
Serving Suggestions
Coxinhas shine as party appetizers but also work as a casual snack or light lunch when paired with the right sides. Serve them hot from the oil for maximum impact, though they taste great at room temperature too.
- With lime wedges and hot sauce for authentic Brazilian street food vibes
- Alongside a fresh green salad and vinaigrette for a lighter meal
- With a simple tomato-based dipping sauce or garlic aioli for extra flavor
- As part of a larger appetizer spread with other finger foods for parties
- With cold beer or Brazilian lemonade for an authentic pairing experience
Variations to Try
- Shrimp Coxinha: Replace chicken with seasoned cooked shrimp and add a pinch of paprika for a seafood twist that’s lighter and more delicate than the traditional version.
- Cheese and Ham: Skip the olives and fill with shredded cheddar, diced ham, and fresh herbs for a breakfast-style coxinha that works beautifully alongside coffee.
- Spicy Chorizo Version: Mix spicy chorizo into the filling instead of plain chicken and add roasted red peppers for a bolder, more intense flavor profile.
- Palmito Filling: Use canned palmito (hearts of palm) combined with chicken for a creamier, more delicate filling that’s popular in some Brazilian regions.
- Vegetarian Option: Fill with seasoned mashed potato, corn, carrots, peas, and herbs for a meat-free version that’s equally satisfying and great for mixed-diet gatherings.
Dietary Adaptations
- Gluten-Free: Replace all-purpose flour with a high-quality gluten-free flour blend designed for savory baking and use gluten-free panko for breading. Expect slightly different texture, but the result is still delicious.
- Dairy-Free: Use olive oil or coconut oil instead of butter in both the filling and dough, and omit the egg yolk from the dough while adding an extra tablespoon of flour for binding. The texture shifts slightly but remains enjoyable.
- Vegan and Vegetarian: Use vegetable broth instead of chicken, fill with seasoned vegetables and nutritional yeast, use aquafaba (chickpea liquid) instead of egg wash, and coat as usual. The result is completely plant-based and surprisingly satisfying.
- Low-Carb and Keto: This recipe is challenging to adapt without significantly changing the nature of the dish. A cauliflower-based dough could work but would lose the signature creamy texture that makes coxinha special.
Storage and Reheating
Refrigerator
Store cooked coxinhas in an airtight container for up to 3 days. They taste best eaten fresh but remain safe and edible through day three.
- Let them cool completely before sealing to prevent condensation
- Layer them gently with parchment between coxinhas to prevent sticking
Freezer
Freeze uncooked breaded coxinhas on a baking sheet before transferring to a freezer bag for up to 3 months. This is the best option for make-ahead entertaining since you can fry them straight from frozen.
- Freeze them uncooked rather than after frying for best texture
- Label your bag with the date so you know when they were made
- Fry from frozen, adding just 1 minute to the cooking time
Reheating
Reheat cooked coxinhas in a 350-degree oven for 8 to 10 minutes until heated through and crispy again. Avoid microwaving, which makes them soggy and ruins that crispy coating you worked for.
- Place on a wire rack in the oven so air circulates underneath
- Check internal temperature reaches 165 degrees if you’re concerned about food safety
Nutrition Information
| Nutrient | Amount |
|---|---|
| Calories | 185 |
| Total Fat | 9g |
| Saturated Fat | 3g |
| Carbohydrates | 16g |
| Fiber | 0g |
| Sugar | 1g |
| Protein | 12g |
| Sodium | 420mg |
| Cholesterol | 55mg |
Nutrition facts are estimated based on standard ingredient amounts and serving size of one coxinha. Individual results vary based on oil absorption during frying and exact ingredients used.
Frequently Asked Questions
Can I make the filling and dough ahead of time?
Absolutely, and I
Coxinha (Brazilian Chicken Fritters)
Ingredients
Equipment
Method
- Heat 2 tablespoons butter in a medium saucepan over medium heat and add the diced onion. Saute for 2 to 3 minutes until the onion softens and becomes translucent.
- Stir in the shredded chicken, chopped olives, parsley, salt, pepper, and 1/4 cup chicken broth. Cook for 3 to 4 minutes, stirring occasionally, until most of the liquid absorbs and the mixture feels thick and cohesive.
- Spread the filling on a clean plate to cool completely.
- Pour 3 cups chicken broth, 4 tablespoons butter, and 1 teaspoon salt into a medium saucepan and bring to a rolling boil over medium-high heat.
- Once boiling, remove from heat and add the 2 cups flour all at once, stirring vigorously with a wooden spoon until a thick, paste-like dough forms. Work it for about 30 seconds until flour is completely incorporated.
- Let the dough rest for 2 to 3 minutes until cool enough to handle but still warm.
- Once cooled slightly, mix in the egg yolk, stirring vigorously until the dough becomes smooth, shiny, and holds together as one mass.
- Place the cooled filling, beaten eggs, and panko breadcrumbs into separate shallow bowls. Have a small bowl of water nearby.
- Wet your hands lightly with water and grab about 2 tablespoons of dough, rolling it into a ball. Flatten it gently between your palms into a small disc about 2 inches across.
- Place about 1 teaspoon of filling in the center of the dough disc. Fold the dough up and over the filling, sealing the edges by gently pressing them together, then roll between your palms to form a smooth, teardrop shape about 2 inches long.
- Place each shaped coxinha on a clean plate or baking sheet. Repeat with remaining dough and filling.
- Dip each shaped coxinha into the beaten egg, letting any excess drip off.
- Immediately roll the egg-coated coxinha in panko breadcrumbs, pressing gently so they adhere evenly. Place each breaded coxinha on a plate and let the coating dry slightly for 5 to 10 minutes.
- Fill a large pot or deep skillet with oil to about 3 inches deep and heat to 350 degrees Fahrenheit using a candy thermometer.
- Carefully place 4 to 5 coxinhas into the hot oil, working in batches. Fry for 2 to 3 minutes per side until the coating is deep golden brown and the coxinha floats to the surface.
- Transfer fried coxinhas to a plate lined with paper towels to drain excess oil. Serve warm or at room temperature.