
There’s something magical about the smell of freshly baked sourdough ciabatta bread wafting through your kitchen. The crust is perfectly crispy, while the inside is airy and chewy, making each bite a delightful experience. This recipe is a celebration of simplicity and flavor, perfect for sandwiches or simply enjoying with a drizzle of olive oil. With its rustic charm and artisanal feel, making this ciabatta at home is not just rewarding but truly delicious. Let’s gather our ingredients and get started!
Why You’ll Love This Recipe
This sourdough ciabatta bread is a standout for several reasons.
- Its crust is crispy, while the inside remains soft and airy.
- Using sourdough starter gives it a unique flavor profile.
- The dough is easy to handle, making the process enjoyable.
- Perfect for sandwiches, bruschetta, or toast.
- It’s a fun project that impresses family and friends.
My Experience Making This Recipe
When I first attempted this sourdough ciabatta, I was pleasantly surprised by how forgiving the dough was. The aroma that filled my kitchen was simply irresistible, and my family couldn’t wait to dig in.
Seeing the dough rise and transform into beautiful loaves felt incredibly rewarding. Each bite had that perfect balance of crust and crumb, making it a cherished addition to our home-baked repertoire.
Recipe Overview
- Recipe Name: Sourdough Ciabatta Bread
- Servings: 8
- Prep Time: 20 minutes (plus rising time)
- Cook Time: 30 minutes
- Total Time: 2 hours (including rising)
- Course: Bread
- Cuisine: Italian
- Calories per Serving: 180
Equipment You Will Need
- Large mixing bowl
- Bench scraper
- Baking sheet
- Parchment paper
- Kitchen scale (optional)
- Proofing basket (optional)
- Oven
Ingredients for Sourdough Ciabatta Bread
- 500g bread flour
- 350g water, at room temperature
- 100g active sourdough starter
- 10g salt
Ingredient Notes and Substitutions
- Bread flour: This flour gives the bread structure and chew. All-purpose flour can work in a pinch but may yield a slightly different texture.
- Water: Using filtered water is best to avoid any chlorine taste. Tap water is generally fine if it tastes good.
- Sourdough starter: A well-fed starter contributes to the flavor and rise of the bread. You can substitute with a store-bought starter, though flavor may vary.
- Salt: Enhances flavor and strengthens gluten. It cannot be omitted, but you can use sea salt instead of table salt.
How to Make Sourdough Ciabatta Bread
Step 1: Mix the Dough
In a large mixing bowl, combine the bread flour, water, and sourdough starter. Stir until no dry flour remains; this ensures proper hydration.
Step 2: Autolyse
Let the mixture rest for 30 minutes. This step allows gluten to develop, making the dough easier to handle.
Step 3: Add Salt
Sprinkle the salt over the dough and mix it in thoroughly. This step helps control fermentation and enhances flavor.
Step 4: Bulk Fermentation
Cover the bowl and let it rise at room temperature for 4 to 6 hours. Perform stretch and folds every 30 minutes for the first 2 hours to develop strength.
Step 5: Shape the Dough
Turn the dough out onto a well-floured surface. Carefully shape it into a rectangle, then cut it into two equal pieces.
Step 6: Pre-shape the Loaves
Gently form each piece into a rough ball. Allow them to rest for about 30 minutes to relax the gluten.
Step 7: Final Shape
Shape the loaves into their final form, ensuring they are tight and smooth. Place them seam-side up into a floured proofing basket or on a floured surface.
Step 8: Preheat the Oven
About 30 minutes before baking, preheat your oven to 450°F (230°C). A hot oven is crucial for a good oven spring and a crispy crust.
Pro Tip: For extra steam in the oven, place a pan with water at the bottom while baking. This helps create that perfect crust.
Tips for the Best Sourdough Ciabatta Bread
- Use a digital scale for accurate measurements, ensuring consistency in your bread.
- Make sure your sourdough starter is active and bubbly before using it.
- Don’t rush the fermentation; longer times develop better flavors.
- Use a pizza stone for a better crust if you have one.
- Experiment with different flours for unique flavors.
Common Mistakes to Avoid
- Skipping the autolyse step can lead to a dense loaf.
- Not allowing enough time for fermentation results in flat bread.
- Using a weak starter can affect the bread’s rise.
- Overworking the dough during shaping can lead to a tough texture.
Serving Suggestions
This sourdough ciabatta is incredibly versatile and can be enjoyed in many ways.
- Sandwiches filled with your favorite meats and cheeses.
- Bruschetta topped with tomatoes and basil.
- Served alongside soups or stews.
- As toast with butter and jam.
- With olive oil and balsamic vinegar for dipping.
Variations to Try
- Add herbs like rosemary or thyme to the dough for an aromatic twist.
- Incorporate olives or sun-dried tomatoes for Mediterranean flair.
- Try whole wheat flour for a nuttier flavor.
- Top with seeds like sesame or poppy before baking for extra crunch.
Dietary Adaptations
- Gluten-free: Use a gluten-free flour blend, though texture will differ.
- Dairy-free: This recipe is naturally dairy-free, so no changes are needed.
- Vegan: The recipe is vegan-friendly as it contains no animal products.
- Low-carb/Keto: Substitute with almond or coconut flour for a lower-carb option, but results will vary.
Storage and Reheating
Refrigerator
Store the bread in a paper bag at room temperature for up to 3 days. This keeps the crust crisp while preventing it from drying out.
- Wrap in plastic wrap for longer storage.
- Freeze for up to 3 months for best results.
Freezer
Wrap the cooled bread tightly in plastic wrap and then in aluminum foil. This prevents freezer burn and maintains quality.
- Slice before freezing for easy access.
- Thaw at room temperature before reheating.
Reheating
To refresh the bread, preheat the oven to 375°F (190°C). Bake for 10 to 15 minutes until warm.
- Spritz with water before reheating for a crispy crust.
- Enjoy within a few days for the best taste.
Nutrition Information
| Nutrient | Amount |
|---|---|
| Calories | 180 |
| Total Fat | 0.5g |
| Saturated Fat | 0g |
| Carbohydrates | 39g |
| Fiber | 2g |
| Sugar | 0g |
| Protein | 6g |
| Sodium | 200mg |
| Cholesterol | 0mg |
This nutrition information is an estimate and can vary based on ingredients used.
Frequently Asked Questions
Can I use all-purpose flour instead of bread flour?
Yes, you can, but the texture of the bread will differ slightly.
Can I make this bread ahead of time?
Absolutely! You can prepare the dough the night before and bake it the next day.
How do I store leftover bread?
Keep the bread in a paper bag at room temperature or freeze for longer storage.
Why is my bread dense?
A dense loaf often results from under-proofing or not using an active starter.
Can I add ingredients like cheese or herbs?
Yes! Incorporating ingredients enhances the flavor and can make it even more delicious.
Final Thoughts
Making your own sourdough ciabatta bread can be an incredibly satisfying experience. I encourage you to try this recipe and enjoy the delightful taste of homemade bread.
For more delicious bread ideas, check out my other recipes like sourdough baguette or a quick same-day sourdough bread. Happy baking!
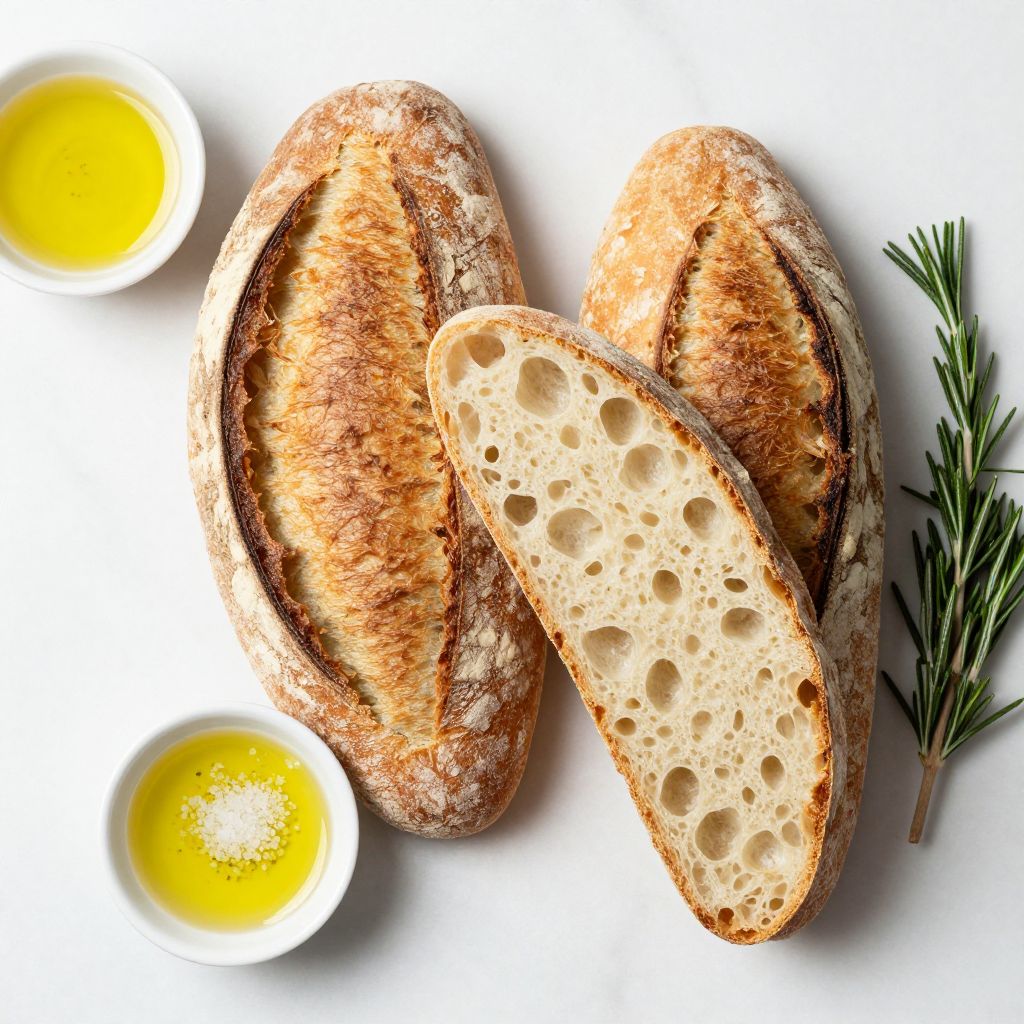
Sourdough Ciabatta Bread
Ingredients
Equipment
Method
- In a large mixing bowl, combine the bread flour, water, and sourdough starter. Stir until no dry flour remains.
- Let the mixture rest for 30 minutes.
- Sprinkle the salt over the dough and mix it in thoroughly.
- Cover the bowl and let it rise at room temperature for 4 to 6 hours, performing stretch and folds every 30 minutes for the first 2 hours.
- Turn the dough out onto a well-floured surface and shape it into a rectangle, then cut it into two equal pieces.
- Gently form each piece into a rough ball and allow them to rest for about 30 minutes.
- Shape the loaves into their final form and place them seam-side up into a floured proofing basket or on a floured surface.
- About 30 minutes before baking, preheat your oven to 450°F (230°C).
- Bake the loaves in the preheated oven until golden brown and hollow when tapped, about 30 minutes.