
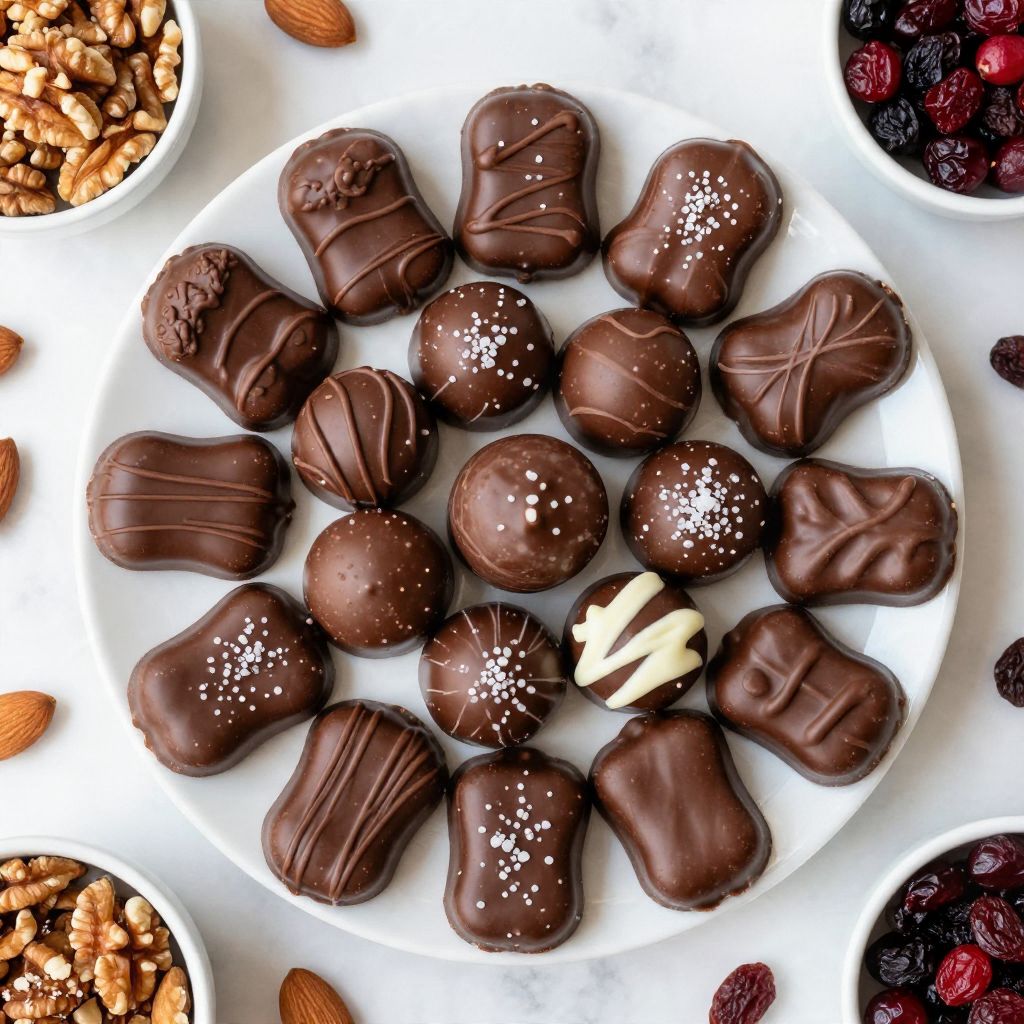
There’s something magical about the smell of melting chocolate wafting through the kitchen, isn’t there? This Chocolate Candy Recipe is not just a treat; it’s an experience that brings back childhood memories of sweet indulgence and creativity. With its rich flavor and delightful texture, this recipe is perfect for satisfying your sweet tooth or impressing guests. Plus, it’s surprisingly easy to whip up, making it a go-to for any occasion. Let’s dive into the ingredients and how to make these delightful candies!
Why You’ll Love This Recipe
This chocolate candy is a crowd favorite for several reasons.
- Decadent flavor that melts in your mouth.
- Versatile for various add-ins like nuts or dried fruits.
- Perfect for gifting or enjoying at home.
- Simple and quick to prepare.
My Experience Making This Recipe
The first time I made this chocolate candy, my kitchen was transformed into a cocoa-scented haven. Watching the chocolate melt and combine with other ingredients felt like a mini science experiment, and the taste was absolutely heavenly.
Friends and family devoured these candies in record time, leaving me with just a few pieces to enjoy myself. It made me realize that sharing is the sweetest part of making candy.
Recipe Overview
- Recipe Name: Chocolate Candy
- Servings: 24 pieces
- Prep Time: 15 minutes
- Cook Time: 10 minutes
- Total Time: 25 minutes
- Course: Dessert
- Cuisine: American
- Calories per Serving: 150
Equipment You Will Need
- Microwave-safe bowl or double boiler
- Silicone candy molds or parchment paper
- Spatula or wooden spoon
- Measuring cups and spoons
- Refrigerator
Ingredients for Chocolate Candy
- 2 cups chocolate chips (semi-sweet or dark)
- 1 cup crushed nuts (almonds, walnuts, or pecans)
- ½ cup dried fruit (raisins or cranberries)
- 1 teaspoon vanilla extract
- Pinch of salt
Ingredient Notes and Substitutions
- Chocolate chips: They create the base of the candy. You can substitute with chopped chocolate bars if preferred.
- Crushed nuts: They add crunch and richness. For nut-free options, use seeds like pumpkin or sunflower seeds.
- Dried fruit: They provide natural sweetness. Swap with mini marshmallows for a fun twist.
- Vanilla extract: It enhances the flavor. Almond extract can be a delightful substitute.
How to Make Chocolate Candy
Step 1: Prepare Your Workspace
Clean and organize your kitchen counter. This helps you focus on the fun part: making candy.
Step 2: Melt the Chocolate
In a microwave-safe bowl, heat the chocolate chips in 30-second intervals, stirring in between. This prevents burning and ensures a smooth melt.
Step 3: Add Flavorings
Once melted, stir in the vanilla extract and a pinch of salt. This enhances the chocolate’s flavor profile and balances the sweetness.
Step 4: Mix in the Add-ins
Fold in the crushed nuts and dried fruit until well combined. This adds texture and bursts of flavor in every bite.
Step 5: Fill the Molds
Pour the chocolate mixture into the silicone molds or drop spoonfuls onto parchment paper. This allows for fun shapes and easy removal once set.
Step 6: Refrigerate
Place the molds in the refrigerator for about 15 minutes. This helps the chocolate set quickly, making it easier to pop out the candies.
Step 7: Unmold the Candies
Once set, gently remove the candies from the molds or peel them off the parchment paper. Take your time; you want these beauties intact.
Step 8: Store or Share
Store the candies in an airtight container or share them with friends. This is where the joy of making candy truly shines.
Pro Tip: For a glossy finish, temper your chocolate before melting. It takes a bit more time but results in a professional look.
Tips for the Best Chocolate Candy
- Use high-quality chocolate for the best flavor.
- Experiment with different nuts and fruits to find your favorite combination.
- Make sure your molds are dry to prevent the chocolate from seizing.
- Let the chocolate cool slightly before adding mix-ins to prevent them from sinking.
- Consider drizzling melted white chocolate on top for a decorative touch.
Common Mistakes to Avoid
- Not stirring the chocolate while melting can cause it to burn.
- Overheating chocolate leads to a grainy texture.
- Skipping the refrigeration step can result in soft candies that don’t hold their shape.
- Using wet utensils can cause chocolate to seize, ruining the batch.
Serving Suggestions
These chocolate candies are delightful on their own but can shine even brighter when paired with other treats.
- Serve alongside fresh fruit for a balanced dessert.
- Pair with a cup of coffee or tea for a cozy afternoon snack.
- Include them in gift baskets with other homemade goodies.
- Serve at parties as a sweet treat that everyone will enjoy.
Variations to Try
- Add a sprinkle of sea salt on top before chilling for a sweet-salty flavor.
- Incorporate crushed cookies for a crunchy texture.
- Use flavored chocolate, like mint or raspberry, for a different taste.
- Mix in spices like cinnamon or cayenne for a kick.
Dietary Adaptations
- Gluten-free: All ingredients used are gluten-free, making this recipe suitable for those with gluten intolerance.
- Dairy-free: Use dairy-free chocolate chips to create a vegan version.
- Vegan/Vegetarian: This recipe is naturally vegetarian and can be made vegan with the right chocolate.
- Low-carb/Keto: Swap regular chocolate for sugar-free options to keep it low-carb.
Storage and Reheating
Refrigerator
Store your chocolate candies in an airtight container in the refrigerator for up to two weeks.
- Keep them away from strong-smelling foods to avoid flavor absorption.
- Layer them with parchment paper to prevent sticking.
Freezer
For longer storage, freeze the candies in a freezer-safe container.
- They can last up to three months in the freezer.
- Let them thaw in the refrigerator before serving for the best texture.
Reheating
There’s no need to reheat these candies, but if they soften, place them back in the fridge to firm up.
- Microwave for just a few seconds if you need to soften them for easy removal from molds.
Nutrition Information
| Nutrient | Amount |
|---|---|
| Calories | 150 |
| Total Fat | 9g |
| Saturated Fat | 5g |
| Carbohydrates | 17g |
| Fiber | 2g |
| Sugar | 12g |
| Protein | 2g |
| Sodium | 50mg |
| Cholesterol | 0mg |
This information is an estimate and can vary based on ingredient choices.
Frequently Asked Questions
Can I substitute chocolate chips with a different type of chocolate?
Yes, you can use any type of chocolate, including milk or white chocolate, for varied sweetness.
Can I make these in advance?
Absolutely! They store well in the refrigerator or freezer, making them perfect for ahead-of-time preparation.
How do I prevent the chocolate from seizing?
Ensure that all utensils are dry and avoid introducing any water into the chocolate.
What if my candy doesn’t set properly?
It may need more time in the refrigerator, or the chocolate wasn’t melted correctly. Always ensure it’s fully melted and mixed.
Can I use different mix-ins?
Definitely! Feel free to get creative with your favorite nuts, seeds, or even spices.
Final Thoughts
Making this chocolate candy is a delightful way to indulge in a sweet treat while flexing your creative muscles. I encourage you to try this recipe and share the love with friends and family!
For more delicious ideas, check out this Mexican Hot Chocolate Recipe or try making Peanut Butter Fudge for another tasty treat.