
Imagine the savory aroma of spices mingling in the air, making your mouth water as you think about a homemade Capicola. This Italian delicacy is not just any deli meat; it’s a flavorful masterpiece that brings the essence of Italy right to your table. The combination of spices, the rich taste of pork, and the slow curing process creates a depth of flavor that is simply irresistible. Making your own Capicola is not only rewarding but also allows you to control the ingredients and tailor the flavors to your liking. Let’s dive into this delicious journey of crafting your own Capicola!
Why You’ll Love This Recipe
This Capicola recipe is a must-try for anyone who loves bold flavors and authentic Italian cuisine.
- Flavor-packed: The spices and curing process create a complex flavor profile.
- Homemade goodness: There’s nothing like the satisfaction of making it yourself.
- Versatile: Perfect for sandwiches, charcuterie boards, or enjoyed on its own.
- Control over ingredients: You choose the quality and type of meat and seasonings.
My Experience Making This Recipe
When I first decided to make Capicola, I was excited but a bit intimidated. The process seemed lengthy, but once I got started, I realized it was much simpler than I had thought.
As the spices blended with the meat, the kitchen filled with mouthwatering scents. The first slice I cut was a moment of pure joy; the flavor was beyond what I expected, and it quickly became a family favorite.
Recipe Overview
- Recipe Name: Capicola
- Servings: 8-10
- Prep Time: 30 minutes
- Cook Time: 3-4 weeks (curing time)
- Total Time: 3-4 weeks
- Course: Charcuterie
- Cuisine: Italian
- Calories per Serving: 150
Equipment You Will Need
- Meat grinder or food processor
- Mixing bowls
- Plastic wrap
- String or butcher twine
- Meat thermometer
- Curing chamber or a cool, dry place
Ingredients for Capicola
- 5 pounds pork shoulder
- 2 teaspoons black pepper
- 2 teaspoons paprika
- 1 teaspoon cayenne pepper
- 2 teaspoons garlic powder
- 3 teaspoons sugar
- 1 tablespoon kosher salt
- 1 teaspoon pink curing salt (Prague Powder #1)
- 1/4 cup white wine or vinegar
Ingredient Notes and Substitutions
- Pork shoulder: This cut has the right amount of fat for flavor. You can substitute with pork butt if needed.
- Kosher salt: Used for curing. Table salt can be used, but adjust the quantity.
- Pink curing salt: Essential for color and flavor. If unavailable, omit, but this will change the final look and taste.
- White wine: Adds acidity and flavor. You can replace it with apple cider vinegar for a different taste.
How to Make Capicola
Step 1: Prepare the Pork
Start by trimming any excess fat from the pork shoulder. This helps ensure an even cure and prevents unwanted greasiness.
Step 2: Grind the Meat
Using a meat grinder, grind the pork shoulder into a coarse mixture. This texture allows the spices to penetrate better during the curing process.
Step 3: Mix the Spices
In a bowl, combine black pepper, paprika, cayenne pepper, garlic powder, sugar, kosher salt, and pink curing salt. This spice blend is what transforms ordinary pork into something extraordinary.
Step 4: Combine Meat and Spices
Add the spice mixture to the ground pork and mix thoroughly by hand. Make sure every bit of meat is coated for a balanced flavor.
Step 5: Add the Wine
Pour in the white wine (or vinegar) and mix until fully incorporated. The moisture helps with the curing and adds a lovely depth of flavor.
Step 6: Shape the Meat
Form the mixture into a log shape, about 4 inches in diameter. The shape helps with even curing and makes slicing easier later.
Step 7: Wrap and Tie
Tightly wrap the log in plastic wrap, ensuring no air pockets are present. Securely tie the ends with butcher twine to maintain shape.
Step 8: Cure the Capicola
Place the wrapped meat in a cool, dry place or curing chamber for 3-4 weeks. This allows the flavors to develop and the meat to dry properly.
Pro Tip: Ensure the curing environment is consistent in temperature and humidity for the best results.
Tips for the Best Capicola
- Use high-quality meat for the best flavor and texture.
- Don’t rush the curing process; patience is key.
- Check the temperature regularly to avoid spoilage.
- Experiment with spice ratios to find your perfect blend.
- Ensure all equipment is sanitized to prevent contamination.
Common Mistakes to Avoid
- Skipping the curing salt can lead to safety issues and an unappealing color.
- Not mixing the spices thoroughly can result in uneven flavor.
- Using too much or too little salt can ruin the final product.
- Rushing the curing time will lead to a less flavorful Capicola.
Serving Suggestions
Capicola shines in many culinary applications. It is delicious on its own, but pairing it with the right sides enhances its flavors.
- Serve it on a charcuterie board with assorted cheeses.
- Pair it with crusty bread and a drizzle of olive oil.
- Enjoy it in a sandwich with provolone and roasted peppers.
- Top a salad for an added protein kick.
Variations to Try
- Spicy Capicola: Add more cayenne or crushed red pepper for extra heat.
- Herbed Capicola: Incorporate fresh herbs like rosemary or thyme for an aromatic twist.
- Smoked Capicola: Use smoked paprika for a subtle smokiness.
- Sweet Capicola: Increase sugar for a sweeter profile that contrasts the spice.
Dietary Adaptations
- Gluten-free: This recipe is naturally gluten-free; just make sure your spices are certified gluten-free.
- Dairy-free: This recipe contains no dairy, making it suitable for dairy-free diets.
- Low-carb/Keto: Capicola is low in carbs, perfect for keto diets.
Storage and Reheating
Refrigerator
Store Capicola wrapped tightly in parchment or wax paper, then in a resealable bag.
- It will last up to 3 weeks in the refrigerator.
Freezer
If you want to store it longer, freeze it in slices or logs.
- It can be frozen for up to 6 months.
Reheating
No need to reheat, but if desired, warm it gently in a skillet to enhance the flavors.
- Avoid overheating to prevent drying out.
Nutrition Information
| Nutrient | Amount |
|---|---|
| Calories | 150 |
| Total Fat | 10g |
| Saturated Fat | 3g |
| Carbohydrates | 1g |
| Fiber | 0g |
| Sugar | 0g |
| Protein | 13g |
| Sodium | 600mg |
| Cholesterol | 45mg |
This information may vary based on specific ingredients used.
Frequently Asked Questions
Can I substitute the pork shoulder with another cut of meat?
Yes, pork butt is a great alternative that will still give you a rich flavor.
How long can I store Capicola?
In the refrigerator, it lasts about 3 weeks; in the freezer, up to 6 months.
Is it safe to eat Capicola without cooking it?
Yes, as it’s cured, it can be enjoyed raw, similar to prosciutto.
Can I make Capicola without curing salt?
While you can omit it, the color and safety may be compromised.
How can I adjust the spice level?
Feel free to increase or decrease the cayenne pepper to suit your taste.
Final Thoughts
Making your own Capicola is a rewarding process that allows you to explore the depths of flavor in your meals. I encourage you to give it a shot and experience the joy of creating this Italian classic.
If you enjoyed this recipe, check out other related topics, like substitutes for vanilla extract or what Tasso is. Happy cooking!
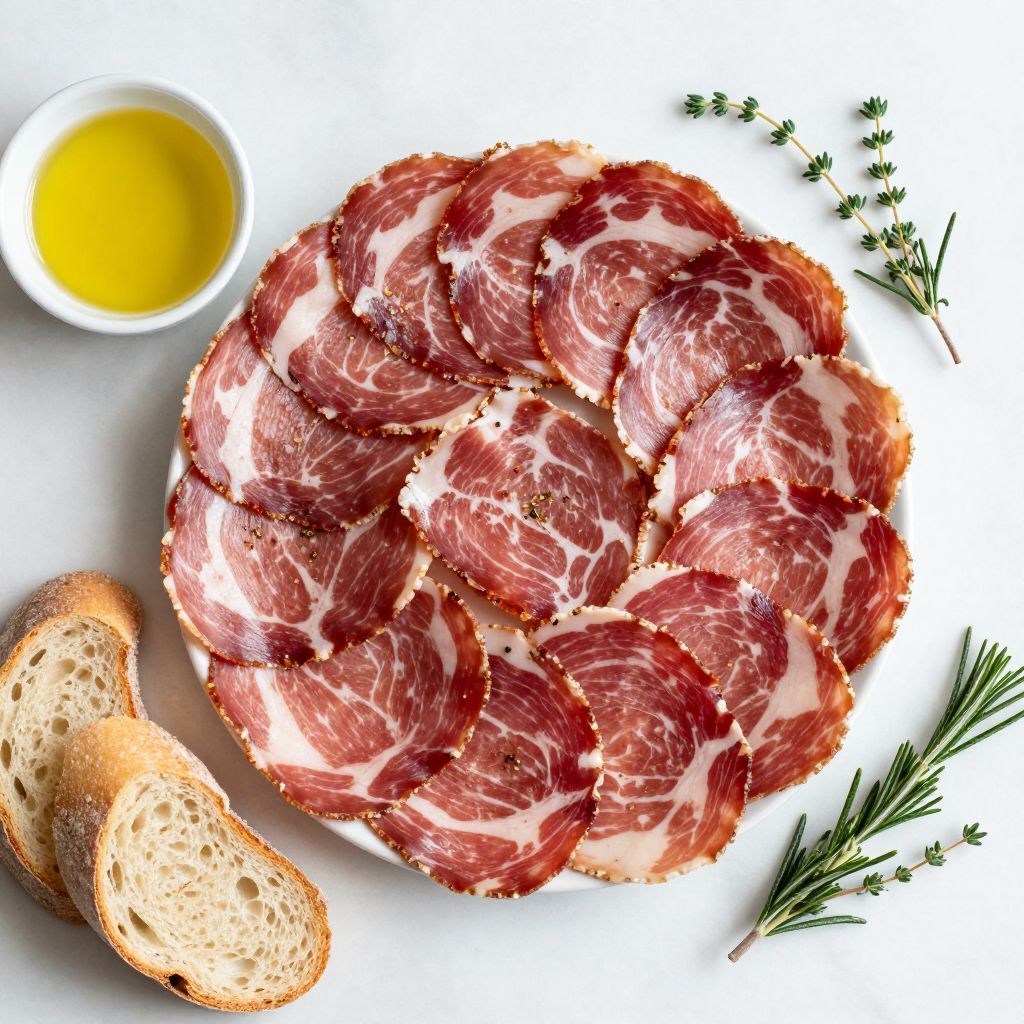
Capicola
Ingredients
Equipment
Method
- Trim any excess fat from the pork shoulder.
- Using a meat grinder, grind the pork shoulder into a coarse mixture.
- In a bowl, combine black pepper, paprika, cayenne pepper, garlic powder, sugar, kosher salt, and pink curing salt.
- Add the spice mixture to the ground pork and mix thoroughly by hand.
- Pour in the white wine (or vinegar) and mix until fully incorporated.
- Form the mixture into a log shape, about 4 inches in diameter.
- Tightly wrap the log in plastic wrap, ensuring no air pockets are present. Securely tie the ends with butcher twine.
- Place the wrapped meat in a cool, dry place or curing chamber for 3-4 weeks.