
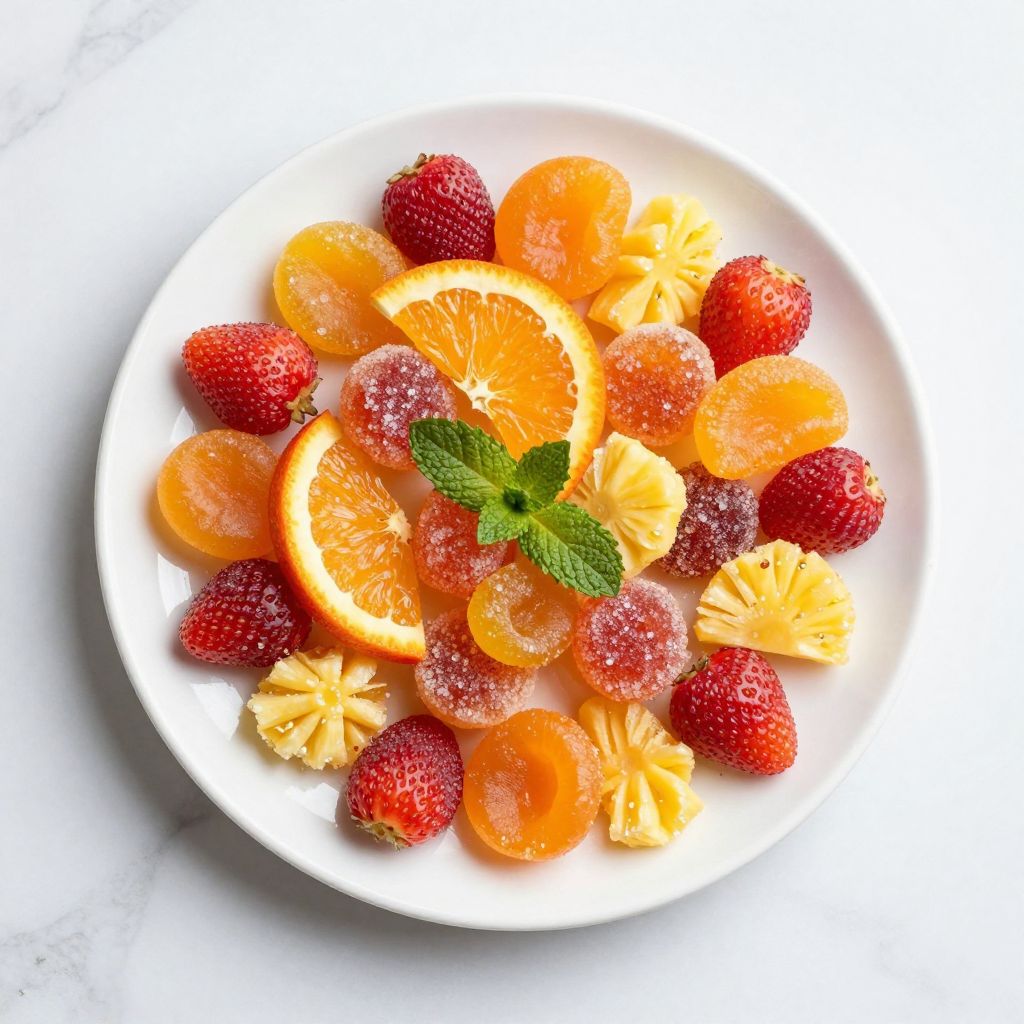
There’s something magical about the jewel-toned shimmer of candied fruit catching the light, and even more magical about that first bite when sugar crystals crack between your teeth before melting into tender, intensely flavored fruit.
Candied fruit transforms simple citrus peels, berries, and stone fruits into pantry staples that belong in your baking arsenal, your gift boxes, and your snack drawer all at once. These glossy gems take patience but require surprisingly little skill, and the payoff is a homemade treat that tastes infinitely better than store-bought versions.
Once you master this technique, you’ll find yourself candying everything from orange peels to strawberries, stashing jars in your pantry for gifting, decorating cakes, or sneaking straight from the container on quiet afternoons.
Why You’ll Love This Recipe
Candied fruit offers the kind of versatility and satisfaction that makes home cooking worthwhile.
- Creates a shelf-stable treat that keeps for weeks, making it perfect for meal prep and gifting
- Transforms ordinary fruit into something restaurant-quality with minimal ingredients
- Works as a cake topper, pastry filling, or standalone candy without any guilt
- Teaches fundamental candy-making skills that build confidence in the kitchen
- Produces zero waste when you simmer the syrup into a homemade drink or glaze
My Experience Making This Recipe
I first candied fruit on a whim after buying too many blood oranges at the farmer’s market, and three hours later I had created something I couldn’t stop eating. My kitchen filled with the most incredible citrus aroma, and the whole process felt more like play than cooking.
The texture surprised me most: firm enough to hold its shape but so tender it dissolves on your tongue, with concentrated flavor that somehow tastes both natural and luxurious. My partner actually asked if I’d bought them from a specialty shop.
Since that first batch, I’ve made candied strawberries for a spring wedding cake, candied lemon peel for holiday baking, and even candied ginger because I couldn’t resist experimenting. Every batch turns out beautifully, and I’ve found it’s genuinely difficult to mess up once you understand the basic technique.
Recipe Overview
- Recipe Name: Candied Fruit
- Servings: Makes approximately 2 cups
- Prep Time: 20 minutes
- Cook Time: 1 hour to 1 hour 30 minutes
- Total Time: 2 to 3 hours (including cooling)
- Course: Dessert, Garnish, or Snack
- Cuisine: French-inspired, International
- Calories per Serving: 45 calories (per piece, approximately)
Equipment You Will Need
- Large heavy-bottomed saucepan or deep skillet
- Candy or instant-read thermometer
- Sharp vegetable peeler or paring knife
- Slotted spoon
- Parchment paper
- Wire cooling rack
- Glass jars for storage
- Measuring cups and spoons
Ingredients for Candied Fruit
- 2 pounds fresh fruit (citrus peels, strawberries, apricots, pineapple, or a combination)
- 2 cups granulated sugar, divided
- 1 cup water
- 1/4 teaspoon salt
- Optional: 1 tablespoon light corn syrup (prevents crystallization)
Ingredient Notes and Substitutions
- Fresh fruit: Choose firm, ripe fruit without soft spots, as you want pieces that hold their shape during the long cooking process. If using citrus, thick-skinned varieties like oranges and lemons work better than delicate thin-skinned fruits.
- Granulated sugar: This dissolves evenly and creates the proper texture for candying. Coconut sugar or turbinado sugar will work but may create slightly grainier results and require careful monitoring.
- Water: Use filtered or distilled water if your tap water is heavily chlorinated, as it can affect flavor. There’s no good substitute here, but you can use juice for extra flavor depth.
- Corn syrup: This prevents sugar crystallization on the finished fruit and improves shine. You can skip it, but your candies may look slightly less glossy and could crystallize if stored long-term.
How to Make Candied Fruit
Step 1: Prepare Your Fruit
If using citrus peels, wash the fruit thoroughly under running water and pat completely dry with paper towels. Cut the fruit into quarters lengthwise, then scoop out the flesh (save it for juice or another use) and slice the peel into thin, even strips about 1/4 inch wide.
For berries and small stone fruits, leave them whole or halve them if very large. Even thickness matters here because thin pieces will overcook while thick pieces remain tough, so take your time with this step.
Step 2: Blanch the Fruit (Optional but Recommended)
Bring a large pot of water to a boil and add your prepared fruit pieces, then simmer for 5 minutes before draining and rinsing under cool water. This step softens the fruit slightly and removes any bitterness from citrus peels, making the final product more tender and pleasant to eat.
If you’re using sweeter fruits like strawberries or pineapple, you can skip this step entirely and move directly to making your syrup.
Step 3: Make the Simple Syrup Base
Combine 1 cup water, 1 cup sugar, and the salt in your saucepan over medium-high heat, stirring until the sugar completely dissolves. Once the syrup reaches a gentle boil, add your prepared fruit pieces and reduce the heat to medium-low.
The syrup should simmer gently, not boil vigorously, because a gentle heat cooks the fruit evenly without toughening the outside while the inside remains firm.
Step 4: Simmer the First Cycle
Let the fruit simmer in the syrup for 20 minutes, maintaining that gentle boil throughout. The fruit will begin absorbing sugar and the syrup will become slightly less concentrated as the fruit releases its juice.
You should see the fruit softening and becoming somewhat translucent at the edges, which indicates the sugar is penetrating the fruit properly.
Step 5: Add the Second Sugar Batch
After 20 minutes, sprinkle the remaining 1 cup of sugar over the surface of the syrup and stir gently to combine, then continue simmering for another 20 to 30 minutes. This staged sugar addition prevents the fruit from hardening in the hot syrup and helps it absorb more sweetness gradually.
The syrup should now look thicker and more concentrated, and if you have a thermometer, it should reach 225 to 230 degrees Fahrenheit for proper candying.
Step 6: Test for Doneness
Remove a piece of fruit with a slotted spoon, place it on a plate, and let it cool for one minute, then cut it in half to test the texture. The fruit should be translucent throughout with no opaque white center, and it should be tender but still hold its shape.
If the center still appears white and firm, return it to the syrup and continue cooking for another 5 to 10 minutes before testing again.
Step 7: Cool and Dry the Fruit
Using a slotted spoon, transfer the candied fruit pieces to a wire cooling rack set over parchment paper, spreading them in a single layer without touching. Let them cool completely at room temperature for at least one hour, during which they’ll firm up slightly and any excess syrup will drain away.
The pieces may still feel slightly tacky on the outside, and that’s exactly what you want.
Step 8: Optional Sugar Coating
If you prefer a crystallized sugar coating, sprinkle about 1/2 cup of granulated sugar onto a plate, then gently roll each cooled fruit piece in the sugar until lightly coated on all sides. This creates a pleasant crunch and makes the candied fruit look more decorative.
You can also dust them with powdered sugar for a more delicate appearance, though this works best if serving them within a few days.
Pro Tip: Don’t discard the leftover syrup after candying your fruit. Store it in a glass jar in the refrigerator and use it to sweeten cocktails, drizzle over yogurt, or thin with water to create a flavored simple syrup for baking.
Tips for the Best Candied Fruit
- Use a candy thermometer to monitor syrup temperature, aiming for 225 to 230 degrees Fahrenheit at the end of cooking. This ensures the syrup concentrates properly without hardening the fruit, and the precise temperature removes guesswork from the process.
- Cut all fruit pieces to roughly the same size before cooking, as uniform pieces cook evenly and finish at the same time. Thin pieces cook much faster than thick ones, so consistency really matters here.
- Resist the urge to stir vigorously while the fruit cooks, as rough stirring breaks delicate pieces and disturbs the texture. A gentle stir now and then is fine, but mostly let the syrup do its work.
- Choose firm, ripe fruit rather than overripe fruit, as softer fruit turns to mush during the long cooking time. A slight underripe fruit actually works better here than fruit at peak ripeness.
- Make sure your fruit is completely dry after washing and again after blanching, as excess water dilutes your syrup and prevents proper sugar absorption. Pat everything carefully with paper towels or a clean kitchen towel.
- Store finished candied fruit in an airtight glass jar with a little of the reserved syrup drizzled over the top to keep pieces moist and prevent them from drying out. This also makes the jar look beautiful on a shelf.
Common Mistakes to Avoid
- Cooking at too high heat causes the outside of the fruit to harden and the inside to remain firm, creating a texture you’ll dislike. Medium-low heat and patience are your friends here.
- Adding all the sugar at once can shock the fruit and cause it to toughen, so always add sugar in two stages at least 20 minutes apart. This gives the fruit time to adjust to increasing sweetness.
- Skipping the cooling step means the fruit will stick together in clumps once stored, making individual pieces impossible to separate without breaking them. Always spread them on a rack to cool and dry.
- Storing in plastic containers instead of glass allows the fruit to absorb plastic flavors and can cause the pieces to stick together from condensation. Glass jars preserve flavor and texture far better.
- Overcooking the syrup to temperatures above 235 degrees Fahrenheit turns it rock-hard and makes the finished fruit brittle and unpleasant to eat. Use a thermometer and stop cooking right at the target temperature.
Serving Suggestions
Candied fruit shines in so many applications that you’ll find yourself reaching for jars constantly once you’ve made a batch.
- Top layer cakes, cupcakes, and frosted desserts with candied fruit pieces for an elegant garnish and burst of flavor
- Chop candied fruit and fold it into vanilla ice cream, whipped cream, or yogurt for a sophisticated dessert
- Scatter over a charcuterie board alongside cheese, nuts, and crackers for a sweet element that guests will ask about
- Stir pieces into hot tea or sparkling water for a naturally flavored beverage with lovely visual appeal
- Mix into brownie batter, cookie dough, or scone mixtures before baking for texture and concentrated fruit flavor
Variations to Try
- Spiced candied fruit: Add one cinnamon stick, three whole cloves, and one star anise to the syrup at the beginning of cooking for warm spice undertones that pair beautifully with citrus peels. The spices infuse the fruit and create a more complex flavor profile.
- Candied ginger: Cut fresh ginger root into thin slices instead of using fruit, blanch for five minutes, then candy using the same method for a spicy-sweet treat that aids digestion and adds serious flavor to baked goods.
- Rose water or vanilla candied fruit: Add one teaspoon of rose water or one vanilla bean split lengthwise to the syrup for floral or creamy undertones that make the candied fruit feel more luxurious. Strain before serving if using rose water.
- Honey candied fruit: Replace one-quarter of the sugar with honey for a deeper flavor and slightly softer texture that works especially well with berries and stone fruits. Honey caramelizes slightly and adds complexity.
- Mixed fruit medley: Combine different fruits in one batch such as orange peel, strawberries, and apricots for visual interest and varied flavors in every jar. Cut each fruit to similar sizes so everything cooks at the same rate.
Dietary Adaptations
- Gluten-free: This recipe is naturally gluten-free with no modifications needed. Use it safely for anyone with celiac disease or gluten sensitivity.
- Dairy-free: The recipe contains no dairy ingredients, making it suitable for anyone avoiding dairy products. Enjoy it confidently on its own or as a topping for dairy-free desserts.
- Vegan and vegetarian: This recipe is completely vegan and vegetarian with no animal-derived ingredients. It fits any plant-based diet without modification.
- Low-carb and keto: Replace granulated sugar with erythritol or monk fruit sweetener, though the texture will be slightly less glossy and requires careful heat monitoring. The final product will have significantly fewer carbohydrates but may taste slightly different.
- Diabetic-friendly: Use a one-to-one sugar replacement like erythritol instead of granulated sugar, though cooking time may increase slightly. Consult a healthcare provider about portion sizes for your specific dietary needs.
Storage and Reheating
Refrigerator
Store candied fruit in an airtight glass jar with a little reserved syrup poured over the top to keep the pieces moist and prevent sticking. The candied fruit keeps perfectly in the refrigerator for up to one month and actually improves slightly as flavors develop.
- Layer pieces between parchment paper if stacking to prevent sticking
- Check the jar occasionally and add more reserved syrup if the fruit starts looking dry
- Remove pieces with a clean fork or spoon to prevent introducing bacteria
Freezer
Candied fruit freezes beautifully for up to three months when stored in an airtight container or freezer bag with a little syrup included. This is perfect if you make large batches and want to extend the shelf life.
- Freeze in a single layer on a baking sheet first, then transfer to containers to prevent clumping
- Include a small container of reserved syrup in the same package for thawing
- Thaw at room temperature for two to three hours before using
Reheating
Candied fruit is meant to be eaten cold or at room temperature and doesn’t require reheating. If you’ve frozen it and want to warm it slightly, simply let it sit at room temperature until thawed, which takes about two to three hours.
- Never microwave candied fruit, as extreme heat will turn it mushy and destroy the texture
- Room temperature serving shows off the fruit’s texture and appearance best
- Serve straight from the refrigerator for a firmer texture on hot days
Nutrition Information
| Nutrient | Amount |
|---|---|
| Calories | 45 |
| Total Fat | 0g |
| Saturated Fat | 0g |
| Carbohydrates | 11g |
| Fiber | 0.5g |
| Sugar | 10g |
| Protein | 0g |
| Sodium | 35mg |
| Cholesterol | 0mg |
Nutrition information is an estimate based on using citrus fruit and granulated sugar without additional coatings. Values vary depending on the fruit type and whether you add a sugar coating.
Frequently Asked Questions
Can I use frozen fruit to make candied fruit?
Frozen fruit works but produces a softer, less structured result since freezing breaks down cell walls. Fresh fruit yields the best texture and appearance, though thawed frozen fruit can work in a pinch.
How long does candied fruit actually keep?
Properly stored candied fruit keeps in the refrigerator for one month and in the freezer for three months. The sugar acts as a preservative, but stored in glass jars keeps the fruit fresher longer than plastic.
What if my candied fruit turns out grainy or crystallized?
Graininess happens when the syrup crystallizes before the fruit finishes cooking, usually from cooking too hot or adding all sugar at once. Next time, cook lower and slower, divide your sugar into two additions, and avoid stirring too much.
Can I make candied fruit in smaller batches?
Absolutely, scale the recipe down proportionally, but keep the cooking times roughly the same since the process depends more on temperature than quantity. A smaller batch will cook just as long but use less fruit and sugar.
What’s the difference between candied fruit and glazed fruit?
Candied fruit simmers slowly in syrup for an hour or more until fully saturated with sugar, while glazed fruit gets a quick coating of syrup without extended cooking. Candied fruit lasts longer and tastes more intensely sweet, while glazed fruit stays fresher-tasting.
Can I use the leftover syrup in the jar?
Yes, the syrup is delicious drizzled over ice cream, stirred into cocktails, or mixed with sparkling water for a homemade flavored drink. You can also thin it with water and use it in your next batch of candied fruit.
Final Thoughts
Making candied fruit transforms an afternoon into something special, filling your kitchen with aroma and your pantry with little jars of edible gold that make you feel like a real baker. Once you taste homemade candied fruit, you’ll never be satisfied with the store-bought version again.
Start with citrus peels or strawberries if you’re nervous, follow the steps precisely, and trust that the process works every single time. Your first batch will probably become your new favorite project, and we promise you’ll be making it repeatedly.
If you loved learning about candied fruit, you might also enjoy making candied bacon for a savory-sweet addition to your cooking repertoire. For even more creative toppings and additions, check out how to make candied walnuts, which pair beautifully with candied fruit in salads, on desserts, and in gift boxes.
Candied Fruit
Ingredients
Equipment
Method
- Wash and dry citrus fruits, peel into 1/4 inch strips or halve berries and stone fruits into even pieces.
- Optional: Bring a large pot of water to a boil, add prepared fruit, simmer for 5 minutes, then drain and rinse under cool water to remove bitterness.
- In a large heavy-bottomed saucepan, combine 1 cup water, 1 cup sugar, and 1/4 teaspoon salt over medium-high heat, stirring until sugar dissolves, then bring to a gentle boil.
- Add prepared fruit to the syrup, reduce heat to medium-low, and simmer gently for 20 minutes, stirring gently every 5 minutes.
- Sprinkle the remaining 1 cup sugar over the syrup, stir gently to combine, then simmer for 25 minutes until the syrup thickens and reaches 225°F to 230°F on a candy thermometer.
- Test doneness by removing a piece, cooling for 1 minute, and cutting it in half; fruit should be translucent with no opaque center.
- Using a slotted spoon, transfer candied fruit to a wire cooling rack over parchment paper and let cool at room temperature for 1 hour to drain and firm up.
- Optional: Spread 1/2 cup granulated sugar on a plate and roll each cooled piece in sugar to coat for extra crunch and decoration.
- Reserve any leftover syrup and store it in a sealed jar in the refrigerator for up to 1 month to use in drinks, glazes, or future candy batches.