
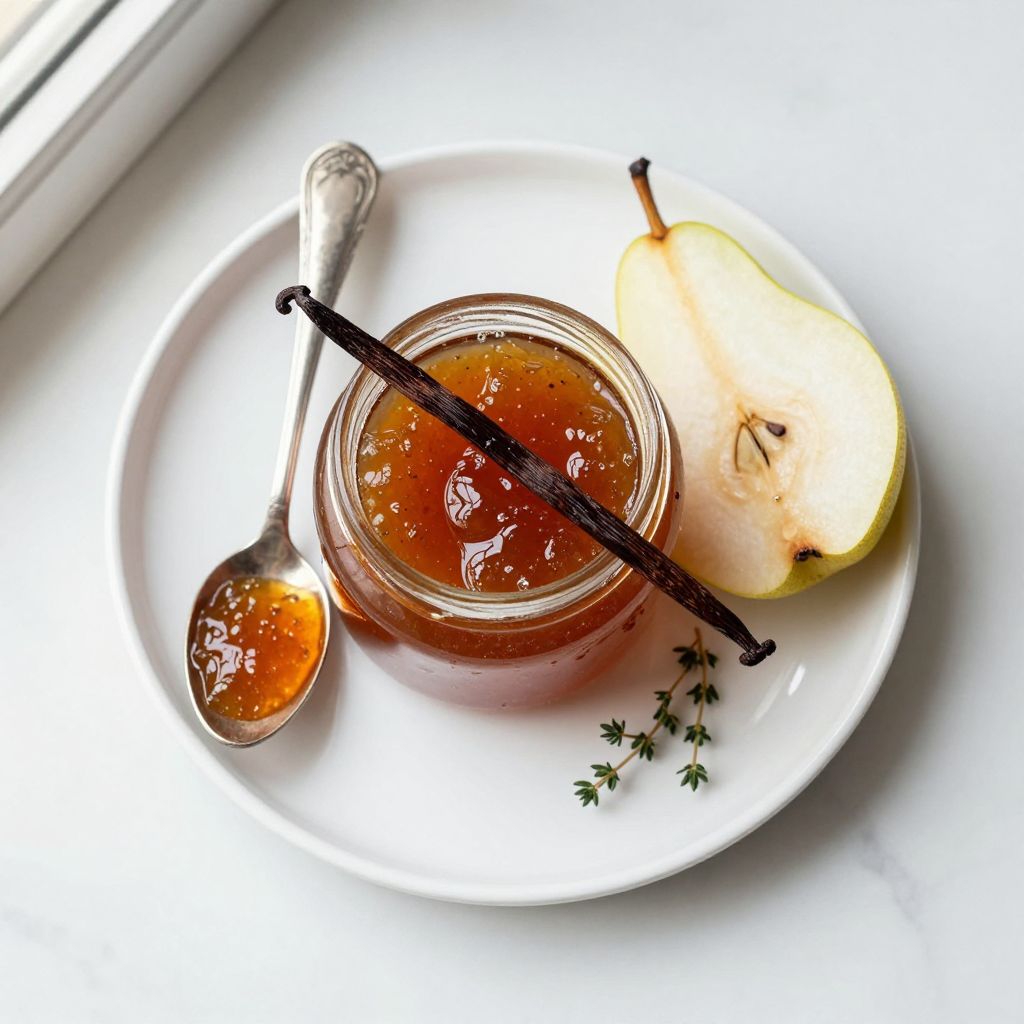
There’s something magical about the smell of pears simmering on the stove, transforming from firm fruit into glossy, amber-colored jam. This pear jam recipe captures that quiet kitchen moment and turns it into jars of spreadable gold that taste like late summer in every spoonful.
Making pear jam at home is simpler than you’d think, and the reward far exceeds what you’ll find on grocery store shelves. The natural sweetness of ripe pears shines through with minimal added sugar, and you can customize the flavor with warm spices like vanilla or ginger to match your mood.
Why You’ll Love This Recipe
This recipe delivers jammy perfection with straightforward technique and forgiving timing. You get beautiful texture, bold flavor, and the satisfaction of homemade preserves without fussy canning equipment.
- Uses just four main ingredients for pure, unadulterated pear flavor
- Ready in under an hour from start to finish
- Naturally thickens without pectin or cornstarch
- Stores for months in the refrigerator or freezer
- Perfect for toast, yogurt, cheese boards, or baking
My Experience Making This Recipe
I first made this jam on a quiet Sunday afternoon with pears from a farmer’s market haul I wasn’t sure how to use. By the time the kitchen filled with that honeyed, vanilla-tinged steam, I was hooked and wondering why I’d never done this before.
My family devoured the first batch on fresh croissants before it even cooled completely. The jam has become my go-to gift for friends, and I’ve learned that slightly softer pears work better than rock-hard ones, which taught me patience with ripeness pays off.
What surprised me most was how little sugar you actually need when pears are ripe and sweet. The flavor stays bright and fruity rather than tasting like candy, and the texture becomes silky without any fussing.
Recipe Overview
- Recipe Name: Homemade Pear Jam
- Servings: Makes about 3 cups (6 half-pint jars)
- Prep Time: 15 minutes
- Cook Time: 35 minutes
- Total Time: 50 minutes
- Course: Condiment
- Cuisine: French-Inspired
- Calories per Serving: 45 calories per tablespoon
Equipment You Will Need
- Large stainless steel or heavy-bottomed pot (at least 5 quarts)
- Wooden spoon or heat-resistant silicone spatula
- Sharp chef’s knife and cutting board
- Instant-read thermometer
- Fine-mesh sieve or food mill (optional but helpful)
- Glass jars with lids for storage
- Measuring cups and spoons
- Ladle
Ingredients for Pear Jam
- 4 pounds ripe Bartlett or Bosc pears (about 8 to 10 medium pears)
- 2 cups granulated sugar
- 2 tablespoons fresh lemon juice
- 1 vanilla bean (or 1 teaspoon vanilla extract), optional
Ingredient Notes and Substitutions
- Ripe Pears: You need pears that yield slightly to pressure but aren’t mushy, as they contain natural pectin that helps the jam set. If your pears are underripe, add one tablespoon of powdered pectin mixed with two tablespoons of sugar halfway through cooking.
- Granulated Sugar: Regular white sugar dissolves cleanly and lets pear flavor shine without adding color. You can swap half the amount with honey or agave for a slightly different texture and deeper flavor, though the jam may set softer.
- Lemon Juice: Acid brightens the pear flavor and helps the jam gel properly by activating pectin in the fruit. If you don’t have fresh lemon juice, use bottled, though fresh is noticeably brighter.
- Vanilla Bean: The subtle floral notes complement pears beautifully but are entirely optional. If you skip it, the pure pear flavor becomes the star, or you can add one-quarter teaspoon of cardamom or fresh ginger instead for warmth.
How to Make Pear Jam
Step 1: Prepare Your Pears
Wash your pears under cool running water and pat them dry. Cut each pear in half, scoop out the seeds and fibrous core with a small spoon, then cut the flesh into rough chunks about one inch in size.
Step 2: Combine Pears and Sugar
Add your chopped pears and sugar to your large pot, stirring gently to combine. The sugar will draw moisture from the pears, and within a few minutes you’ll see liquid beginning to pool at the bottom, which is exactly what you want.
Step 3: Macerate the Fruit
Let the pear and sugar mixture sit at room temperature for 15 to 20 minutes without heat. This step releases the fruit’s natural juices and dissolves the sugar gradually, which helps create smoother jam with better texture.
Step 4: Split and Prepare the Vanilla Bean
If using vanilla bean, split it lengthwise with a sharp knife and scrape the tiny black seeds into the pot with your pear mixture. Drop the empty pod in as well for extra flavor, though you’ll remove it later.
Step 5: Start Cooking Over Medium-High Heat
Place the pot over medium-high heat and stir occasionally until the mixture reaches a gentle boil. The pears should break down within five to eight minutes as the heat and sugar work together, and you’ll see the color deepen from pale yellow to golden.
Step 6: Reduce Heat and Simmer
Once boiling, reduce heat to medium and let the jam simmer gently, stirring frequently, for 20 to 30 minutes. The goal is to cook the pears down until they’re soft enough to mash easily, and the liquid should reduce significantly and thicken slightly.
Step 7: Test for Setting Point
Place a small plate in the freezer before you start cooking so it’s ice-cold when you need it. After 20 minutes, drop a small spoonful of jam onto the frozen plate, wait 30 seconds, then push it with your finger. If it wrinkles and doesn’t run back together immediately, you’ve reached the setting point.
Step 8: Blend Until Smooth or Leave Chunky
Remove the jam from heat and let it cool for five minutes. If you want smooth jam, use an immersion blender to puree it to your preferred texture, or pass it through a fine sieve for elegance.
Step 9: Remove the Vanilla Pod and Jar
Fish out the vanilla pod with tongs and discard it. Ladle the hot jam into sterilized jars, leaving one-half inch of space at the top, then seal with lids while the jam is still hot so they create a proper seal as they cool.
Pro Tip: The jam will continue to thicken as it cools, so don’t panic if it looks slightly loose when you jar it. If you go too long on the heat and the jam becomes too stiff, simply reheat it gently and add a splash of water to loosen the texture.
Tips for the Best Pear Jam
- Choose pears that are ripe but still slightly firm to the touch. Overripe pears make watery jam that won’t set properly, while underripe ones lack sweetness and natural pectin.
- Don’t skip the maceration step, as those 15 to 20 minutes of sitting time create a smoother, more integrated jam with better flavor development.
- Stir frequently but not constantly while cooking. Frequent stirring prevents sticking and burning on the bottom of the pot without breaking down the pear pieces excessively.
- Use a candy or instant-read thermometer if you have one. Pear jam reaches setting point around 220 degrees Fahrenheit, which takes the guesswork out of doneness.
- Work with sterilized jars to ensure proper sealing and longer shelf life. You can sterilize jars by running them through the dishwasher on the hot cycle just before using them.
Common Mistakes to Avoid
- Using underripe pears results in thin, runny jam that never sets properly no matter how long you cook it. Ripe pears have higher pectin content and more natural sugar, both critical for good texture.
- Cooking the jam too long makes it dark, thick, and overly concentrated, losing the bright, fresh pear flavor that makes this recipe special. Stop cooking as soon as you hit the setting point, not minutes after.
- Forgetting to add lemon juice weakens the gel structure and makes the flavor taste flat and one-dimensional. The acid is essential for both texture and taste.
- Filling jars while the jam is still boiling hot and then immediately sealing them can trap steam and create an imperfect seal. Let the jam cool for five minutes first, but jar it while it’s still warm enough to create a seal as it cools.
- Skipping the plate test and guessing at doneness leaves you with either runny jam or overcooked sludge. The wrinkle test is simple, fast, and accurate.
Serving Suggestions
Pear jam’s versatility means you’ll find yourself reaching for it constantly once you’ve made a batch. The subtle sweetness and fruity depth work beautifully beyond just toast.
- Swirl into plain yogurt or Greek yogurt with granola for a quick breakfast
- Layer into vanilla panna cotta or cheesecake for an elegant dessert
- Pair with aged cheddar or manchego cheese on a charcuterie board
- Dollop onto warm croissants with butter and fleur de sel
- Use as a filling in thumbprint cookies or linzer cookies
Variations to Try
- Spiced Pear Jam: Add one-half teaspoon of ground cinnamon, one-quarter teaspoon of ground ginger, and a pinch of nutmeg to the pot during cooking for warm spice notes that complement the fruit without overpowering it.
- Pear and Ginger Jam: Use fresh ginger instead of vanilla by adding one tablespoon of minced fresh ginger along with the pears, which creates a more assertive, warming flavor profile perfect for pairing with sharp cheeses.
- Pear and Cardamom Jam: Substitute the vanilla with one-half teaspoon of ground cardamom seeds for an exotic, slightly floral version that feels sophisticated and unusual.
- Pear and Honey Jam: Replace half the granulated sugar with honey to create a more complex sweetness and slightly thicker texture with deeper flavor complexity.
Dietary Adaptations
- Gluten-Free: This recipe is naturally gluten-free and requires no modifications, making it safe for anyone with celiac disease or gluten sensitivity.
- Dairy-Free: The jam itself contains no dairy, though you’ll want to pair it with dairy-free toast or spreads if following a dairy-free diet.
- Vegan and Vegetarian: The recipe is fully vegan and vegetarian as written, needing no animal products whatsoever.
- Low-Carb and Keto: Standard pear jam is too high in natural fruit sugars for strict keto diets, but you can substitute all granulated sugar with erythritol or monk fruit sweetener, though the texture and setting point may shift slightly.
Storage and Reheating
Refrigerator
Store sealed jars of pear jam in the refrigerator for up to four weeks after opening. Once opened, keep the jar sealed between uses and use a clean spoon each time you scoop to prevent contamination.
- Unopened jars stay fresh for up to three months when refrigerated
- Transfer jam to smaller containers if you like to avoid repeated opening of larger jars
- A light layer of mold can form on top if exposed to air too long, so keep it sealed
Freezer
Pear jam freezes beautifully in airtight containers or freezer-safe jars for up to one year. Leave one-half inch of headspace in jars to account for expansion as the jam freezes.
- Thaw in the refrigerator overnight before serving
- Freeze in ice cube trays, then pop cubes into freezer bags for easy portioning
- The texture remains smooth after thawing with no separation or weeping
Reheating
If your jam has thickened too much in storage, gently warm it in a small pot over low heat with a splash of water to reach your preferred consistency. Never microwave jam directly in the jar, as the glass can become dangerously hot.
- Stir occasionally while reheating to distribute heat evenly
- Add one to two tablespoons of water at a time until you reach the right spreadability
- Taste for flavor after reheating and adjust if needed
Nutrition Information
| Nutrient | Amount |
|---|---|
| Calories | 45 |
| Total Fat | 0g |
| Saturated Fat | 0g |
| Carbohydrates | 11g |
| Fiber | 0g |
| Sugar | 10g |
| Protein | 0g |
| Sodium | 1mg |
| Cholesterol | 0mg |
These values are approximate and based on one tablespoon of finished jam. Actual nutrition may vary based on the specific pears used and cooking time, which affects water loss and final yield.
Frequently Asked Questions
Can I make pear jam without a vanilla bean?
Absolutely, the vanilla is optional and the jam tastes wonderful without it. You’ll enjoy the pure, clean pear flavor more prominently, or you can add a different spice like cinnamon, ginger, or cardamom instead.
How do I know if my pears are ripe enough?
Ripe pears should yield gently when you press them near the stem with your thumb, but shouldn’t feel mushy. If they’re rock hard, let them sit at room temperature for two to three days until they soften slightly.
What if my jam didn’t set properly?
If your finished jam is too runny, reheat it to 220 degrees Fahrenheit on the candy thermometer, then re-jar it. If it’s consistently too soft, you can mix one tablespoon of powdered pectin with two tablespoons of sugar and stir it in before reheating.
Can I use frozen pears instead of fresh?
Yes, frozen pears work well and actually release their liquid more readily than fresh pears. Thaw them completely and drain off excess liquid before measuring, as frozen pears contain more water than fresh ones.
How long does pear jam last unopened?
Sealed jars stored in a cool, dark cupboard last up to one year, though flavor is brightest within the first three to four months. Once opened, refrigerate and use within three to four weeks for the best quality.
Can I double this recipe?
Yes, doubling works fine, but cook time may increase by 10 to 15 minutes since there’s more volume to reduce. Stir more frequently with larger batches and watch carefully near the end to prevent overcooking.
Final Thoughts
Making homemade pear jam shifts your kitchen from ordinary to something special, filling the air with those honeyed, vanilla-scented aromas that linger long after the jars are sealed. There’s real pride in knowing exactly what goes into your condiment, free from additives or unnecessary thickeners.
Grab some ripe pears this week and give this recipe a try. Whether you’re a seasoned jam maker or picking up a pot for the first time, you’ll find this approach straightforward, forgiving, and endlessly rewarding.
Explore More Pear Recipes
If you loved making this jam, there’s a whole world of pear recipes waiting to expand your kitchen repertoire. Try making a rich pear butter recipe for an even silkier spread, or dive into the comfort of a classic pear pie recipe perfect for any occasion.
Homemade Pear Jam
Ingredients
Equipment
Method
- Wash pears, remove cores, and cut into 1-inch chunks.
- Combine chopped pears and sugar in a large pot and stir gently to combine.
- Let pear and sugar mixture sit at room temperature for 15 to 20 minutes to macerate.
- Split vanilla bean, scrape seeds into pot, and add pod if using vanilla.
- Place pot over medium-high heat and bring to a gentle boil, stirring occasionally, about 5 to 8 minutes.
- Reduce heat to medium and simmer gently, stirring frequently, for 20 to 30 minutes until pears are soft and liquid thickens.
- Test for setting point by placing a spoonful of jam on a frozen plate; if it wrinkles after 30 seconds, it is ready.
- Remove from heat and let cool for 5 minutes, then blend with an immersion blender for a smooth texture or leave chunky.
- Discard vanilla pod, ladle hot jam into sterilized jars leaving 1/2 inch headspace, and seal while warm.
Notes