
The smell of vanilla and caramelized banana fills your kitchen, and suddenly you’re transported back to childhood potlucks and family gatherings. This Not Your Mama’s Banana Pudding takes the classic comfort dessert and flips it on its head with layers of unexpected textures and bold flavors that make people ask for your recipe.
What makes this version special is the balance of creamy, crunchy, and rich all in one spoonful. You’ll find silky pudding, buttery wafer crumbles, fresh bananas, and a caramelized topping that separates this from every other banana pudding you’ve ever tasted. The best part: it comes together in under an hour and tastes like you spent all day in the kitchen.
Why You’ll Love This Recipe
This pudding strikes the perfect balance between nostalgic and innovative, delivering comfort with a sophisticated edge. You get layers of flavor and texture that keep each spoonful interesting, and it serves a crowd without requiring fancy skills.
- Creamy vanilla pudding infused with caramelized banana flavor creates depth most basic recipes lack
- Buttery wafer cookie crumbles add satisfying crunch that stays textured even when chilled
- Whipped cream topping stays fluffy and light rather than becoming dense and heavy
- Makes 8 to 10 servings, perfect for potlucks, dinner parties, or feeding your own cravings
- Ready to serve in under an hour with mostly hands-off chilling time
My Experience Making This Recipe
The first time I made this version, I caramelized the bananas in brown sugar and butter instead of just slicing them raw. That single decision changed everything for me; the sweet, nutty flavor elevated the entire dessert from ordinary to memorable.
I watched my guests go back for seconds and thirds, which never happens with standard banana pudding. Everyone commented on how the flavors tasted more complex, like a dessert you’d order at a nice restaurant but could actually make at home.
The texture contrast hit me hardest. The wafer crumbles stayed crispy on top while softening just slightly into the pudding, creating this interesting interplay that kept my palate engaged throughout. That’s when I knew this recipe deserved a permanent spot in my collection.
Recipe Overview
- Recipe Name: Not Your Mama’s Banana Pudding
- Servings: 8 to 10
- Prep Time: 15 minutes
- Cook Time: 25 minutes
- Total Time: 50 minutes plus 2 hours chilling
- Course: Dessert
- Cuisine: American
- Calories per Serving: 385
Equipment You Will Need
- 9×13 inch baking dish or similar deep dish
- Medium saucepan
- Small skillet or shallow pan
- Whisk
- Mixing bowl
- Electric mixer or whisk for whipped cream
- Measuring cups and spoons
- Rubber spatula
- Sharp knife for slicing bananas
Ingredients for Not Your Mama’s Banana Pudding
- Whole milk: 2 cups
- Heavy cream: 1 cup
- Egg yolks: 5 large
- Granulated sugar: 3/4 cup, divided
- Cornstarch: 3 tablespoons
- Vanilla extract: 2 teaspoons
- Butter: 6 tablespoons, divided
- Fresh bananas: 4 medium, ripe but firm
- Brown sugar: 1/4 cup
- Vanilla wafer cookies: 35 to 40 cookies
- Pinch of salt: 1/4 teaspoon
- Powdered sugar: 2 tablespoons for whipped cream
Ingredient Notes and Substitutions
- Egg yolks: Raw or lightly cooked egg yolks create a silky, custard-like pudding that coats the back of a spoon perfectly. Substitute with 2 tablespoons of cornstarch mixed with an extra 1/4 cup milk if you prefer to skip raw eggs, though the texture becomes slightly thicker and less luxurious.
- Vanilla extract: Pure vanilla amplifies the pudding’s flavor and makes it taste homemade rather than artificial. Use 1 tablespoon of vanilla bean paste for deeper complexity, or 1 teaspoon of almond extract for a subtle flavor twist that plays beautifully with banana.
- Vanilla wafer cookies: Buttery wafers absorb pudding flavor while maintaining crunch due to their density. Swap for crushed gingersnaps for spiced warmth, or use Nilla wafers specifically for consistency, as generic wafers sometimes turn mushy faster than expected.
- Brown sugar: The molasses in brown sugar caramelizes the bananas beautifully and adds nutty depth. Regular granulated sugar works if that’s what you have, but you’ll lose some of the rich, sophisticated flavor that makes this version special.
- Heavy cream: Whipping heavy cream to soft peaks creates an airy, cloud-like topping that feels elegant and light. Whipped coconut cream works as a dairy-free option, though it whips less stiffly and has a slightly different mouthfeel.
How to Make Not Your Mama’s Banana Pudding
Step 1: Heat the Milk and Cream
Pour 2 cups of whole milk and 1 cup of heavy cream into a medium saucepan over medium heat. Bring the mixture to a gentle simmer, which helps the pudding thicken evenly without developing lumps or a scorched flavor on the bottom of the pan.
Step 2: Whisk Together the Egg Base
In a mixing bowl, whisk together 5 egg yolks, 1/2 cup of granulated sugar, and 3 tablespoons of cornstarch until the mixture turns pale yellow and ribbon-like. This combination of eggs and cornstarch creates a double-thickening system that produces silky pudding rather than grainy custard.
Step 3: Temper the Eggs
Slowly pour about 1 cup of the hot milk mixture into the egg bowl while whisking constantly to raise the egg temperature gradually. This tempering step prevents the eggs from scrambling when you combine them with the hot liquid, which would ruin your pudding’s texture completely.
Step 4: Combine Everything and Cook
Pour the tempered egg mixture back into the saucepan with the remaining hot milk, whisking constantly as you pour. Reduce heat to medium-low and cook for 5 to 7 minutes, stirring frequently, until the pudding thickens enough to coat the back of a spoon.
Step 5: Finish the Pudding
Remove the pan from heat and stir in 2 teaspoons of vanilla extract, 2 tablespoons of butter, and 1/4 teaspoon of salt. The butter adds richness and a subtle glossy finish, while vanilla and salt balance and enhance the overall flavor profile.
Step 6: Caramelize the Bananas
Slice your 4 bananas on the bias into 1/4 inch thick pieces to increase their surface area for caramelization. In a small skillet, melt 4 tablespoons of butter over medium-high heat, then add 1/4 cup of brown sugar and cook for 1 minute until bubbling before adding the bananas.
Step 7: Cook the Banana Slices
Add the banana slices to the hot brown sugar butter and cook for 2 to 3 minutes per side without stirring too often, allowing them to develop a caramelized crust. The bananas should turn golden brown and smell like caramel; this is where the magic happens and sets this pudding apart from the basic version.
Step 8: Crush the Wafer Cookies
Place 35 to 40 vanilla wafer cookies in a sealed bag and crush them with a rolling pin or meat mallet until you have coarse, varied crumbles with some larger pieces remaining. Varied textures of crumbles mean you’ll get pockets of crunch throughout the pudding rather than a uniform, sandy texture.
Step 9: Build Your Layers
Spread a thin layer of the vanilla pudding on the bottom of your 9×13 inch baking dish, then add a layer of caramelized bananas, followed by a layer of crushed wafer crumbles. Repeat these layers one more time, ending with a layer of wafer crumbles on top for maximum texture.
Step 10: Chill and Set
Cover the pudding with plastic wrap and refrigerate for at least 2 hours, which allows the pudding to set properly and the flavors to meld together. The cold temperature also firms up the bananas slightly so they hold their shape when you scoop.
Step 11: Whip the Cream Topping
Just before serving, pour 1 cup of heavy cream into a clean bowl and whip with an electric mixer until soft peaks form. Add 2 tablespoons of powdered sugar and 1/2 teaspoon of vanilla extract, then whip for another 30 seconds until the cream holds its shape but remains light and fluffy.
Step 12: Serve and Enjoy
Top each portion of banana pudding with a generous dollop of whipped cream and enjoy immediately. The whipped cream melts slightly into the warm (or cold, depending on preference) pudding, creating an extra layer of luxury that makes this dessert feel special.
Pro Tip: Don’t skip the caramelizing step with the bananas; that brown sugar and butter combination is what transforms this recipe from standard to show-stopping.
Tips for the Best Not Your Mama’s Banana Pudding
- Use bananas that are ripe but still slightly firm to the touch; overly soft bananas break apart during caramelizing and turn into mush rather than holding their shape.
- Stir the pudding frequently as it cooks and don’t walk away from the stove, since even a moment of inattention can result in lumps or a scorched bottom layer.
- Layer while the pudding is still slightly warm so the wafer crumbles begin to soften and absorb the vanilla flavor without becoming soggy by serving time.
- Make this dessert no more than 6 to 8 hours ahead of serving; the wafers gradually soften and lose their crucial textural contrast if the pudding sits too long in the fridge.
- Reserve a few whole vanilla wafers to crumble fresh and sprinkle on top just before serving for maximum crunch and visual appeal.
- Serve the pudding slightly chilled rather than ice cold; cold temperatures mute the caramel and vanilla flavors, so let it sit at room temperature for 5 to 10 minutes before serving.
Common Mistakes to Avoid
- Skipping the tempering step with the eggs causes them to scramble into little bits throughout the pudding, creating a gritty texture that tastes unpleasant and ruins the entire dessert.
- Using overly ripe bananas that are too soft won’t caramelize properly and instead turn into mush that dissolves into the pudding rather than providing chunks of caramelized fruit.
- Overheating the pudding after adding the eggs breaks the egg proteins and causes the pudding to become thin and watery instead of thick and creamy.
- Adding the wafer layer too far ahead of serving allows them to absorb moisture and become mushy, losing the textural contrast that makes this recipe special.
- Not crushing the wafers into varied sizes results in either dust that falls to the bottom or chunks that don’t integrate well with the pudding layers.
Serving Suggestions
This pudding shines as the grand finale to any dinner party or potluck gathering, though it’s equally at home as an indulgent weeknight treat. Serve it chilled in individual glasses for elegance, or from a large dish for a more casual, family-style presentation.
- Serve alongside a cup of strong black coffee or espresso to cut through the dessert’s richness and balance the sweetness beautifully
- Pair with a glass of cold milk for a nostalgic approach that feels like childhood comfort at its best
- Top with a sprinkle of sea salt flakes and a tiny drizzle of dark chocolate sauce for sophistication and depth
- Offer alongside fresh berries like raspberries or blackberries to add tartness and visual contrast to the plate
- Serve at room temperature rather than ice cold to let the vanilla and caramel flavors shine through without muting
Variations to Try
- Rum or Bourbon Version: Add 2 tablespoons of dark rum or bourbon to the pudding mixture after removing it from heat for a sophisticated adult twist that adds warmth and complexity without overpowering the banana flavor.
- Salted Caramel Drizzle: Prepare a simple salted caramel sauce and drizzle it between layers or over the top instead of just using brown sugar and butter on the bananas, which deepens the caramel notes considerably.
- Chocolate Chip Version: Sprinkle 1/2 cup of mini chocolate chips between the pudding layers to add richness and subtle bitterness that plays beautifully with the sweet bananas and vanilla.
- Nutella and Banana: Spread a thin layer of Nutella on the bottom of your dish before adding pudding layers for a hazelnut-chocolate element that transforms the entire flavor profile into something decadent.
- Graham Cracker Base: Replace half the vanilla wafers with crushed graham crackers mixed with melted butter and a touch of brown sugar for a s’mores-inspired variation that adds toasted flavor complexity.
Dietary Adaptations
- Gluten-Free: Substitute vanilla wafer cookies with gluten-free vanilla cookies in equal amounts; the pudding itself contains no gluten, so this simple swap keeps the recipe safe for gluten-sensitive guests.
- Dairy-Free: Use coconut milk in place of whole milk, and replace heavy cream with full-fat canned coconut cream for both the pudding and whipped topping; the result tastes slightly different but remains delicious and creamy.
- Vegan: Replace egg yolks with 3 tablespoons of cornstarch mixed with 1/4 cup of non-dairy milk, use plant-based butter, and prepare whipped coconut cream for topping; you’ll lose some silkiness but gain a fully plant-based dessert.
- Low-Carb/Keto: Reduce sugar to 1/4 cup total and use a sugar substitute like erythritol for the pudding and caramelizing step; swap wafer cookies for almond flour cookies or skip the crumble layer entirely to keep carbs minimal.
Storage and Reheating
Refrigerator
Store your banana pudding in an airtight container on a shelf away from strong-smelling foods that could transfer flavors. The dessert keeps well for 3 to 4 days, though the wafer crumbles gradually soften as they absorb moisture from the pudding.
- Cover with plastic wrap pressed directly onto the surface to prevent a skin from forming
- Keep away from the coldest part of the fridge to avoid over-chilling, which mutes the vanilla and caramel flavors
- Add whipped cream topping fresh just before serving rather than storing it topped and ready
Freezer
This pudding doesn’t freeze particularly well because the texture of the bananas becomes mushy and unpleasant when thawed. If you must freeze, store it without the wafer layer and add fresh crumbles after thawing.
- Freeze in an airtight container for up to 2 months if you’re willing to accept texture changes
- Thaw overnight in the refrigerator before serving
- Crumble fresh vanilla wafers on top after thawing to restore textural contrast
Reheating
This dessert tastes best served cold or at room temperature and doesn’t require reheating. If you prefer warmth, simply let the pudding sit at room temperature for 15 to 20 minutes before serving.
- Never microwave as the pudding will heat unevenly and the whipped cream will melt into thin liquid
- Gently stir before serving if layers have separated during storage
- Add fresh whipped cream topping just before plating for the best texture and appearance
Nutrition Information
| Nutrient | Amount |
|---|---|
| Calories | 385 |
| Total Fat | 18g |
| Saturated Fat | 11g |
| Carbohydrates | 51g |
| Fiber | 1g |
| Sugar | 37g |
| Protein | 4g |
| Sodium | 145mg |
| Cholesterol | 95mg |
These values are calculated based on 9 servings per recipe and may vary slightly depending on specific brands used and serving sizes. This pudding contains eggs and dairy, so it’s unsuitable for vegan or dairy-free diets without significant substitutions.
Frequently Asked Questions
Can I Make This Pudding Ahead of Time?
Yes, you can make the pudding up to 8 hours ahead and store it covered in the refrigerator. Add the whipped cream topping and fresh wafer crumbles only when you’re ready to serve to keep everything at peak texture.
What If I Don’t Want to Use Raw Eggs?
Increase the cornstarch to 4 tablespoons and reduce the egg yolks to 2, which provides enough thickening power without raw eggs. The pudding will be slightly thicker and less silky but still delicious and completely safe to eat.
Can I Use Instant Pudding Mix Instead of Making It from Scratch?
You could, though homemade pudding tastes significantly richer and has better flavor complexity than instant mixes. If you’re short on time, vanilla instant pudding plus extra butter and vanilla extract can work, but the result won’t be quite the same.
Why Are My Banana Slices Not Caramelizing Properly?
Your bananas might be too soft or not receiving enough direct heat from the pan. Use firmer bananas, increase the heat slightly, and avoid stirring too frequently so the banana pieces stay in contact with the hot pan long enough to brown.
How Can I Make This Recipe Gluten-Free?
Simply swap the vanilla wafer cookies for gluten-free vanilla cookies in equal amounts; the pudding itself is naturally gluten-free. Make sure your vanilla extract and all other ingredients are certified gluten-free if you need strict adherence to gluten-free standards.
Can I Substitute the Vanilla Wafers with Something Else?
Gingersnaps, vanilla sandwich cookies, or even crushed pound cake work beautifully and create different flavor profiles. Graham crackers add a toasted quality, though they soften faster than traditional vanilla wafers, so add them just before serving.
Final Thoughts
This Not Your Mama’s Banana Pudding delivers comfort and sophistication in every spoonful, proving that classics can be reimagined while still honoring what made them beloved in the first place. The caramelized bananas, silky pudding, and buttery wafer crumbles work together to create something that tastes restaurant-quality but comes from your own kitchen.
Make this for your next gathering and watch people’s faces light up when they taste something familiar yet completely new. You’ll find yourself making it again and again, each time appreciating the balance of flavors and textures that make it special.
Ready to explore more classic desserts with creative twists? Check out our banana bread recipe with oil for another way to celebrate this versatile fruit, or discover comfort in a bowl with our recipe for rice pudding that brings similar warmth and nostalgia to your dessert table.
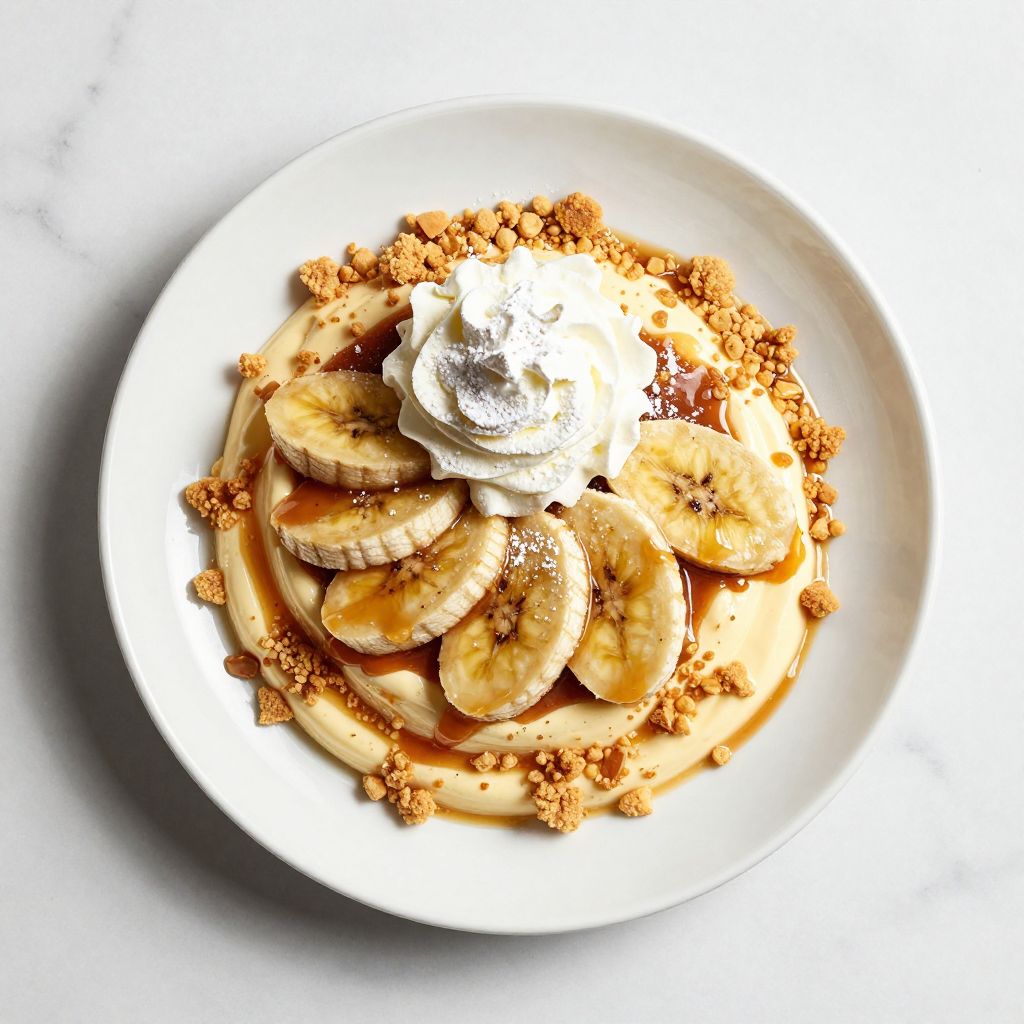
Not Your Mama's Banana Pudding
Ingredients
Equipment
Method
- Pour 2 cups whole milk and 1 cup heavy cream into a medium saucepan over medium heat and bring to a gentle simmer.
- In a mixing bowl, whisk together 5 large egg yolks, 1/2 cup granulated sugar, and 3 tablespoons cornstarch until the mixture turns pale yellow and ribbon-like.
- Slowly pour 1 cup of the hot milk mixture into the egg mixture while whisking constantly to temper the eggs and prevent scrambling.
- Pour the tempered egg mixture back into the saucepan with the remaining milk mixture, reduce heat to medium-low, and cook for 5 to 7 minutes, stirring frequently, until the pudding thickens and coats the back of a spoon.
- Remove the saucepan from heat and stir in 2 teaspoons vanilla extract, 2 tablespoons butter, and 1/4 teaspoon salt until fully combined.
- Slice 4 medium bananas on the bias into 1/4-inch thick pieces; melt 4 tablespoons butter in a small skillet over medium-high heat, add 1/4 cup brown sugar, and cook for 1 minute until bubbling.
- Add the banana slices to the skillet and cook for 2 to 3 minutes per side without stirring to allow them to develop a caramelized crust.
- Place 35 to 40 vanilla wafer cookies in a sealed bag and crush them with a rolling pin until you have coarse, varied crumbles.
- Spread a thin layer of vanilla pudding in a 9x13 inch baking dish, top with caramelized bananas and a layer of wafer crumbles; repeat layers ending with wafer crumbles on top.
- Cover the baking dish with plastic wrap and refrigerate for at least 2 hours to allow the pudding to set and flavors to meld.
- Just before serving, pour 1 cup heavy cream into a clean bowl and whip with an electric mixer until soft peaks form, then add 2 tablespoons powdered sugar and whip for 30 seconds more.
- Top each portion of pudding with a dollop of whipped cream and serve immediately.