
The smell of seasoned ground beef sizzling in a cast iron skillet on a lazy Saturday afternoon takes me straight back to my grandmother’s kitchen in the Midwest.
The loose meat sandwich is a regional treasure that deserves way more attention than it gets, and honestly, once you taste one, you’ll wonder why you haven’t been making them all along.
This sandwich hits different because the meat is crumbly, piled high, and soaks up all the flavors from simple seasonings and a quick pan fry with onions and spices.
It’s faster than a burger, more forgiving than meatloaf, and surprisingly versatile when you get creative with toppings and condiments.
Ready to learn how to build the perfect loose meat sandwich at home?
Why You’ll Love This Recipe
This sandwich checks every box for weeknight dinners, game day gatherings, or when you want something hearty without the fuss.
- Takes only 15 minutes from start to finish, perfect for busy schedules
- Uses basic pantry ingredients with zero fancy equipment required
- Makes enough for a crowd or scales down for two people easily
- Naturally customizable with your favorite toppings and condiments
- Tastes just as good as the diner version but costs a fraction of the price
My Experience Making This Recipe
I first made this sandwich on a whim after a road trip through Iowa, and I’ve been hooked ever since. The whole process felt oddly meditative: breaking up the meat as it cooked, letting the onions soften, stirring in those simple spices that somehow transform basic ground beef into something special.
My teenage daughter, who usually turns her nose up at anything I cook, actually asked for seconds. That’s when I knew this recipe was a keeper.
Now I make these at least twice a month, and my friends have stopped asking what’s for dinner and just show up expecting loose meat sandwiches. There’s something about the casual, laid-back vibe of eating a messy, delicious sandwich that brings people together.
Recipe Overview
- Recipe Name: Loose Meat Sandwich
- Servings: 4 sandwiches
- Prep Time: 5 minutes
- Cook Time: 10 minutes
- Total Time: 15 minutes
- Course: Main Course
- Cuisine: American (Midwest)
- Calories per Serving: 385 calories
Equipment You Will Need
- Large cast iron skillet or heavy-bottomed frying pan
- Wooden spoon or spatula for breaking up meat
- Cutting board and sharp knife
- Measuring spoons and cups
- Small bowl for mixing seasonings
- Tongs or slotted spoon for serving
Ingredients for Loose Meat Sandwich
- Ground beef (80/20 blend): 1.5 pounds
- Yellow onion, finely diced: 1 medium
- Beef broth: 1/2 cup
- Worcestershire sauce: 1 tablespoon
- Yellow mustard: 1 teaspoon
- Garlic powder: 1/2 teaspoon
- Onion powder: 1/2 teaspoon
- Salt: 1/2 teaspoon, plus more to taste
- Black pepper: 1/4 teaspoon
- Hamburger buns: 4 toasted buns
- Toppings: pickles, onions, mustard, ketchup, or your favorites
Ingredient Notes and Substitutions
- Ground beef (80/20 blend): This ratio gives you enough fat to flavor the meat without excess grease pooling on top. You can use 85/15 if you prefer leaner meat, though the sandwich will be slightly less juicy.
- Beef broth: This keeps the meat moist and helps distribute the seasonings evenly. Chicken broth or vegetable broth works as a substitute, though the flavor will be milder.
- Worcestershire sauce: The backbone of the umami flavor that makes this sandwich sing. You can swap in soy sauce if needed, using the same amount.
- Yellow onion: Raw onion would overpower the dish, so we cook it down for sweetness. White onion works fine if that’s what you have on hand.
- Hamburger buns: Standard soft buns are traditional, but brioche buns add richness and potato buns give better structure if your filling is extra saucy.
How to Make Loose Meat Sandwich
Step 1: Heat Your Skillet and Add Onions
Place your cast iron skillet over medium-high heat and let it warm for about one minute. Add your diced onion directly to the dry pan and cook for about two minutes, stirring occasionally, until the onion softens and releases its natural sweetness.
Step 2: Brown the Ground Beef
Add the ground beef to the skillet with the onions and immediately start breaking it apart with your wooden spoon or spatula. Work quickly and continuously for about three to four minutes, breaking the meat into small, crumbly pieces instead of letting it form a patty.
The goal is tiny crumbles that brown evenly and soak up the seasonings throughout the cooking process.
Step 3: Drain Excess Grease
Once the meat is mostly browned and cooked through, tilt the skillet slightly and carefully pour off any excess fat that has pooled in the pan. Leave just enough fat to coat the bottom of the skillet, as this carries flavor and keeps everything moist.
Step 4: Mix Your Seasonings
In a small bowl, whisk together the garlic powder, onion powder, salt, and black pepper. This ensures the seasonings distribute evenly rather than creating pockets of heavy seasoning in one bite.
Step 5: Add Seasonings and Liquid
Sprinkle your seasoning mixture over the meat and stir well to coat everything evenly. Pour in the beef broth, Worcestershire sauce, and yellow mustard, stirring constantly to combine and break up any remaining clumps of meat.
The liquid should simmer gently and reduce as the meat absorbs all those savory flavors.
Step 6: Simmer Until Flavorful
Reduce the heat to medium and let the mixture simmer for about three to four minutes, stirring occasionally. The broth will reduce slightly and concentrate the flavors while the meat becomes tender and infused with seasoning.
Step 7: Toast Your Buns
While the meat is simmering, lightly butter both sides of your hamburger buns and place them face-down on a separate skillet or griddle over medium heat. Toast them for about one to two minutes per side until they’re golden brown and slightly crispy.
Toasting the buns prevents them from getting soggy and adds a subtle nutty flavor that elevates the whole sandwich.
Step 8: Assemble Your Sandwiches
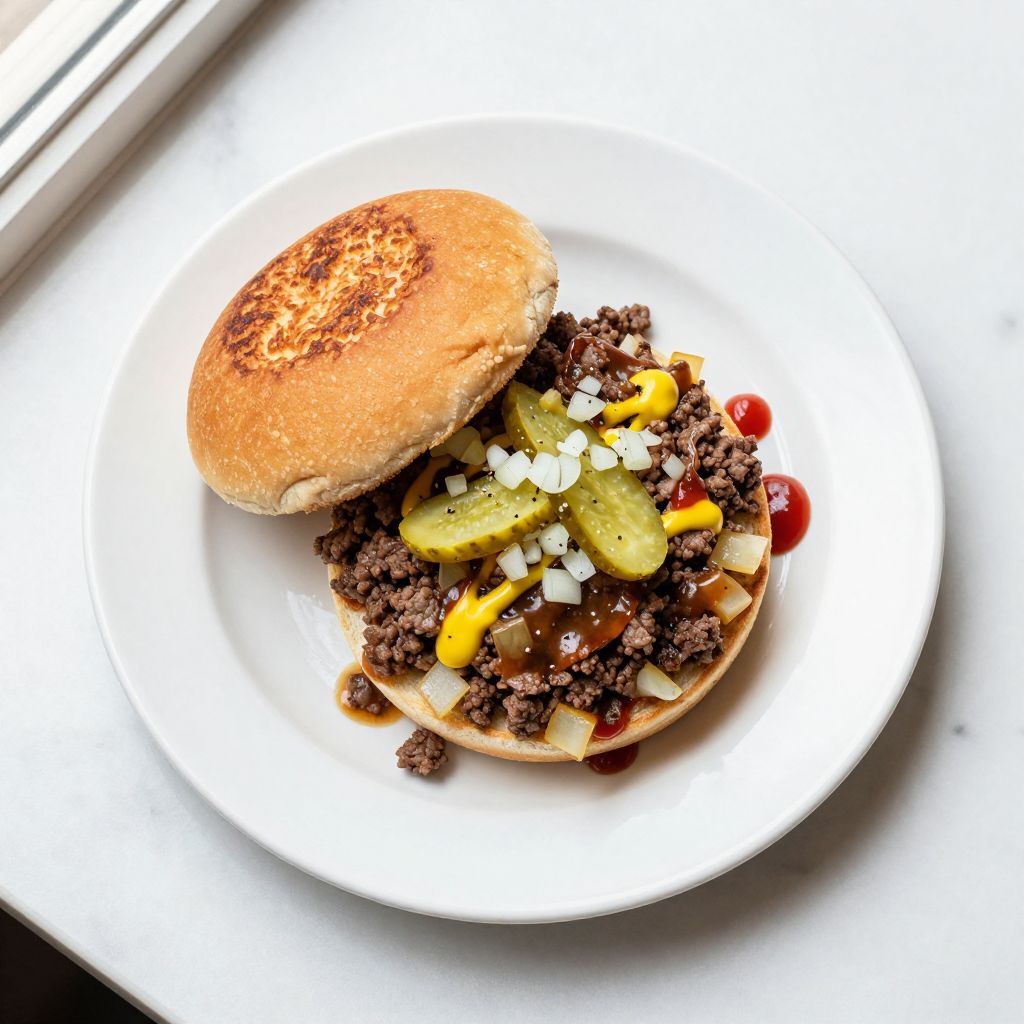
Place each toasted bun on a plate or serving surface and spoon a generous portion of the loose meat mixture onto the bottom half of each bun. The meat should be piled high and slightly spilling over the edges for that authentic loose meat sandwich look.
Top with your favorite toppings like pickles, onions, extra mustard, or ketchup, then place the top bun gently on top and serve immediately.
Pro Tip: Don’t skip toasting the buns; it’s the difference between a soggy sandwich and one that holds together while still being juicy.
Tips for the Best Loose Meat Sandwich
- Break the meat into the smallest possible crumbles as it cooks so it cooks evenly and absorbs seasonings uniformly. Large chunks cook slower and won’t have the same tender texture.
- Use an 80/20 ground beef blend for the perfect balance of flavor and texture. Leaner meat tends to dry out, while fattier blends leave grease pooling on your plate.
- Toast your buns without fail to give them structure and prevent sogginess from the meat mixture. A crispy exterior also adds textural contrast that makes every bite more interesting.
- Simmer the meat mixture long enough for the broth to reduce by about half, concentrating all those savory flavors into every bite. Rushing this step leaves you with diluted seasoning.
- Pile the meat high on the bun rather than spreading it thin, as this gives you a proper meat-to-bread ratio that defines a real loose meat sandwich.
- Taste and adjust seasonings at the very end before serving. Sometimes you need an extra pinch of salt or a splash more Worcestershire to hit that perfect balance.
Common Mistakes to Avoid
- Not breaking the meat into small enough pieces results in chunky texture that doesn’t cook evenly and misses out on that signature crumbly consistency.
- Skipping the toast on the buns leads to soggy, falling-apart sandwiches that are unpleasant to eat. The moisture from the meat needs a structural barrier.
- Using lean ground beef or draining all the fat creates dry, flavorless meat that tastes more like cardboard than a proper loose meat sandwich.
- Not reducing the liquid enough leaves you with a soupy, sloppy mess that’s more about liquid than meat. The broth should reduce to coat the meat, not drown it.
- Adding cold toppings straight from the fridge makes the whole sandwich cold by the time you eat it. Let toppings sit at room temperature or warm them slightly for better overall temperature balance.
Serving Suggestions
Loose meat sandwiches pair beautifully with classic sides that won’t overshadow the star of the plate. Keep it simple so the focus stays on that delicious, savory meat filling.
- Crispy shoestring fries with a dusting of salt and malt vinegar for dipping
- Creamy coleslaw with just a touch of vinegar to cut through the richness
- Dill pickle spears or chips for a bright, acidic contrast
- Simple green salad with a light vinaigrette to balance the heaviness of the sandwich
- Onion rings for a more indulgent, diner-style meal experience
Variations to Try
- Spicy Loose Meat Sandwich: Add a quarter teaspoon of cayenne pepper and a half teaspoon of hot sauce to the meat mixture for a kick that builds heat without overpowering the savory base.
- Bacon and Cheddar Version: Crumble four slices of crispy bacon into the meat mixture and top each sandwich with a slice of melted cheddar cheese for extra richness and smokiness.
- Mushroom and Swiss: Sauté sliced mushrooms in a separate pan until golden, then add them to the meat mixture and top each sandwich with Swiss cheese for an earthy, umami-forward twist.
- Chipotle Lime: Swap the Worcestershire for a tablespoon of chipotle hot sauce and add a teaspoon of fresh lime juice for a southwestern flair with smoky, citrusy notes.
- Classic Diner Style: Top your sandwich with grilled onions, pickles, and a swipe of yellow mustard for the most nostalgic, diner-authentic experience possible.
Dietary Adaptations
- Gluten-Free: Use certified gluten-free hamburger buns made from rice flour or a gluten-free flour blend; the meat filling is naturally gluten-free already and needs no modification.
- Dairy-Free: This recipe is naturally dairy-free as written, so no changes needed unless you want to add cheese toppings, in which case use a dairy-free cheddar alternative.
- Vegan/Vegetarian: Swap ground beef for a plant-based meat crumble like lentils and mushrooms cooked the same way; the resulting texture will be slightly different but still delicious and satisfying.
- Low-Carb/Keto: Skip the bun and serve the loose meat mixture over lettuce leaves or in a low-carb wrap, or eat it as a meat salad with your favorite toppings mixed in.
Storage and Reheating
Refrigerator
Store the cooked loose meat mixture in an airtight container in the refrigerator for up to three days. The meat will stay moist and flavorful, and you can quickly reheat it whenever cravings strike.
- Let the meat cool completely before refrigerating to prevent condensation
- Keep toasted buns separate or store them in an airtight container to maintain crispness
- Store toppings separately to maintain their texture and freshness
Freezer
The loose meat mixture freezes beautifully for up to two months, making it perfect for meal prep or unexpected hunger emergencies. Thaw overnight in the refrigerator before reheating.
- Transfer cooled meat mixture to a freezer-safe container or zip-top bag, removing as much air as possible
- Label with the date so you remember when you froze it
- Freeze buns separately in an airtight container for up to one month
Reheating
Reheat the meat mixture over medium heat in a skillet with a splash of beef broth or water to restore moisture and prevent drying out. Warm for about three to five minutes, stirring occasionally, until heated through.
- Microwave is faster but risks drying out the meat; add a little broth before microwaving for two to three minutes
- Toast fresh buns right before serving for the best texture and taste
- Add fresh toppings after reheating for maximum crispness and flavor
Nutrition Information
| Nutrient | Amount |
|---|---|
| Calories | 385 |
| Total Fat | 18g |
| Saturated Fat | 7g |
| Carbohydrates | 24g |
| Fiber | 1g |
| Sugar | 2g |
| Protein | 28g |
| Sodium | 720mg |
| Cholesterol | 75mg |
These values are based on one sandwich with the meat mixture and bun only, not including additional toppings which will add calories and sodium. Nutritional content may vary depending on your specific brands and ingredient ratios.
Frequently Asked Questions
Can I make loose meat sandwiches ahead of time?
Yes, you can make the meat mixture up to three days ahead and store it in the refrigerator in an airtight container. Toast the buns fresh right before serving to maintain their crispness and texture.
What’s the best way to reheat frozen loose meat?
Thaw the meat mixture overnight in the refrigerator, then reheat it in a skillet over medium heat with a splash of beef broth to restore moisture. Avoid microwaving directly from frozen as it can dry out the meat.
Can I use ground turkey or ground chicken instead of beef?
You can, but the flavor will be lighter and less rich since poultry lacks the deep umami that beef brings. Use the same seasoning amounts and be careful not to overcook ground poultry, as it dries out quickly.
Why is my loose meat mixture too saucy or too dry?
Too saucy means you didn’t reduce the broth enough during simmering; cook it longer next time or use less broth initially. Too dry means you need more fat in the meat or less cooking time; an 80/20 blend and careful timing are key.
Do I really have to toast the buns or can I skip that step?
Toasting is strongly recommended because it prevents the bun from becoming soggy and adds a subtle nutty flavor that makes a huge difference. If you absolutely must skip it, at least lightly butter and warm the buns for structure.
Can I make these sandwiches without the Worcestershire sauce?
You can, but Worcestershire is what gives the sandwich its signature depth and umami flavor. If you don’t have it, soy sauce is the best substitute at the same amount, or you can add a bit more beef broth and adjust seasonings to taste.
Final Thoughts
The loose meat sandwich is proof that you don’t need fancy techniques or complicated ingredients to create something truly delicious and satisfying. This recipe brings together simple, honest flavors in a way that tastes like comfort and reminds you why home cooking beats takeout every single time.
Next time you’re planning dinner and want something that feels both special and effortless, give these a shot. Your family and friends will wonder why you haven’t been making them forever, and you’ll have a new weeknight go-to that’s hard to beat.
Explore More Delicious Recipes
If you loved this loose meat sandwich, you’ll definitely want to check out more of our favorite handheld meals and comfort food classics. We have plenty of easy, crowd-pleasing recipes that deliver big flavor with minimal fuss.
Try our crack burger recipe for another quick, satisfying sandwich option that your family will request constantly. If you’re in the mood for something with a bit more bread and toppings, our grinder sandwich recipe brings similar casual vibes with a completely different flavor profile.
Loose Meat Sandwich
Ingredients
Equipment
Method
- Heat the skillet over medium-high heat for about 1 minute.
- Add the diced onion and cook for 2 minutes, stirring occasionally, until softened.
- Add the ground beef and break it into small crumbles, cooking for 3 to 4 minutes until browned.
- Tilt the skillet and carefully drain off excess grease, leaving just enough to coat the pan.
- In a small bowl, whisk together garlic powder, onion powder, salt, and black pepper.
- Sprinkle the seasoning mixture over the meat, then pour in beef broth, Worcestershire sauce, and mustard, stirring to combine.
- Reduce heat to medium and simmer for 3 to 4 minutes, allowing the liquid to reduce and flavors to concentrate.
- While the meat simmers, butter the buns and toast them face-down in a separate skillet over medium heat for 1 to 2 minutes per side.
- Assemble the sandwiches by piling the meat onto the bottom buns, adding desired toppings, and capping with the top buns.