
The smell of Navajo fry bread sizzling in hot oil is unmistakable, pulling you back to gatherings, fairs, and kitchen tables where this beloved bread has fed generations. This recipe creates pillowy, golden rounds that are crispy on the outside and tender within, ready to top with anything from savory chili and cheese to sweet honey and cinnamon.
Navajo fry bread strikes that rare balance between approachable and impressive, taking just basic pantry staples and transforming them into something that tastes like tradition and celebration. Whether you serve it as a savory base for toppings or drizzle it with honey for dessert, this bread delivers serious flavor and satisfaction in under an hour.
Why You’ll Love This Recipe
This recipe works because it delivers restaurant-quality fry bread without any fuss or special equipment. You get golden, puffy bread that stays crispy outside and soft inside, and the entire process takes less time than you’d think.
- Simple pantry ingredients with no exotic substitutions needed
- Ready in under an hour from start to finish
- Naturally versatile for both sweet and savory toppings
- Scales easily for small families or crowds
- Teaches you fundamental frying skills you’ll use elsewhere
My Experience Making This Recipe
The first time I made fry bread at home, I was surprised how quickly the dough came together and how forgiving it actually was. I’d expected something technical and fussy, but instead I got to stand there watching these beautiful golden bubbles form, with my kitchen smelling like a county fair in the best way possible.
My family gathered around as soon as the first batch came out of the oil, and we went through them faster than I could make them. The crispy exterior gave way to that tender, slightly chewy interior, and everyone wanted toppings immediately.
What I appreciate most is how this bread connects to something real and meaningful while still being something anyone can make on a Tuesday night. You’re not just cooking; you’re participating in a tradition that matters.
Recipe Overview
- Recipe Name: Navajo Fry Bread
- Servings: 8 pieces
- Prep Time: 15 minutes
- Cook Time: 20 minutes
- Total Time: 35 minutes
- Course: Bread / Appetizer
- Cuisine: Native American
- Calories per Serving: 285
Equipment You Will Need
- Large mixing bowl
- Measuring cups and spoons
- Wooden spoon or dough hook
- Large heavy-bottomed pot or Dutch oven
- Deep-fry or candy thermometer
- Slotted spoon or spider strainer
- Paper towels
- Shallow bowl or plate for draining
- Rolling pin (optional, for shaping)
Ingredients for Navajo Fry Bread
- 2 cups all-purpose flour
- 1 tablespoon baking powder
- 1 teaspoon salt
- 3/4 cup warm water
- Oil for frying (vegetable, canola, or peanut oil, about 2 to 3 quarts)
Ingredient Notes and Substitutions
- All-purpose flour: The standard choice because it develops enough gluten for structure without being too heavy. Bread flour works but creates a slightly chewier texture, while cake flour makes softer, more delicate pieces.
- Baking powder: This creates lift and those characteristic bubbles without requiring yeast or rising time. You cannot replace it with baking soda alone without an acidic ingredient to activate it.
- Warm water: Helps the dough come together smoothly and makes it easier to work with. Cold water works but makes the dough stiffer and harder to shape.
- Oil for frying: High-smoke-point oils are essential to prevent burning and off flavors. Never use olive oil, which breaks down at frying temperatures and tastes wrong here.
- Salt: Enhances flavor and helps control gluten development. Sea salt and kosher salt work identically to table salt in this recipe.
How to Make Navajo Fry Bread
Step 1: Combine Your Dry Ingredients
In your large mixing bowl, whisk together the flour, baking powder, and salt until evenly distributed. This ensures the baking powder spreads throughout the dough so you get even rising and texture.
Step 2: Add the Water
Pour the warm water into the flour mixture and stir with a wooden spoon until a shaggy dough forms. You want everything moistened but the dough will still look rough and slightly sticky at this stage.
Step 3: Knead the Dough
Switch to using your hands and knead for about 5 minutes until the dough becomes smooth and elastic. You’re developing the gluten structure that will give your fry bread its tender but structured texture.
Step 4: Rest the Dough
Cover the bowl loosely with a clean kitchen towel and let it rest for 10 minutes at room temperature. This resting period allows the flour to fully hydrate and makes the dough much easier to shape.
Step 5: Divide and Shape
Divide the dough into 8 equal pieces and gently shape each one into a ball, then flatten to about 1/4-inch thickness. You can use your hands or a rolling pin, and the exact shape doesn’t matter since it will puff up unpredictably in the oil anyway.
Step 6: Heat Your Oil
Pour oil into your pot to a depth of about 3 inches and heat it to 375 degrees Fahrenheit. Use your thermometer to monitor this carefully, as oil that’s too cool produces greasy bread while oil that’s too hot burns the outside before the inside cooks.
Step 7: Fry in Batches
Carefully place one dough round into the hot oil and it will immediately sink then bubble and rise within 30 seconds. Fry for 1 to 2 minutes per side until golden brown, then remove with a slotted spoon to a paper towel-lined plate.
Only fry one piece at a time so you can maintain oil temperature and have space to flip it easily. Multiple pieces at once drops the oil temperature too much and crowds the pan, causing uneven cooking.
Step 8: Drain and Serve
Let each piece drain on paper towels while you continue frying the remaining dough. Serve warm, ideally within minutes of frying, topped with your choice of toppings.
Pro Tip: Keep finished fry bread warm by placing pieces on a baking sheet in a 200-degree oven while you fry the remaining batches. This way, everything stays hot and crispy when you sit down to eat.
Tips for the Best Navajo Fry Bread
- Make sure your oil hits exactly 375 degrees before you start frying, since this single detail makes the difference between grease-soaked bread and crispy perfection.
- Don’t skip the resting period after kneading, as this small pause dramatically improves how easily the dough shapes and how it puffs during frying.
- Use a thermometer every single time instead of guessing, and check the temperature between batches since it can drop as you add cold dough.
- Fry one piece at a time for better control and more consistent results, even though it takes slightly longer than batching.
- Work quickly but gently when handling the dough, since overworking makes it tough while rough handling causes uneven cooking.
- Keep the finished bread in a warm oven so everything stays hot and crispy, rather than letting early batches cool while you finish cooking.
Common Mistakes to Avoid
- Oil that is too cool produces soggy, greasy bread that tastes heavy and absorbs excess oil instead of crisping properly.
- Overworking the dough makes it tough and dense instead of light and tender, so mix just until combined and don’t knead excessively.
- Skipping the rest period makes the dough harder to shape and results in less even puffing during frying.
- Frying multiple pieces at once drops your oil temperature and causes uneven cooking, with some pieces browning too fast while others stay pale.
- Letting finished bread sit uncovered causes it to soften as steam escapes, so serve immediately or keep in a warm oven.
Serving Suggestions
The beauty of fry bread is its flexibility: serve it as a vehicle for your favorite toppings or as a standalone treat. Think beyond the obvious and get creative with what you pile on top.
- Savory version: seasoned ground beef, shredded lettuce, diced tomatoes, shredded cheddar, and a dollop of sour cream
- Chili bread: top with hot chili, diced onions, jalapeños, and melted cheese for a heartier meal
- Sweet treatment: drizzle generously with warm honey and dust with cinnamon sugar
- Breakfast option: top with scrambled eggs, crumbled bacon, and shredded cheese
- Simple approach: sprinkle with sea salt while still warm and eat with honey for dipping
Variations to Try
- Whole wheat fry bread: Replace up to half the all-purpose flour with whole wheat flour for more nutrition and nuttier flavor, though the bread will be slightly denser and require an extra tablespoon of water.
- Herbed version: Add 1 teaspoon of dried herbs like oregano, garlic powder, or mixed Italian seasoning to the dry ingredients for savory depth.
- Cornmeal crust: Dust your work surface with cornmeal instead of flour before shaping the dough for a slightly grainy exterior texture.
- Skillet version: Pan-fry the dough in a cast-iron skillet with 1/4-inch oil instead of deep-frying for easier cleanup, though you won’t get quite as much puff.
- Stuffed fry bread: Place a small amount of shredded cheese or cooked meat in the center of each piece before frying, though seal the edges carefully so filling doesn’t escape.
Dietary Adaptations
- Gluten-free: Use a one-to-one gluten-free flour blend instead of all-purpose flour, though you may need an extra tablespoon of water since gluten-free flour absorbs differently and the bread will be slightly less tender.
- Dairy-free: This recipe contains no dairy, so it’s naturally dairy-free without any modifications.
- Vegan: This recipe is naturally vegan as written, containing only flour, water, salt, baking powder, and oil.
- Low-carb or keto: Replace all-purpose flour with almond flour or coconut flour, though expect a very different texture and you may need to adjust water amounts significantly, making this a fundamentally different recipe.
Storage and Reheating
Refrigerator
Store leftover fry bread in an airtight container for up to 3 days, though it gradually loses its crispness. Place pieces in a single layer with parchment between them to prevent sticking.
- Use within 2 days for best texture and crispness
- Don’t stack pieces without parchment, as they stick together
- Let come to room temperature before reheating
Freezer
Freeze fry bread for up to 2 months by layering pieces with parchment in a freezer bag. This works better than you’d expect, though you lose some of the original crispness.
- Freeze within 2 hours of frying for best results
- Thaw at room temperature for 30 minutes before reheating
- Don’t thaw in the refrigerator, as this introduces excess moisture
Reheating
Warm leftover fry bread in a 350-degree oven for 5 to 7 minutes to restore crispness without drying it out. A toaster oven works well for small quantities and heats faster than a full oven.
- Don’t microwave, which makes the bread rubbery and soft
- Wrap loosely in foil to prevent the top from browning too fast
- Place directly on the oven rack for maximum crisping
Nutrition Information
| Nutrient | Amount |
|---|---|
| Calories | 285 |
| Total Fat | 14g |
| Saturated Fat | 2g |
| Carbohydrates | 34g |
| Fiber | 1g |
| Sugar | 0g |
| Protein | 4g |
| Sodium | 480mg |
| Cholesterol | 0mg |
These values are estimates based on standard ingredients and serving sizes. Actual nutrition varies depending on your specific oil, brand of flour, and how much oil each piece absorbs during frying.
Frequently Asked Questions
Can I make the dough ahead of time?
Yes, you can prepare the dough up to 2 hours in advance and refrigerate it in a covered bowl. Let it come to room temperature for about 10 minutes before shaping and frying, since cold dough is harder to work with.
What if my fry bread doesn’t puff up?
Flat fry bread usually means your oil wasn’t hot enough or your baking powder is old and has lost its rising power. Make sure the oil reaches 375 degrees and check your baking powder’s expiration date.
Can I use a deep fryer instead of a pot?
Absolutely, an electric deep fryer gives you more consistent temperature control and is easier to work with. Follow your fryer’s instructions and maintain the same 375-degree oil temperature.
Why is my bread greasy instead of crispy?
This happens when the oil is too cool and the dough absorbs oil instead of crisping on the surface. Use a thermometer to verify your oil is exactly 375 degrees before starting and between batches.
How thick should I roll the dough?
About 1/4-inch thickness is ideal, creating a balance between crispy exterior and tender interior. Thicker dough stays too doughy inside while too-thin pieces burn before cooking through.
Can I use self-rising flour instead?
You can, but reduce the salt to 1/2 teaspoon since self-rising flour already contains salt and baking powder. The results will be slightly different since you can’t control the ratio of leavening agent to flour.
Final Thoughts
Making Navajo fry bread at home connects you to something meaningful while filling your kitchen with an aroma that’s almost impossible to resist. This recipe proves that simple ingredients and basic technique create something special worth sharing.
Don’t let the frying step intimidate you, because once you nail the oil temperature, the rest becomes intuitive and rewarding. Give this recipe a try this week and discover why fry bread has remained a beloved staple for generations.
If you enjoyed this recipe, explore more traditional and authentic fry bread recipes to expand your cooking skills and discover new favorite variations for your family table.
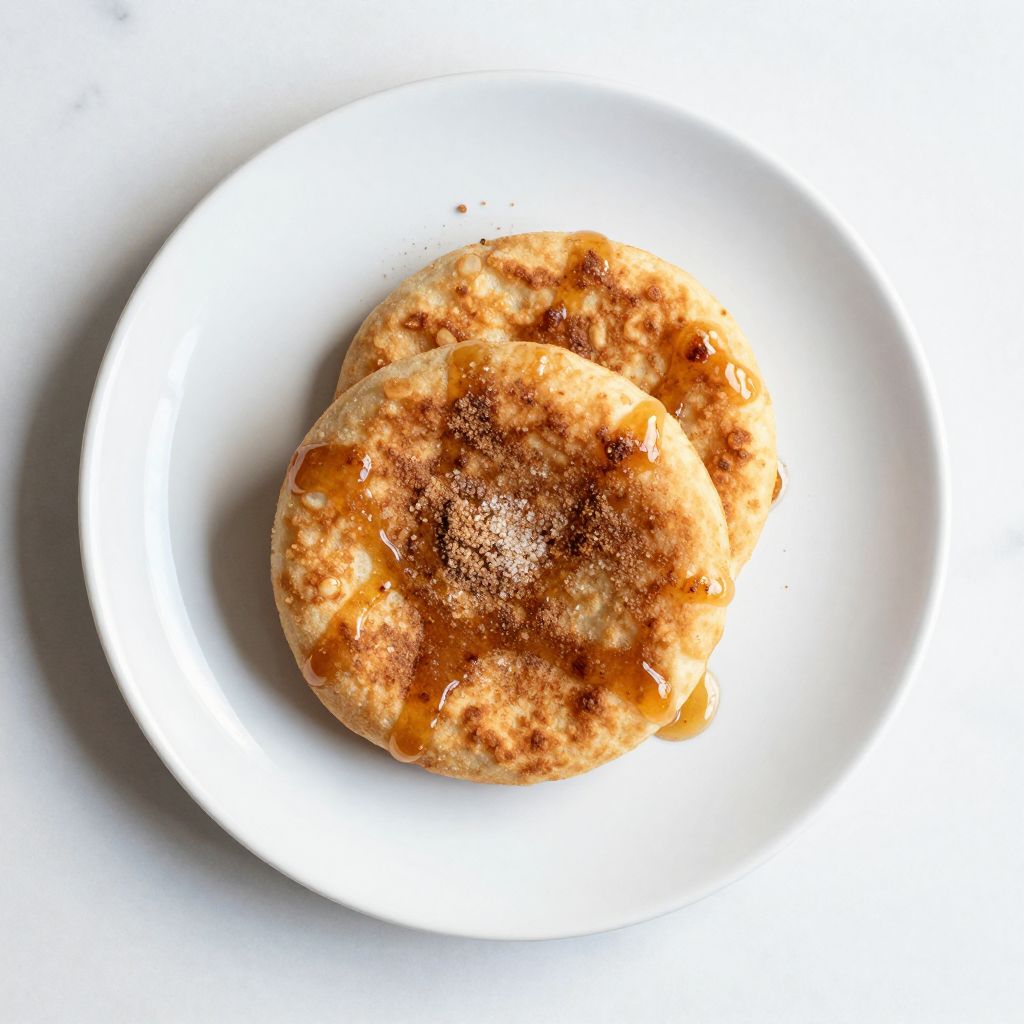
Navajo Fry Bread
Ingredients
Equipment
Method
- Whisk together 2 cups all-purpose flour, 1 tablespoon baking powder, and 1 teaspoon salt in a large mixing bowl until evenly distributed.
- Pour 3/4 cup warm water into the flour mixture and stir with a wooden spoon until a shaggy dough forms.
- Knead the dough by hand for about 5 minutes until smooth and elastic.
- Cover the dough with a clean kitchen towel and let it rest for 10 minutes at room temperature.
- Divide the dough into 8 equal pieces and flatten each one into a 1/4-inch-thick round using your hands or a rolling pin.
- Heat oil in a heavy-bottomed pot or Dutch oven to 375°F, monitoring with a deep-fry or candy thermometer.
- Carefully fry one dough round at a time for 1 to 2 minutes per side, flipping with a slotted spoon when golden brown.
- Remove the fry bread with a slotted spoon and drain on paper towels; keep warm in a 200°F oven if necessary.
- Serve warm with desired sweet or savory toppings.