There’s nothing quite like pulling a warm loaf of sourdough from the oven on the same day you started it, your kitchen filled with that unmistakable yeasty aroma that makes everything feel like home.
Most sourdough recipes demand patience measured in days, but same day sourdough bread proves you don’t need to wait to enjoy a beautifully tangy, crispy-crusted loaf with that coveted open crumb structure. This recipe works by using a refreshed, active starter and strategic timing to develop flavor and rise in just a few hours.
You’ll get real sourdough taste, impressive results, and the satisfaction of baking fresh bread without the multi-day commitment. Let’s make bread that tastes like you’ve been feeding a starter for months.
Why You’ll Love This Recipe
This loaf delivers authentic sourdough flavor and texture in a single day, making it perfect for spontaneous baking or weeknight dinners.
- Ready to eat in 6 to 8 hours instead of days
- Real sourdough tang and chew, not a shortcut taste
- Minimal hands-on time once you mix the dough
- Teaches you proper fermentation techniques you can scale up
- Looks and tastes restaurant-quality at home
My Experience Making This Recipe
I first tried same-day sourdough on a whim when a friend insisted it could actually work. Skeptical but curious, I fed my starter in the morning, mixed dough by noon, and had a stunning loaf cooling on the counter by evening.
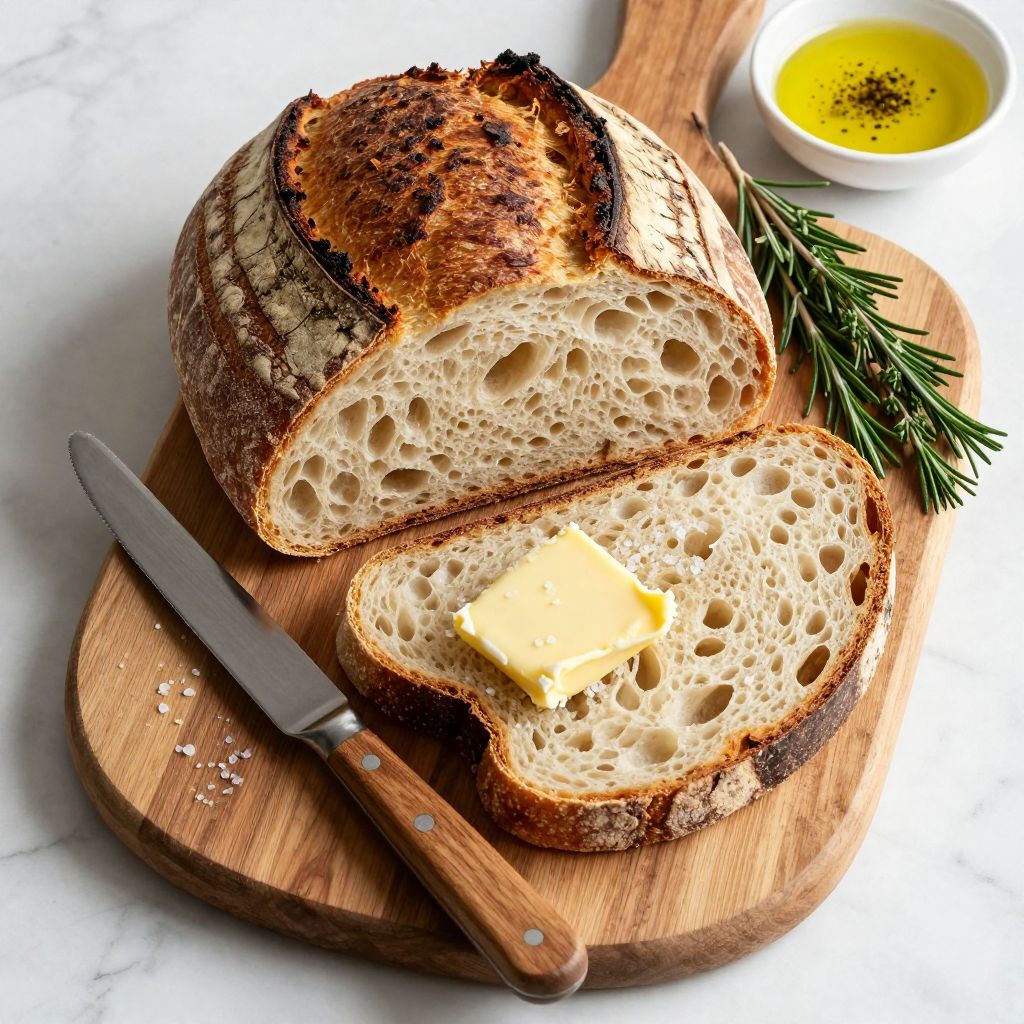
The crust crackled when I cut into it, releasing steam and revealing an airy crumb dotted with irregular holes. My family actually noticed the difference from regular bread and asked when I’d make it again.
What surprised me most was how forgiving the process felt once I understood the timing. No complex shaping techniques required, no mysterious overnight proof that might go sideways.
Recipe Overview
- Recipe Name: Same Day Sourdough Bread
- Servings: 1 loaf, 8 to 10 slices
- Prep Time: 30 minutes
- Cook Time: 45 minutes
- Total Time: 6 to 8 hours including fermentation
- Course: Bread
- Cuisine: French
- Calories per Serving: 210
Equipment You Will Need
- Digital kitchen scale
- Large mixing bowl
- Dutch oven or covered baking vessel
- Bench scraper or dough cutter
- Banneton proofing basket or bowl lined with floured towel
- Instant-read thermometer
- Sharp serrated bread knife or lame
- Spray bottle for misting
Ingredients for Same Day Sourdough Bread
- Active sourdough starter, fed 4 to 6 hours prior, 100 grams
- Bread flour, 500 grams
- Water, 350 grams, room temperature
- Sea salt, 10 grams
Ingredient Notes and Substitutions
- Active starter: Your starter must be at peak activity, roughly doubled in volume with visible bubbles at the surface, to provide sufficient leavening power. If your starter is sluggish, feed it again and wait another 4 to 6 hours rather than rushing forward with weak leavening.
- Bread flour: The higher protein content (12 to 14 percent) builds strong gluten structure, which traps gas and creates open crumb. All-purpose flour works in a pinch but produces a slightly denser loaf with less oven spring.
- Water: Room temperature water speeds fermentation compared to cold water and allows better dough development. You can substitute filtered or tap water depending on your local water quality and mineral content.
- Sea salt: Salt strengthens gluten and controls fermentation speed by inhibiting yeast activity slightly. Table salt works but may taste slightly sharper; use the same weight.
How to Make Same Day Sourdough Bread
Step 1: Feed Your Starter
First thing in the morning, feed your sourdough starter with equal parts starter, water, and flour by weight (roughly 1:1:1 ratio). For this recipe, you need 100 grams of active starter at its peak, so feed about 50 grams of starter with 50 grams of water and 50 grams of flour.
Let it sit at room temperature for 4 to 6 hours until it roughly doubles and shows visible bubbles and a dome shape at the top. Peak activity looks bubbly and active, not flat or deflated.
Step 2: Mix the Dough
Pour 350 grams of room temperature water into a large bowl and add your 100 grams of active starter. Stir until the starter breaks apart and disperses into the water.
Add 500 grams of bread flour and mix by hand or with a wooden spoon until all dry flour is fully hydrated and you have a shaggy, rough dough. Hydration matters here: this dough is wetter than typical bread dough, which helps create an open crumb and requires proper gluten development.
Step 3: Autolyse Period
Cover the bowl with a damp towel and let the dough rest for 30 minutes without salt. During this rest, the flour fully absorbs water and gluten begins developing on its own.
This short autolyse period gives you better extensibility and structure with less kneading, which is why same-day sourdough works at all.
Step 4: Add Salt and Incorporate
After the 30-minute rest, sprinkle 10 grams of sea salt over the dough and incorporate it fully by pinching and folding the dough in on itself over about 2 to 3 minutes. The salt will seem difficult to mix in at first, but persistence wins.
Salt strengthens gluten and regulates yeast fermentation speed, which is critical for timing the bulk fermentation correctly.
Step 5: Bulk Fermentation with Stretch and Fold
Leave the dough in the bowl and perform four sets of stretch and fold at 30-minute intervals over the next 2 hours. To stretch and fold: wet your hand, grab one side of the dough, stretch it up and fold it over the center, then rotate the bowl 90 degrees and repeat four times per set.
These stretches build strength without aggressive kneading and trap gas gradually. You should see the dough visibly rise and feel increasingly smooth and elastic by the final stretch.
Step 6: Check Dough Temperature and Readiness
After the final stretch and fold, check your dough temperature with an instant-read thermometer. Aim for 75 to 78 degrees Fahrenheit for ideal fermentation speed.
The dough should look puffy, filled with bubbles visible at the surface and sides, and increase in volume by about 50 percent. It should feel airy and hold its shape loosely.
Step 7: Shape and Proof
Carefully flip the dough onto a lightly floured work surface and gently shape it into a round by folding the edges toward the center. You’re not looking for aggression here, just mild surface tension to give the loaf structure.
Place the shaped dough seam-side up in a floured banneton or bowl lined with a floured kitchen towel. Cover loosely and let it proof at room temperature for 2 to 3 hours until slightly puffy and the dough springs back slowly when gently poked.
Step 8: Score and Bake
Place your Dutch oven in the oven and preheat to 500 degrees Fahrenheit for at least 30 minutes. Turn the dough out onto parchment paper, score the top with a sharp knife or lame at a 45-degree angle using one swift confident motion, and carefully place it into the screaming hot Dutch oven.
Bake covered for 25 minutes to trap steam, which creates that crispy crust. Lower the heat to 450 degrees, remove the lid, and bake uncovered for 20 to 25 minutes until the crust is deep brown and crackled.
Step 9: Cool and Slice
Remove the loaf and place it on a wire rack to cool for at least 1 hour before slicing. The interior continues to set as it cools, and cutting into warm bread will cause it to compress and gum.
Once completely cool, slice with a serrated knife using a gentle sawing motion to preserve the crumb structure and enjoy your reward.
Pro Tip: An active starter is everything for same-day sourdough success, so feed it only when it shows clear signs of activity at peak rise with visible bubbles and doming at the surface.
Tips for the Best Same Day Sourdough Bread
- Use a digital scale for precise measurements, as volume measurements for flour vary too much and throw off hydration ratios. Accuracy here directly impacts how your dough behaves during fermentation.
- Keep your dough at 75 to 78 degrees Fahrenheit by adjusting your kitchen temperature or water temperature. Warmer dough ferments faster but risks over-fermentation, while cooler dough takes longer and may not finish in a single day.
- Don’t skip the autolyse rest even though you’re short on time. This 30-minute pause is where much of your gluten develops, making subsequent shaping and fermentation more reliable.
- Watch the dough, not the clock. Fermentation speed depends on temperature and starter activity, so trust visual cues like the dough doubling in volume and jiggly bubbles rather than hitting exact timings.
- Score decisively and confidently with one clean motion, angling the blade at 45 degrees. Hesitant scoring produces ragged edges rather than a clean ear, and the blade must be sharp enough that it glides through without dragging.
- Use boiling water to create steam in your Dutch oven if you lack one. Place a pan of boiling water on the lower oven rack and bake your covered dough on the upper rack for the first 25 minutes, then proceed uncovered.
Common Mistakes to Avoid
- Using an inactive or sluggish starter: A weak starter lacks the strength to leaven dough in just 6 to 8 hours, resulting in a dense, gummy loaf that doesn’t rise. Always feed your starter multiple hours in advance and wait for clear signs of peak activity.
- Skipping the stretch and fold process: These folds build strength and structure that the dough desperately needs without sufficient time for autolyse. Skipping them results in slack dough that spreads flat rather than rising up.
- Proofing too long or too short: Over-proofed dough collapses in the oven and produces a flat loaf with tight crumb. Under-proofed dough doesn’t have enough gas trapped to open up, resulting in dense bread.
- Not preheating the Dutch oven: Cold baking vessels waste your initial oven energy and produce pale, soft crusts instead of crispy, caramelized ones. Give the Dutch oven a full 30 minutes at temperature.
- Cutting the loaf while warm: Warm interior crumb collapses under the knife and compresses, turning fluffy sourdough into a gummy mess. Patient cooling for at least an hour rewards you with clean slices and better texture.
Serving Suggestions
Freshly baked sourdough shines with simple toppings that let the bread’s tangy flavor and crispy crust do the talking. Warm slices pair beautifully with good butter, quality olive oil, or creamy spreads.
- Warm with unsalted butter and fleur de sel for pure sourdough enjoyment
- Toasted and topped with mashed avocado, lemon, red pepper flakes, and sea salt
- Alongside a bowl of rustic vegetable or bone broth soup for dunking
- Sliced thick and used for open-faced sandwiches with cured meats and soft cheese
- Rubbed with garlic and olive oil, then toasted with fresh herbs for homemade crostini
Variations to Try
- Whole wheat sourdough: Replace 25 percent of the bread flour with whole wheat flour for nuttier flavor and added fiber. Whole wheat absorbs more water, so increase hydration by roughly 10 grams if the dough feels stiff.
- Seeded sourdough: Fold in 50 to 75 grams of mixed seeds such as sesame, flax, and sunflower seeds after the final stretch and fold. Seeds add crunch, nutrition, and visual interest without significantly changing fermentation timing.
- Rosemary and olive oil sourdough: Incorporate 2 teaspoons of fresh minced rosemary and 1 tablespoon of good olive oil into the dough during the autolyse. The herbs infuse subtle earthy notes that complement the sourdough tang beautifully.
- High hydration open crumb: Increase water from 350 grams to 370 grams for a wetter, more extensible dough that develops larger, more irregular holes. Handle this dough gently during shaping since it’s more delicate.
- Longer fermentation overnight: If you want more complex flavor, shape in the evening and proof in the refrigerator overnight instead of at room temperature. Cold fermentation develops deeper sourness and lets you bake fresh bread for breakfast.
Dietary Adaptations
- Gluten-free: Replace bread flour with a quality gluten-free flour blend designed for bread baking and add 1 teaspoon of xanthan gum per 500 grams of flour. Gluten-free dough behaves very differently, requiring wetter consistency and gentler handling, and may not develop the same open crumb structure.
- Dairy-free: Sourdough bread contains no dairy by default, making it naturally suitable for dairy-free diets. You can serve it with olive oil or dairy-free spreads without any recipe modifications.
- Vegan: This recipe is already fully vegan since it contains only flour, water, salt, and a sourdough starter fed with plant-based ingredients. No modifications needed.
- Low-carb or keto: Traditional sourdough is quite high in carbohydrates and not suitable for strict keto diets. You could experiment with almond flour blends, but they won’t produce authentic sourdough flavor or texture.
Storage and Reheating
Refrigerator
Store cooled sourdough in a paper bag or linen bread bag at room temperature for up to 3 days. Paper allows the crust to stay crispy while the interior stays tender, unlike plastic which traps moisture and softens the crust.
- Place in paper bag and store on the counter, away from direct sunlight
- Do not refrigerate, as cool temperatures stale bread much faster than room temperature
Freezer
Wrap cooled bread tightly in plastic wrap, then aluminum foil, and freeze for up to 3 months. The dual wrapping prevents freezer burn and maintains the interior crumb quality.
- Slice before freezing for convenient grab-and-go portions
- Label with the date so you remember how long it’s been frozen
Reheating
To refresh day-old or frozen sourdough, wrap it loosely in damp parchment paper and warm in a 350-degree Fahrenheit oven for 10 to 15 minutes. The moisture from the damp paper restores softness to the crumb while the dry heat revives the crust.
- For frozen bread, thaw at room temperature for 2 to 3 hours first, then reheat
- Toast slices in a toaster oven for crispy edges and soft interiors
Nutrition Information
| Nutrient | Amount |
|---|---|
| Calories | 210 |
| Total Fat | 1 gram |
| Saturated Fat | 0 grams |
| Carbohydrates | 43 grams |
| Fiber | 2 grams |
| Sugar | 1 gram |
| Protein | 8 grams |
| Sodium | 280 milligrams |
| Cholesterol | 0 milligrams |
These values are approximate and based on using bread flour and sea salt with no additional toppings. Actual nutrition will vary slightly depending on your specific ingredients and how you slice the loaf.
Frequently Asked Questions
Can I make this recipe with less active time?
The bulk fermentation and proofing steps are where flavor and structure develop, so you can’t meaningfully skip them without compromising results. What you can do is increase your dough temperature slightly to speed fermentation, or begin with a very active starter fed just a few hours prior.
What if my starter isn’t quite active enough?
Feed it again and wait another 4 to 6 hours rather than proceeding with weak leavening. A sluggish starter simply lacks the yeast population density needed to ferment dough in a single day, and no amount of mixing or timing can fix that.
Can I use all-purpose flour instead of bread flour?
Yes, though your loaf will be slightly denser with less dramatic oven spring. All-purpose flour contains roughly 10 to 12 percent protein compared to bread flour’s 12 to 14 percent, so the gl
Same Day Sourdough Bread
Ingredients
Equipment
Method
- First thing in the morning, feed your sourdough starter with equal parts starter, water, and flour by weight (roughly 1:1:1 ratio). For this recipe, feed about 50 grams of starter with 50 grams of water and 50 grams of flour. Let it sit at room temperature for 4 to 6 hours until it roughly doubles and shows visible bubbles and a dome shape at the top.
- Pour 350 grams of room temperature water into a large bowl and add your 100 grams of active starter. Stir until the starter breaks apart and disperses into the water.
- Add 500 grams of bread flour and mix by hand or with a wooden spoon until all dry flour is fully hydrated and you have a shaggy, rough dough.
- Cover the bowl with a damp towel and let the dough rest for 30 minutes without salt. During this autolyse period, the flour fully absorbs water and gluten begins developing on its own.
- After the 30-minute rest, sprinkle 10 grams of sea salt over the dough and incorporate it fully by pinching and folding the dough in on itself over about 2 to 3 minutes.
- Leave the dough in the bowl and perform four sets of stretch and fold at 30-minute intervals over the next 2 hours. To stretch and fold: wet your hand, grab one side of the dough, stretch it up and fold it over the center, then rotate the bowl 90 degrees and repeat four times per set.
- After the final stretch and fold, check your dough temperature with an instant-read thermometer. Aim for 75 to 78 degrees Fahrenheit. The dough should look puffy, filled with bubbles visible at the surface and sides, and increase in volume by about 50 percent.
- Carefully flip the dough onto a lightly floured work surface and gently shape it into a round by folding the edges toward the center. Place the shaped dough seam-side up in a floured banneton or bowl lined with a floured kitchen towel. Cover loosely and let it proof at room temperature for 2 to 3 hours until slightly puffy and the dough springs back slowly when gently poked.
- Place your Dutch oven in the oven and preheat to 500 degrees Fahrenheit for at least 30 minutes.
- Turn the dough out onto parchment paper, score the top with a sharp knife or lame at a 45-degree angle using one swift confident motion, and carefully place it into the preheated Dutch oven.
- Bake covered for 25 minutes to trap steam. Lower the heat to 450 degrees Fahrenheit, remove the lid, and bake uncovered for 20 to 25 minutes until the crust is deep brown and crackled.
- Remove the loaf and place it on a wire rack to cool for at least 1 hour before slicing. Once completely cool, slice with a serrated knife using a gentle sawing motion.