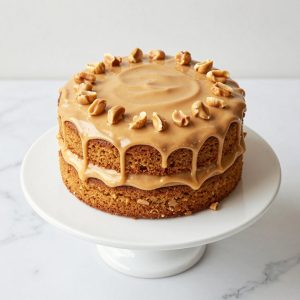
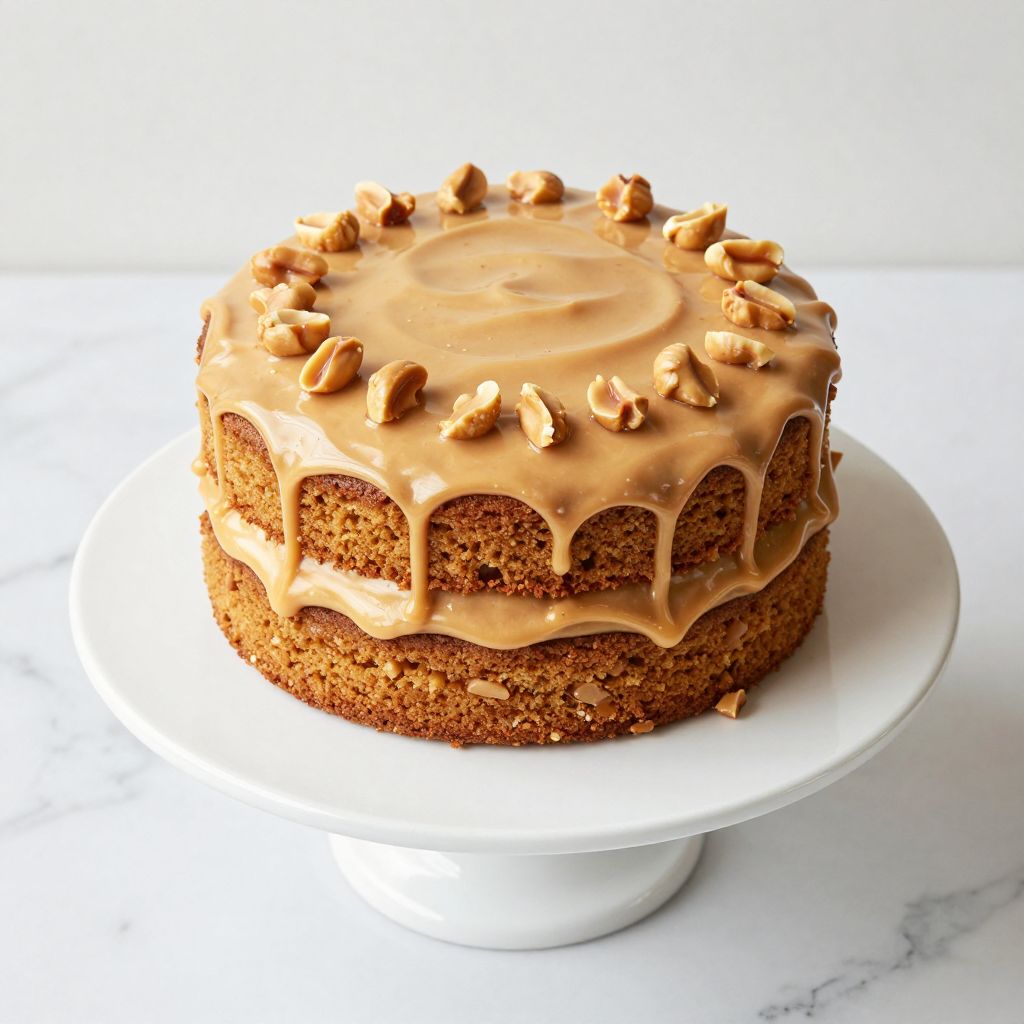
There’s something magical about biting into a layer of cake that tastes like a candy bar melted into frosting, isn’t there? Butterfinger cake combines the crispy-flaky texture of the iconic candy with tender cake layers and silky frosting, creating dessert magic that feels both nostalgic and indulgent.
This recipe is special because it captures that beloved candy flavor without requiring you to actually crumble up store-bought bars into batter. The butterfinger toffee bits baked right into the layers stay crunchy, while the frosting gets that signature peanut-butter-meets-toffee richness that makes this cake irresistible.
What makes this cake a crowd-pleaser is the contrast: soft, buttery cake against crunchy candy pieces and smooth frosting that tastes like liquid gold. Whether you’re baking for a birthday or just because your kitchen needs to smell amazing, this recipe delivers restaurant-quality results from your own oven.
Why You’ll Love This Recipe
This cake hits all the marks for a dessert that feels fancy but comes together without fussy techniques or obscure ingredients.
- Crispy toffee bits baked throughout keep their crunch even after frosting and stacking
- The frosting tastes like peanut butter and toffee had a delicious collaboration
- Works equally well for casual gatherings or dressed-up celebrations
- Makes enough for a standard two-layer cake or can be split into three thinner layers for drama
- Flavors intensify after a day, making it a smart make-ahead choice
My Experience Making This Recipe
The first time I made this cake, I was skeptical that butterfinger flavor could come through without tasting artificial or one-note. I creamed the butter and sugar, folded in the crushed toffee bits, and poured the batter into pans with honest doubt.
Then the kitchen filled with this incredible toffee-butter aroma, and when I pulled the layers out, they were golden brown with visible candy pieces studding the crumb. My family’s faces when they tasted it told me everything: this was a keeper.
I’ve made it since with minor tweaks, and it’s become the cake I reach for when I want people to feel genuinely impressed. The best part is seeing guests’ surprise when they realize it’s not artificially flavored but built on real ingredients and technique.
Recipe Overview
- Recipe Name: Butterfinger Cake
- Servings: 12 slices
- Prep Time: 20 minutes
- Cook Time: 30 minutes
- Total Time: 50 minutes plus cooling and assembly
- Course: Dessert
- Cuisine: American
- Calories per Serving: 450
Equipment You Will Need
- Two 9-inch round cake pans
- Parchment paper
- Stand mixer or hand mixer
- Mixing bowls (large and medium)
- Whisk
- Measuring cups and spoons
- Wooden spoon for folding
- Cake cooling rack
- Offset spatula for frosting
- Cake turntable (optional but helpful)
Ingredients for Butterfinger Cake
For the Cake
- All-purpose flour, 2 and 1/4 cups
- Baking powder, 2 teaspoons
- Baking soda, 1/2 teaspoon
- Salt, 1/2 teaspoon
- Unsalted butter, 1/2 cup, softened to room temperature
- Granulated sugar, 1 and 1/2 cups
- Eggs, 3 large, room temperature
- Buttermilk, 1 cup, room temperature
- Vanilla extract, 2 teaspoons
- Butterfinger toffee bits, 1 and 1/2 cups, plus 1/2 cup for garnish
For the Butterfinger Frosting
- Unsalted butter, 1 cup, softened to room temperature
- Creamy peanut butter, 1/2 cup
- Powdered sugar, 4 cups
- Toffee bits, 1/2 cup, finely crushed
- Vanilla extract, 1 teaspoon
- Heavy cream, 3 tablespoons
- Salt, pinch
Ingredient Notes and Substitutions
- Butterfinger toffee bits: These are the heart of the recipe, giving you authentic candy flavor and texture without grinding whole bars. You can substitute crushed butterfinger candies, but toffee bits are easier to distribute and stay crunchier in baked goods.
- Buttermilk: This acid reacts with baking soda to create lift and keeps the crumb tender. If you don’t have buttermilk, whisk 1 tablespoon lemon juice or white vinegar into 1 cup regular milk and let it sit 5 minutes.
- Room-temperature eggs and butter: Cold ingredients don’t emulsify smoothly, which affects texture and rise. Let them sit on the counter for 30 minutes before baking.
- Creamy peanut butter in frosting: This pairs with toffee to create the signature butterfinger flavor profile. Natural peanut butter works but will be thinner; add 1 extra tablespoon powdered sugar to compensate.
- Heavy cream in frosting: This loosens the frosting to a spreadable consistency without making it oily. Milk can substitute, but use 2 tablespoons only.
How to Make Butterfinger Cake
Step 1: Prepare Your Pans and Preheat the Oven
Preheat your oven to 350 degrees Fahrenheit. Line the bottoms of two 9-inch round pans with parchment paper, then lightly butter the sides and parchment. This prevents sticking and ensures clean cake edges when you remove the layers.
Step 2: Whisk Together Dry Ingredients
In a medium bowl, whisk together flour, baking powder, baking soda, and salt. Whisking combines the leavening agents evenly throughout the flour so your cake rises uniformly and has an even crumb structure rather than tunneling or doming.
Step 3: Cream Butter and Sugar
In a stand mixer fitted with the paddle attachment, beat softened butter and granulated sugar together on medium-high speed for 3 to 4 minutes until the mixture is pale, fluffy, and noticeably lighter in color. This creaming process traps air bubbles that expand during baking, creating a tender cake with good rise.
Step 4: Add Eggs One at a Time
Add eggs one at a time to the butter mixture, beating on medium speed for about 30 seconds after each addition. Wait until each egg is fully incorporated before adding the next, scraping down the bowl as needed. Adding eggs slowly allows them to emulsify into the butter, creating a stable batter that holds air.
Step 5: Add Vanilla and Alternate Wet and Dry
Beat in vanilla extract, then alternate adding the dry mixture and buttermilk to the batter in three additions, starting and ending with flour. Begin with 1/3 of the flour, then 1/2 of the buttermilk, then another 1/3 flour, the remaining buttermilk, and finally the last 1/3 flour. Alternating prevents overmixing, which would develop gluten and make the cake tough instead of tender.
Step 6: Fold in Toffee Bits
Using a wooden spoon or rubber spatula, gently fold in 1 and 1/2 cups of butterfinger toffee bits until just combined. Folding instead of mixing keeps the batter light and prevents you from breaking the candy pieces into smaller fragments, preserving their crunchy texture.
Step 7: Divide and Bake
Pour the batter evenly into the prepared pans and smooth the tops with an offset spatula. Bake for 28 to 32 minutes, until a toothpick inserted in the center comes out with a few moist crumbs but no wet batter. The toffee bits conduct heat slightly differently than regular cake, so check starting at 28 minutes rather than relying on standard timing.
Step 8: Cool the Layers
Let cakes cool in the pans for 15 minutes, then turn them out onto a wire cooling rack and cool completely for at least 1 hour before frosting. This cooling period allows the crumb to set; frosting a warm cake will cause the frosting to melt and slide off.
Step 9: Make the Butterfinger Frosting
In a clean mixer bowl with the paddle attachment, beat softened butter and peanut butter together on medium speed for 2 minutes until well combined. Add powdered sugar in two batches, beating on low speed until combined, then increase to medium and beat for 2 minutes. Add crushed toffee bits, vanilla, heavy cream, and salt, then beat until light and fluffy, about 2 more minutes.
Step 10: Assemble the Cake
Place one cake layer on your serving plate or cake board and spread about 1/2 cup frosting on top using an offset spatula. Set the second layer on top, then frost the top and sides of the entire cake with the remaining frosting. Sprinkle the reserved 1/2 cup toffee bits over the top for a professional, crunchy finish.
Pro Tip: Chill the frosted cake for 30 minutes before serving so the frosting sets and the slices cut cleanly.
Tips for the Best Butterfinger Cake
- Use room-temperature ingredients: This is non-negotiable for a tender crumb and smooth frosting. Set butter, eggs, and buttermilk out 30 to 45 minutes before baking.
- Don’t overmix the batter: Mix only until ingredients are combined; lumps of flour are fine. Overmixing develops gluten and makes the cake dense and chewy rather than tender.
- Reserve some toffee bits for garnish: Baking some bits inside the cake layers and saving others for the top gives you texture in every bite and a polished appearance.
- Make the frosting texture adjustable: If your frosting is too thick, add heavy cream one tablespoon at a time. If it’s too thin, add a bit more powdered sugar.
- Level your cake layers: Use a serrated knife or cake leveler to trim any domed tops so the layers stack evenly and the cake stays upright.
- Taste the peanut butter frosting: Some peanut butters are saltier than others; adjust the salt pinch accordingly to avoid an overly salty frosting.
Common Mistakes to Avoid
- Using cold ingredients: Cold butter won’t cream properly, and cold eggs won’t emulsify, resulting in a dense, gritty crumb instead of a fluffy one.
- Skipping the parchment paper: This causes cake to stick and tear, making it difficult to assemble neatly.
- Crushing toffee bits too finely: If you crush them before baking, they dissolve into powder during cooking instead of staying crunchy as a textural contrast.
- Frosting a warm cake: Warm cake melts the frosting, which slides down the sides and won’t stay where you want it.
- Overmixing the frosting: Beating frosting too long incorporates excess air and makes it grainy or separated instead of smooth and spreadable.
Serving Suggestions
This cake shines on its own but pairs beautifully with beverages and simple sides that don’t compete with the toffee-peanut flavor. Serve slices at room temperature so the frosting is soft and the cake crumb is tender.
- Black coffee cuts through the richness and complements the toffee notes perfectly
- Cold milk is the classic pairing, especially for casual afternoon cake moments
- Vanilla ice cream melts into the warm cake and toffee for an indulgent dessert
- A small scoop of salted caramel ice cream echoes the candy flavors
- Hot tea with honey balances the sweetness without overwhelming the palate
Variations to Try
- Triple-layer cake: Split each baked layer horizontally and add frosting between all three levels for a showier presentation and more frosting-to-cake ratio. This creates a more decadent dessert with stronger frosting presence.
- Chocolate butterfinger cake: Replace 1/4 cup flour with cocoa powder to add chocolate depth. The cocoa mellows the toffee sweetness and creates a more complex flavor.
- Brown butter frosting: Cook the butter until golden and nutty before creaming it with peanut butter for a deeper, toasted flavor in the frosting.
- Drip cake topping: Make a toffee glaze by melting toffee bits with cream, then pour it down the sides of the frosted cake for a dramatic finish.
- Candy bar smash: Crumble whole butterfinger bars and layer them between frosting in the middle of the cake for concentrated candy flavor bursts.
Dietary Adaptations
- Gluten-free: Swap all-purpose flour for a one-to-one gluten-free baking blend and reduce baking soda to 1/4 teaspoon. The trade-off is a slightly denser crumb, though toffee bits help mask this texture difference.
- Dairy-free: Use dairy-free butter in both cake and frosting, and replace buttermilk with almond milk mixed with lemon juice. Use dairy-free heavy cream or full-fat coconut milk in the frosting, though the texture will be slightly softer.
- Vegan: Replace eggs with 1 tablespoon ground flaxseed mixed with 3 tablespoons water per egg, and use vegan butter and vegan cream. Confirm that your toffee bits contain no animal products, as many store brands do.
- Low-carb or keto: This cake is not a good fit for strict low-carb diets because of the flour and sugar content. A specialized low-carb flour blend and keto sweeteners would require complete recipe reworking and may not produce reliable results.
Storage and Reheating
Refrigerator
Store the frosted cake loosely covered with plastic wrap or in an airtight container for up to 4 days. The butterfinger bits stay crunchiest when the cake is kept cool but not ice-cold.
- Remove from the refrigerator 30 minutes before serving so frosting softens slightly
- Individual wrapped slices stay fresh longer and are convenient for grab-and-go snacking
Freezer
Wrap the unfrosted cake layers individually in plastic wrap and freeze in an airtight container for up to 3 months. Frosted whole cakes freeze less successfully because frosting cracks when thawed.
- Thaw frozen layers in the refrigerator overnight, then frosting and assemble at room temperature
- Toffee bits stay crunchy even after freezing and thawing
Reheating
This cake is best served cold or at room temperature and doesn’t require reheating. If you’d like to serve a slice warm, microwave it for 10 to 15 seconds to soften the frosting without melting it completely.
- Never microwave the whole cake; reheat individual slices only
- Warm cake pairs beautifully with cold ice cream for a temperature contrast
Nutrition Information
| Nutrient | Amount |
|---|---|
| Calories | 450 |
| Total Fat | 22g |
| Saturated Fat | 12g |
| Carbohydrates | 58g |
| Fiber | 1g |
| Sugar | 44g |
| Protein | 6g |
| Sodium | 320mg |
| Cholesterol | 65mg |
Nutritional values are approximate and calculated based on standard ingredient measurements. Actual values vary based on specific brands and preparation methods used. This cake is rich and meant to be enjoyed in moderate portions.
Frequently Asked Questions
Can I make this cake ahead of time?
Absolutely. The cake layers can be baked and wrapped tightly up to 2 days ahead, then frosted on the day you plan to serve. The flavors actually deepen after a day, making advance baking a smart move.
Butterfinger Cake
Ingredients
Equipment
Method
- Preheat your oven to 350 degrees Fahrenheit. Line the bottoms of two 9-inch round pans with parchment paper, then lightly butter the sides and parchment.
- In a medium bowl, whisk together flour, baking powder, baking soda, and salt. Set aside.
- In a stand mixer fitted with the paddle attachment, beat softened butter and granulated sugar together on medium-high speed for 3 to 4 minutes until the mixture is pale, fluffy, and noticeably lighter in color.
- Add eggs one at a time to the butter mixture, beating on medium speed for about 30 seconds after each addition. Scrape down the bowl as needed.
- Beat in vanilla extract, then alternate adding the dry mixture and buttermilk to the batter in three additions, starting and ending with flour. Begin with 1/3 of the flour, then 1/2 of the buttermilk, then another 1/3 flour, the remaining buttermilk, and finally the last 1/3 flour.
- Using a wooden spoon or rubber spatula, gently fold in 1 and 1/2 cups of butterfinger toffee bits until just combined.
- Pour the batter evenly into the prepared pans and smooth the tops with an offset spatula. Bake for 28 to 32 minutes, until a toothpick inserted in the center comes out with a few moist crumbs but no wet batter.
- Let cakes cool in the pans for 15 minutes, then turn them out onto a wire cooling rack and cool completely for at least 1 hour before frosting.
- In a clean mixer bowl with the paddle attachment, beat softened butter and peanut butter together on medium speed for 2 minutes until well combined.
- Add powdered sugar in two batches, beating on low speed until combined, then increase to medium and beat for 2 minutes.
- Add crushed toffee bits, vanilla, heavy cream, and salt, then beat until light and fluffy, about 2 more minutes.
- Place one cake layer on your serving plate or cake board and spread about 1/2 cup frosting on top using an offset spatula.
- Set the second layer on top, then frost the top and sides of the entire cake with the remaining frosting. Sprinkle the reserved 1/2 cup toffee bits over the top.
- Chill the frosted cake for 30 minutes before serving so the frosting sets and the slices cut cleanly.