
Picture a slice of cake, perfectly adorned with fluffy, light-as-air Whipped Cream Icing. This icing brings a delightful sweetness without overwhelming your dessert. It’s the icing that turns an ordinary cake into a celebration. With its creamy texture and subtle vanilla flavor, this recipe is not only easy to whip up but also incredibly versatile, perfect for any occasion. Let’s dive into how to create this dreamy topping that will have everyone asking for seconds!
Why You’ll Love This Recipe
This whipped cream icing is truly a crowd-pleaser. It is light, fluffy, and perfect for any dessert.
- Quick to prepare, taking only minutes.
- Rich, creamy texture that complements cakes and cupcakes.
- Customizable with flavors like chocolate or coffee.
- Stays stable for decorating and piping.
- Perfect for both casual and elegant occasions.
My Experience Making This Recipe
When I first tried making Whipped Cream Icing, I was amazed at how simple it was. The moment I whipped the cream, the airy texture filled my kitchen with a sweet aroma that reminded me of childhood birthday parties.
As I spread it on my cake, I could hardly resist tasting it straight from the bowl. The lightness of the icing paired beautifully with the rich chocolate cake I had baked, making it a hit at the dinner table.
Recipe Overview
- Recipe Name: Whipped Cream Icing
- Servings: 8
- Prep Time: 10 minutes
- Cook Time: 0 minutes
- Total Time: 10 minutes
- Course: Dessert
- Cuisine: American
- Calories per Serving: 120
Equipment You Will Need
- Mixing bowl
- Electric mixer or whisk
- Spatula
- Measuring cups and spoons
- Chilled storage container
Ingredients for Whipped Cream Icing
- 1 cup heavy whipping cream
- 1/4 cup powdered sugar
- 1 teaspoon vanilla extract
- 1/2 teaspoon almond extract (optional)
Ingredient Notes and Substitutions
- Heavy whipping cream: This ingredient creates the luscious texture. You can substitute it with coconut cream for a dairy-free option.
- Powdered sugar: It sweetens and stabilizes the icing. Granulated sugar can be used, but it may not dissolve as well.
- Vanilla extract: It adds flavor depth. You could use any flavored extract like peppermint or lemon for a twist.
- Almond extract: Optional for added flavor. You can skip it if you prefer a more straightforward vanilla taste.
How to Make Whipped Cream Icing
Step 1: Chill Your Equipment
Before you begin, chill your mixing bowl and beaters in the freezer for about 10 minutes. This helps the cream whip up faster and increases its volume.
Step 2: Measure Ingredients
Gather your ingredients and measure them out. Having everything ready makes the process smoother and quicker.
Step 3: Combine Ingredients
In the chilled mixing bowl, combine the heavy whipping cream, powdered sugar, vanilla extract, and almond extract if using. Mixing them together will flavor the cream as it whips.
Step 4: Begin Whipping
Using an electric mixer or a whisk, start whipping the mixture on medium speed. This helps incorporate air, leading to a fluffy texture.
Step 5: Increase Speed
Once the cream starts to thicken, increase the mixer speed to high. This is where the magic happens as you watch the cream turn into soft peaks.
Step 6: Check for Peaks
Continue whipping until you reach medium to stiff peaks. This means the cream holds its shape well but is still smooth and not over-whipped.
Step 7: Taste and Adjust
Give your icing a taste test. If you want it sweeter, add a touch more powdered sugar and mix briefly to combine.
Step 8: Store or Use Immediately
Use the whipped cream icing right away for decorating or store it in a chilled container in the fridge. It can last for a few days but is best used fresh.
Pro Tip: For extra stability, add a tablespoon of cornstarch when whipping for icing that holds up longer, especially in warmer conditions.
Tips for the Best Whipped Cream Icing
- Use cold ingredients for the best results; this helps the cream whip more easily.
- Avoid over-whipping, as it can turn into butter; stop when you see stiff peaks.
- For a richer taste, try adding a bit of cream cheese for a tangy flavor.
- If decorating, use a piping bag for beautiful swirls and designs.
- Experiment with flavored extracts to customize your icing for different desserts.
Common Mistakes to Avoid
- Using warm cream; this prevents proper whipping and results in a runny icing.
- Over-whipping the cream can lead to a grainy texture or even butter.
- Not using enough sugar can make the icing too savory; adjust to your sweetness preference.
- Skipping the chilling step; this is crucial for achieving the right texture.
Serving Suggestions
This whipped cream icing is perfect for a variety of desserts. Pair it with your favorite cakes, cupcakes, or even pies.
- Chocolate cake
- Strawberry shortcake
- Angel food cake
- Fruit tarts
- Pancakes or waffles
Variations to Try
- Add cocoa powder for a rich chocolate whipped cream icing.
- Incorporate fresh fruit purees like strawberry or raspberry for fruity flavors.
- Use flavored liquors like Irish cream for an adult twist.
- Try adding citrus zest for a refreshing citrus-infused icing.
Dietary Adaptations
- Gluten-free: This recipe is naturally gluten-free; no adjustments needed.
- Dairy-free: Substitute heavy cream with coconut cream for a dairy-free version.
- Vegan: Use aquafaba whipped to replace heavy cream for a vegan option.
- Low-carb/keto: Use a sugar substitute like erythritol in place of powdered sugar.
Storage and Reheating
Refrigerator
Store any leftover whipped cream icing in an airtight container in the fridge. It will remain fresh for up to 3 days.
- Transfer to a sealed container.
- Chill immediately after use.
Freezer
While not ideal, you can freeze whipped cream icing for up to a month. Just remember it may lose some texture upon thawing.
- Use an airtight container for freezing.
- Thaw in the refrigerator before using.
Reheating
To restore its fluffiness, gently re-whip thawed icing. Be careful not to over-whip.
- Use a mixer on low speed.
- Add a splash of cream if needed to adjust consistency.
Nutrition Information
| Nutrient | Amount |
|---|---|
| Calories | 120 |
| Total Fat | 11g |
| Saturated Fat | 7g |
| Carbohydrates | 7g |
| Fiber | 0g |
| Sugar | 6g |
| Protein | 1g |
| Sodium | 5mg |
| Cholesterol | 40mg |
This information is an estimate and will vary based on specific ingredients used.
Frequently Asked Questions
Can I make this icing ahead of time?
Yes, you can prepare it a few hours in advance and store it in the fridge until needed.
What can I substitute for heavy cream?
You can use coconut cream or a non-dairy whipping cream for a dairy-free version.
Why is my whipped cream not thickening?
This could be due to warm cream or equipment. Ensure everything is chilled before starting.
Can I use this icing on warm desserts?
It’s best used on cooled desserts to prevent melting. If you must, work quickly!
How can I flavor the whipped cream?
Add flavored extracts like almond or citrus zest for a unique twist.
Final Thoughts
Making your own Whipped Cream Icing is not just a skill; it’s a delightful addition to your dessert repertoire. With just a few ingredients, you can elevate your cakes and treats into something truly special.
So, why not give this recipe a try? Your next dessert deserves a topping that is as delightful as it is delicious. For more icing ideas, check out my easy icing recipe or explore my powdered sugar icing recipe for more sweet treats!
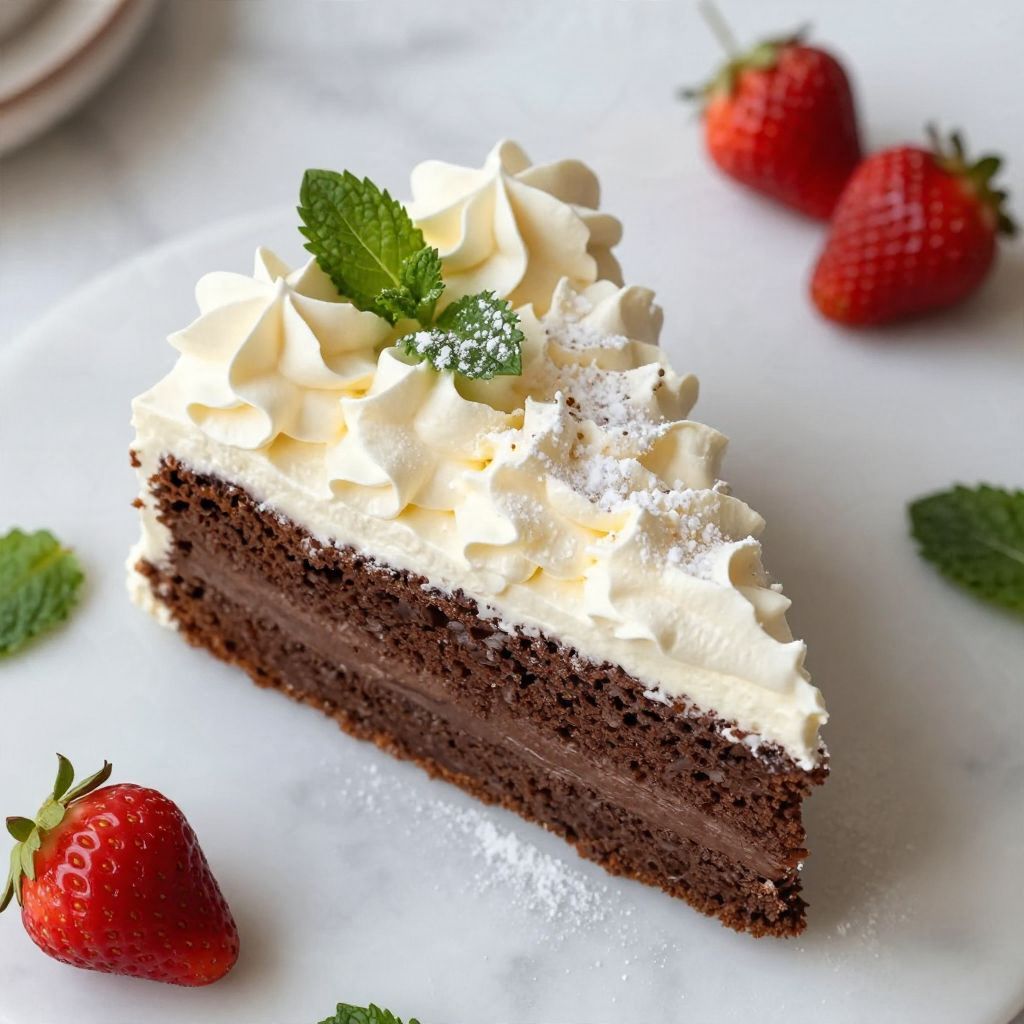
Whipped Cream Icing
Ingredients
Equipment
Method
- Chill your mixing bowl and beaters in the freezer for about 10 minutes.
- Gather your ingredients and measure them out.
- In the chilled mixing bowl, combine the heavy whipping cream, powdered sugar, vanilla extract, and almond extract if using.
- Using an electric mixer or a whisk, start whipping the mixture on medium speed.
- Once the cream starts to thicken, increase the mixer speed to high.
- Continue whipping until you reach medium to stiff peaks.
- Give your icing a taste test and adjust sweetness if necessary.
- Use the whipped cream icing right away for decorating or store it in a chilled container in the fridge.