
There’s something undeniably comforting about the smell of freshly baked cheese straws wafting through the kitchen. These delightful snacks have a crispy texture and a cheesy flavor that makes them irresistible, perfect for gatherings or just a cozy night in.
This recipe is special because it combines simple ingredients to create a snack that feels gourmet without the fuss. The balance of rich cheese and flaky pastry makes each bite a treat, and they are incredibly versatile for any occasion.
Why You’ll Love This Recipe
This recipe is a crowd-pleaser that is sure to impress. It’s easy to whip up and perfect for sharing.
- Quick to prepare—no long hours in the kitchen.
- Perfectly crispy and cheesy with every bite.
- Great for parties, snacks, or a cozy evening.
- Customizable with different cheeses and spices.
My Experience Making This Recipe
The first time I made these cheese straws, I could hardly keep my family from devouring them before they cooled. As the buttery, cheesy aroma filled the house, I knew I had struck gold.
They disappeared so quickly that I barely managed to snap a picture. Each crispy straw was met with delighted smiles, and it was clear this recipe would become a household favorite.
Recipe Overview
- Recipe Name: Cheese Straws
- Servings: 20 straws
- Prep Time: 15 minutes
- Cook Time: 15 minutes
- Total Time: 30 minutes
- Course: Snack
- Cuisine: American
- Calories per Serving: 80
Equipment You Will Need
- Baking sheet
- Parchment paper
- Rolling pin
- Knife or pizza cutter
- Mixing bowl
- Grater
Ingredients for Cheese Straws
- 1 cup all-purpose flour
- 1/2 cup butter, softened
- 1 cup sharp cheddar cheese, grated
- 1/4 teaspoon cayenne pepper (optional)
- 1/4 teaspoon salt
- 1/4 teaspoon paprika (optional)
Ingredient Notes and Substitutions
- All-purpose flour: This forms the base of the straws. You can substitute with a gluten-free blend.
- Butter: Adds richness and flakiness. Margarine can be used, but it may alter the flavor slightly.
- Sharp cheddar cheese: Provides a strong flavor. Feel free to mix in Parmesan or Gruyere for variety.
- Cayenne pepper: Adds a kick. Omit if you’re looking for a milder flavor.
- Salt: Enhances all flavors. Adjust based on your cheese’s saltiness.
How to Make Cheese Straws
Step 1: Preheat the Oven
Start by preheating your oven to 400°F (200°C). This ensures the cheese straws bake evenly and become perfectly crispy.
Step 2: Prepare the Baking Sheet
Line a baking sheet with parchment paper. This will prevent sticking and make cleanup a breeze.
Step 3: Mix the Ingredients
In a mixing bowl, combine the flour, butter, grated cheese, cayenne, salt, and paprika. Mixing thoroughly incorporates the cheese and spices into the dough.
Step 4: Form the Dough
Knead the mixture gently until it forms a cohesive dough. Be careful not to over-knead; you want a tender texture.
Step 5: Roll Out the Dough
On a lightly floured surface, roll the dough into a rectangle about 1/4 inch thick. This thickness allows for a crispy texture while still being easy to bite into.
Step 6: Cut into Straws
Using a knife or pizza cutter, cut the dough into strips about 1/2 inch wide. This gives the classic straw shape.
Step 7: Transfer to the Baking Sheet
Place the cut strips onto the prepared baking sheet, leaving space between each one for expansion. This helps them bake evenly and stay crispy.
Step 8: Bake the Cheese Straws
Bake in the preheated oven for 12-15 minutes or until golden brown. Keep an eye on them; overbaking can lead to a hard texture.
Pro Tip: For extra flavor, sprinkle some additional cheese or herbs on top before baking.
Tips for the Best Cheese Straws
- Use freshly grated cheese for the best flavor and melting properties.
- Chill the dough for about 30 minutes if it feels too soft to handle.
- Experiment with different cheeses to find your favorite flavor combinations.
- Add herbs like thyme or rosemary for an aromatic twist.
- Serve immediately for the best texture; they are crispiest fresh out of the oven.
Common Mistakes to Avoid
- Not preheating the oven can lead to uneven baking.
- Over-kneading the dough makes the straws tough instead of flaky.
- Cutting the straws too thick can prevent them from baking properly.
- Skipping the parchment paper may cause sticking and tearing.
Serving Suggestions
Cheese straws are fantastic on their own but pair beautifully with other snacks.
- Serve with a spicy dip for a kick.
- Pair with a glass of wine for a sophisticated snack.
- Enjoy alongside a fresh salad for a light meal.
- Offer them at parties with a charcuterie board.
Variations to Try
- Add crushed garlic for a savory flavor boost.
- Incorporate sun-dried tomatoes for a Mediterranean twist.
- Use blue cheese for a bold, tangy alternative.
- Mix in some jalapeños for a spicy version.
Dietary Adaptations
- Gluten-free: Substitute with a gluten-free flour blend.
- Dairy-free: Use vegan butter and dairy-free cheese alternatives.
- Vegan: Replace butter with coconut oil and use vegan cheese.
- Low-carb/keto: Use almond flour instead of all-purpose flour.
Storage and Reheating
Refrigerator
Store leftover cheese straws in an airtight container in the fridge for up to a week.
- Make sure they cool completely before sealing.
Freezer
For longer storage, freeze the cheese straws in a single layer before transferring them to a bag. They can last up to 3 months.
- Thaw before reheating to maintain texture.
Reheating
To reheat, place them in a preheated oven at 350°F (175°C) for about 5-7 minutes. This restores their crispiness.
- Avoid microwaving, as this can make them chewy.
Nutrition Information
| Nutrient | Amount |
|---|---|
| Calories | 80 |
| Total Fat | 6g |
| Saturated Fat | 4g |
| Carbohydrates | 6g |
| Fiber | 0g |
| Sugar | 0g |
| Protein | 2g |
| Sodium | 150mg |
| Cholesterol | 20mg |
This information is an estimate and may vary based on ingredient brands and portions used.
Frequently Asked Questions
Can I make cheese straws ahead of time?
Yes, you can prepare the dough and keep it in the fridge for up to 2 days before baking.
What can I substitute for cheese?
Try using a mix of different cheeses for a unique flavor or opt for a vegan cheese alternative.
How should I store leftover cheese straws?
Store them in an airtight container to keep them crispy, or freeze them for longer storage.
Why are my cheese straws chewy?
This often happens if the dough is overworked or if they are microwaved to reheat.
Can I use whole wheat flour?
Yes, whole wheat flour can be used, but it may result in a denser straw.
Final Thoughts
Making cheese straws is a delightful experience that fills your kitchen with warmth and tantalizing aromas. I hope you enjoy every crispy bite as much as I do.
Why not explore more delicious recipes? Check out this Brazilian cheese bread recipe or whip up a tasty cottage cheese dip recipe to pair with your straws!
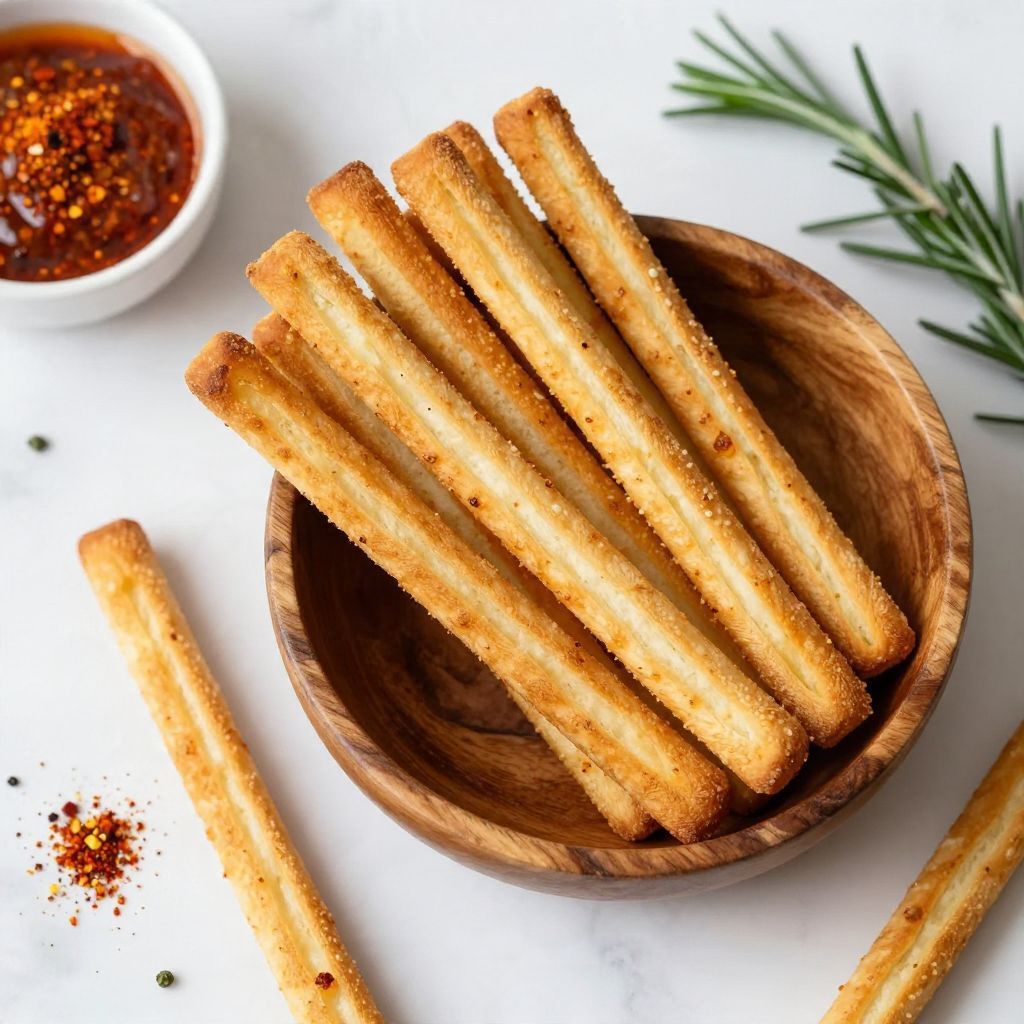
Cheese Straws
Ingredients
Equipment
Method
- Preheat the oven to 400°F (200°C).
- Line a baking sheet with parchment paper.
- In a mixing bowl, combine flour, butter, grated cheese, cayenne, salt, and paprika.
- Knead the mixture gently until it forms a cohesive dough.
- On a lightly floured surface, roll the dough into a rectangle about 1/4 inch thick.
- Using a knife or pizza cutter, cut the dough into strips about 1/2 inch wide.
- Place the cut strips onto the prepared baking sheet.
- Bake in the preheated oven for 12-15 minutes or until golden brown.