
Imagine spreading a generous dollop of rich, creamy bliss on a warm scone, feeling the luscious texture melt in your mouth. This Easy Clotted Cream Recipe transforms ordinary afternoons into extraordinary tea times with its velvety smoothness and luxurious flavor. It’s a simple indulgence that elevates any dessert or breakfast spread, making it a must-try for your culinary repertoire. Plus, with just two ingredients and minimal effort, you can whip up this delightful treat at home. Let’s dive into the details of making this dreamy delicacy!
Why You’ll Love This Recipe
This clotted cream recipe is sure to impress with its rich flavor and simplicity. You’ll find it perfect for any occasion.
- Rich, creamy texture that complements pastries beautifully.
- Only two ingredients required, making it super easy.
- Perfect for scones, desserts, and breakfast spreads.
- Can be made ahead of time and stored in the fridge.
- Elevates your afternoon tea experience to a whole new level.
My Experience Making This Recipe
The first time I made clotted cream, I felt like a culinary wizard. Watching the cream thicken and transform into something so luxurious was truly a joy.
It became an instant favorite in my household, with everyone clamoring for scones just to enjoy that rich spread. Now, I always keep a jar on hand for those impromptu tea parties.
Recipe Overview
- Recipe Name: Easy Clotted Cream
- Servings: 8
- Prep Time: 5 minutes
- Cook Time: 12 hours
- Total Time: 12 hours 5 minutes
- Course: Dessert
- Cuisine: British
- Calories per Serving: 100
Equipment You Will Need
- Oven-safe dish
- Heavy cream
- Refrigerator
- Spatula
- Jar for storage
Ingredients for Easy Clotted Cream
- 2 cups heavy cream
Ingredient Notes and Substitutions
- Heavy cream: Provides the rich texture and flavor. You can substitute with whipping cream, but the result may be slightly less creamy.
How to Make Easy Clotted Cream
Step 1: Preheat Your Oven
Begin by preheating your oven to 180°F (82°C). This low temperature allows the cream to thicken slowly without cooking it too much.
Step 2: Pour the Cream
Pour the heavy cream into an oven-safe dish. A shallow dish works best to maximize the surface area, which helps with the thickening process.
Step 3: Bake the Cream
Place the dish in the oven and let it bake for about 12 hours. This long baking time is key for achieving that signature clotted texture.
Step 4: Cool the Cream
After baking, turn off the oven and leave the cream inside to cool for another hour. This gradual cooling helps it set perfectly.
Step 5: Refrigerate
Remove the dish from the oven and cover it with plastic wrap. Refrigerate it for at least 8 hours or overnight to fully thicken.
Step 6: Skim the Cream
Once chilled, you will see a thick layer of clotted cream on top. Gently skim this off with a spatula, being careful not to disturb the liquid underneath.
Step 7: Store the Cream
Transfer the clotted cream into a clean jar. Seal it tightly and store it in the refrigerator for up to two weeks.
Step 8: Enjoy!
Your homemade clotted cream is now ready to be spread on scones or served with desserts. Relish the rich, creamy texture!
Pro Tip: For the best results, use fresh, high-quality cream. It really makes a difference in flavor.
Tips for the Best Easy Clotted Cream
- Use a shallow dish for even cooking.
- Keep an eye on the oven temperature; too hot will ruin the texture.
- Let it cool gradually; patience is key!
- Make it a day ahead for the best flavor.
- Experiment with flavored creams by infusing vanilla or other extracts.
Common Mistakes to Avoid
- Baking at too high a temperature can prevent proper clumping. Stick to low heat.
- Using low-fat cream will yield subpar results; always opt for heavy cream.
- Not refrigerating long enough will lead to a runny consistency.
- Skipping the cooling step can affect texture; let it cool slowly.
Serving Suggestions
Clotted cream is a versatile topping that pairs beautifully with many treats. Here are some delightful ideas.
- Freshly baked scones
- Fruit tarts or pastries
- Pancakes or waffles
- Brownies or chocolate cake
- Toast with jam
Variations to Try
- Infuse the cream with vanilla for a sweet touch.
- Add a bit of lemon zest for a tangy flavor twist.
- Stir in a touch of honey for natural sweetness.
- Mix in finely chopped herbs for a savory spread.
Dietary Adaptations
- Gluten-free: This recipe is naturally gluten-free.
- Dairy-free: Use coconut cream as a substitute, but the flavor will differ.
- Vegan/Vegetarian: Similar to dairy-free, coconut cream works well.
- Low-carb/Keto: This recipe fits perfectly into a low-carb diet.
Storage and Reheating
Refrigerator
Store clotted cream in the fridge for up to two weeks. Ensure it’s in a sealed container to maintain freshness.
- Transfer to an airtight jar for best results.
- Label with the date it was made.
Freezer
Freezing is not recommended as it can change the texture. Best enjoyed fresh!
- If needed, use small portions to avoid waste.
Reheating
No reheating is needed; clotted cream is best served cold. Just spread it directly onto your favorite treats.
- Allow it to soften slightly at room temperature before serving.
Nutrition Information
| Nutrient | Amount |
|---|---|
| Calories | 100 |
| Total Fat | 11g |
| Saturated Fat | 7g |
| Carbohydrates | 1g |
| Fiber | 0g |
| Sugar | 1g |
| Protein | 0g |
| Sodium | 5mg |
| Cholesterol | 40mg |
This nutrition information is approximate and can vary based on specific ingredients used.
Frequently Asked Questions
Can I use half-and-half instead of heavy cream?
Half-and-half won’t yield the same creamy texture, so stick with heavy cream for the best results.
How far in advance can I make clotted cream?
You can make it up to two weeks in advance and store it in the fridge.
Can I freeze clotted cream?
Freezing is not recommended as it alters the texture, making it less enjoyable.
What if my clotted cream doesn’t thicken?
If it doesn’t thicken, it may be due to the cream type or temperature. Ensure you’re using heavy cream and a low oven setting.
How should I serve clotted cream?
Serve it chilled on scones, pastries, or even pancakes for a delicious treat.
Final Thoughts
Making your own clotted cream is a delightful experience that brings comfort and luxury to your kitchen. Once you try this recipe, you’ll wonder why you ever bought it!
Explore more delightful recipes like English Scones or try making Cream Cheese Mints to complement your clotted cream!
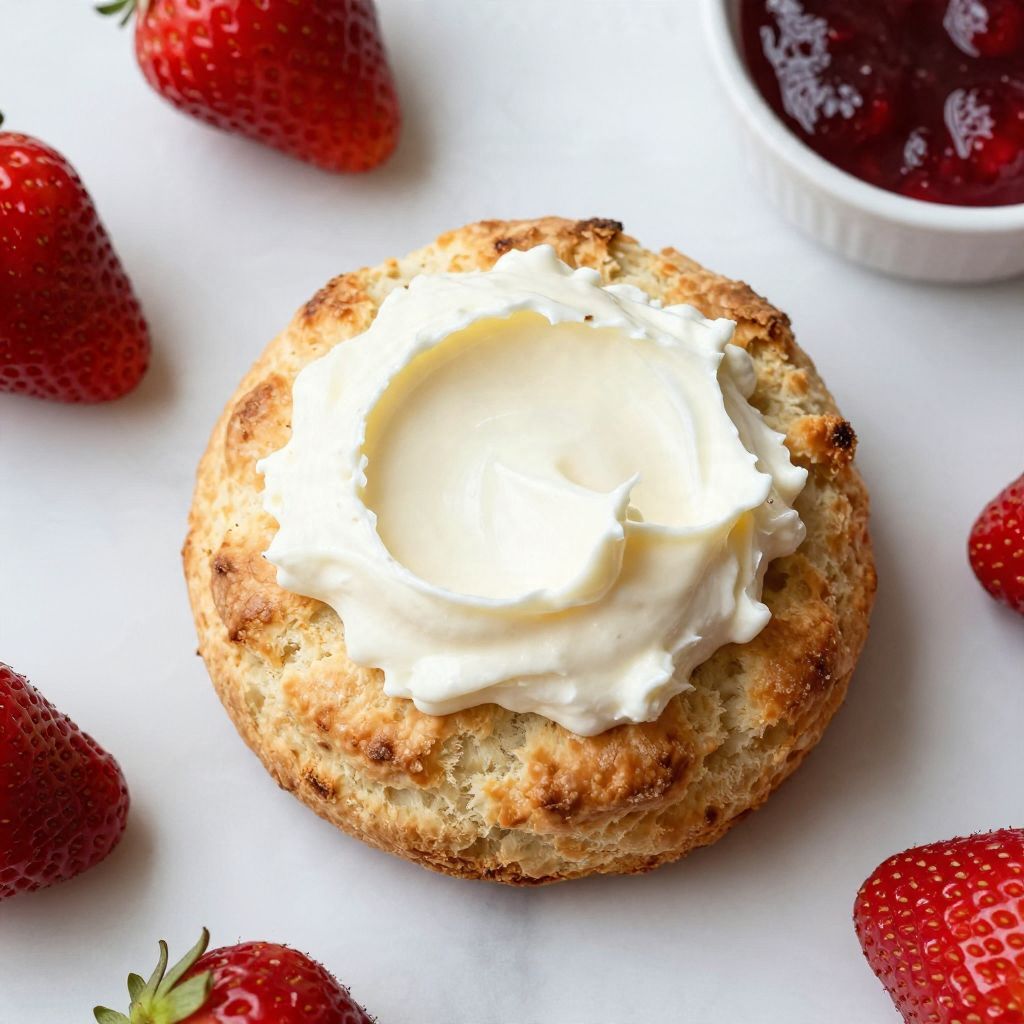
Easy Clotted Cream
Ingredients
Equipment
Method
- Preheat your oven to 180°F (82°C).
- Pour the heavy cream into an oven-safe dish.
- Place the dish in the oven and let it bake for about 12 hours.
- After baking, turn off the oven and leave the cream inside to cool for another hour.
- Remove the dish from the oven and cover it with plastic wrap. Refrigerate it for at least 8 hours or overnight.
- Once chilled, gently skim off the thick layer of clotted cream on top with a spatula.
- Transfer the clotted cream into a clean jar, seal it tightly, and store it in the refrigerator for up to two weeks.
- Serve the clotted cream cold on scones or with desserts.