
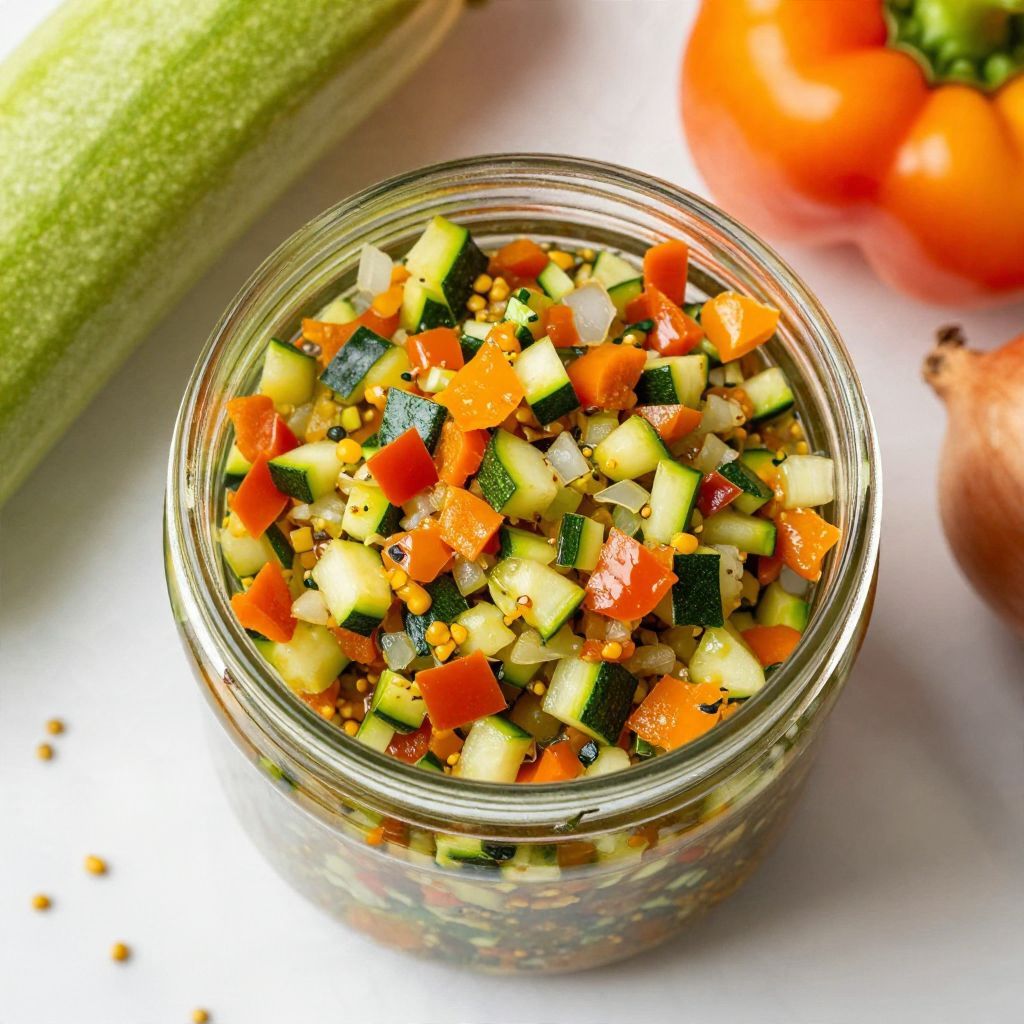
There’s something nostalgic about the crunch of homemade Zucchini Relish on a summer evening, isn’t there? This relish not only captures the essence of fresh garden zucchini but also serves as a fantastic way to preserve that summer flavor for months to come.
This recipe is perfect for anyone looking to add a sweet and tangy kick to their meals. With its delightful crunch and vibrant flavor, it’s a versatile condiment that can elevate sandwiches, burgers, and even salads.
Why You’ll Love This Recipe
This Zucchini Relish is a must-try for every home cook.
- Quick and easy to make, even for beginners.
- Perfect for using up garden zucchini or leftovers.
- Sweet and tangy flavor that brightens up any dish.
- Great for canning, so you can enjoy it year-round.
- Versatile enough to customize with your favorite spices.
My Experience Making This Recipe
When I first made this relish, my kitchen was filled with the fresh aroma of sautéing onions and spices. As I stirred the bubbling mixture, I couldn’t help but feel a wave of nostalgia wash over me, recalling summer barbecues from my childhood.
Sharing this relish with friends and family was a delight; everyone loved the unexpected burst of flavors. It always sparks joy and conversation, whether served at a picnic or as part of a cozy family meal.
Recipe Overview
- Recipe Name: Zucchini Relish
- Servings: About 4 pints
- Prep Time: 30 minutes
- Cook Time: 30 minutes
- Total Time: 1 hour
- Course: Condiment
- Cuisine: American
- Calories per Serving: 40
Equipment You Will Need
- Large mixing bowl
- Colander
- Large pot
- Wooden spoon
- Jar lifter
- Canning jars with lids
- Measuring cups and spoons
Ingredients for Zucchini Relish
- 4 cups grated zucchini
- 1 cup grated onion
- 1 cup grated bell pepper
- 2 cups granulated sugar
- 2 cups apple cider vinegar
- 1 tablespoon mustard seeds
- 1 tablespoon celery seeds
- 1 teaspoon turmeric
- 1 teaspoon salt
- 1/2 teaspoon black pepper
Ingredient Notes and Substitutions
- Zucchini: Provides the main texture; yellow squash can also work.
- Onion: Adds sweetness; use shallots for a milder flavor.
- Bell Pepper: For crunch and color; feel free to use any color of bell pepper.
- Sugar: Balances the vinegar; honey or agave can be good substitutes.
- Vinegar: Brings acidity; white vinegar can be used in a pinch.
How to Make Zucchini Relish
Step 1: Prepare the Vegetables
Grate the zucchini, onion, and bell pepper using a box grater or food processor. This ensures even distribution in the relish.
Step 2: Drain Excess Water
Place the grated vegetables in a colander and sprinkle with salt. Let them sit for about 30 minutes to drain excess moisture, which helps prevent a watery relish.
Step 3: Combine Ingredients
In a large pot, combine the drained vegetables with sugar, apple cider vinegar, mustard seeds, celery seeds, turmeric, and black pepper. Stir well to combine all the ingredients.
Step 4: Cook the Mixture
Bring the pot to a boil over medium heat, stirring frequently. This cooking process melds the flavors together and helps the vegetables soften.
Step 5: Simmer
Once boiling, reduce the heat and let the mixture simmer for about 20 minutes. This allows the relish to thicken and develop a deeper flavor.
Step 6: Sterilize Jars
While the relish simmers, sterilize your canning jars and lids by boiling them in water for 10 minutes. This step is crucial for preserving the relish safely.
Step 7: Fill the Jars
Carefully ladle the hot relish into the sterilized jars, leaving about 1/4 inch of headspace. This space allows for expansion during cooling.
Step 8: Seal and Cool
Wipe the rims of the jars with a clean cloth and seal with lids. Let the jars cool completely before storing them in a cool, dark place.
Pro Tip: Always make sure your jars are sterilized to prevent spoilage.
Tips for the Best Zucchini Relish
- Choose firm, fresh zucchini for the best texture.
- Adjust the sugar based on your sweetness preference; taste as you go.
- Consider adding a pinch of red pepper flakes for a spicy twist.
- For a more complex flavor, let the relish sit for a few days before using.
- Use fresh spices for the best flavor impact.
Common Mistakes to Avoid
- Not draining the vegetables properly can lead to a watery relish.
- Skipping the sterilization of jars can cause spoilage.
- Using old spices can dull the flavor of the relish.
- Not adjusting the seasoning to taste can result in a bland dish.
Serving Suggestions
This relish pairs beautifully with various dishes, adding a pop of flavor. Here are some ideas to get you started:
- Spread it on sandwiches or burgers for extra crunch.
- Serve alongside grilled meats for a refreshing contrast.
- Add it to potato salad for a tangy twist.
- Mix it into deviled eggs for a flavorful upgrade.
Variations to Try
- Add diced tomatoes for a more robust flavor.
- Include chopped jalapeños for a spicy kick.
- Mix in fresh herbs like dill or basil for added freshness.
- Experiment with different types of vinegar for unique flavors.
Dietary Adaptations
- Gluten-Free: This recipe is naturally gluten-free.
- Dairy-Free: Completely dairy-free, perfect for all diets.
- Vegan: No animal products are used, suitable for vegans.
- Low-Carb/Keto: Reduce the sugar or use a sugar substitute for a keto-friendly option.
Storage and Reheating
Refrigerator
Store opened jars in the refrigerator for up to 3 weeks.
- Keep the lid tightly sealed.
- Use a clean spoon to avoid contamination.
Freezer
You can freeze this relish for up to 6 months.
- Use freezer-safe containers.
- Leave space at the top for expansion.
Reheating
Reheat gently in a saucepan if serving warm.
- Stir occasionally to prevent sticking.
- Heat just until warmed through.
Nutrition Information
| Nutrient | Amount |
|---|---|
| Calories | 40 |
| Total Fat | 0g |
| Saturated Fat | 0g |
| Carbohydrates | 10g |
| Fiber | 1g |
| Sugar | 8g |
| Protein | 0g |
| Sodium | 140mg |
| Cholesterol | 0mg |
This nutritional information is an estimate and will vary based on specific ingredients used.
Frequently Asked Questions
Can I use yellow squash instead of zucchini?
Yes, yellow squash works well and gives a slightly different flavor.
How long can I store this relish?
When properly canned, it can last up to one year; opened jars should be refrigerated.
Can I make this relish ahead of time?
Absolutely! It tastes even better after sitting for a few days.
What if my relish is too watery?
Next time, ensure you drain the vegetables thoroughly before cooking.
Is this recipe spicy?
No, but you can add jalapeños to spice things up!
Final Thoughts
Making your own Zucchini Relish is a rewarding experience that brings summer flavors to your table year-round. I encourage you to give this recipe a try and savor the delightful crunch and tang it brings to your meals.
If you loved this relish, you might enjoy exploring more recipes like Zucchini Relish or other delightful condiments to complement your cooking.
Zucchini Relish
Ingredients
Equipment
Method
- Grate the zucchini, onion, and bell pepper using a box grater or food processor.
- Place the grated vegetables in a colander and sprinkle with salt. Let them sit for about 30 minutes to drain excess moisture.
- In a large pot, combine the drained vegetables with sugar, apple cider vinegar, mustard seeds, celery seeds, turmeric, and black pepper. Stir well to combine.
- Bring the pot to a boil over medium heat, stirring frequently.
- Once boiling, reduce the heat and let the mixture simmer for about 20 minutes.
- While the relish simmers, sterilize your canning jars and lids by boiling them in water for 10 minutes.
- Carefully ladle the hot relish into the sterilized jars, leaving about 1/4 inch of headspace.
- Wipe the rims of the jars with a clean cloth and seal with lids. Let the jars cool completely before storing them.