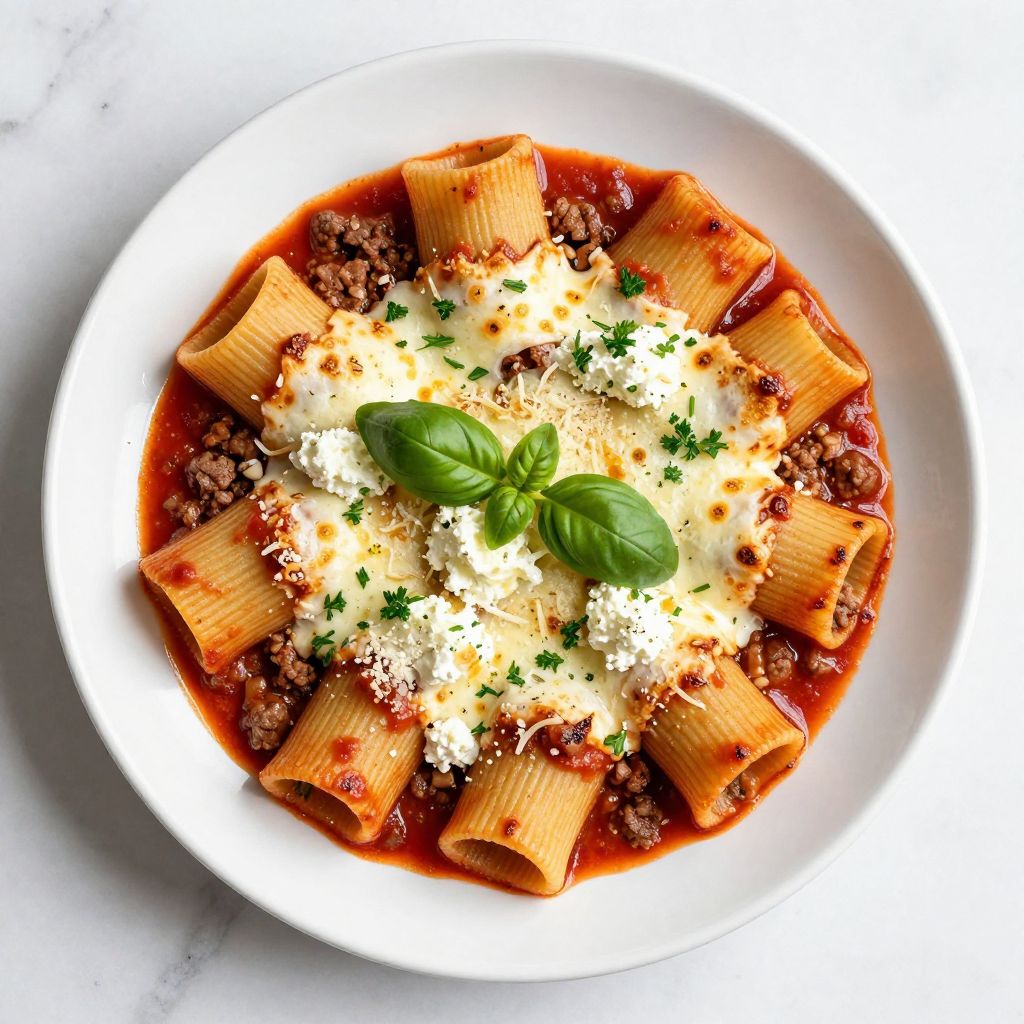
The first time I pulled a bubbling pan of manicotti recipe with meat from my oven, the kitchen filled with an aroma so intoxicating my neighbor knocked on the door asking what I was cooking. These golden pasta tubes, stuffed with seasoned meat and ricotta, then blanketed in marinara and melted mozzarella, deliver the kind of comfort that makes you forget about everything else on your to do list.
This recipe bridges the gap between weeknight dinner and Sunday feast. The combination of savory ground beef, creamy ricotta, and tangy tomato sauce creates layers of flavor that rival any Italian restaurant. Whether you are feeding a crowd or meal prepping for the week ahead, these stuffed pasta tubes always deliver.
Why You Will Love This Recipe
This meat filled manicotti hits all the right notes for a satisfying Italian dinner. Here is what makes it stand out from the pasta crowd.
- The hearty meat and cheese filling makes each bite incredibly satisfying
- Freezes beautifully for easy make ahead meals
- Impressive presentation without complicated techniques
- Leftovers taste even better the next day as flavors meld together
- Customizable to your family’s taste preferences
My Experience Making This Recipe
I have made this manicotti with meat more times than I can count, and it never disappoints. The filling comes together quickly in one skillet, and I always make extra because my family hovers around the stove sneaking bites before I can stuff a single tube.
The moment this dish comes out of the oven, the cheese pulls in those gorgeous strings that make everyone reach for their phones. My kids actually fight over the corner pieces where the cheese gets extra crispy and caramelized.
I once brought this to a potluck and came home with an empty pan and six recipe requests. That pretty much sealed its spot in my regular rotation.
Recipe Overview
- Recipe Name: Meat Stuffed Manicotti
- Servings: 6 to 8 servings
- Prep Time: 30 minutes
- Cook Time: 45 minutes
- Total Time: 1 hour 15 minutes
- Course: Main Dish
- Cuisine: Italian American
- Calories per Serving: 485 calories
Equipment You Will Need
- Large pot for boiling pasta
- Large skillet or saute pan
- 9×13 inch baking dish
- Colander
- Large mixing bowl
- Small spoon or piping bag for filling
- Aluminum foil
- Wooden spoon
Ingredients for Meat Stuffed Manicotti
For the Pasta
- 1 package (8 ounces) manicotti shells, about 14 shells
- 1 tablespoon salt for pasta water
- 1 tablespoon olive oil
For the Meat Filling
- 1 pound ground beef, 85% lean
- 1/2 pound Italian sausage, casings removed
- 1 cup ricotta cheese, whole milk
- 1/2 cup Parmesan cheese, freshly grated
- 1 large egg, beaten
- 2 cloves garlic, minced
- 1/4 cup fresh parsley, chopped
- 1 teaspoon Italian seasoning
- 1/2 teaspoon salt
- 1/4 teaspoon black pepper
For the Sauce and Topping
- 3 cups marinara sauce, homemade or jarred
- 2 cups mozzarella cheese, shredded
- 1/4 cup Parmesan cheese, grated for topping
- Fresh basil for garnish
Ingredient Notes and Substitutions
- Ground beef: The 85% lean provides the best balance of flavor and texture. You can substitute ground turkey or chicken for a lighter option.
- Italian sausage: Adds depth and seasoning to the filling. Skip it and use all ground beef if you prefer milder flavors.
- Ricotta cheese: Creates the creamy texture in the filling. Cottage cheese blended smooth works as an alternative.
- Manicotti shells: These large tubes hold generous amounts of filling. Jumbo shells make a fine substitute with a slightly different presentation.
- Marinara sauce: Use your favorite jarred brand or homemade. Crushed tomatoes with Italian seasonings work in a pinch.
- Mozzarella: Low moisture mozzarella melts better than fresh. Fresh mozzarella works but releases more liquid.
How to Make Meat Stuffed Manicotti
Step 1: Cook the Manicotti Shells
Bring a large pot of water to a rolling boil and add the salt. The heavily salted water seasons the pasta from the inside out, which you cannot replicate any other way.
Cook the manicotti shells for 2 minutes less than the package directions indicate. They will finish cooking in the oven, and undercooked shells are much easier to fill without tearing.
Step 2: Cool and Prepare the Shells
Drain the shells carefully and lay them in a single layer on a sheet pan drizzled with olive oil. Gently toss to coat each shell, which prevents them from sticking together while you prepare the filling.
Step 3: Brown the Meat
Heat a large skillet over medium high heat and add the ground beef and Italian sausage. Break the meat into small pieces as it cooks, since larger chunks will be difficult to pipe into the pasta tubes.
Cook until no pink remains, about 8 to 10 minutes, then drain any excess fat. Residual grease will make your filling greasy and separate the cheese.
Step 4: Season the Meat
Add the minced garlic to the cooked meat and stir for about 30 seconds until fragrant. Stir in the Italian seasoning, salt, and pepper, then remove the skillet from heat to cool slightly.
Step 5: Make the Filling
In a large bowl, combine the ricotta cheese, Parmesan, beaten egg, and parsley. The egg acts as a binder that holds everything together once baked.
Add the cooled meat mixture and stir until everything is well combined. Taste and adjust the seasoning now, because you cannot fix a bland filling once it is in the shells.
Step 6: Prepare the Baking Dish
Preheat your oven to 375 degrees Fahrenheit. Spread 1 cup of marinara sauce evenly across the bottom of your baking dish.
This sauce layer prevents the manicotti from sticking and burning on the bottom. It also creates a flavorful base that seeps into each shell during baking.
Step 7: Fill the Manicotti
Using a small spoon or piping bag, carefully fill each manicotti shell with the meat mixture. Work from both ends to ensure the filling reaches the center without air pockets.
Arrange the filled shells in a single layer over the sauce in the baking dish. Slightly crooked shells are perfectly fine and will straighten as they bake.
Step 8: Add Sauce and Cheese
Pour the remaining marinara sauce over the filled manicotti, making sure each shell gets covered. The sauce protects the exposed pasta from drying out in the oven.
Sprinkle the shredded mozzarella and grated Parmesan evenly over the top. Cover the dish tightly with aluminum foil.
Step 9: Bake the Manicotti
Bake covered for 25 minutes, which allows the filling to heat through and the flavors to meld. The steam trapped under the foil ensures even cooking.
Remove the foil and bake for an additional 15 to 20 minutes until the cheese turns golden and bubbly. Let the dish rest for 5 minutes before serving so the filling sets up.
Pro Tip: Fill your manicotti shells with a zip top bag with the corner snipped off. It gives you precision control and speeds up the process significantly.
Tips for the Best Meat Stuffed Manicotti
- Undercook your pasta shells by 2 minutes to prevent them from falling apart during filling and baking.
- Let the meat mixture cool before adding the ricotta and egg to prevent the egg from scrambling.
- Use whole milk ricotta for the creamiest filling with the best texture.
- Save two extra shells in case any tear during the filling process.
- Grate your own Parmesan from a block for superior melting and flavor compared to pre grated versions.
- Rest the baked manicotti for at least 5 minutes so slices hold together when served.
Common Mistakes to Avoid
- Overcooking the pasta shells: They become mushy and tear when you try to fill them, ruining your presentation.
- Skipping the sauce on the bottom: The manicotti will stick and the bottom layer will burn and become inedible.
- Using hot meat in the filling: The heat will partially cook the egg and curdle the ricotta, creating a grainy texture.
- Not covering while baking initially: The exposed pasta dries out and becomes tough instead of tender.
- Overfilling the shells: They will burst during baking and create a messy, unappealing dish.
Serving Suggestions
This meat manicotti stands beautifully on its own but pairs wonderfully with simple sides. Keep accompaniments light to balance the richness of the dish.
- Garlic bread or crusty Italian bread for soaking up extra sauce
- Simple green salad with Italian vinaigrette
- Roasted broccoli or sauteed spinach
- Caesar salad with homemade croutons
- A glass of medium bodied red wine like Chianti or Sangiovese
Variations to Try
- Chicken manicotti: Swap the beef for shredded rotisserie chicken mixed with spinach for a lighter take with similar satisfaction.
- Three cheese version: Skip the meat entirely and add goat cheese and fresh mozzarella to the ricotta for a vegetarian option.
- Spicy manicotti: Use hot Italian sausage and add red pepper flakes to the sauce for those who like heat.
- Creamy white sauce: Replace marinara with bechamel sauce for a richer, more indulgent dish.
- Mushroom lovers: Add sauteed cremini mushrooms to the meat filling for extra umami depth.
Dietary Adaptations
- Gluten free: Use gluten free manicotti shells or large zucchini slices rolled around the filling with slightly softer texture.
- Dairy free: Substitute cashew ricotta and dairy free mozzarella shreds, though the texture will differ.
- Vegetarian: Replace meat with seasoned crumbled tofu or plant based ground meat for similar protein content.
- Low carb and keto: Skip the pasta and use blanched cabbage leaves as wrappers, reducing carbs significantly.
Storage and Reheating
Refrigerator
Store leftover manicotti in an airtight container for up to 4 days. The flavors actually improve overnight as everything melds together.
- Cover tightly with plastic wrap or transfer to a sealed container
- Keep the sauce in contact with the pasta to prevent drying
Freezer
Freeze unbaked or baked manicotti for up to 3 months. Unbaked freezes better since the pasta retains more texture.
- Wrap the baking dish tightly in plastic wrap then foil
- Label with the date and reheating instructions
- Thaw overnight in the refrigerator before baking
Reheating
Reheat individual portions in the microwave or warm the entire dish in the oven. The oven method produces better results.
- Microwave single servings at 50% power for 2 to 3 minutes
- Oven reheat at 350 degrees covered for 20 to 25 minutes
- Add a splash of water or extra sauce if the pasta seems dry
Nutrition Information
| Nutrient | Amount |
|---|---|
| Calories | 485 |
| Total Fat | 24g |
| Saturated Fat | 11g |
| Carbohydrates | 35g |
| Fiber | 3g |
| Sugar | 6g |
| Protein | 32g |
| Sodium | 890mg |
| Cholesterol | 95mg |
Nutritional values are estimates and may vary based on specific ingredients and portion sizes used.
Frequently Asked Questions
Can I make manicotti ahead of time?
Absolutely. Assemble the entire dish, cover tightly, and refrigerate for up to 24 hours before baking. Add 10 extra minutes to the covered baking time since it starts cold.
Why are my manicotti shells tearing when I fill them?
The shells are likely overcooked or handled too roughly. Cook them 2 minutes less than directed and handle gently with your fingers rather than tongs.
Can I use no boil manicotti shells?
Yes, but increase the sauce amount by about half a cup and add 10 minutes to the covered baking time. The extra liquid helps the pasta cook properly in the oven.
How do I prevent the bottom from burning?
Always spread a generous layer of sauce on the bottom of the pan before adding the filled shells. This creates a protective barrier and adds flavor.
What is the best way to fill manicotti without a piping bag?
Use a small spoon and work from both ends of each shell, pushing the filling toward the center. A butter knife helps pack the filling in tightly.
Final Thoughts
This meat stuffed manicotti deserves a spot in your regular dinner rotation. The combination of savory meat, creamy cheese, and tangy tomato sauce creates the kind of meal that brings everyone to the table fast.
Give this recipe a try for your next family dinner or when you need to impress guests without spending all day in the kitchen. Once you taste those first cheesy, meaty bites, you will understand why this classic Italian American dish never goes out of style.
Meat Stuffed Manicotti
Ingredients
Equipment
Method
- Bring a large pot of water to a rolling boil and add the salt. Cook the manicotti shells for 2 minutes less than the package directions indicate. Drain carefully and lay them in a single layer on a sheet pan drizzled with olive oil, tossing gently to coat each shell.
- Heat a large skillet over medium-high heat and add the ground beef and Italian sausage. Break the meat into small pieces as it cooks until no pink remains, about 8 to 10 minutes. Drain any excess fat.
- Add the minced garlic to the cooked meat and stir for about 30 seconds until fragrant. Stir in the Italian seasoning, salt, and pepper, then remove the skillet from heat to cool slightly.
- In a large bowl, combine the ricotta cheese, 1/2 cup Parmesan, beaten egg, and parsley. Add the cooled meat mixture and stir until everything is well combined. Taste and adjust seasoning as needed.
- Preheat your oven to 375 degrees Fahrenheit. Spread 1 cup of marinara sauce evenly across the bottom of your 9x13 inch baking dish.
- Using a small spoon or piping bag, carefully fill each manicotti shell with the meat mixture, working from both ends to ensure the filling reaches the center. Arrange the filled shells in a single layer over the sauce in the baking dish.
- Pour the remaining marinara sauce over the filled manicotti, making sure each shell gets covered. Sprinkle the shredded mozzarella and 1/4 cup grated Parmesan evenly over the top. Cover the dish tightly with aluminum foil.
- Bake covered for 25 minutes. Remove the foil and bake for an additional 15 to 20 minutes until the cheese turns golden and bubbly.
- Let the dish rest for 5 minutes before serving. Garnish with fresh basil.