
There’s something magical about the smell of freshly baked bread wafting through the kitchen. This Gluten Free Bread Maker Recipe is not only a lifesaver for those avoiding gluten, but it also provides a wonderfully soft and airy loaf that you won’t be able to resist. With a simple mix of ingredients and a trusty bread maker, you’ll enjoy the perfect, homemade bread without the hassle of traditional baking methods.
Why You’ll Love This Recipe
This recipe is a game changer for gluten-free bread lovers. It’s easy, delicious, and versatile.
- Quick preparation time — let your bread maker do all the work.
- Perfectly soft texture that rivals traditional bread.
- Customizable with your favorite herbs or seeds.
- Ideal for sandwiches, toast, or just slathering with butter.
- No special baking skills required!
My Experience Making This Recipe
The first time I made this bread, I was skeptical about how it would turn out. But as the bread maker worked its magic, the rich aroma filled my home, promising a delightful treat.
When the loaf finally emerged, golden and crusty, I couldn’t wait to slice into it. It was a hit with my family, who devoured it within hours.
Recipe Overview
- Recipe Name: Gluten Free Bread Maker Recipe
- Servings: 12 slices
- Prep Time: 15 minutes
- Cook Time: 3 hours
- Total Time: 3 hours 15 minutes
- Course: Bread
- Cuisine: Gluten-Free
- Calories per Serving: 120
Equipment You Will Need
- Bread maker
- Measuring cups
- Measuring spoons
- Mixing bowl
- Spatula
Ingredients for Gluten Free Bread Maker Recipe
- 2 cups gluten-free all-purpose flour
- 1 cup warm water (about 110°F)
- 1/4 cup vegetable oil
- 3 tablespoons sugar
- 1 teaspoon salt
- 1 tablespoon active dry yeast
- 1 teaspoon apple cider vinegar
Ingredient Notes and Substitutions
- Gluten-free all-purpose flour: This blend usually contains xanthan gum, which helps mimic the elasticity of gluten. You can substitute it with a homemade blend of rice flour, tapioca flour, and potato starch.
- Warm water: Activates the yeast for a good rise. You can use milk or a dairy-free alternative if desired.
- Vegetable oil: Adds moisture and richness. Olive oil or melted coconut oil can be used as substitutes.
- Sugar: Feeds the yeast and contributes to browning. Honey or maple syrup will work well too.
- Active dry yeast: Essential for leavening. Instant yeast can be used without changes in quantity.
How to Make Gluten Free Bread Maker Recipe
Step 1: Prepare the Bread Maker
Start by ensuring your bread maker is clean and ready for use. This prevents any leftover flavors from previous bakes from affecting your bread.
Step 2: Combine Dry Ingredients
In a mixing bowl, whisk together the gluten-free flour, sugar, salt, and yeast. This helps distribute the ingredients evenly for a consistent texture.
Step 3: Mix Wet Ingredients
In another bowl, combine the warm water, vegetable oil, and apple cider vinegar. Mixing these first ensures the yeast activates properly.
Step 4: Combine Mixtures
Slowly pour the wet ingredients into the dry ingredients. Use a spatula to mix until a thick batter forms; it won’t have the consistency of traditional bread dough.
Step 5: Pour into Bread Maker
Transfer the batter into the bread maker’s pan. Spread it evenly, smoothing the top with your spatula for an even rise.
Step 6: Set the Bread Maker
Select the gluten-free setting on your bread maker. If your machine does not have this option, use the basic bread setting but keep an eye on the baking time.
Step 7: Let It Bake
Close the lid and let the bread maker work its magic. Resist the urge to peek, as opening the lid can cause the bread to collapse.
Step 8: Cool the Bread
Once the cycle is complete, carefully remove the bread from the pan. Allow it to cool on a wire rack to prevent sogginess.
Pro Tip: Always check the bread for doneness by inserting a toothpick; it should come out clean.
Tips for the Best Gluten Free Bread
- Use fresh ingredients, especially yeast, for the best rise.
- Let the bread cool completely before slicing to maintain its structure.
- Experiment with adding seeds or herbs for extra flavor.
- Store bread in a sealed bag to keep it fresh longer.
- Always measure flour correctly — spoon it into your cup and level it off.
Common Mistakes to Avoid
- Using expired yeast can lead to a dense loaf. Always check the date.
- Not measuring ingredients accurately can throw off the texture.
- Peeking into the bread maker mid-cycle may cause the bread to collapse.
- Skipping the cooling step can make your bread gummy.
Serving Suggestions
This bread is perfect for any meal of the day. Try it toasted with avocado or as the base for your favorite sandwich.
- Serve with a hearty soup.
- Use for breakfast toast with jam.
- Pair with a salad for a light lunch.
- Enjoy with eggs for a protein-packed breakfast.
Variations to Try
- Add herbs like rosemary or thyme for a savory twist.
- Mix in seeds such as sunflower or pumpkin for added crunch.
- Incorporate nuts for a hearty texture.
- Use different types of flour like almond or coconut for varied flavor.
Dietary Adaptations
- Gluten-free: This recipe is naturally gluten-free, perfect for those with sensitivities.
- Dairy-free: Substitute any oils and use plant-based options.
- Vegan: Replace honey with maple syrup for a completely plant-based bread.
- Low-carb/keto: Use almond flour instead of gluten-free flour for a keto-friendly option.
Storage and Reheating
Refrigerator
Store leftover bread in an airtight container in the fridge.
- Will last up to a week.
Freezer
Wrap the bread tightly in plastic wrap and foil.
- Can be frozen for up to three months.
Reheating
To reheat, toast slices directly or warm in a preheated oven.
- Best served warm for optimal flavor.
Nutrition Information
| Nutrient | Amount |
|---|---|
| Calories | 120 |
| Total Fat | 4g |
| Saturated Fat | 0.5g |
| Carbohydrates | 20g |
| Fiber | 2g |
| Sugar | 1g |
| Protein | 2g |
| Sodium | 150mg |
| Cholesterol | 0mg |
This information is approximate and can vary based on specific ingredients used.
Frequently Asked Questions
Can I use a different type of gluten-free flour?
Yes, you can use various gluten-free flour blends, but check for those that contain xanthan gum.
Can I make this bread ahead of time?
Absolutely! You can prepare the dough and refrigerate it before baking.
How should I store the bread?
Store it in an airtight container at room temperature or freeze it for longer storage.
Why is my bread dense?
This could be due to expired yeast or incorrect measurements of flour and water.
Can I add flavors to the bread?
Definitely! Feel free to add herbs, spices, or seeds to enhance the flavor.
Final Thoughts
Making your own gluten-free bread can be a delightful experience. I encourage you to try this recipe and enjoy the warm, comforting taste of homemade bread.
Explore more delicious recipes like this one, including a gluten-free waffle recipe and an almond dough bread recipe for more baking inspiration!
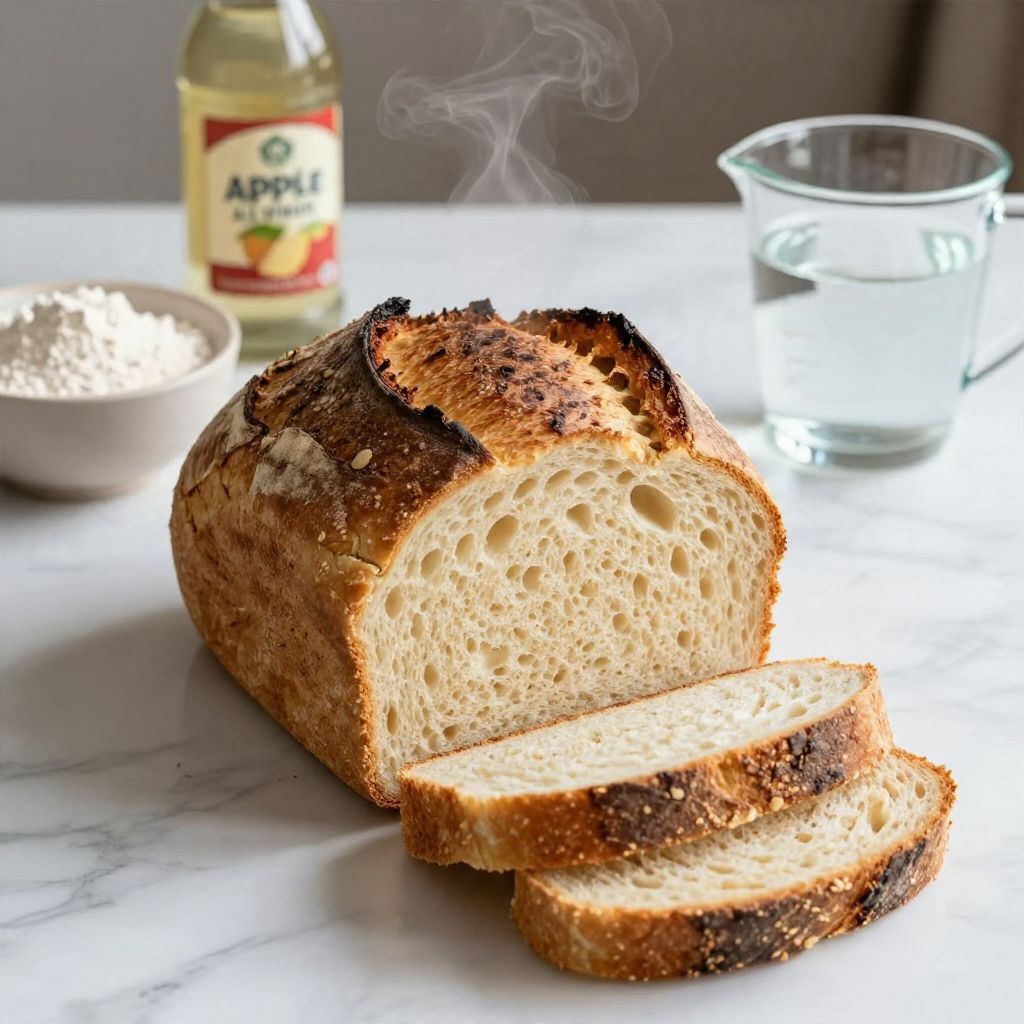
Gluten Free Bread Maker Recipe
Ingredients
Equipment
Method
- Start by ensuring your bread maker is clean and ready for use.
- In a mixing bowl, whisk together the gluten-free flour, sugar, salt, and yeast.
- In another bowl, combine the warm water, vegetable oil, and apple cider vinegar.
- Slowly pour the wet ingredients into the dry ingredients and mix with a spatula until a thick batter forms.
- Transfer the batter into the bread maker's pan and smooth the top.
- Select the gluten-free setting on your bread maker.
- Close the lid and let the bread maker bake the bread.
- Once the cycle is complete, remove the bread from the pan and allow it to cool on a wire rack.