
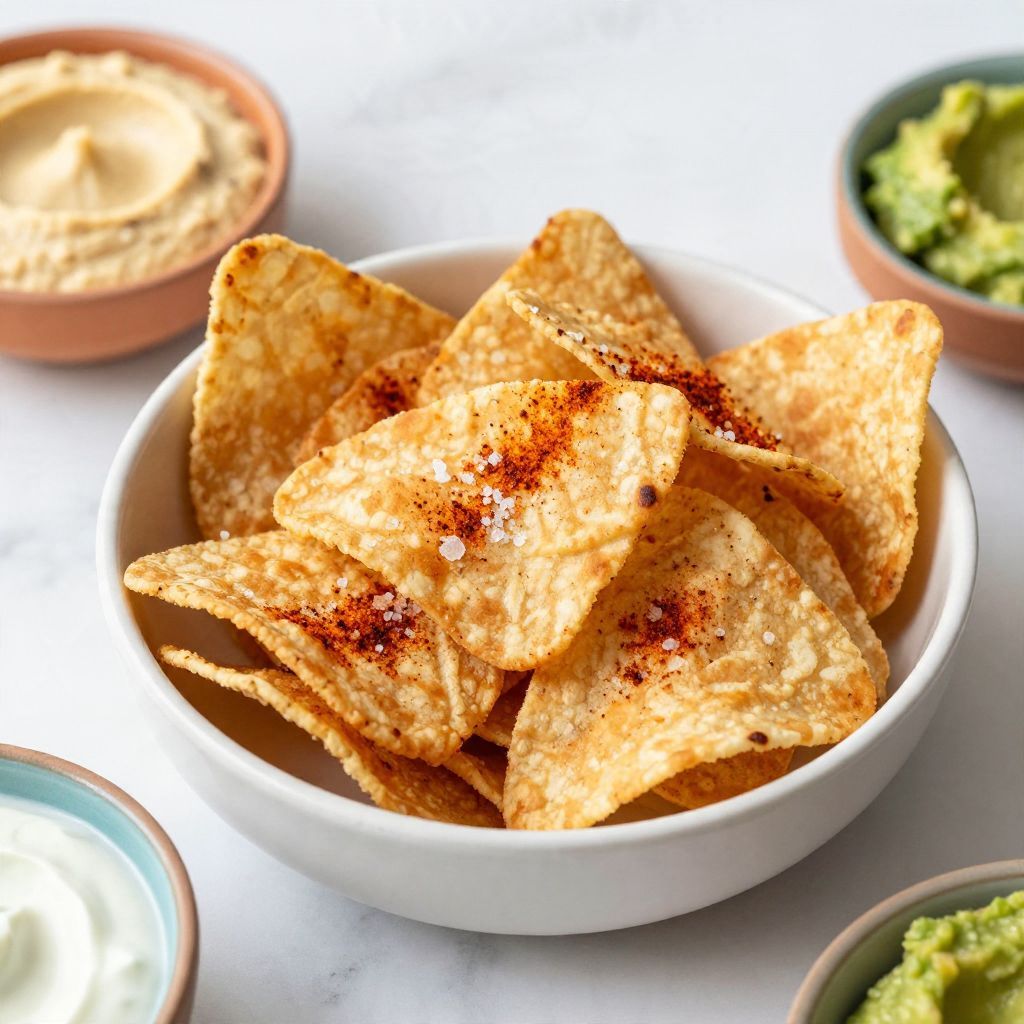
Picture this: you’re sitting on the couch, a warm bowl of homemade Pita Chips in hand, crunching away as you watch your favorite show. These chips are a delightful alternative to store-bought snacks, bursting with flavor and crispiness. This easy recipe transforms simple pita bread into crunchy, golden chips that are versatile enough to pair with any dip or enjoy on their own. Plus, they are a healthier option that you can whip up quickly, making them perfect for unexpected guests or a cozy movie night in. Let’s dive into how to make these deliciously addictive chips!
Why You’ll Love This Recipe
This recipe is a must-try for any snack lover. It combines simplicity with delightful crunch.
- Quick and easy to prepare.
- Customizable with your favorite seasonings.
- Baked, not fried, for a healthier option.
- Perfect for dipping or snacking on their own.
- Great for parties or a casual night in.
My Experience Making This Recipe
The first time I made these Pita Chips, my kitchen filled with the aroma of olive oil and spices. The moment I took that first bite, I was hooked; the crunch paired beautifully with my homemade hummus.
Friends and family have always raved about them, and I often get requests for the recipe. It’s hard to believe something so satisfying can be made with just a few simple ingredients!
Recipe Overview
- Recipe Name: Pita Chips
- Servings: 4
- Prep Time: 10 minutes
- Cook Time: 10 minutes
- Total Time: 20 minutes
- Course: Snack
- Cuisine: Mediterranean
- Calories per Serving: 150
Equipment You Will Need
- Oven
- Baking sheet
- Parchment paper
- Brush or spray for oil
- Knife or scissors
Ingredients for Pita Chips
- 4 large pita breads
- 2 tablespoons olive oil
- 1 teaspoon sea salt
- 1 teaspoon garlic powder
- 1 teaspoon paprika
Ingredient Notes and Substitutions
- Pita breads: These provide a sturdy base for the chips. You can substitute with naan or flatbreads.
- Olive oil: Adds richness and helps with crisping. Avocado oil can be used for a different flavor.
- Sea salt: Enhances the taste. Use kosher salt or any preferred salt type.
- Garlic powder: Adds savory depth. Fresh garlic can be used, but be cautious of burning.
- Paprika: Brings a mild smokiness. Experiment with smoked paprika for an extra kick.
How to Make Pita Chips
Step 1: Preheat the Oven
Set your oven to 400°F (200°C). This high temperature ensures that the chips get nice and crispy.
Step 2: Prepare the Baking Sheet
Line your baking sheet with parchment paper. This prevents sticking and makes cleanup easier.
Step 3: Cut the Pita Bread
Using a knife or kitchen scissors, cut each pita bread into wedges. Aim for 6-8 pieces per pita for perfect snacking size.
Step 4: Coat the Pita Wedges
In a mixing bowl, combine the olive oil, sea salt, garlic powder, and paprika. Toss the pita wedges in the mixture to coat evenly.
Step 5: Arrange on the Baking Sheet
Lay the coated pita wedges in a single layer on the baking sheet. Avoid overcrowding for even cooking.
Step 6: Bake the Chips
Place the baking sheet in the oven and bake for about 8-10 minutes. Keep a close eye on them to prevent burning.
Step 7: Cool and Crisp
Once golden brown, remove the chips from the oven and let them cool for a few minutes. They will continue to crisp up as they cool.
Step 8: Serve and Enjoy
Serve your homemade pita chips with your favorite dips. Hummus, tzatziki, or guacamole work wonderfully!
Pro Tip: For extra flavor, try seasoning the oil with herbs like oregano or thyme before coating the pita.
Tips for the Best Pita Chips
- Use fresh pita bread for the best texture and flavor.
- Experiment with different spices to find your perfect blend.
- Make sure the pita wedges are dry before baking for extra crunch.
- Keep an eye on the chips while baking; they can go from perfect to burnt quickly.
- Store leftover chips in an airtight container to maintain crispness.
Common Mistakes to Avoid
- Overcrowding the baking sheet can lead to uneven cooking. Spread them out for better results.
- Not preheating the oven means soggy chips. Always preheat for that perfect crunch.
- Baking at too low a temperature won’t give you the desired crispness. Stick to 400°F for optimal results.
- Skipping the oil can result in bland chips. The oil is key for flavor and texture.
Serving Suggestions
These chips are incredibly versatile and work well with many dishes. Pairing them with the right dips can elevate your snack game.
- Hummus for a classic Mediterranean experience.
- Tzatziki for a refreshing twist.
- Guacamole for a creamy delight.
- Spinach dip for a crowd-pleaser.
- Cheese spreads for a rich flavor.
Variations to Try
- Spicy Pita Chips: Add cayenne pepper or chili powder for a heat boost.
- Herb-Infused Chips: Mix in dried herbs like rosemary or basil for a fragrant twist.
- Cheesy Chips: Sprinkle grated Parmesan or nutritional yeast before baking for a cheesy flavor.
- Sweet Pita Chips: Use cinnamon and sugar for a dessert version. Perfect with yogurt!
Dietary Adaptations
- Gluten-free: Use gluten-free pita or flatbreads instead.
- Dairy-free: The recipe is naturally dairy-free as written.
- Vegan: This recipe is vegan-friendly.
- Low-carb/Keto: Opt for low-carb pita alternatives if needed.
Storage and Reheating
Refrigerator
Store leftover pita chips in an airtight container at room temperature for up to a week.
- Ensure they are completely cooled before sealing.
- Do not refrigerate as this can make them soggy.
Freezer
You can freeze pita chips for longer storage. They will keep well for about a month.
- Layer them between parchment paper in a freezer bag.
- Thaw at room temperature before enjoying.
Reheating
To reheat, place them back in a preheated oven at 350°F (175°C) for a few minutes. This will restore their crunch.
- Microwaving them will make them chewy, so avoid that method.
Nutrition Information
| Nutrient | Amount |
|---|---|
| Calories | 150 |
| Total Fat | 7g |
| Saturated Fat | 1g |
| Carbohydrates | 20g |
| Fiber | 2g |
| Sugar | 1g |
| Protein | 4g |
| Sodium | 300mg |
| Cholesterol | 0mg |
Nutrition values may vary based on specific ingredients used.
Frequently Asked Questions
Can I make these pita chips ahead of time?
Yes, you can prepare them in advance and store them in an airtight container.
What can I use instead of olive oil?
Avocado oil or melted coconut oil can be good substitutes for olive oil.
How do I store leftover pita chips?
Keep them in an airtight container at room temperature for up to a week.
Why are my pita chips not crispy?
If they aren’t crispy, they may not have been baked long enough or were overcrowded on the baking sheet.
Can I use whole wheat pita for a healthier option?
Absolutely! Whole wheat pita adds extra fiber and nutrients.
Final Thoughts
These homemade Pita Chips are a delightful addition to any snack lineup. With their crunch and flavor, they are bound to become a family favorite.
Give this recipe a try, and enjoy the satisfaction of homemade snacks. For other tasty ideas, explore more about cottage cheese chips or check out this cottage cheese flatbread recipe for more delicious options!
Pita Chips
Ingredients
Equipment
Method
- Preheat the oven to 400°F (200°C).
- Line a baking sheet with parchment paper.
- Cut each pita bread into wedges, aiming for 6-8 pieces per pita.
- In a mixing bowl, combine olive oil, sea salt, garlic powder, and paprika. Toss the pita wedges in the mixture.
- Arrange the coated pita wedges in a single layer on the baking sheet.
- Bake in the preheated oven for about 8-10 minutes, watching closely to prevent burning.
- Once golden brown, remove from the oven and let cool for a few minutes.
- Serve with your favorite dips.